Introduction
Having strong online security is crucial in an increasingly digital world, especially when it comes to protecting your personal information. One effective way to enhance your security is by using two-factor authentication (2FA) tools, such as Google Authenticator. This powerful app adds an extra layer of protection to your online accounts, ensuring that only you can access them.
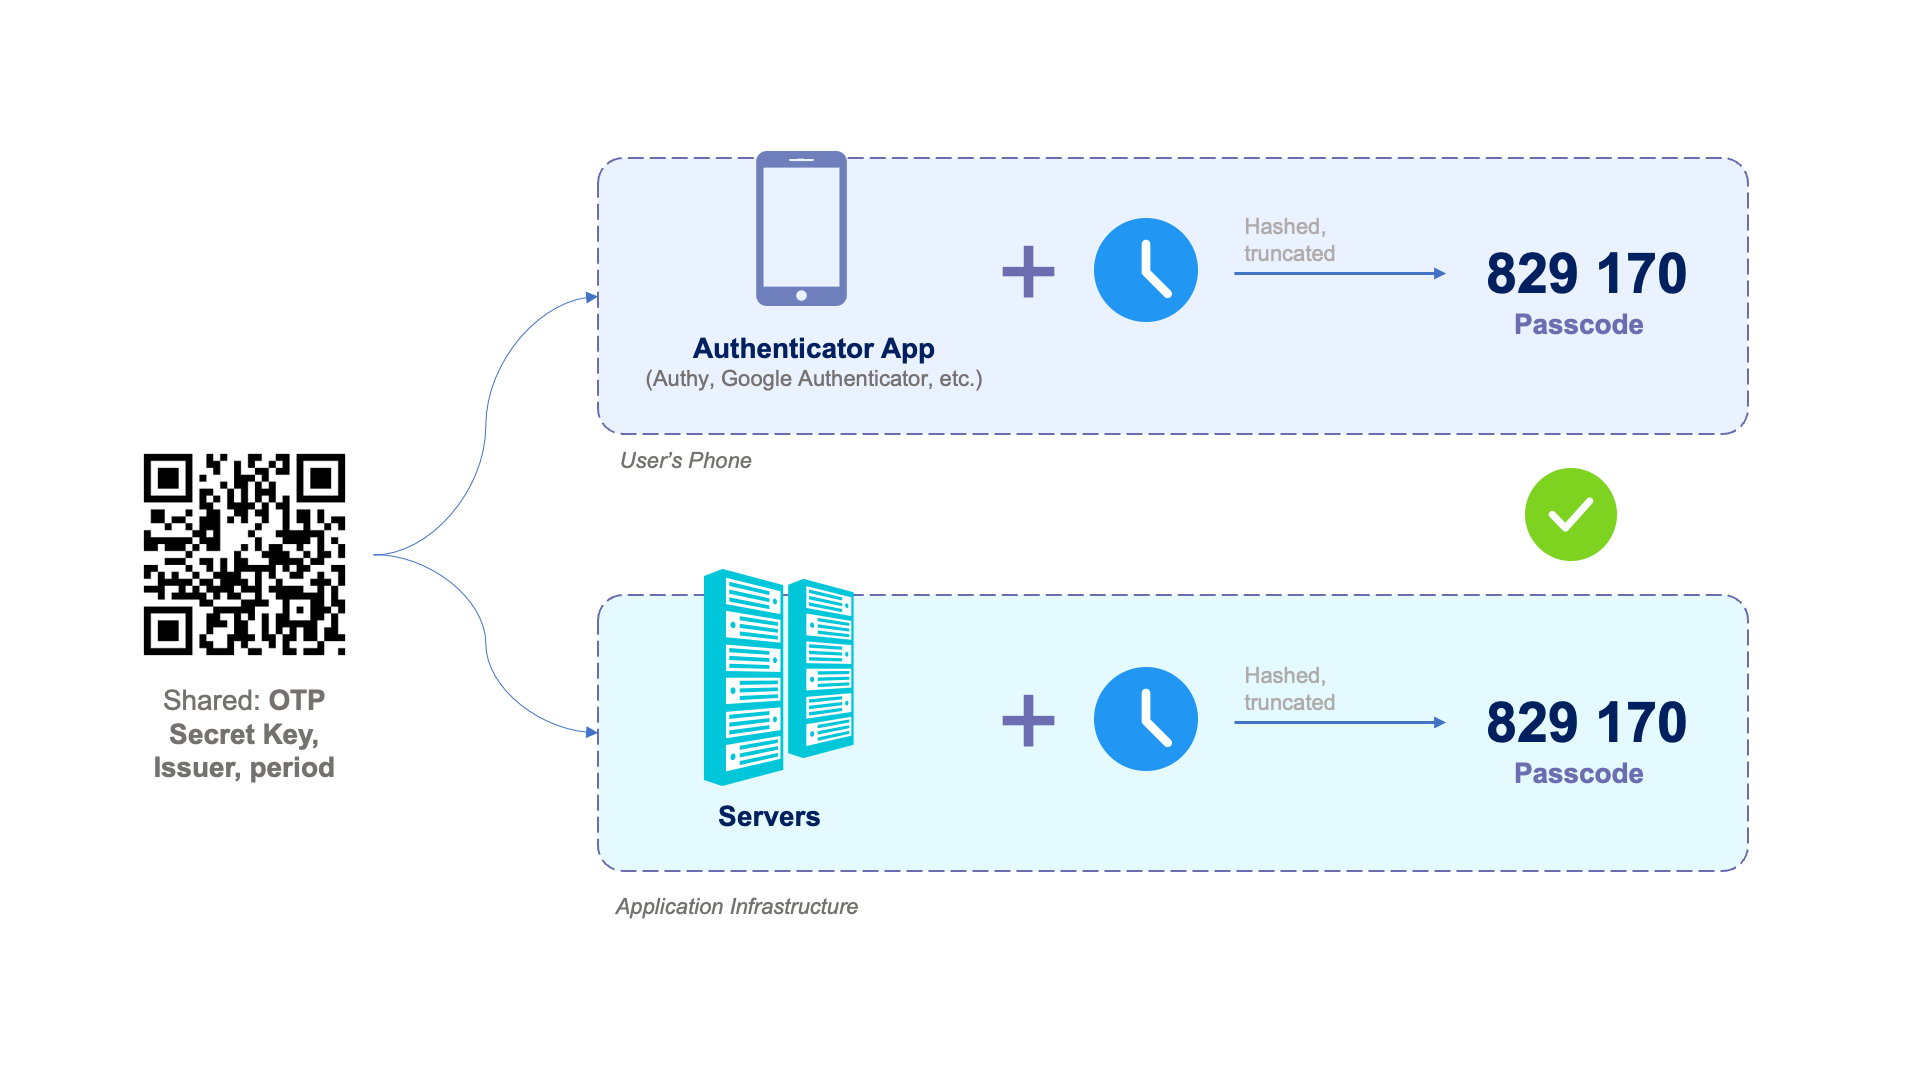
Google Authenticator is a popular and trusted 2FA app that generates time-based one-time passwords (TOTPs). These one-time codes are used in combination with your regular username and password to provide an additional layer of security. Google Authenticator is available for both Android and iOS devices, but in this guide, we will focus on setting it up on your Android phone.
Setting up Google Authenticator on your Android phone is a straightforward process that requires you to download and install the app from the Google Play Store. Once installed, you can easily configure it to work with various supported online accounts, such as email services, social media platforms, and more.
By using Google Authenticator, you’ll not only add an extra layer of security to your online accounts but also reduce the risk of falling victim to phishing attacks or unauthorized access. In this guide, we will walk you through the process of downloading, installing, and setting up Google Authenticator on your Android phone, as well as managing your accounts and troubleshooting common issues that may arise along the way.
Downloading and Installing Google Authenticator
To get started with Google Authenticator on your Android phone, you’ll need to download and install the app from the Google Play Store. Follow these simple steps to get it up and running:
- Open the Google Play Store on your Android phone.
- Search for “Google Authenticator” using the search bar at the top of the screen.
- From the search results, select the official Google Authenticator app.
- Tap on the “Install” button to begin the installation process. If prompted, review the required permissions and accept them to proceed.
- Wait for the app to download and install on your device. The app’s icon will appear in your app drawer once it’s installed.
Once you’ve successfully installed Google Authenticator, you’re ready to set it up and start securing your accounts with two-factor authentication. In the next section, we’ll guide you through the process of setting up Google Authenticator and adding your accounts.
Setting Up Google Authenticator
Once you have installed Google Authenticator on your Android phone, the next step is to set it up and configure it for your accounts. Follow these steps to get started:
- Open the Google Authenticator app on your Android phone. You’ll be greeted with a welcome screen.
- Tap on the “Begin Setup” button to initiate the setup process.
- Next, you’ll have two options for adding an account: “Scan barcode” or “Enter a provided key”. The most common method is scanning a barcode, so let’s choose that option.
- If prompted, grant the app permissions to access your camera to scan the barcode.
- Now, on your computer or another device, open the website or app for the account you want to add to Google Authenticator.
- Look for the option to enable two-factor authentication or find settings related to account security.
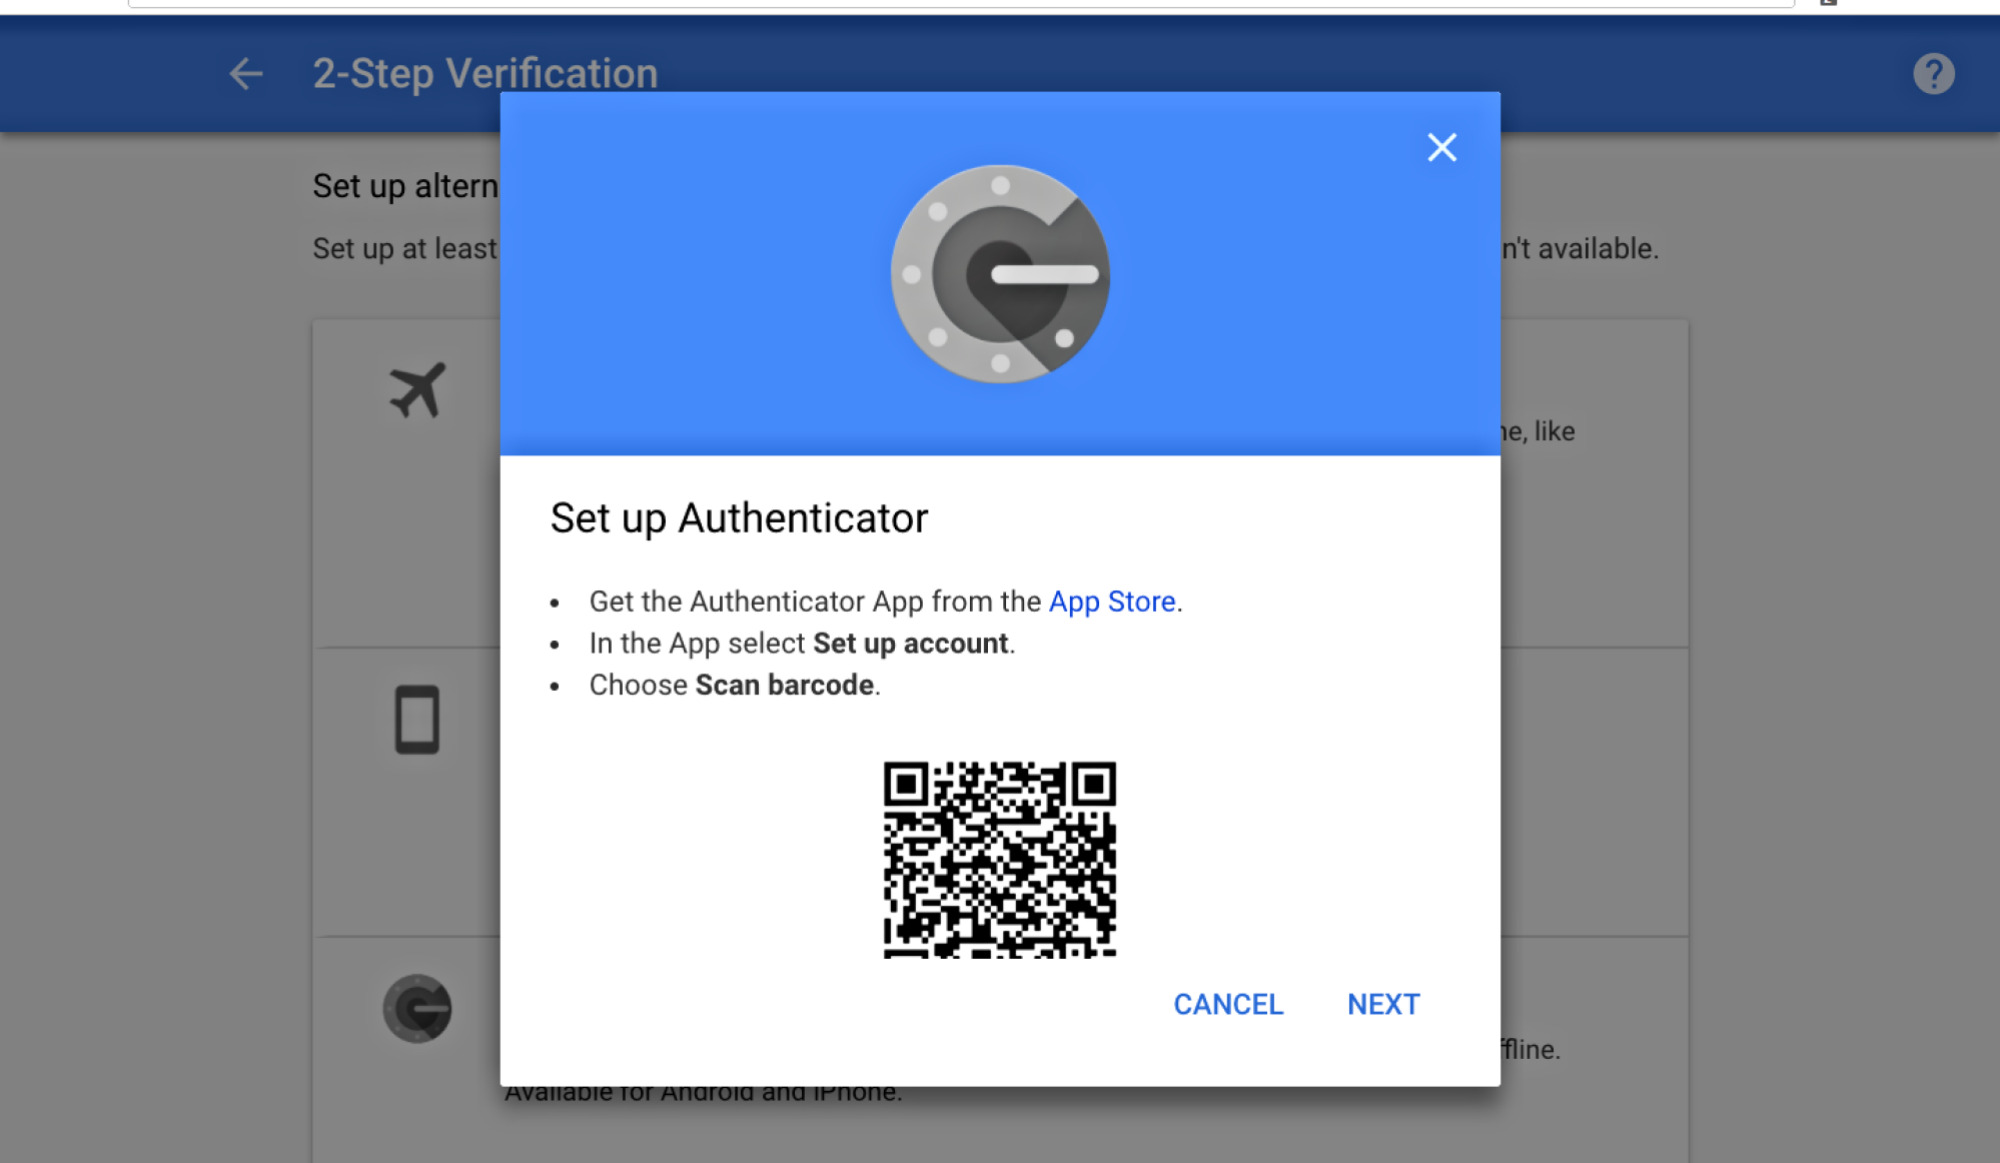
- Select the option to set up Google Authenticator or scan a QR code.
- A QR code will appear on the screen. Point your phone’s camera at the QR code to capture it.
- If the QR code cannot be scanned, you can manually enter the provided key by selecting the “Enter a provided key” option in the app.
- Once the QR code is successfully scanned or the key is entered, Google Authenticator will generate a unique verification code for your account.
- Enter the verification code in the corresponding field on the website or app you’re setting up Google Authenticator for.
- Follow any additional prompts or instructions to finalize the setup process.
Congratulations! You have successfully set up Google Authenticator for your account. Repeat these steps for any other accounts you want to add to the app. In the next section, we’ll explore how to generate one-time codes using Google Authenticator.
Adding Accounts to Google Authenticator
Now that you have Google Authenticator set up on your Android phone, it’s time to start adding your accounts to the app. Follow these straightforward steps to add accounts to Google Authenticator:
- Open the Google Authenticator app on your Android phone.
- To add a new account, tap on the “+” icon located at the bottom-right corner of the screen.
- You will have two options for adding an account: “Scan barcode” or “Enter a provided key”.
- If the account you want to add provides a QR code, select “Scan barcode” and allow permissions for the app to access your camera. Point your phone at the QR code to scan it.
- If the account doesn’t provide a QR code, select “Enter a provided key” and manually enter the account name and the key provided by the website or app.
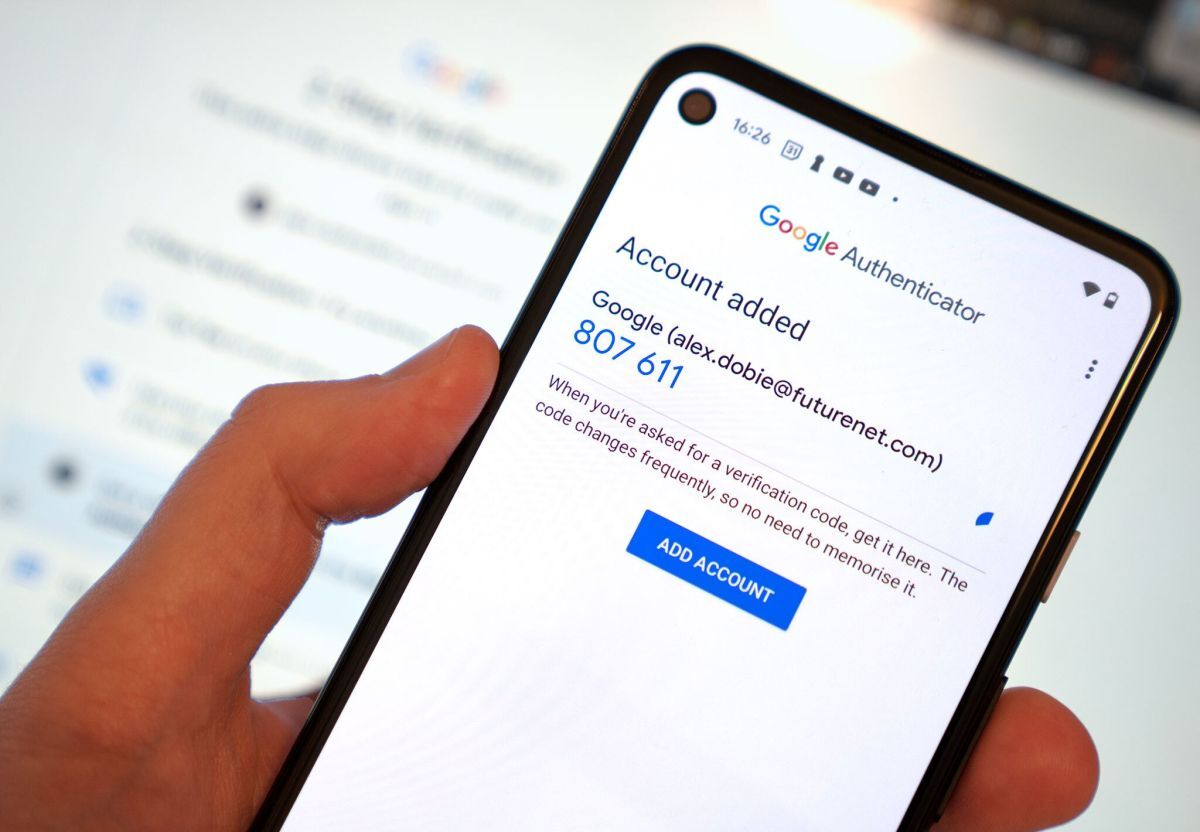
- Once the account is successfully added, you will see it listed in the Google Authenticator app.
- Repeat the process for each account you want to add to Google Authenticator.
It’s important to note that some websites or apps may require additional verification steps during the account setup process. These steps may include entering additional codes or confirming your identity. Make sure to follow the instructions provided by the website or app to complete the account setup successfully.
By adding your accounts to Google Authenticator, you now have an added layer of security for those accounts. In the next section, we’ll explore how to generate one-time codes using Google Authenticator.
Generating One-Time Codes
Once you have added your accounts to Google Authenticator on your Android phone, you can start generating one-time codes to use for two-factor authentication. Follow these steps to generate one-time codes using Google Authenticator:
- Open the Google Authenticator app on your Android phone.
- The main screen of the app will display a list of your added accounts, along with a six-digit code next to each account name. These codes are time-based and will refresh every 30 seconds.
- To generate a one-time code, look for the code associated with the account you want to authenticate with.
- Enter the six-digit code displayed on your screen when prompted by the website or app you are trying to log in to.
- After entering the code, it will be verified, and if correct, you will gain access to your account.
- It’s important to note that each one-time code can only be used once and has a limited validity period before it refreshes.
By generating one-time codes with Google Authenticator, you add an extra layer of security to your accounts. Even if someone knows your username and password, they won’t be able to access your account without the unique one-time code generated by Google Authenticator. This significantly reduces the risk of unauthorized access to your sensitive information.
In the next section, we will explore how to manage and remove accounts from Google Authenticator.
Managing and Removing Accounts
Managing and removing accounts from Google Authenticator on your Android phone is simple and allows you to keep your app organized and up to date. Follow these steps to manage and remove accounts from Google Authenticator:
- Open the Google Authenticator app on your Android phone.
- To manage an account, tap and hold on the account you want to edit or remove. A contextual menu will appear.
- From the contextual menu, select the desired action. You can choose to rename the account, edit the account details, or remove the account.
- If you want to rename the account, select the “Edit” option and enter a new name for the account.
- If you want to remove the account, select the “Remove” option. Confirm the removal when prompted.
- Repeat the process for any other accounts you want to manage or remove.
By managing your accounts in Google Authenticator, you can keep your app organized and easily identify your different accounts. Additionally, if you no longer use a particular account or it becomes inactive, removing it from Google Authenticator removes any potential confusion and keeps your app clutter-free.
In case you accidentally remove an account, don’t worry. You can always re-add it by following the steps outlined in the “Adding Accounts to Google Authenticator” section. Keep in mind that you may need to go through the verification process with the website or app again.
In the next section, we will address some common troubleshooting issues that you may encounter while using Google Authenticator on your Android phone.
Troubleshooting Common Issues
While using Google Authenticator on your Android phone, you may encounter some common issues. Here are some troubleshooting tips to help you overcome these challenges:
Issue 1: Codes not matching
If the one-time codes generated by Google Authenticator do not match with the codes expected by the website or app you are trying to log in to, make sure the time on your Android phone is accurate. Google Authenticator uses the time on your device to generate the codes, so any discrepancy can cause code mismatch. To resolve this issue, ensure that your device is set to auto-sync the time or manually adjust the time settings.
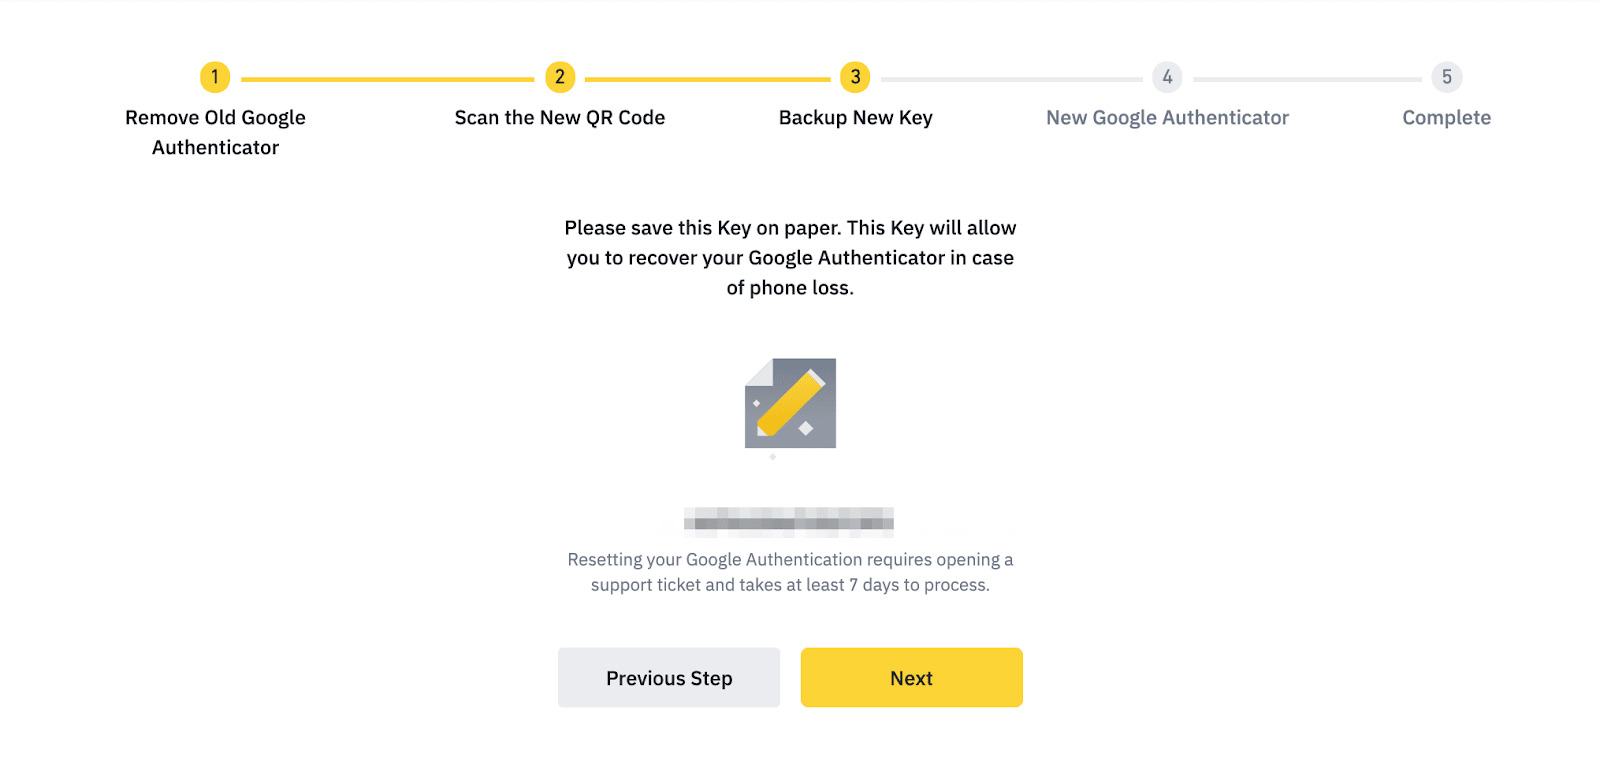
Issue 2: Lost or damaged phone
If you have lost or damaged your Android phone, it is important to have a backup plan. Before such an incident, consider enabling backup options provided by Google Authenticator. This can help you recover your accounts on a new device easier. Additionally, you can also reach out to the individual websites or apps for further assistance in recovering your accounts.
Issue 3: Difficulty scanning QR codes
If you are having trouble scanning QR codes with the Google Authenticator app, make sure that you have given the app necessary permissions to access your camera. Additionally, ensure that the QR code is well-lit and clear for easy scanning. If the camera still fails to scan the code, you can manually enter the key provided by the website or app into Google Authenticator.
Issue 4: App not functioning properly
If you are experiencing issues with the Google Authenticator app, such as freezing or crashing, try clearing the app cache or reinstalling the app. If the problem persists, check for any available updates for the app in the Google Play Store. You can also contact the Google Authenticator support team for further assistance.
These troubleshooting tips should help you overcome common issues that you may encounter while using Google Authenticator. If you continue to face issues or have specific concerns, it is recommended to reach out to the support channels provided by the individual websites or apps you have linked with Google Authenticator for further assistance.
With these tips in mind, you can maximize the effectiveness of Google Authenticator and enjoy a secure online experience. In the final section, we will recap the main points and conclude the guide.
Conclusion
In an era where online security is of utmost importance, Google Authenticator offers a reliable and convenient solution for protecting your accounts. By adding an extra layer of security through two-factor authentication, you significantly reduce the risk of unauthorized access to your online accounts and sensitive information.
In this guide, we explored how to download, install, and set up Google Authenticator on your Android phone. We also learned how to add accounts to the app, generate one-time codes, manage and remove accounts, and troubleshoot common issues that may arise.
Remember, Google Authenticator provides a robust and user-friendly interface to protect your accounts. However, it is crucial to take precautions such as backing up your accounts and ensuring your device’s time is accurate to avoid any potential access issues.
With Google Authenticator as your trusty companion, you can have peace of mind knowing that your online accounts are secure. Enjoy the added layer of protection provided by Google Authenticator and continue exploring other ways to enhance your digital security.
Stay vigilant, keep your accounts updated, and always prioritize your online security. Happy authenticating!