Introduction
Welcome to the world of advanced security with Google Authenticator! In today’s digital age, keeping our sensitive information safe is of utmost importance. With the rise of online threats, it has become imperative to strengthen our security measures. That’s where Google Authenticator comes in.
Google Authenticator is a free app, available for both Android and iOS devices, that adds an extra layer of security to your online accounts. It provides a two-factor authentication (2FA) method, making it difficult for unauthorized individuals to access your accounts, even if they have your password.
Using Google Authenticator is a simple and efficient way to protect your accounts from unauthorized access. It generates time-based one-time passwords (TOTPs), which are valid for a short period of time and required to log in to your accounts.
In this article, we will walk you through the process of setting up Google Authenticator, accessing it on your primary device, and on a new device. We will also address common issues that users may encounter while using Google Authenticator.
So, whether you’re new to Google Authenticator or looking to set it up on a new device, this guide has got you covered. Let’s dive in and learn how to get into your Google Authenticator!
What is Google Authenticator?
Google Authenticator is a two-factor authentication (2FA) app developed by Google. It provides an extra layer of security for your online accounts by requiring a second method of verification, in addition to your password, when logging in.
The app generates time-based one-time passwords (TOTPs) that are used to authenticate your identity. These passwords are valid for a short period of time, typically 30 seconds, and are required to access your accounts.
Unlike traditional SMS-based verification methods, Google Authenticator does not rely on an internet connection to generate and verify codes. This makes it more secure and reliable, as it is not susceptible to vulnerabilities such as SIM card swapping or network issues.
Google Authenticator is widely supported by various online services, including social media platforms, email providers, financial institutions, and more. It adds an additional layer of security to your accounts, making it harder for hackers to gain unauthorized access.
Using Google Authenticator is simple and straightforward. Once enabled for an account, you will be prompted to enter a six-digit verification code generated by the app alongside your password when logging in. This ensures that even if someone obtains your password, they would still need physical access to your device to authenticate.
It’s important to note that Google Authenticator does not require an internet connection to function. The app works offline by generating TOTPs locally on your device. This means you can use it even in areas with limited or no network connectivity.
In addition to its security benefits, Google Authenticator also offers the convenience of managing multiple accounts within the app. You can easily add and organize your various online accounts, making it a hassle-free solution for 2FA.
Now that we have a clear understanding of what Google Authenticator is and how it works, let’s explore the steps to set it up for the first time or on a new device.
Steps to Set Up Google Authenticator
Setting up Google Authenticator is a straightforward process that can be done in a few simple steps. Whether you are setting it up for the first time or on a new device, follow these instructions to get started:
Method 1: Setting up Google Authenticator for the first time:
- Install the Google Authenticator app from the App Store or Google Play Store on your mobile device.
- Open the app and tap on the “+” icon to add a new account.
- You have two options to add an account:
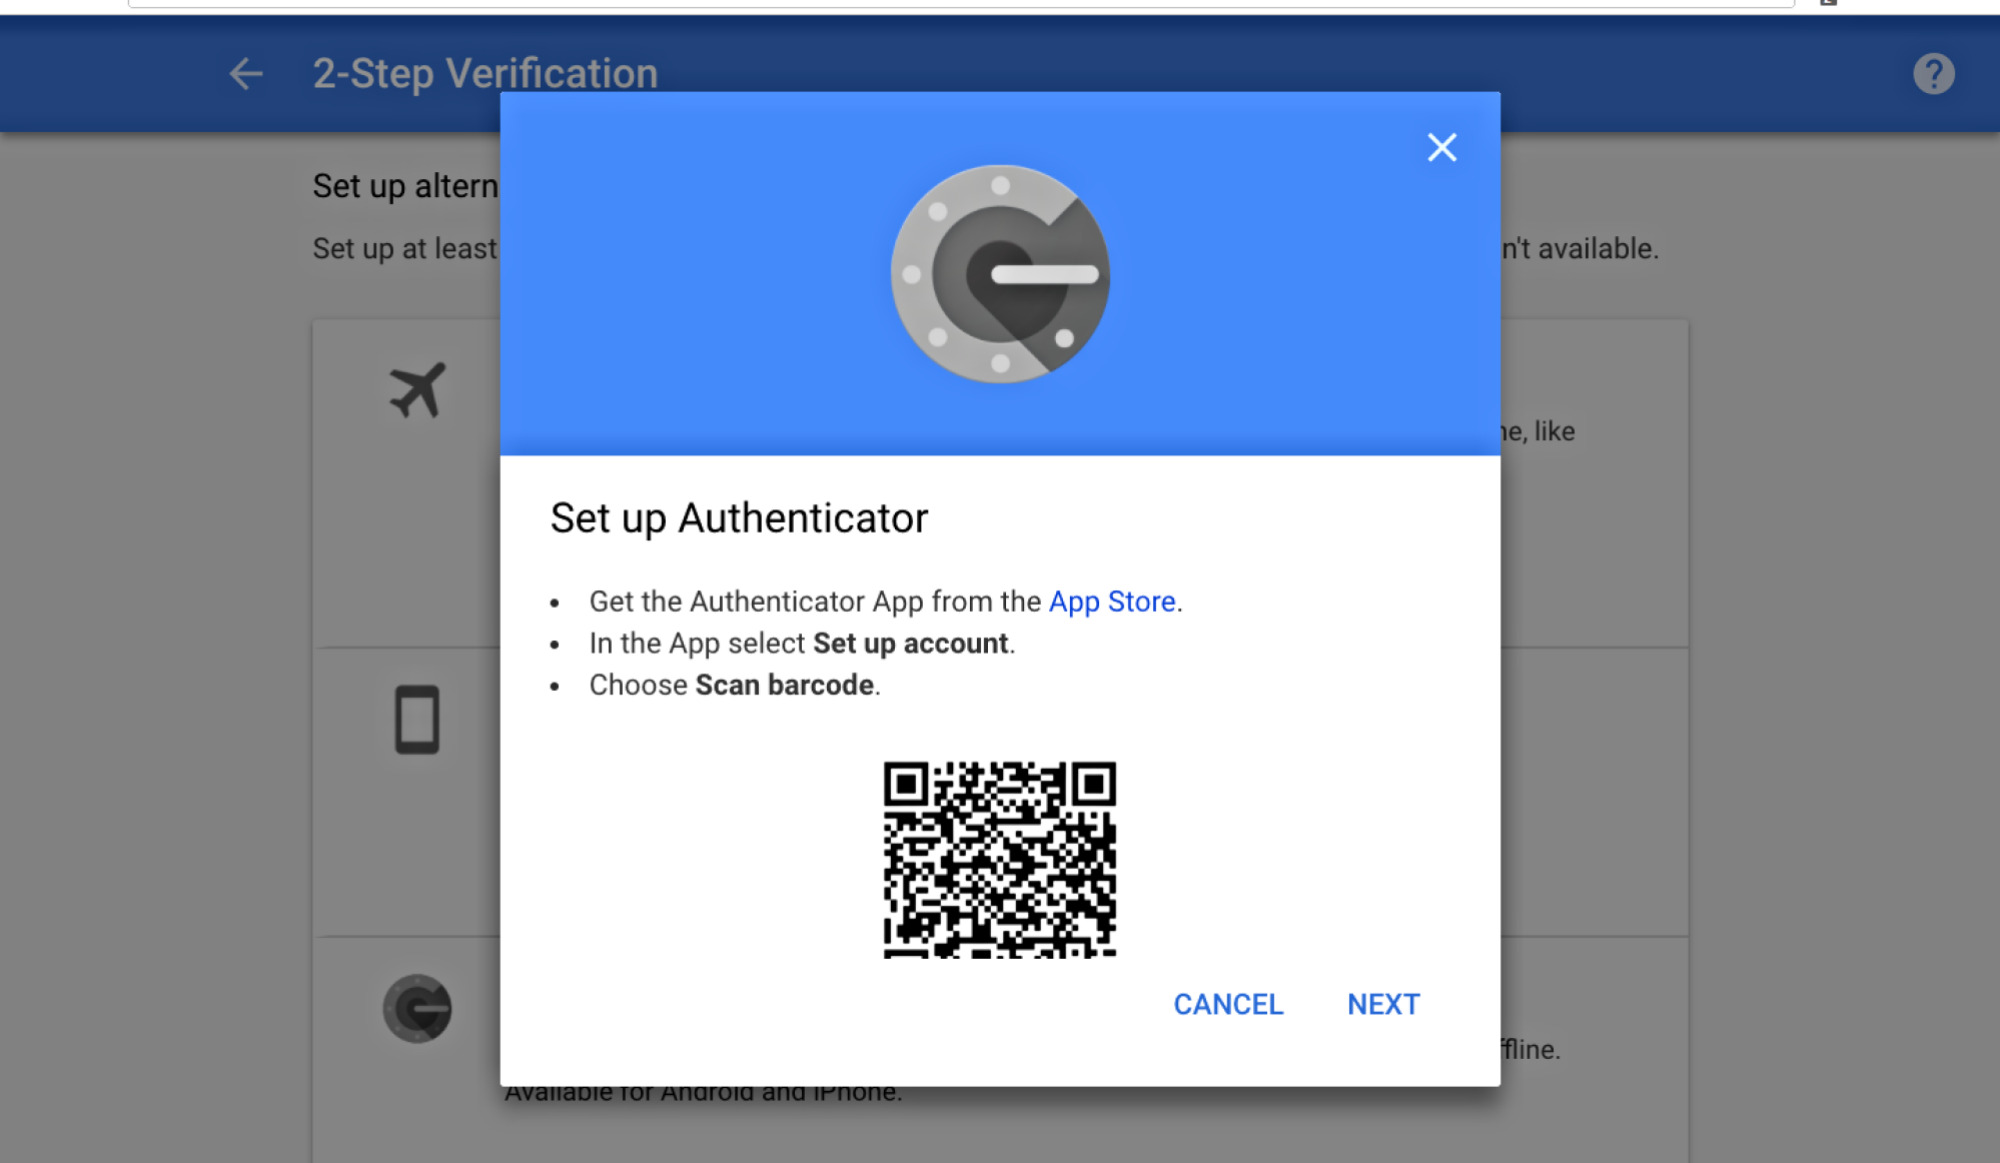
- Scan QR code: If your account provider provides a QR code, tap on “Scan a barcode” and align your device’s camera with the QR code.
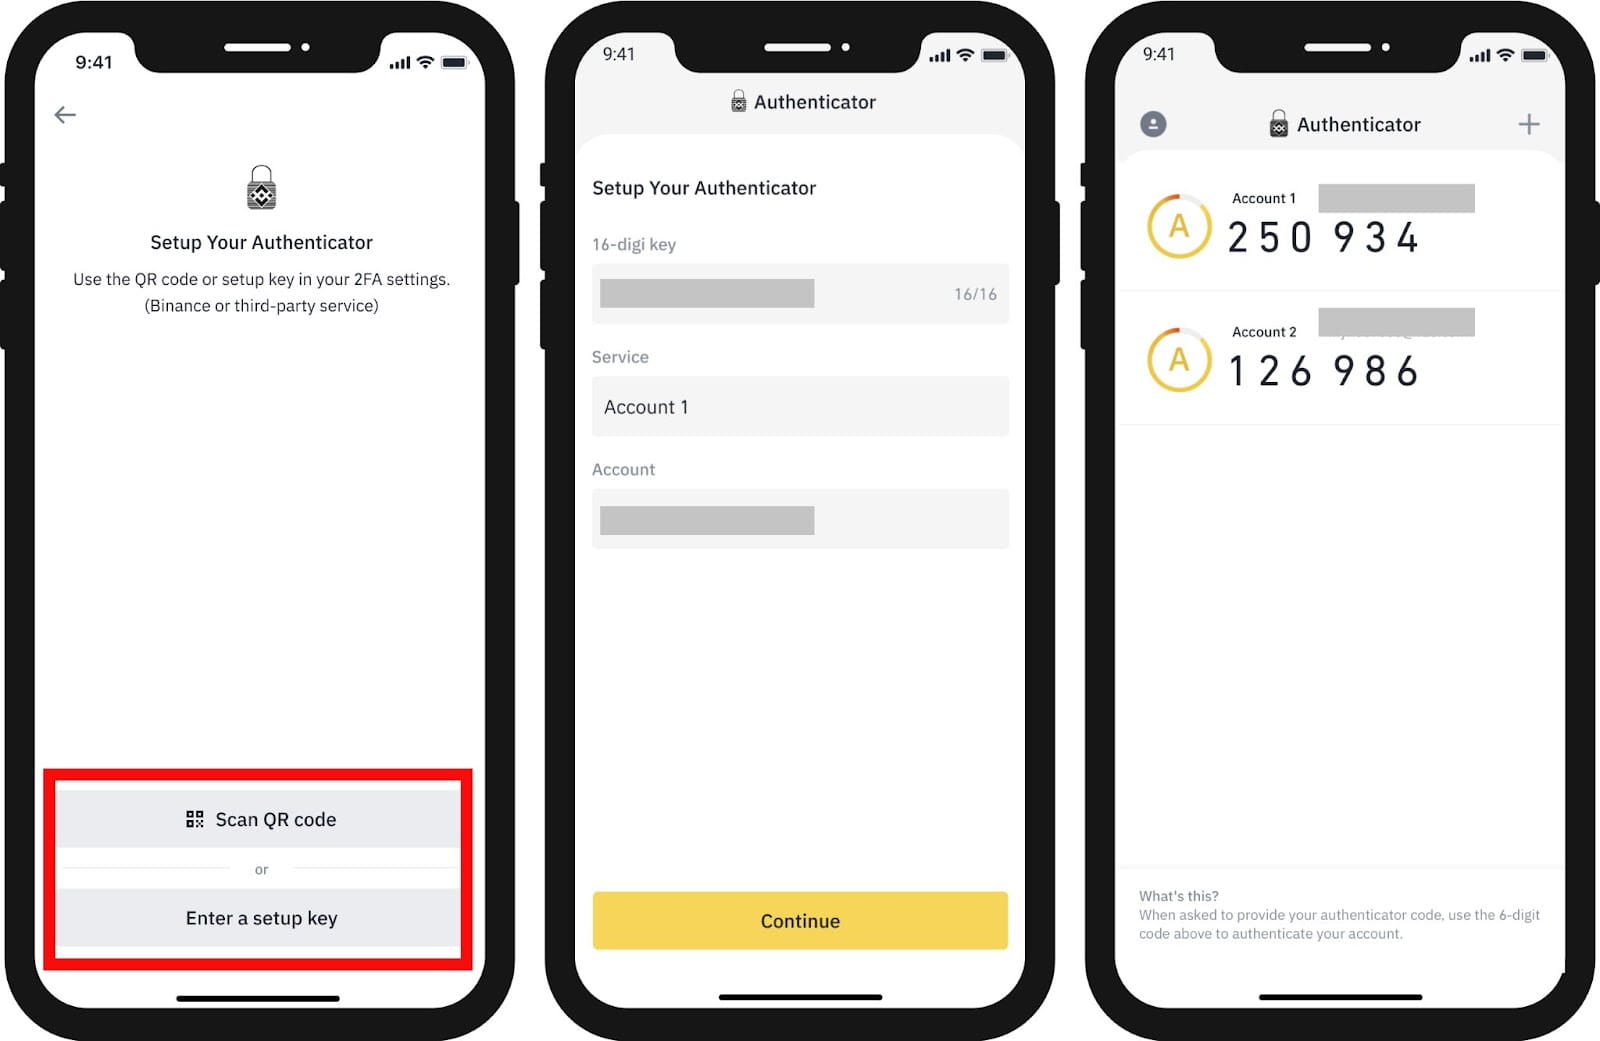
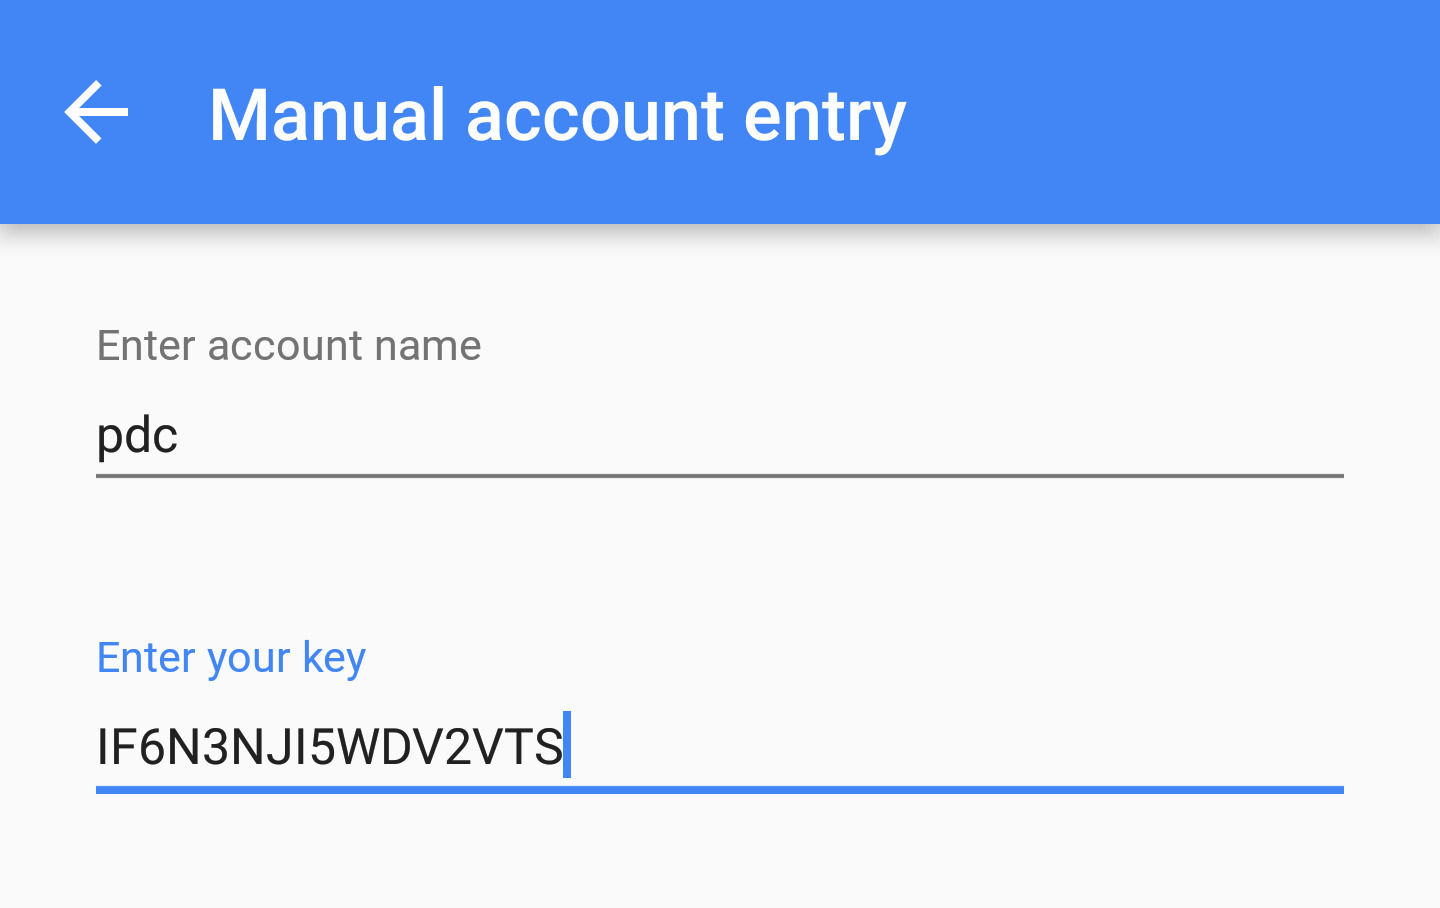
- Manual entry: If your account provider does not provide a QR code, tap on “Enter a provided key” and enter the account name and the key provided by your account provider.
- After adding the account, the app will verify and display a six-digit verification code. Keep this code safe, as it will be needed for future logins.
- Enter the verification code into the account you are setting up, usually in the account settings or during the login process.
- That’s it! Your Google Authenticator is now set up for the account you added.
Method 2: Setting up Google Authenticator on a new device:
- Install the Google Authenticator app on your new device from the App Store or Google Play Store.
- Sign in to your Google Account or other account used for Google Authenticator on your primary device.
- In the settings of your primary device’s Google Authenticator app, select “Transfer accounts” and choose the accounts you want to transfer to the new device.
- Open the Google Authenticator app on your new device, tap on the “+” icon, and select “Import existing accounts.”
- Choose the method of transfer, either by scanning a QR code from your primary device or entering the provided key.
- Follow the prompts on your new device to complete the transfer process.
Once you have set up Google Authenticator, it is important to know how to access it on your primary device or a new device when needed. Let’s explore the methods to access Google Authenticator in the next section.
Method 1: Setting up Google Authenticator for the First Time
If you are setting up Google Authenticator for the first time on your device, follow these steps to ensure a smooth and successful setup:
- Start by installing the Google Authenticator app on your mobile device from the App Store for iOS or Google Play Store for Android.
- Once the app is installed, open it and tap on the “+” icon located either at the top or bottom of the screen, depending on your device.
- You will have two options to add an account: scanning a QR code or entering a provided key manually.
- If your account provider has provided a QR code, select “Scan a barcode” and align your device’s camera with the QR code displayed by the account provider. The app will automatically scan the code and add the account.
- If there is no QR code available, select “Enter a provided key” to manually enter the account name and the key provided by the account provider.
- After adding the account, Google Authenticator will verify the details and display a six-digit verification code on the screen. This code is unique to your account and constantly changes at regular intervals, typically every 30 seconds.
- It is essential to keep this verification code secure and easily accessible, as it will be required whenever you need to log in to your account.
- Finally, enter the verification code into the account you are setting up. This code is usually requested during the login process or can be saved in the account’s settings for future reference.
That’s it! You have successfully set up Google Authenticator for the first time. The app will now generate unique verification codes for your account, providing an additional layer of security.
Remember to repeat these steps for each new account you want to enable with Google Authenticator. The process is quick and straightforward, giving you peace of mind knowing that your accounts are protected from unauthorized access.
In the next section, we will explore how to access Google Authenticator on your primary device.
Method 2: Setting up Google Authenticator on a New Device
If you have a new device and need to set up Google Authenticator again, you can easily transfer your accounts from your primary device following these steps:
- Start by installing the Google Authenticator app on your new device from the App Store for iOS or Google Play Store for Android.
- Next, sign in to your Google Account or other account used for Google Authenticator on your primary device.
- In the settings of your primary device’s Google Authenticator app, locate and select the option “Transfer accounts.”
- You will find a list of all your accounts that are currently set up in Google Authenticator. Choose the accounts you want to transfer to your new device.
- Once you have selected the accounts, follow the prompts to initiate the transfer process.
- Now, open the Google Authenticator app on your new device and tap on the “+” icon.
- Select the option “Import existing accounts” to transfer the accounts from your primary device.
- Choose the method of transfer – either by scanning a QR code from your primary device or entering the provided key manually.
- Follow the on-screen instructions on your new device to complete the transfer process.
After completing these steps, the Google Authenticator app on your new device will now have all the accounts that were transferred from your primary device.
It’s important to note that transferring your accounts to a new device will remove them from your primary device. Therefore, make sure to choose the accounts you want to transfer carefully.
By setting up Google Authenticator on your new device, you can continue to enjoy the added security and convenience of two-factor authentication without disruptions. You can now generate verification codes for your accounts directly from your new device.
In the next section, we will explore how to access Google Authenticator on your primary device when needed.
How to Access Google Authenticator
Accessing Google Authenticator is simple and intuitive, whether you’re using your primary device or a new device. Here are the methods to access Google Authenticator:
Method 1: Accessing Google Authenticator on Your Primary Device:
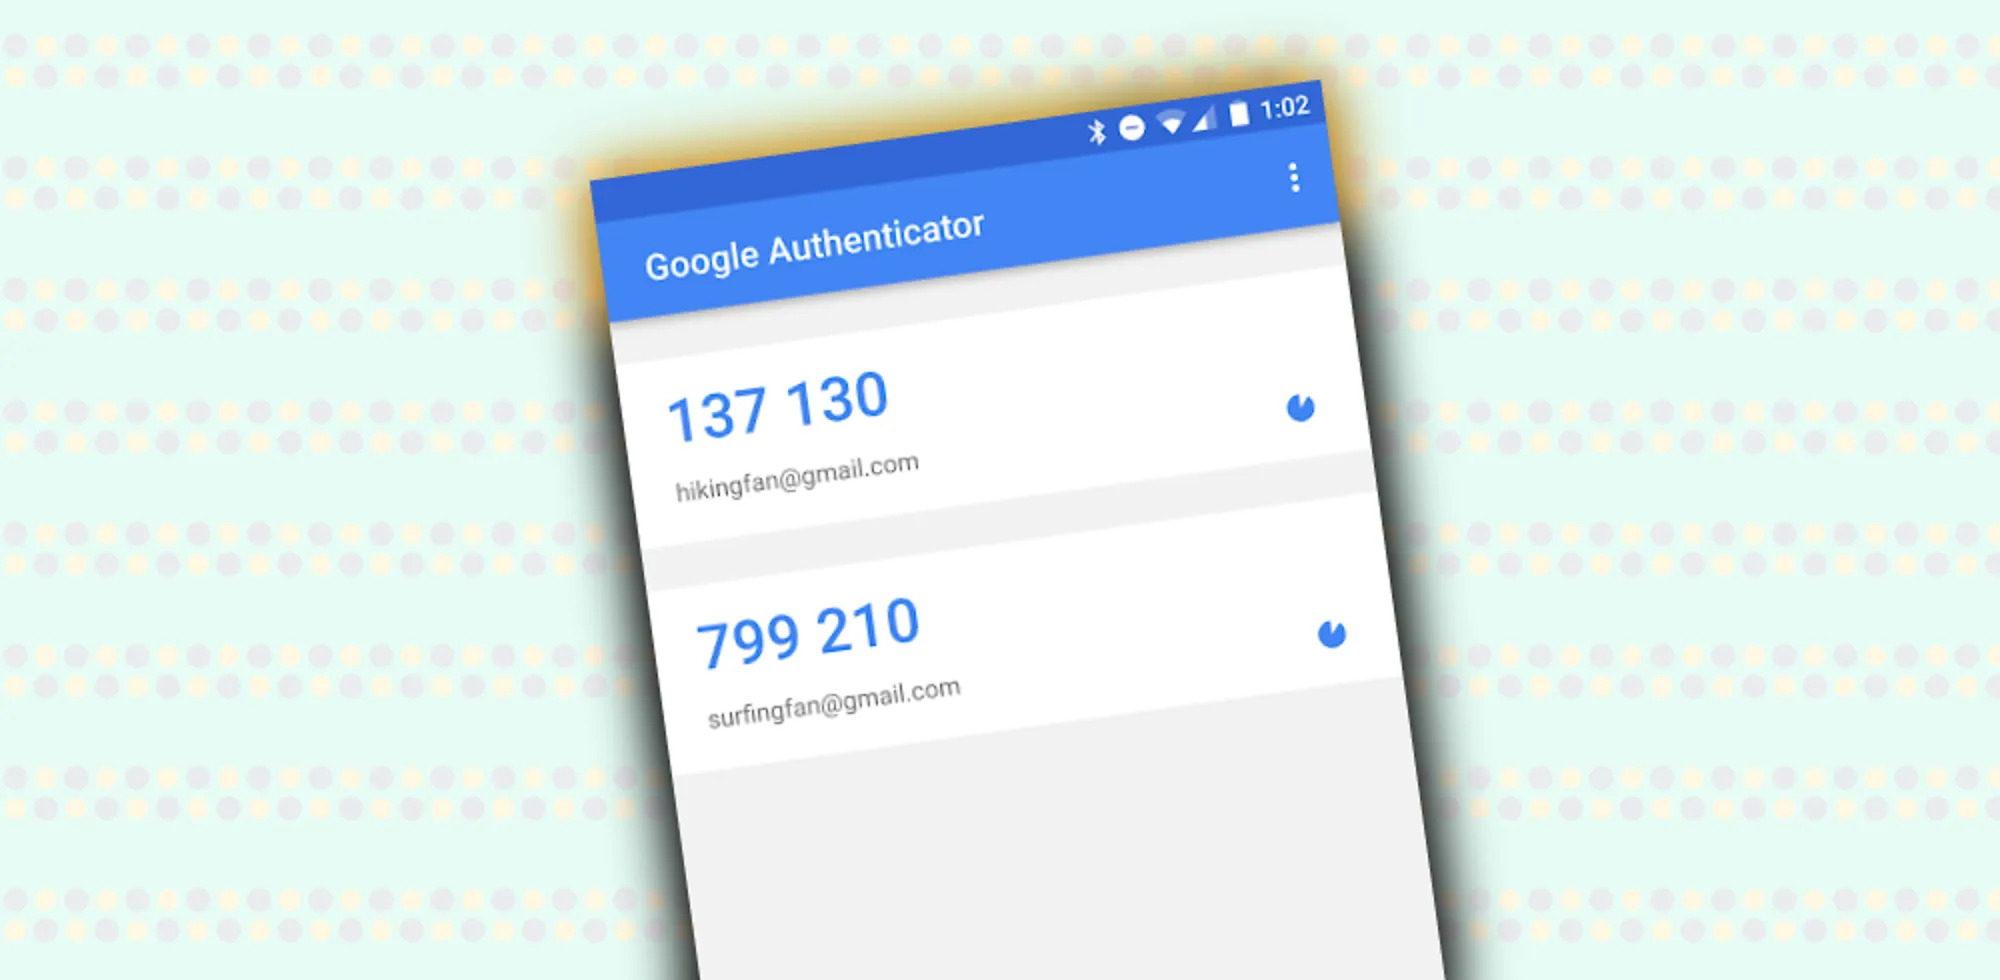
- Open the Google Authenticator app on your primary device. You will see a list of all the accounts that you have added to the app.
- Each account will display a six-digit verification code that refreshes every 30 seconds.
- To log in to an account, simply enter the current verification code displayed for that specific account into the login prompt of the respective service.
- The verification code ensures that only the legitimate account holder, who has access to the device with Google Authenticator, can log in.
Method 2: Accessing Google Authenticator on a New Device:
- If you have set up Google Authenticator on a new device and transferred your accounts, open the app on the new device.
- Similar to accessing it on your primary device, you will see a list of all the transferred accounts along with their respective verification codes.
- Follow the same process of entering the current verification code displayed for the specific account into the login prompt of the respective service.
- Ensure that the time on your new device is correctly synced as the verification codes generated by Google Authenticator are time-based and rely on accurate time information.
It’s important to note that the verification codes are time-sensitive and constantly changing. Therefore, it’s essential to use the current code displayed by Google Authenticator at the time of login.
If for any reason you are unable to access Google Authenticator on your primary or new device, there are steps you can take to troubleshoot common issues, which we will explore in the next section.
Method 1: Accessing Google Authenticator on Your Primary Device
When it comes to accessing Google Authenticator on your primary device, follow these steps to retrieve the verification codes for your accounts:
- Locate and open the Google Authenticator app on your primary device. This is the device where you initially set up Google Authenticator.
- Once you open the app, you will see a list of all the accounts that you have added to Google Authenticator.
- Each account will display a six-digit verification code next to its name.
- To access the verification code for a specific account, simply locate it in the list and refer to the corresponding verification code next to it.
- The verification code constantly refreshes every 30 seconds, so make sure to use the current code for the account you wish to log in to.
- Enter the current verification code into the login prompt of the respective service or website you are trying to access. This ensures that only the legitimate account holder, who has physical access to the primary device with Google Authenticator, can log in.
It’s crucial to note that the verification codes are time-sensitive, and using an expired or incorrect code will result in login failures. Always ensure that you enter the current verification code displayed for the account you are attempting to access.
By following these steps, you can easily retrieve the verification codes from Google Authenticator on your primary device. This provides an additional layer of security, making it more challenging for unauthorized individuals to gain access to your accounts.
Now, let’s explore how to access Google Authenticator on a new device in case you need to switch devices or want to have a backup option.
Method 2: Accessing Google Authenticator on a New Device
If you have switched to a new device or want to access Google Authenticator on a secondary device, you can easily do so by following these steps:
- Install the Google Authenticator app on your new device from the App Store for iOS or Google Play Store for Android.
- Open the Google Authenticator app on your new device once it is installed.
- If you have already set up Google Authenticator on your primary device, there are two ways to access it on your new device:
- Transfer accounts: You can transfer your accounts from your primary device to the new device. This method ensures an identical setup on the new device, with the same accounts and verification codes as on your primary device.
- Set up accounts manually: If you prefer not to transfer accounts or want to set up different accounts on your new device, you can manually add each account to the app by scanning QR codes or entering the provided key.
- To transfer accounts:
- On your primary device, open the Google Authenticator app and go to the settings.
- Select the option “Transfer accounts” or “Export accounts.”
- Choose the accounts you want to transfer to the new device.
- Follow the prompts to generate a QR code or transfer key.
- On your new device, open the Google Authenticator app and add accounts by scanning the QR code or entering the transfer key provided by your primary device.
- To set up accounts manually:
- Open the Google Authenticator app on your new device.
- Tap on the “+” icon to add a new account.
- Choose the option to add an account manually.
- Enter the account name and the provided key manually.
- Follow the prompts to complete the setup for each account.
- Once you have set up Google Authenticator on your new device, you can access your accounts by opening the app and viewing the verification codes for each account.
By following these steps, you can easily access Google Authenticator on your new device and start using it for two-factor authentication. Whether you choose to transfer accounts or set them up manually, you can enjoy the added security and peace of mind that Google Authenticator provides.
Now that you know how to access Google Authenticator on your primary device and a new device, let’s move on to the next section, where we will address common issues and provide troubleshooting tips.
Troubleshooting Common Issues
While Google Authenticator is a reliable and secure app, there are some common issues that users may encounter. Here are a few troubleshooting tips to help you resolve these issues:
1. Incorrect Time Sync: Ensure that the time on your device is accurate and synchronized with the correct time zone. Verification codes generated by Google Authenticator are time-based, so any discrepancy in time can lead to login failures. Check your device’s settings for time and date synchronization.
2. Lost or Reset Device: If you have lost your primary device or had to perform a factory reset, you might lose access to Google Authenticator. In such cases, it is important to have a backup plan in place. Before this happens, make sure to enable backup codes or consider using alternative authentication methods, such as a physical security key or SMS-based verification.
3. Device Change: If you switch to a new device, you will need to transfer your accounts from the old device to the new one. Follow the steps outlined in the earlier section to transfer accounts or set them up manually on your new device.
4. QR Code Scanning Issues: If you are unable to scan a QR code when setting up Google Authenticator, ensure that there is proper lighting and the QR code is positioned within the frame correctly. If issues persist, try cleaning your device’s camera lens and ensuring that the QR code is not damaged or distorted. Additionally, you can manually enter the provided key instead of scanning the QR code.
5. Account Recovery: If you are unable to access your Google Authenticator accounts due to device loss or other issues, you should reach out to the respective account providers for account recovery options. Most online services have alternative methods or backup codes to regain access to your accounts in such scenarios.
6. Multiple Device Syncing: If you use Google Authenticator on multiple devices, ensure that all devices are in sync with each other. Any change made on one device, such as adding or removing an account, should reflect on all devices. If syncing issues occur, try signing out and signing back in, or reinstalling the app on the affected devices.
If you encounter other issues or require further assistance with Google Authenticator, it is recommended to contact the support channels provided by the app or the respective account providers.
By following these troubleshooting tips, you can overcome common issues and continue using Google Authenticator with confidence and convenience.
Now, let’s conclude our exploration of Google Authenticator and the various aspects of setting it up and accessing it.
Conclusion
Google Authenticator is a powerful tool that adds an extra layer of security to your online accounts. By following the simple steps outlined in this guide, you can easily set up and access Google Authenticator on your primary device or a new device.
We discussed the importance of two-factor authentication (2FA) and how Google Authenticator generates time-based one-time passwords (TOTPs) to verify your identity. This additional layer of security helps protect your accounts from unauthorized access, even if someone gains access to your password.
We covered the process of setting up Google Authenticator for the first time, which involves installing the app, adding accounts either by scanning QR codes or entering keys manually, and entering verification codes during the login process.
For those who switch to a new device, we explained how to transfer accounts from your primary device to the new one, ensuring a seamless transition of your accounts and verification codes. Alternatively, you can manually set up accounts on the new device.
To access Google Authenticator, simply open the app on your primary device or new device and view the constantly-refreshing verification codes for each account. Ensure that the time on your device is accurate to ensure the validity of the codes.
If you encounter any issues, we provided troubleshooting tips, including time synchronization, device changes, QR code scanning, account recovery, and multiple device syncing.
By utilizing Google Authenticator and following the steps outlined in this guide, you can enhance the security of your online accounts and enjoy peace of mind knowing that your sensitive information is well-protected.
Remember to always keep your device secure and consider enabling additional security measures, such as backup codes or alternative authentication methods, to prevent being locked out of your accounts.
Now that you’re equipped with the knowledge of how to set up and access Google Authenticator, go ahead and take advantage of this powerful security tool to safeguard your online presence.