Introduction
In our increasingly digital world, securing our online accounts has become more important than ever. With the rise in cyber threats and hacking attempts, it is crucial to have robust authentication methods in place to protect our sensitive information. Google Authenticator is one such tool that provides an extra layer of security to our online accounts.
Google Authenticator is a free app developed by Google that helps protect your accounts by providing a two-factor authentication (2FA) mechanism. It works on both Android and iOS devices, and it provides a simple and reliable way to add an additional security step to your online accounts beyond just a username and password combination.
Unlike traditional SMS-based authentication, Google Authenticator generates time-based one-time passwords (TOTPs). This means that each code is unique and expires after a short period of time, making it virtually impossible for attackers to access your accounts even if they manage to steal your passwords.
In this article, we will explore how to set up and use Google Authenticator, along with some common troubleshooting tips. Whether you want to protect your email, social media, or any other online accounts, Google Authenticator can be a valuable tool in enhancing your security.
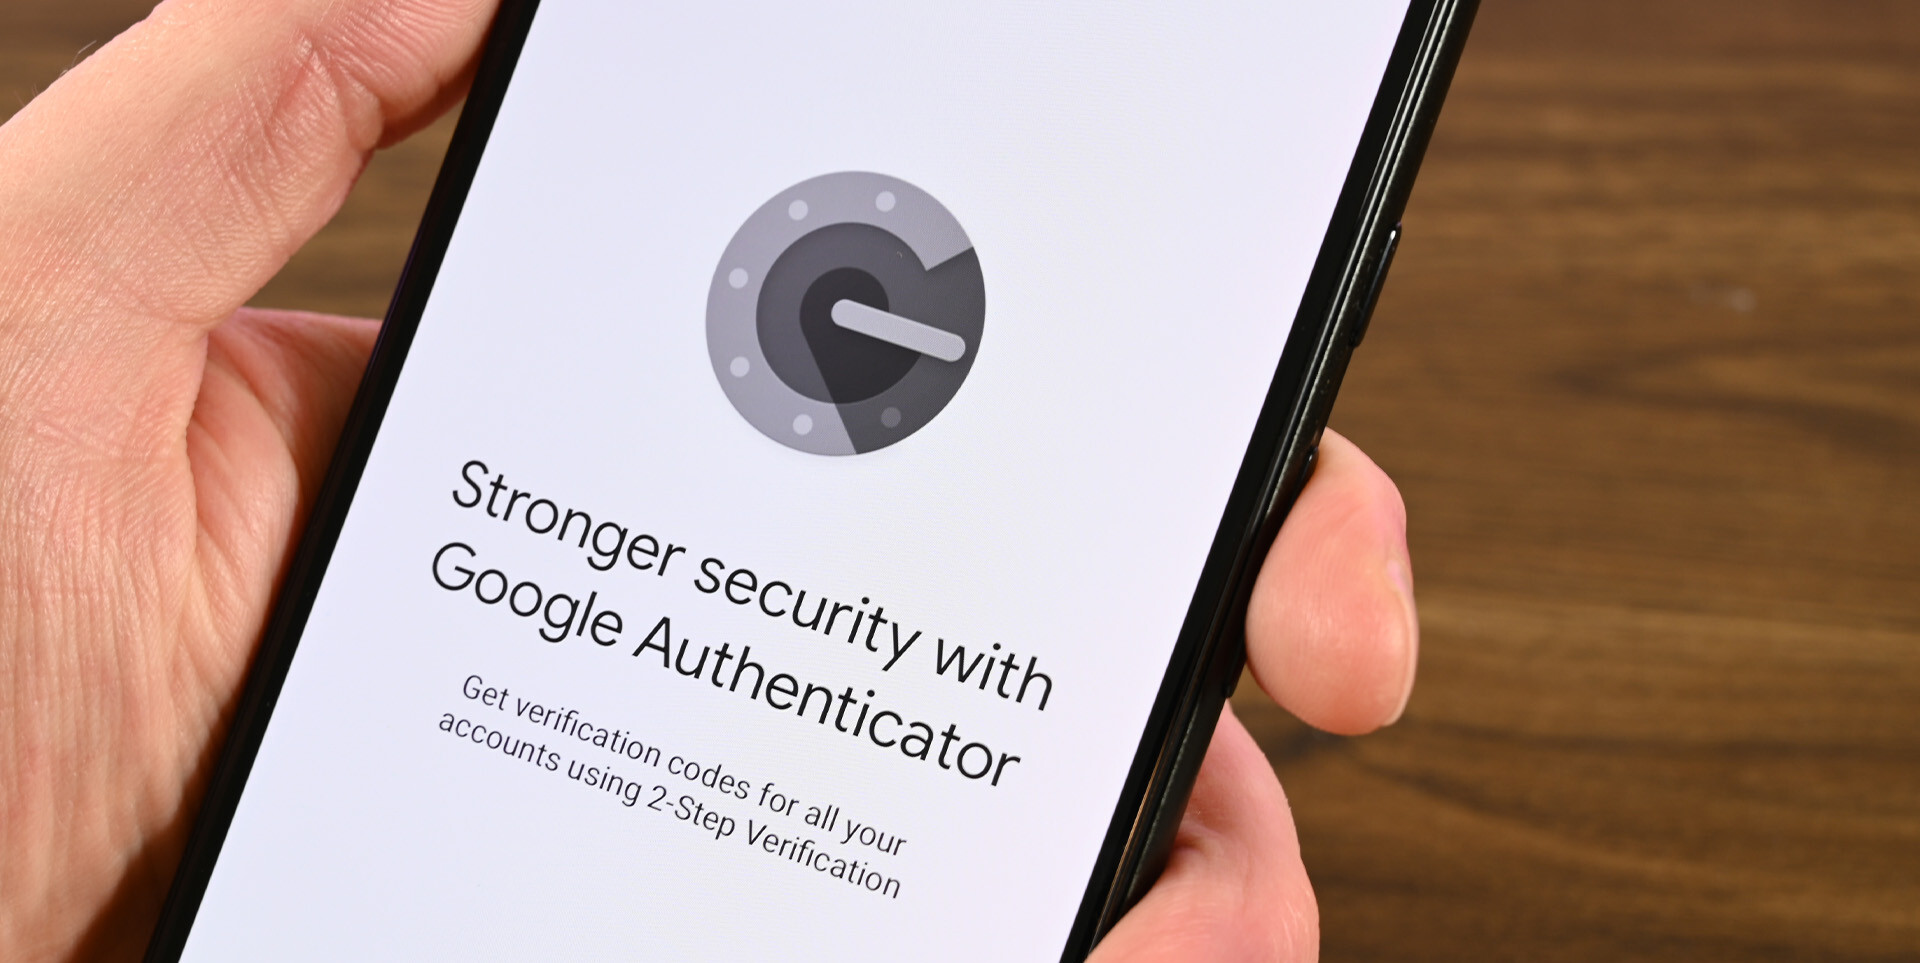
What is Google Authenticator?
Google Authenticator is a two-factor authentication (2FA) app developed by Google. It is designed to enhance the security of your online accounts by requiring a secondary verification method in addition to your password. Instead of solely relying on something you know (your password), Google Authenticator adds an extra layer of security by introducing something you have (your mobile device) for authentication purposes.
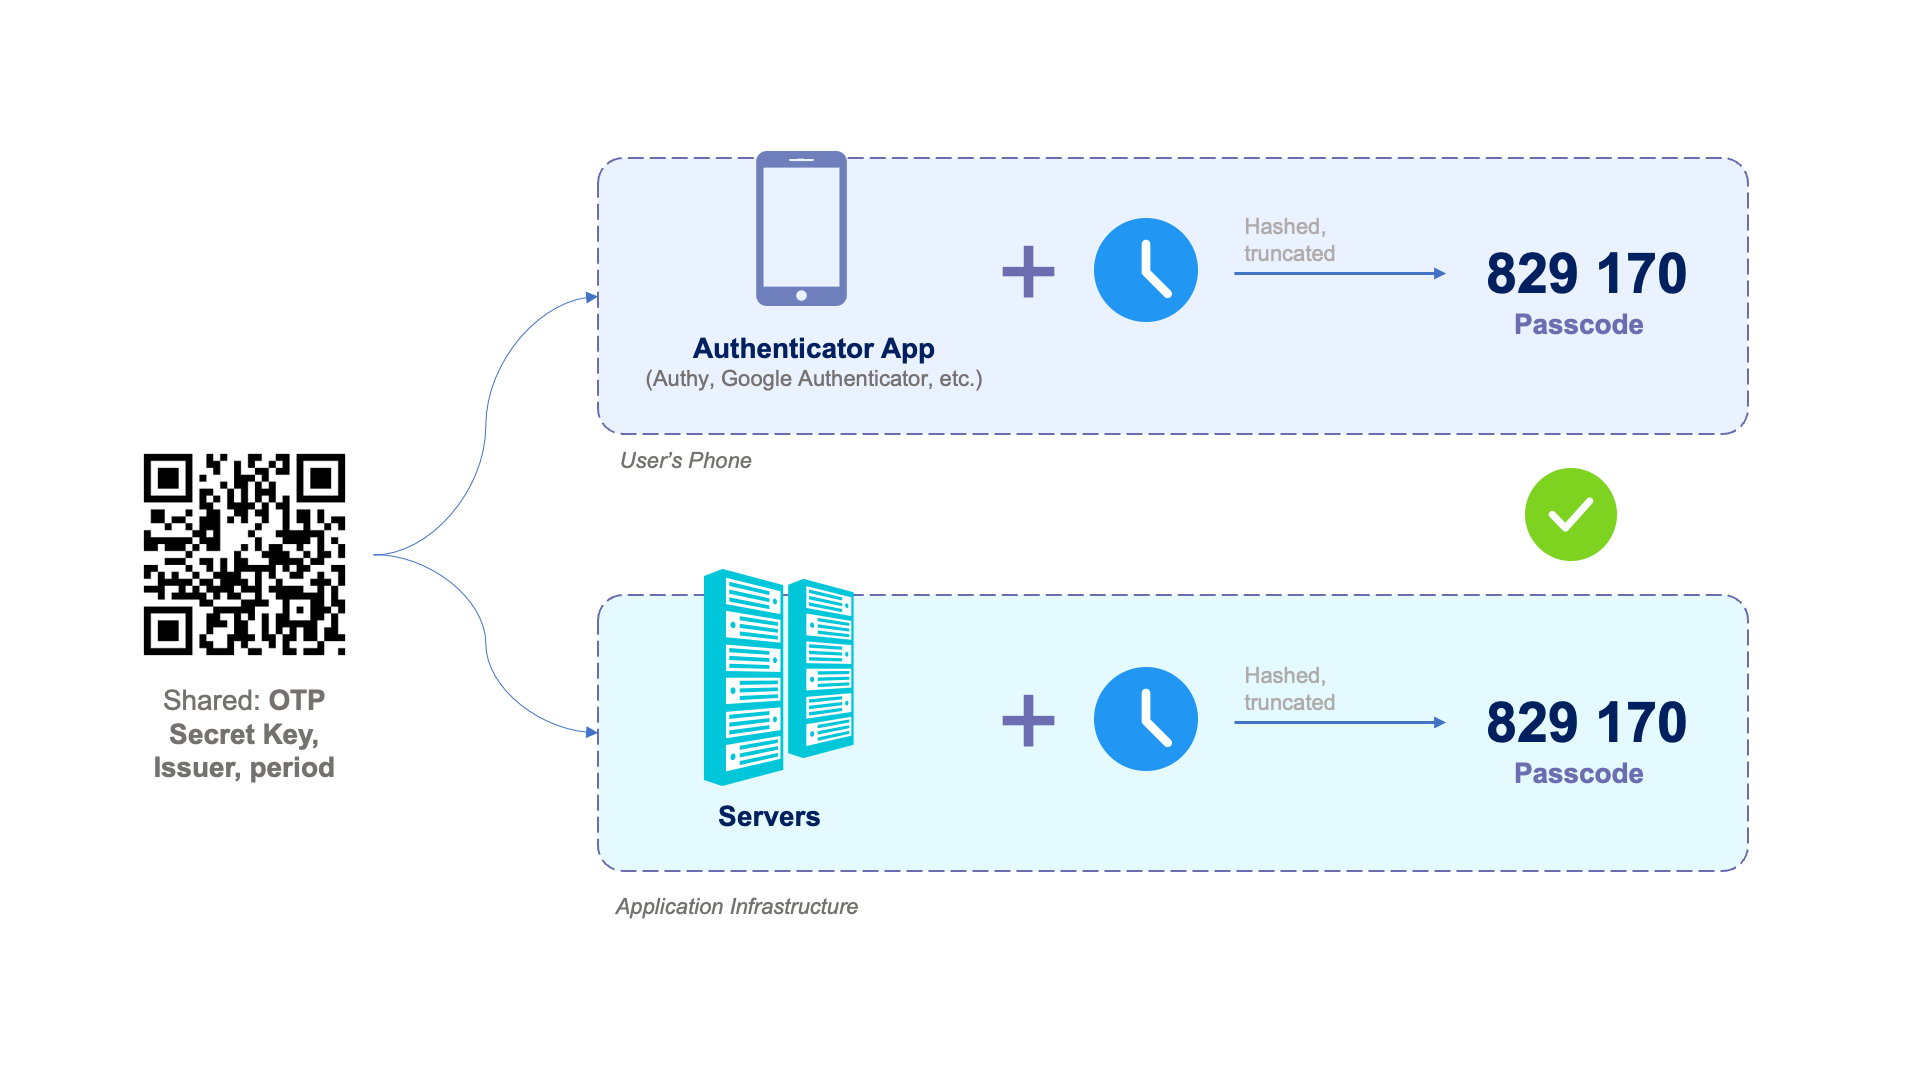
The app generates time-based one-time passwords (TOTPs) that you can use to verify your identity when logging into various online services. These passwords are valid for a short duration, typically 30 seconds, and are unique to each account and device. This means that even if someone manages to obtain your username and password, they would still need access to your mobile device to generate the correct authentication code, thwarting their unauthorized access attempts.
One of the advantages of using Google Authenticator is that it does not require an internet connection for generating authentication codes. The app uses algorithms to generate the passwords within the app and does not rely on external servers or SMS messages, making it more reliable and secure.
Some of the popular platforms and services that support Google Authenticator include Google accounts, Facebook, Twitter, Instagram, Dropbox, and many others. By enabling two-factor authentication and using Google Authenticator, you can significantly reduce the risk of unauthorized access to your accounts, protecting your personal information, financial data, and online identity.
It is important to note that Google Authenticator provides an additional layer of security, but it is not foolproof. It is crucial to maintain a strong password and ensure the security of your mobile device where the app is installed. Additionally, it is always recommended to regularly update the app and review the security settings of your online accounts to stay protected.
Setting up Google Authenticator
Setting up Google Authenticator is a simple process that requires a few easy steps. Here’s a step-by-step guide on how to set up the app on your mobile device:
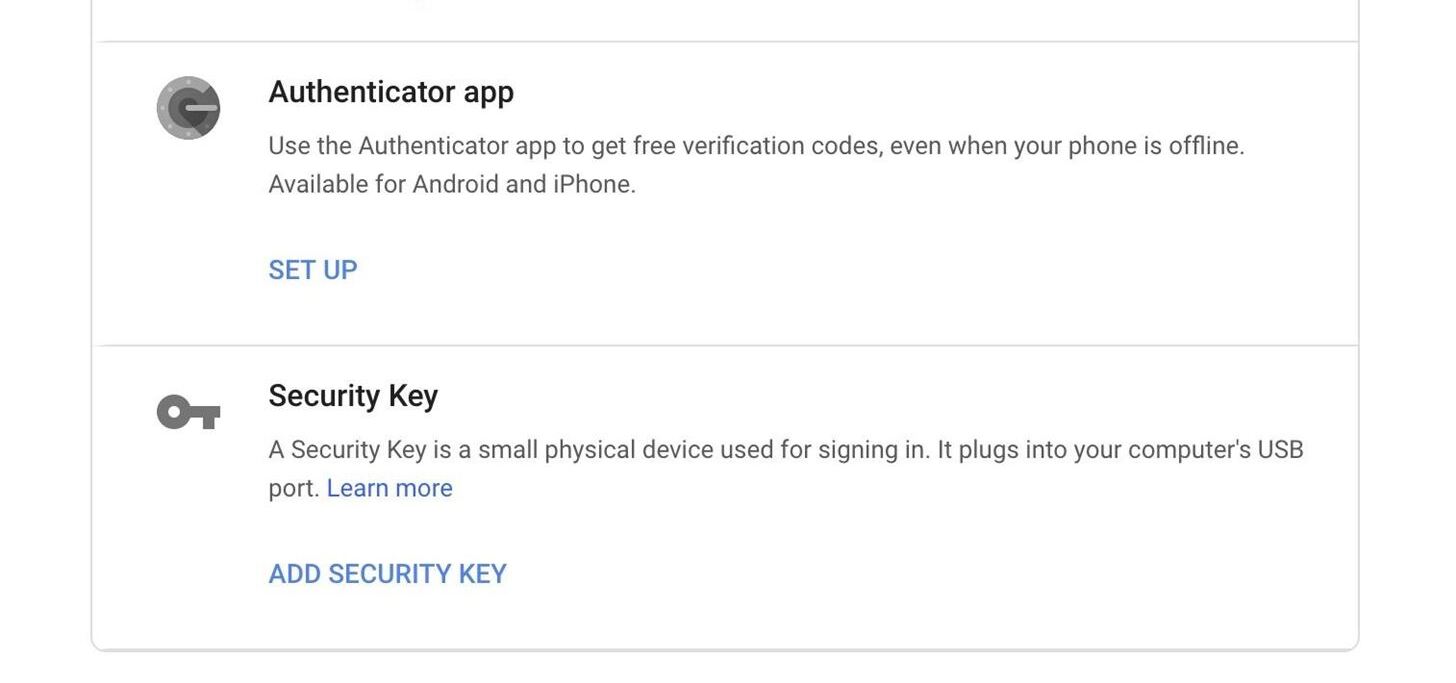
- First, download and install the Google Authenticator app from the App Store (iOS) or Google Play Store (Android).
- Once the app is installed, open it and tap on the “Get Started” button.
- Next, you’ll have the option to either scan a QR code or manually enter an account. Most services provide a QR code for easy setup. If you choose to scan a QR code, simply point your device’s camera at the code and allow the app to capture it.
- If you prefer to manually enter an account, tap on the “Enter a setup key” option and provide the requested information, such as the account name and the secret key code provided by the service you’re setting up.
- After scanning the QR code or manually entering the account details, the app will verify the setup and generate a verification code.
- Enter the verification code into the appropriate field on the website or service you’re setting up two-factor authentication for.
- Finally, once the verification code is accepted, you’re all set. Google Authenticator will now generate time-based one-time passwords for the account you’ve added.
It’s important to note that during the setup process, some services may provide backup codes. These codes can be helpful if you ever lose access to your Google Authenticator app or mobile device. It’s highly recommended to store these backup codes in a safe and secure location.
Once you’ve successfully set up Google Authenticator for an account, you can repeat the process for any other accounts you wish to secure with two-factor authentication. The app supports multiple accounts, making it easy to manage and generate unique verification codes for each one.
Please keep in mind that the setup process for Google Authenticator may vary slightly depending on the platform or service you are configuring it for. However, the general steps outlined above should provide a good starting point to get you up and running with enhanced account security.
Adding an account to Google Authenticator
To further enhance the security of your online accounts, you can add them to the Google Authenticator app. Here’s how you can add an account to Google Authenticator:
- Open the Google Authenticator app on your mobile device.
- Tap on the “+” icon or the “Add Account” button (the exact option may vary depending on your device or app version).
- Choose the method of adding the account from the available options. You can either scan a QR code or manually enter the account details.
- If you have a QR code provided by the service you’re adding, tap on the “Scan a QR code” option and align your device’s camera with the code. The app will automatically detect and add the account.
- If you don’t have a QR code, select the “Enter a setup key” option to manually enter the account details. This typically involves providing the account name and the corresponding secret key provided by the service.
- Once you’ve scanned the QR code or entered the account details, the app will verify the setup and add the account to Google Authenticator.
- Repeat the above steps for each account you want to add to the app.
It’s important to note that some services may have specific instructions for setting up two-factor authentication with Google Authenticator. In such cases, be sure to follow the guidelines provided by the service to ensure a seamless setup process.
Once you’ve added an account to Google Authenticator, the app will generate a time-based one-time password (TOTP) for that account. The TOTP will refresh every 30 seconds, providing you with a unique code each time you need to authenticate your identity.
Remember to securely store any backup codes provided by the service during the account setup process. These codes can be used if you ever lose access to your Google Authenticator app and need to regain access to your account.
By adding your accounts to Google Authenticator, you’ll have an extra layer of security in place, helping to safeguard your online presence and protect your sensitive information from unauthorized access.
Generating codes with Google Authenticator
Once you have set up your accounts in Google Authenticator, generating codes to authenticate your identity is a straightforward process. Here’s how you can generate codes with Google Authenticator:
- Launch the Google Authenticator app on your mobile device.
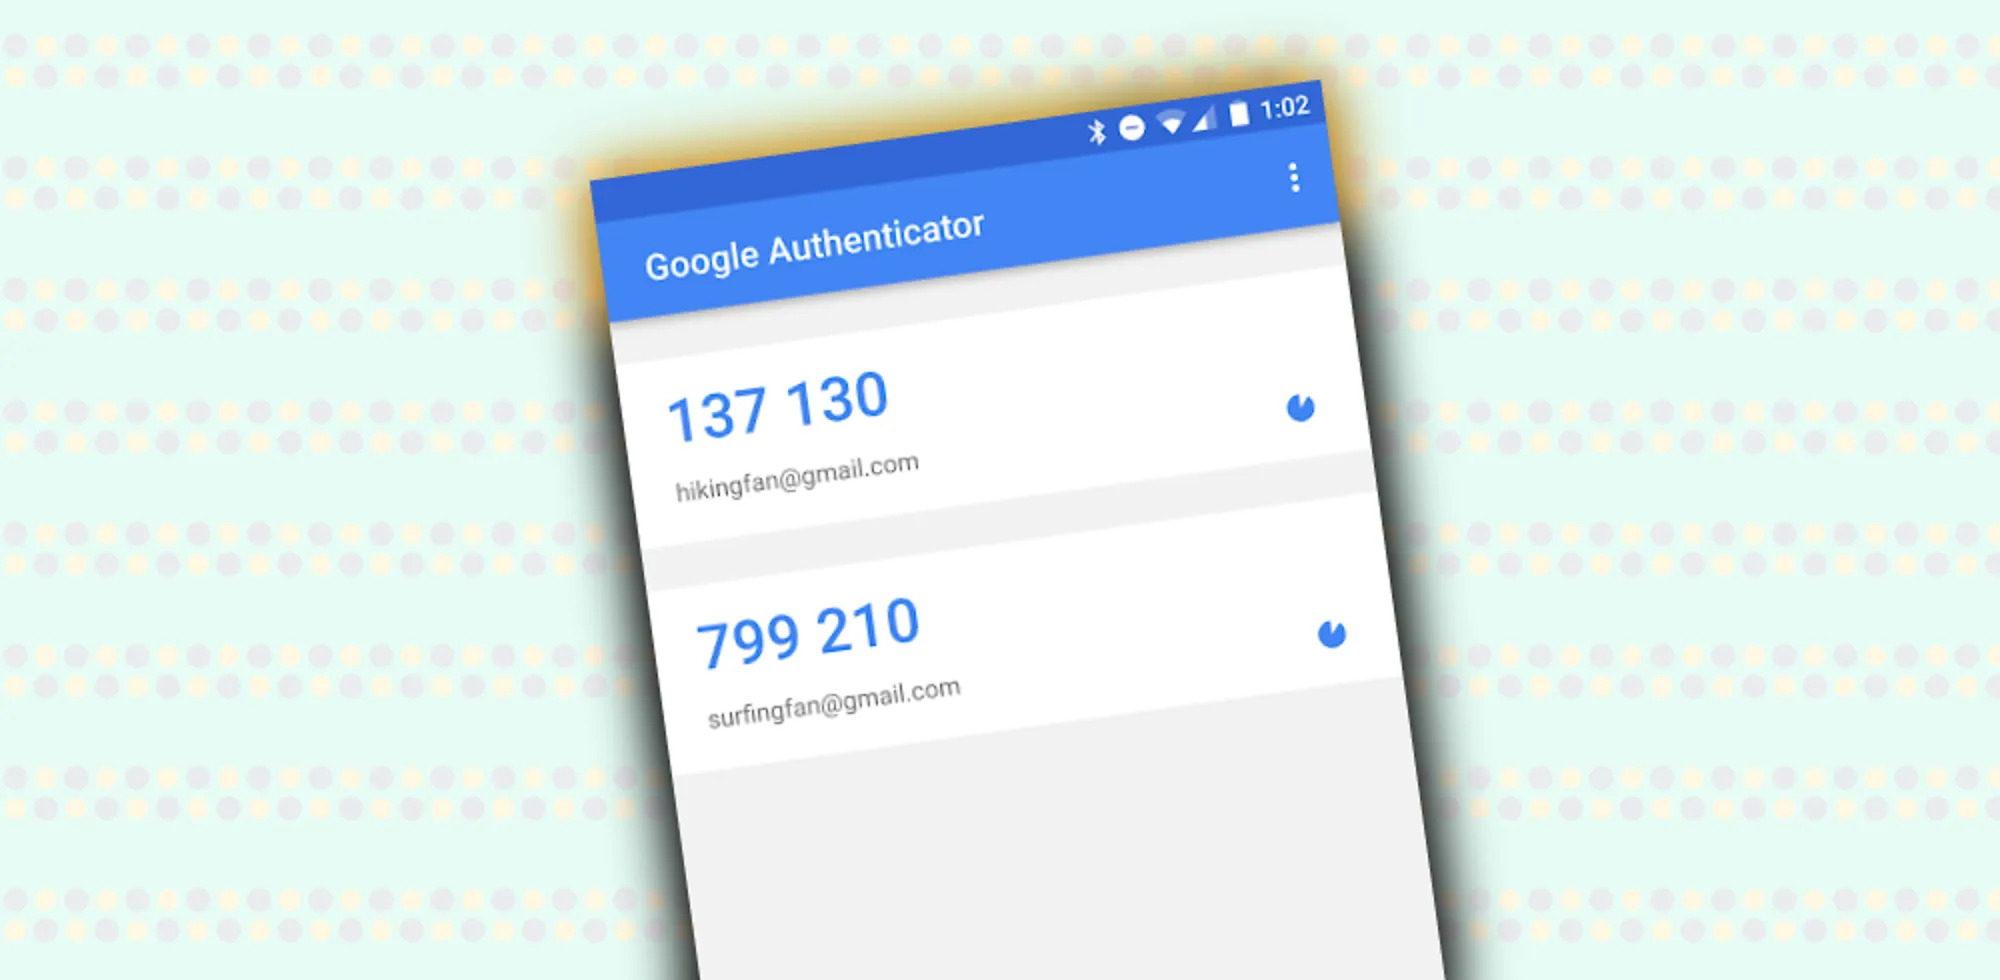
- You will see a list of all the accounts you have added to the app.
- Select the account for which you need to generate a verification code.
- The app will display a six-digit verification code that is unique to that specific moment in time.
- Enter this verification code in the appropriate field on the website or service where you are prompted for two-factor authentication.
- Once you have entered the code, it will be verified, and if correct, you will be granted access to your account.
The verification codes generated by Google Authenticator have a short lifespan, typically around 30 seconds. After this time has elapsed, the code will expire, and a new one will be generated. This time-based functionality adds an extra layer of security, ensuring that even if someone manages to intercept a code, it will be useless once it expires.
It’s important to note that if you encounter issues with the verification codes, make sure the time on your mobile device is accurately set. Google Authenticator relies on precise time synchronization to generate the correct codes, so any discrepancy could cause authentication problems.
Generating codes with Google Authenticator is a quick and reliable process, providing you with an additional layer of security for your online accounts. By using these time-based one-time passwords, you can protect your accounts from unauthorized access and ensure the confidentiality of your sensitive information.
Using Google Authenticator with different services
Google Authenticator is compatible with a wide range of online platforms and services that support two-factor authentication. Here are some of the common services where you can use Google Authenticator for enhanced security:
- Google Accounts: Protect your Gmail, Google Drive, and other Google services by enabling two-factor authentication with Google Authenticator. Follow the account security settings in your Google Account to set it up.
- Social Media: Popular social media platforms like Facebook, Twitter, and Instagram allow you to enable two-factor authentication and use Google Authenticator as the verification method. Check the security settings on these platforms to activate it.
- Cloud Storage: Services like Dropbox and OneDrive offer support for Google Authenticator. By enabling two-factor authentication, you can add an extra layer of security to protect your files and documents stored in the cloud.
- Financial Accounts: Many banking institutions and financial service providers offer two-factor authentication options, including integration with Google Authenticator. Implementing this additional security measure helps protect your financial information and transactions.
- Business Applications: If your workplace uses business applications or platforms that support two-factor authentication, consider using Google Authenticator to enhance the security of your work-related accounts.
To enable Google Authenticator on these services, navigate to the security settings or account settings section and look for the option to enable two-factor authentication. Once enabled, follow the instructions provided by the specific service to add the account to your Google Authenticator app.
Using Google Authenticator with different services provides a consistent and convenient method of adding an extra layer of security to your online accounts. It offers a more reliable alternative to SMS-based authentication, ensuring that you always have access to time-based one-time passwords generated directly on your mobile device.
Remember to regularly review your security settings on these platforms, including updating passwords and managing authorized devices, to maintain the integrity and security of your online presence.
Troubleshooting common issues
While Google Authenticator is generally reliable and straightforward to use, you may encounter some common issues along the way. Here are a few troubleshooting tips to help you overcome these challenges:
- Time synchronization issues: If your verification codes are not working, make sure the time on your device is accurately set. Google Authenticator relies on precise time synchronization to generate the correct codes.
- Device change or loss: If you change your mobile device or lose it, you may lose access to your Google Authenticator app. That’s why it’s crucial to keep a record of the backup codes provided during the initial account setup. These backup codes can help you regain access to your accounts.
- Recovery options: Some services may provide alternative recovery options in case you lose access to your Google Authenticator app. These options could include backup email addresses or phone numbers. Make sure to set up and verify these recovery options to prevent account lockout situations.
- QR code scanning issues: If you are having trouble scanning the QR code during the account setup process, make sure the code is not blurry and is well-lit. Additionally, ensure that you have granted the necessary camera permissions to the Google Authenticator app.
- Account removal: If you need to remove an account from Google Authenticator, go to the app’s settings and select the account you want to remove. Follow the prompts to remove the account from the app.
If you continue to experience issues or encounter specific problems with Google Authenticator, it is recommended to consult the support documentation or contact the customer support of the service you are using. They will be able to provide guidance and assistance tailored to their platform’s implementation of two-factor authentication with Google Authenticator.
It’s important to remember that while Google Authenticator adds an extra layer of security, it is not a foolproof solution. Always practice good password hygiene, use a combination of strong and unique passwords, and regularly review and update your security settings to ensure maximum account protection.
Conclusion
Google Authenticator is a valuable tool for enhancing the security of your online accounts. By adding an extra layer of verification through two-factor authentication, it helps protect your sensitive information from unauthorized access. This powerful app generates time-based one-time passwords (TOTPs), making it extremely difficult for hackers to gain entry even if they manage to obtain your passwords.
In this article, we have explored the various aspects of Google Authenticator, from understanding its purpose to setting it up, adding accounts, and troubleshooting common issues. We discussed how it can be used with different services, such as Google accounts, social media platforms, cloud storage providers, and financial accounts, among others.
By following the step-by-step instructions provided in this article, you can easily set up Google Authenticator on your mobile device and add your accounts to enjoy the benefits of two-factor authentication. Remember to securely store any backup codes and review your security settings regularly to maintain the integrity of your online accounts.
While Google Authenticator offers robust protection, it is essential to adopt additional security measures. This includes utilizing strong and unique passwords, being cautious of phishing attempts, and keeping your mobile device secure. By practicing good security habits and leveraging the power of Google Authenticator, you can significantly reduce the risk of falling victim to unauthorized access and protect your valuable online presence.
Take the proactive step today and enable Google Authenticator for your accounts. Safeguard your personal information, enjoy peace of mind, and stay one step ahead of potential cyber threats.