Introduction
In today’s digital age, a strong and reliable internet connection has become a necessity for gaming enthusiasts. While many gamers opt for a wireless internet connection, there are several advantages to setting up an Ethernet connection for your PlayStation 5 (PS5) console.
An Ethernet connection provides a more stable and faster connection compared to Wi-Fi, reducing any latency or lag during gameplay. This can significantly enhance your online gaming experience, allowing you to play games seamlessly without any interruptions.
In this guide, we will walk you through the process of setting up an Ethernet connection on your PS5 console. Whether you’re a seasoned gamer or a beginner, don’t worry, as the steps are straightforward and easy to follow.
We will start by explaining how to physically connect the Ethernet cable to your PS5 console. Next, we will delve into configuring the network settings to ensure a successful connection. Finally, we will address some common troubleshooting tips to help you overcome any Ethernet connection issues you might encounter.
By the end of this guide, you will be well-equipped to enjoy a stable and lightning-fast internet connection for your gaming adventures on the PS5.
Connecting the Ethernet Cable
Before getting started, make sure you have an Ethernet cable and a free Ethernet port on your modem or router. Follow these steps to connect the Ethernet cable to your PS5:
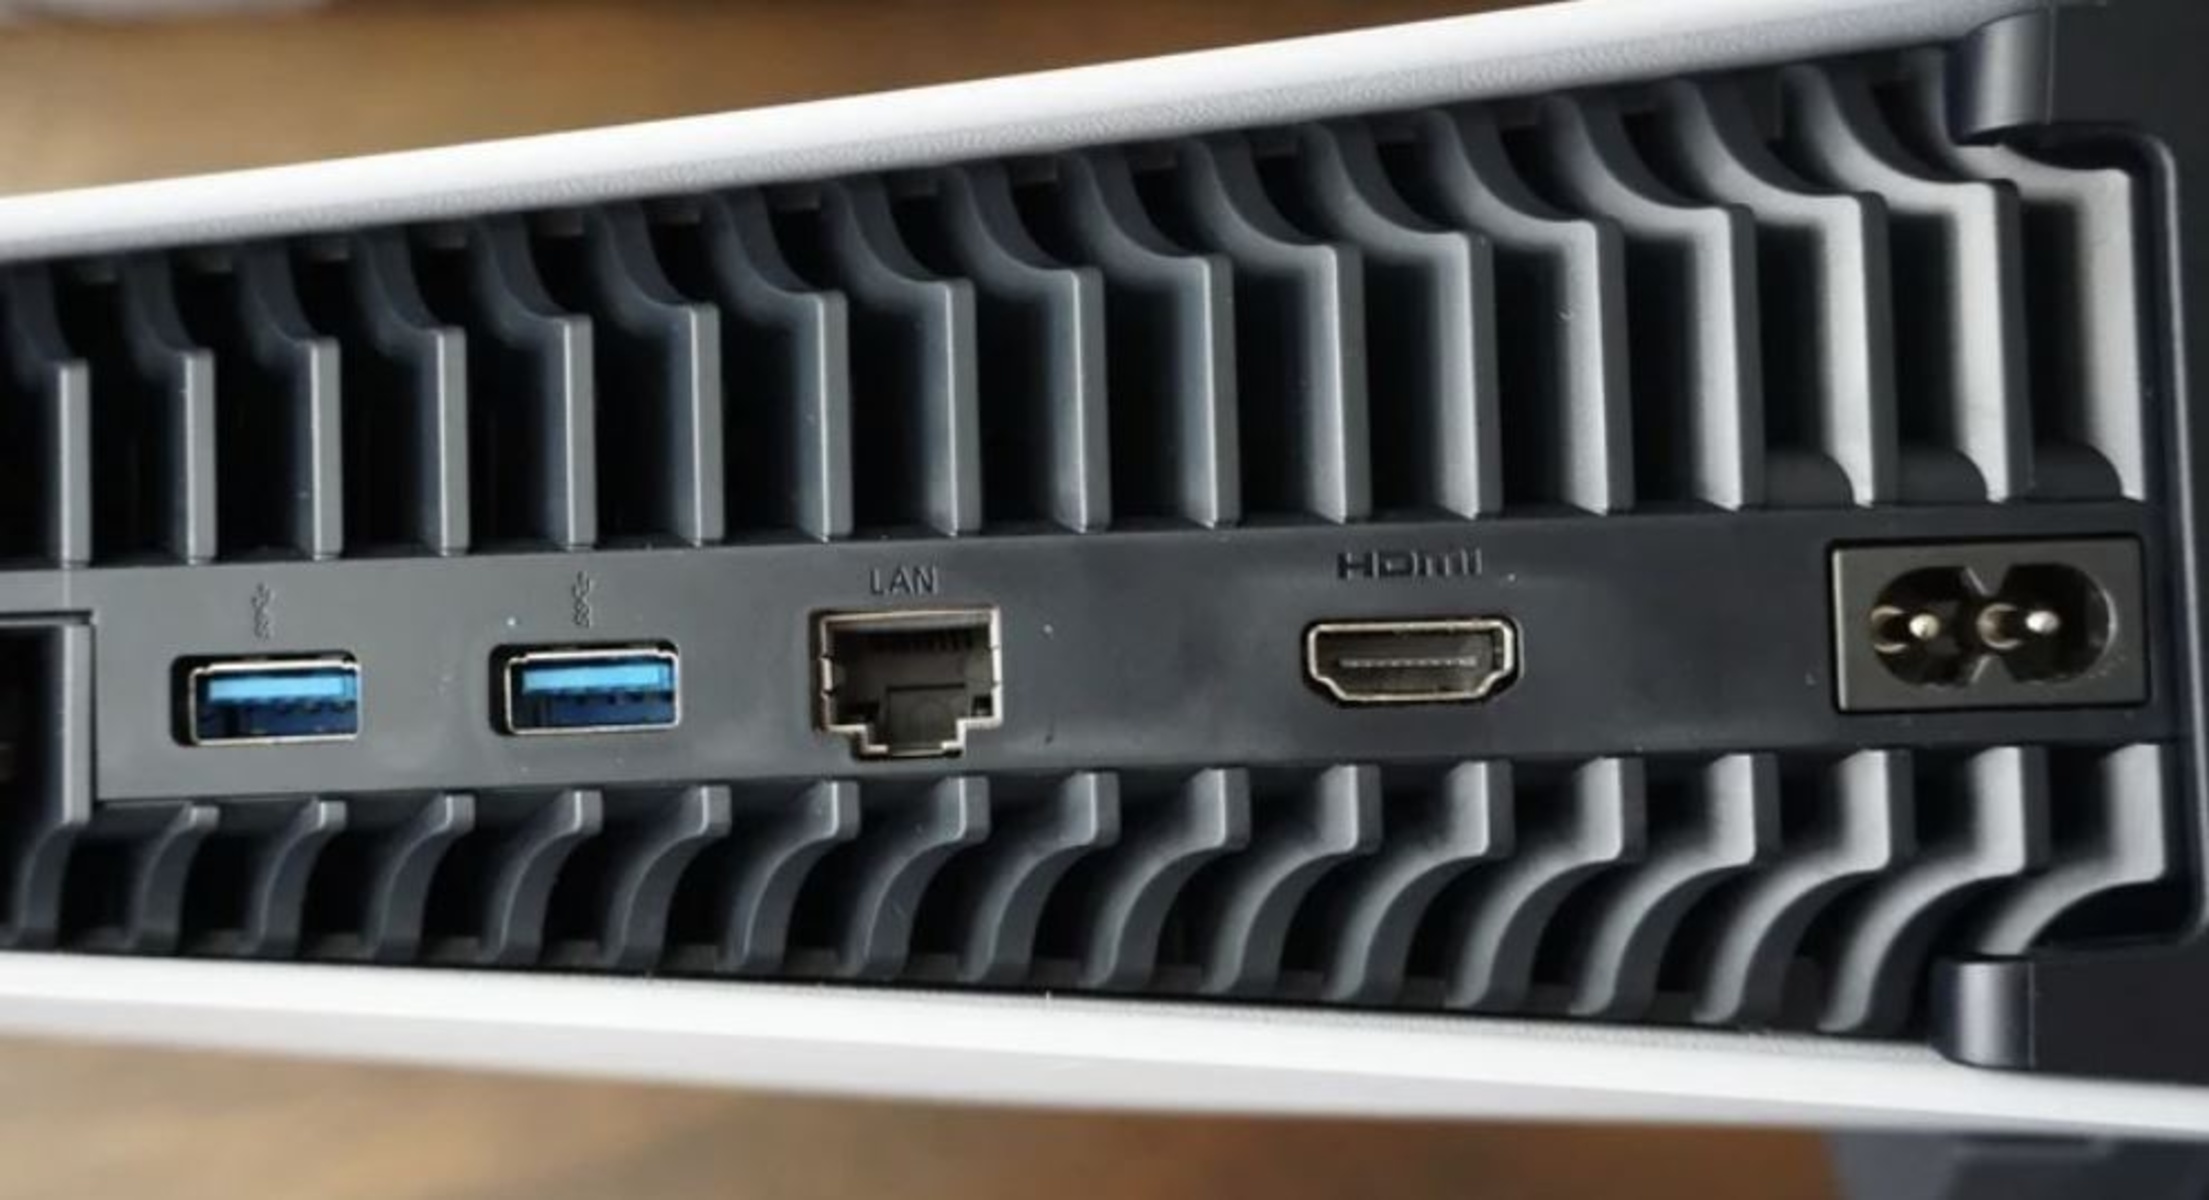
- Locate the Ethernet port on the back of your PS5 console. It is labeled with an Ethernet icon.
- Take one end of the Ethernet cable and insert it into the Ethernet port on your PS5 console. Make sure it is securely and fully inserted.
- Next, take the other end of the Ethernet cable and connect it to an available Ethernet port on your modem or router. Again, ensure a secure connection.
- Once both ends of the Ethernet cable are securely connected, power on your modem or router if it is not already powered on.
- Now, turn on your PS5 console and wait for it to boot up.
The Ethernet cable is now successfully connected to your PS5 console. The next step is to configure the network settings to establish a connection.
It’s important to note that the PS5 also supports a feature called “Wired LAN connection” which allows you to connect your console directly to your modem or router using the Ethernet cable. This feature can be enabled if you prefer a direct connection without going through a router.
Now that the physical connection is complete, let’s move on to the network configuration process on your PS5 console.
Configuring Network Settings on the PS5
Once the Ethernet cable is connected to your PS5 console, you need to configure the network settings to establish a successful connection. Follow the steps below:
- On your PS5 console, go to the main menu and select the “Settings” option.
- In the settings menu, scroll down and select “Network” to access the network settings.
- Under the Network settings, select “Settings” again to proceed to the network setup.
- Choose “Set Up Internet Connection” and select “Use a LAN Cable” as your preferred connection method.
- The PS5 will now automatically detect the Ethernet connection. If the connection is successful, you can proceed to the next step. If not, make sure the Ethernet cable is securely connected at both ends.
- On the next screen, you will be prompted to choose the IP address settings. It is recommended to select “Automatic” to let the PS5 obtain the IP address automatically from your router or modem. However, if you prefer to set a manual IP address, you can choose the “Manual” option and enter the details provided by your internet service provider.
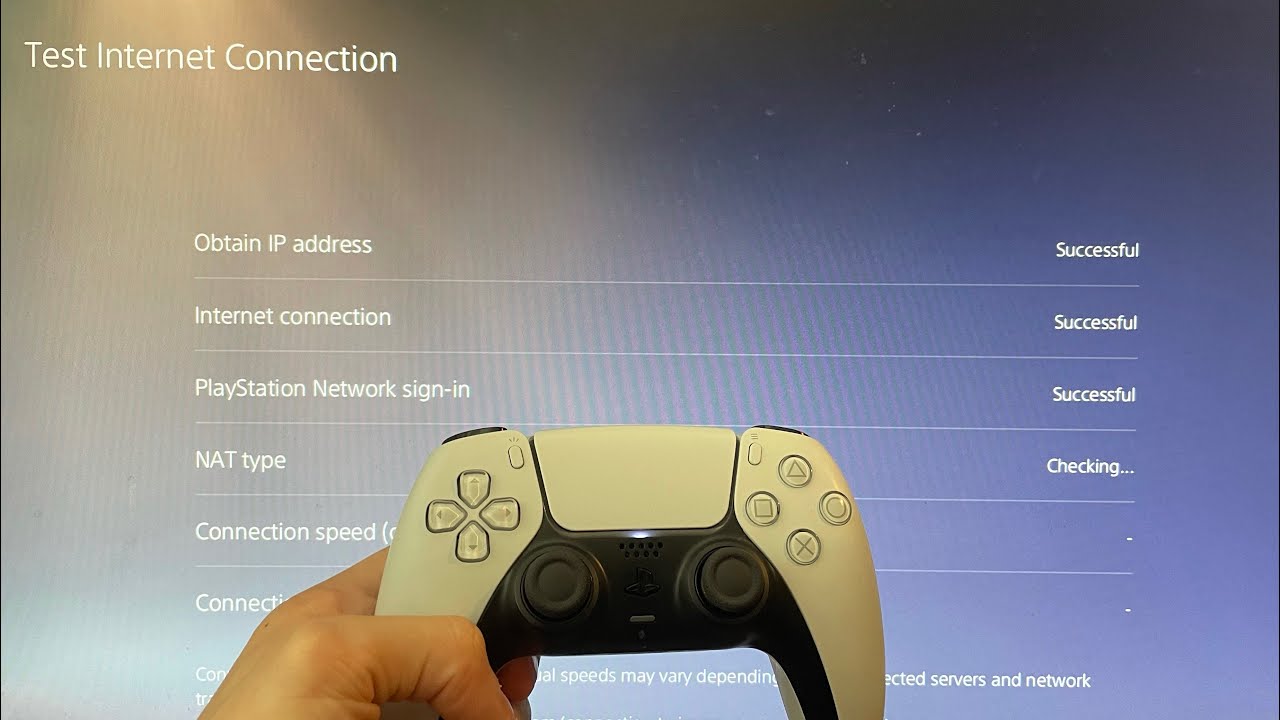
- After selecting the IP address settings, the PS5 will perform a network connection test to verify the setup. If the test is successful, you will see a confirmation message indicating that the connection is complete.
At this point, the network settings on your PS5 console are configured for the Ethernet connection. You can now enjoy a stable and fast internet connection for your gaming sessions.
If you encounter any issues during the network setup process, refer to the troubleshooting section of this guide for possible solutions.
Now that your Ethernet connection is established and the network settings are configured, it’s time to check the connection and ensure everything is working correctly.
Checking the Ethernet Connection
After setting up the Ethernet connection and configuring the network settings on your PS5 console, it’s essential to check if the connection is working properly. Follow these steps to verify the Ethernet connection:
- On your PS5 console, navigate to the main menu and select the “Settings” option.
- In the settings menu, scroll down and select “Network” to access the network settings.
- Under the Network settings, choose “Connection Status” to view the status of your network connection.
- Under the “Connection Status” section, you will see information about your Ethernet connection, including the IP address, internet status, and network speed. Ensure that the connection status displays as “Connected” and the network speed is satisfactory.
If the connection status shows as “Connected,” congratulations! Your Ethernet connection is successfully established. You can now enjoy a stable and fast internet connection for your gaming experience on the PS5.
If the connection status does not indicate “Connected” or you are experiencing slow network speeds, there might be some troubleshooting steps you can follow to improve the connection. Check the next section for troubleshooting tips to address potential Ethernet connection issues.
Remember, a reliable Ethernet connection not only enhances your gaming experience but also allows for smoother and faster downloads, updates, and online interactions. If you encounter any persistent issues, it may be worth reaching out to your internet service provider for further assistance.
Now that you’ve checked the connection, let’s explore some troubleshooting tips for Ethernet connection issues.
Troubleshooting Ethernet Issues
While setting up an Ethernet connection on your PS5 console is generally a straightforward process, you might encounter some issues along the way. Here are some troubleshooting tips to help you resolve common Ethernet connection issues:
- Check the physical connections: Ensure that the Ethernet cable is securely connected to both your PS5 console and the modem or router. Sometimes, a loose connection can result in an unstable or nonexistent connection.
- Try a different Ethernet cable: If you are experiencing connection issues, it’s worth trying a different Ethernet cable to rule out any potential cable defects.
- Restart the modem and router: Power cycling your modem and router can help resolve temporary network issues. Try turning off the devices, waiting for a few seconds, and then turning them back on.
- Update firmware: Check if there are any firmware updates available for your modem or router. Keeping the firmware up to date can address compatibility issues and improve overall network performance.
- Disable any VPN or proxy settings: Virtual Private Networks (VPNs) and proxy servers can sometimes interfere with the Ethernet connection. Try disabling these settings temporarily to see if it resolves the issue.
- Adjust the MTU settings: In some cases, adjusting the Maximum Transmission Unit (MTU) settings on your PS5 console can improve network stability. Try lowering the MTU value to see if it resolves the connection problem.
- Check for IP conflicts: Ensure that there are no IP address conflicts within your network. If multiple devices have the same IP address, it can cause connectivity issues. Assigning a static IP address to your PS5 console can help avoid conflicts.
- Contact your internet service provider: If you have tried all the troubleshooting steps and are still experiencing Ethernet connection issues, it may be necessary to reach out to your internet service provider for further assistance. They can help diagnose any larger network problems that may be affecting your connection.
By following these troubleshooting tips, you should be able to resolve most Ethernet connection issues on your PS5 console. However, if the problem persists, it’s advisable to consult professional technical support for further guidance.
Now that you have an understanding of troubleshooting Ethernet connection issues, let’s wrap up this guide.
Conclusion
Setting up an Ethernet connection on your PS5 console can greatly enhance your gaming experience by providing a stable and fast internet connection. In this guide, we walked you through the process of connecting the Ethernet cable, configuring network settings, checking the connection, and troubleshooting common Ethernet issues.
By physically connecting the Ethernet cable to your PS5 console and ensuring a secure connection to your modem or router, you have taken the first step towards a reliable network connection. Configuring the network settings on your PS5, such as choosing the IP address settings, further ensures a seamless connection.
Remember to regularly check the network status to confirm that the Ethernet connection is working correctly. If you encounter any issues, utilize the troubleshooting tips provided to address common Ethernet connection problems. Restarting the modem and router, checking physical connections, and updating firmware are just a few of the steps you can take to resolve these issues.
By following these steps and troubleshooting tips, you can enjoy uninterrupted online gaming sessions, faster downloads and updates, and a smoother overall gaming experience on your PS5 console.
If you encounter persistent issues despite troubleshooting, don’t hesitate to reach out to your internet service provider or seek professional technical support for further assistance. They will be able to provide more specialized guidance to resolve any network-related problems.
We hope this guide has been helpful in setting up and troubleshooting your Ethernet connection on your PS5. Now, go ahead and immerse yourself in the world of online gaming with a fast and reliable internet connection!


