Introduction
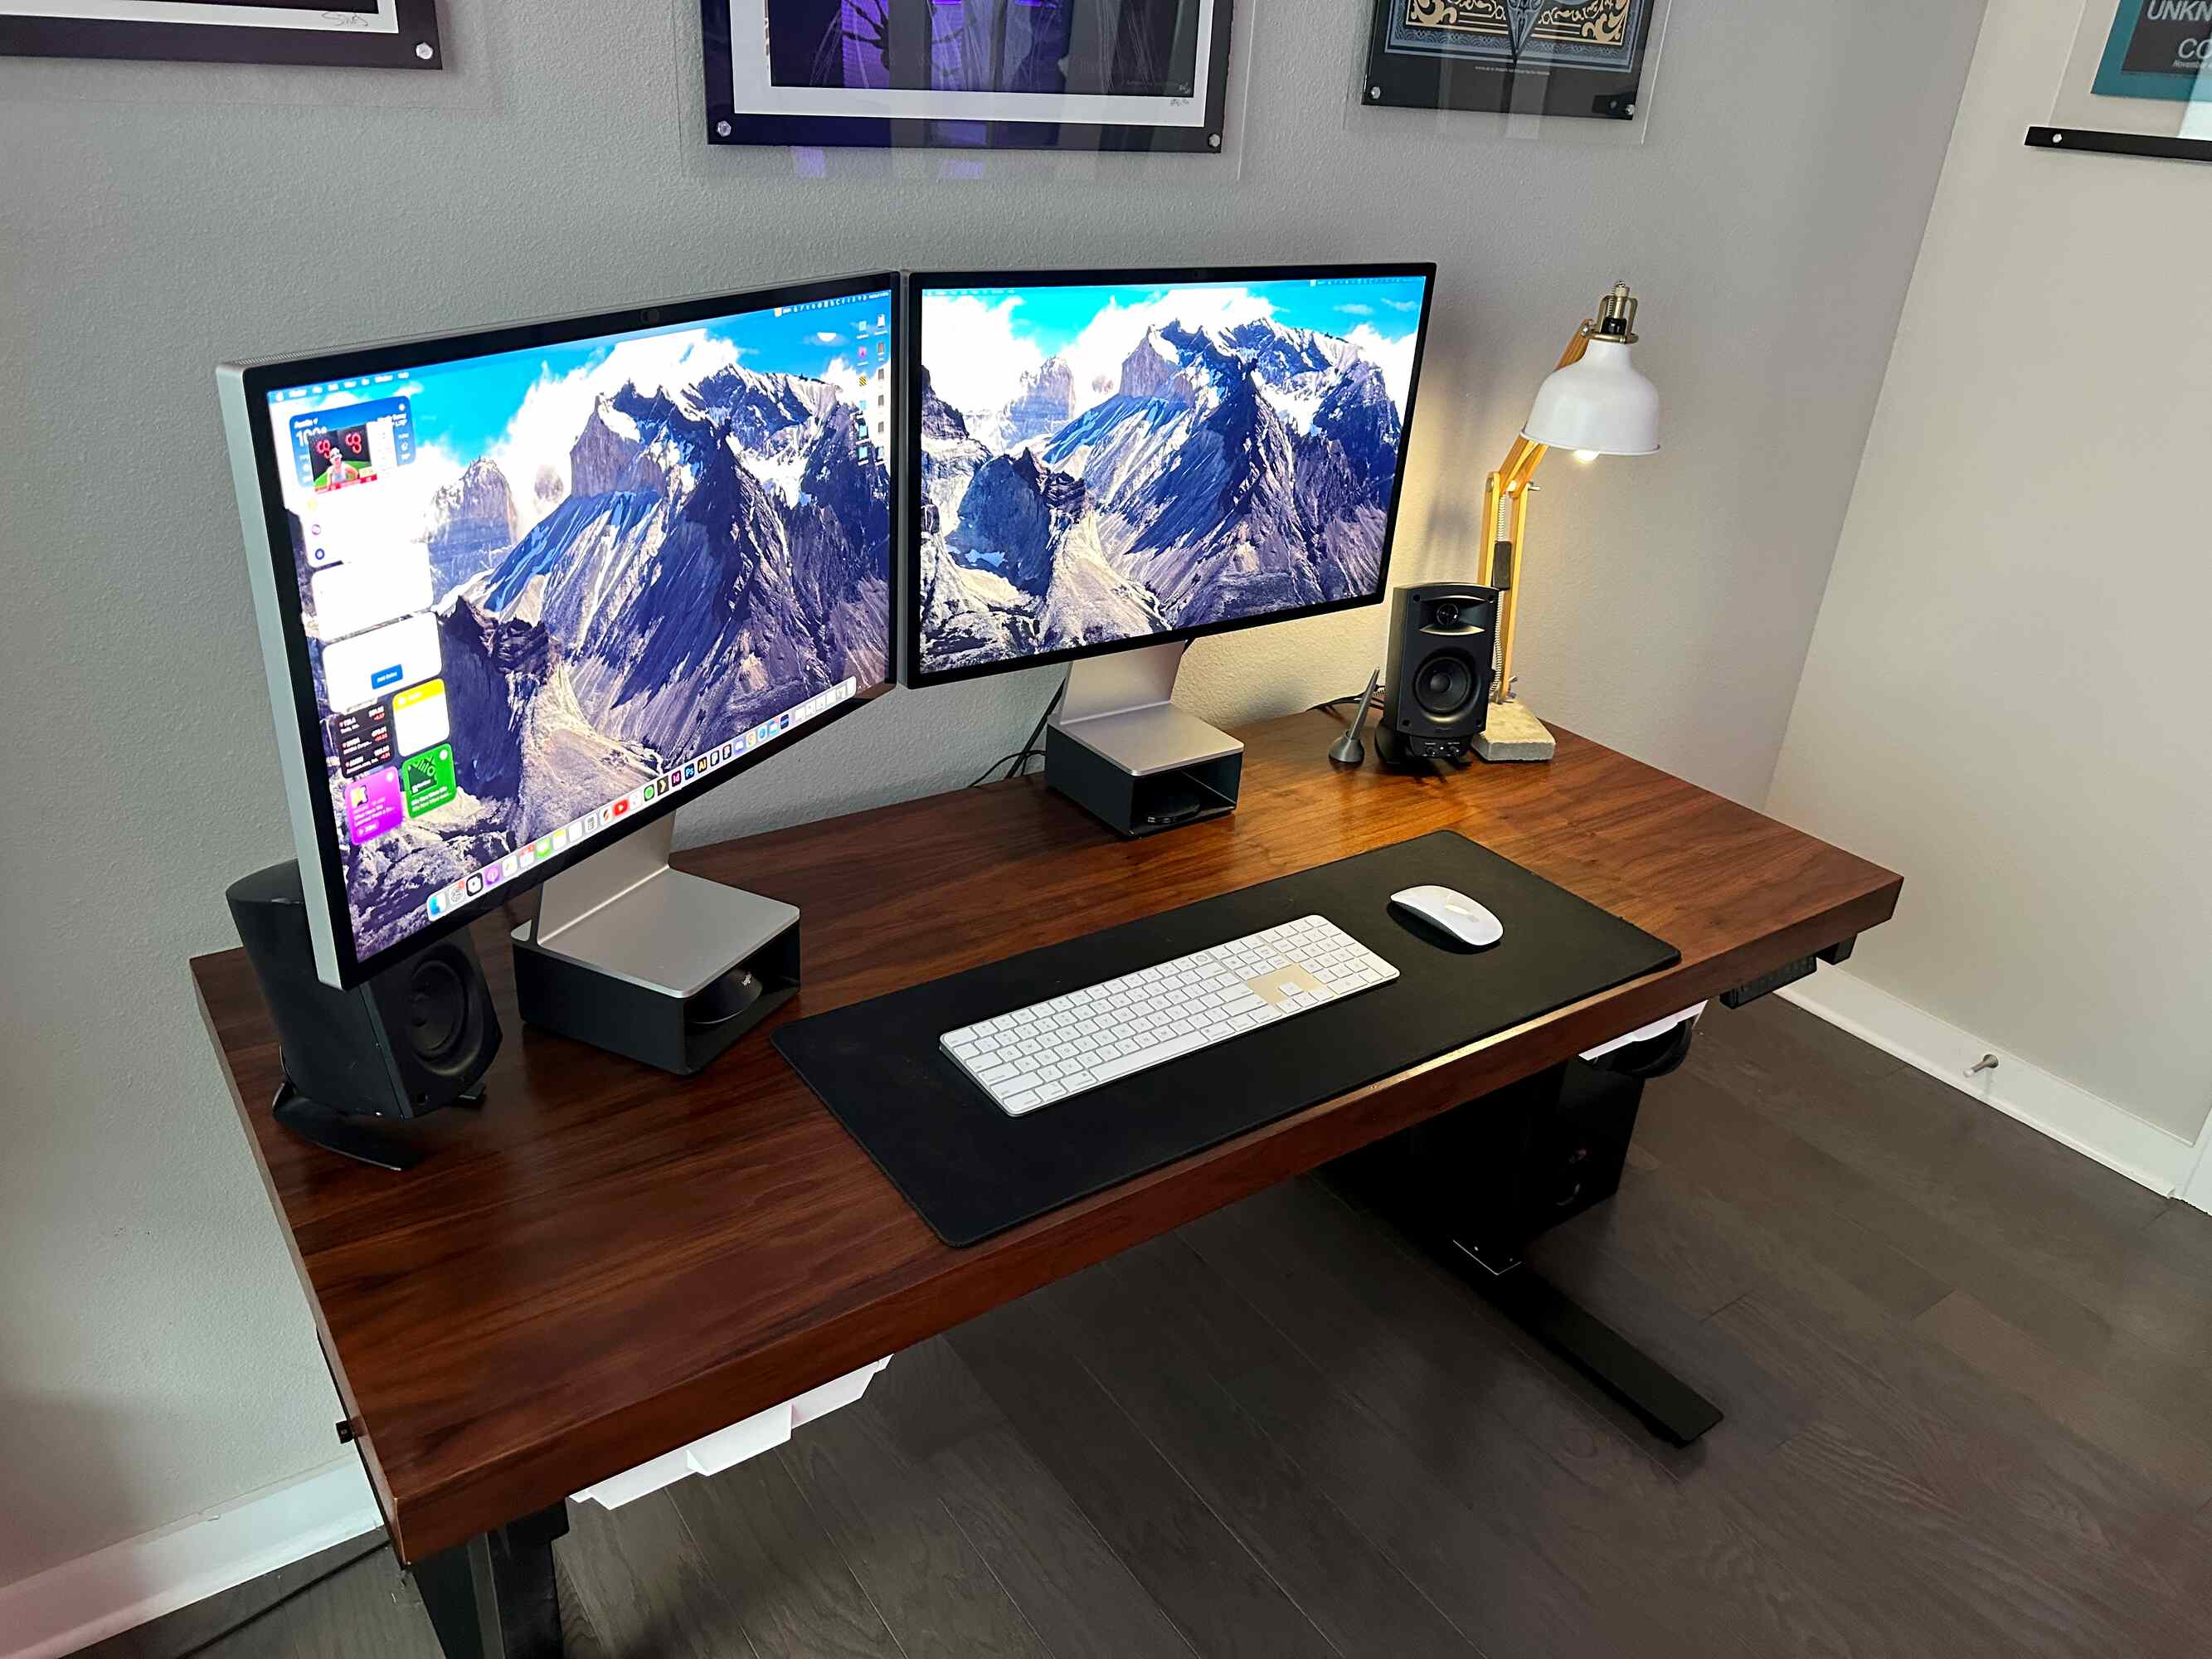
Working with a single monitor can be limiting, especially for professionals who require multitasking and efficient workflow. This is where a multiple-monitor workstation comes in. By setting up multiple monitors, you can significantly enhance your productivity and streamline your work processes.
Imagine having multiple screens at your disposal, each displaying different applications, documents, or websites. You can easily switch between tasks, compare information side by side, and have a more organized and clutter-free workspace. Whether you’re a designer, programmer, writer, or data analyst, a multiple-monitor setup can revolutionize the way you work.
In this article, we will guide you through the process of setting up a multiple-monitor workstation and provide tips on maximizing your productivity in this setup. We will discuss the benefits of using multiple monitors, how to choose the right monitors, check your computer’s capabilities, connect the monitors, adjust display settings, arrange and orient the monitors, and manage windows effectively. Are you ready to take your work setup to the next level? Let’s get started!
Benefits of a Multiple-Monitor Workstation
A multiple-monitor workstation offers a range of benefits that can greatly enhance your productivity and efficiency. Here are some of the key advantages of using multiple monitors:
- Increased Screen Real Estate: With multiple monitors, you have a larger workspace to spread out your tasks and applications. This allows you to have more windows open simultaneously without cluttering your screen, making it easier to multitask and switch between different projects.
- Improved Multitasking: Having multiple monitors enables you to work on different tasks at the same time without constantly toggling between windows. For example, you can have your email client open on one screen while working on a document or browsing the internet on another. This eliminates the need for constant window resizing and alt-tabbing, saving you time and improving your workflow.
- Enhanced Productivity: With a multiple-monitor setup, you can keep all the relevant information visible and easily accessible. This means you won’t waste time searching for files or switching between applications. Plus, having a larger workspace encourages better organization and helps you stay focused on specific tasks, leading to increased productivity.
- Improved Collaboration: If you work in a team or collaborate with others frequently, multiple monitors can be incredibly useful. You can easily share your screen or display different documents simultaneously during virtual meetings or presentations. This makes it easier for everyone to follow along and contribute, enhancing collaboration and communication.
- Better Graphics and Editing Capabilities: Professionals in fields such as graphic design, video editing, and software development can benefit from a multiple-monitor setup. With dual screens or more, you can have your main workspace on one monitor while dedicating the other screen(s) to tools, palettes, or previews. This enables you to have a larger canvas to work with and enhances your ability to visualize and manipulate complex data or visuals.
These are just a few of the many advantages of using multiple monitors in your workstation. Whether you’re a professional who needs to handle multiple tasks simultaneously or a creative individual looking for a more expansive workspace, implementing a multiple-monitor setup can significantly improve your work efficiency and productivity.
Choosing the Right Monitors
When setting up a multiple-monitor workstation, selecting the right monitors is crucial for the optimal viewing experience. Here are some factors to consider when choosing the monitors for your setup:
- Size and Resolution: The size and resolution of the monitors will determine the amount of screen real estate available to you. Consider the tasks you’ll be performing and the space you have available on your desk. Larger monitors with higher resolutions provide more workspace and sharper visuals.
- Monitor Bezels: Bezel refers to the frame surrounding the display. A small or thin bezel is desirable for a multiple-monitor setup as it minimizes the gaps between screens and provides a more seamless viewing experience. Narrow bezels also create a more cohesive and immersive workspace.
- Connectivity Options: Ensure that the monitors you choose have the necessary ports and connectivity options to connect to your computer. Common ports include HDMI, DisplayPort, and VGA. Check your computer’s graphics card outputs and choose monitors that are compatible with those ports.
- Ergonomics: Consider the ergonomics of the monitors, such as adjustable stands or VESA mount compatibility. Adjustable stands allow you to position the monitors at a comfortable height and angle, reducing strain on your neck and eyes. If you prefer a monitor arm or wall mount, make sure the monitors are VESA mount compatible.
- Color Accuracy and Viewing Angle: For tasks that require color accuracy, such as graphic design or photo editing, opt for monitors with high color accuracy and wide viewing angles. This ensures that colors appear consistent and accurate, regardless of the angle at which you view the screen.
- Budget: Set a budget for your multiple-monitor setup and look for monitors that provide the best value for your investment. Consider the features that are most important to you and prioritize those when making your selection.
It’s also helpful to read reviews and seek recommendations from professionals or other users who have experience with the monitors you are considering. They can provide insights into the performance, reliability, and overall quality of the monitors.
By considering these factors, you can choose the right monitors that best fit your workflow needs and create an optimal multiple-monitor workstation that enhances your productivity and enhances your viewing experience.
Checking Your Computer’s Capabilities
Before setting up a multiple-monitor workstation, it’s essential to ensure that your computer can support the additional monitors. Here are some important aspects to check regarding your computer’s capabilities:
- Graphics Card: Check if your computer’s graphics card has multiple video outputs. Most modern graphics cards offer multiple outputs such as HDMI, DisplayPort, or VGA. Make sure you have enough video outputs to connect each monitor you plan to use.
- Operating System: Verify if your operating system supports multiple monitors. Most modern operating systems, including Windows, macOS, and Linux, have native support for multiple monitors. However, older or customized operating systems may have limitations or require additional configuration.
- Memory and Processing Power: Having multiple monitors requires more system resources. Ensure that your computer has enough memory (RAM) and processing power to handle the increased workload. Insufficient resources can cause slowdowns or system instability.
- Display Driver: Check that you have the latest drivers installed for your graphics card. Updated drivers optimize performance and ensure compatibility with multi-monitor setups. Visit the manufacturer’s website or use their software to download and install the latest drivers.
- Power Supply: Consider the power supply of your computer. Multiple monitors will consume more power, so ensure that your power supply can handle the increased load. If necessary, consider upgrading to a higher-wattage power supply to avoid power-related issues.
- Cable Compatibility: Verify that the cables you plan to use for connecting the monitors to your computer are compatible with the ports on both ends. For example, if your monitors have DisplayPort inputs and your computer has HDMI outputs, you may need adapters or different cables to ensure compatibility.
If you’re unsure about any of these aspects or need assistance, consult your computer’s user manual or contact the manufacturer’s support for guidance. Knowing your computer’s capabilities beforehand will help you make informed decisions when setting up your multiple-monitor workstation.
Now that you’ve checked your computer’s capabilities, it’s time to move on to the next step: connecting the monitors.
Connecting the Monitors
Once you have determined that your computer can support multiple monitors, it’s time to connect them. Follow these steps to properly set up your multiple-monitor workstation:
- Determine Monitor Placement: Decide on the physical placement of your monitors. Consider factors such as desk space, viewing angles, and ergonomics. Arrange them in a way that feels comfortable and provides an optimal viewing experience.
- Gather Necessary Cables: Make sure you have the appropriate cables to connect your monitors to your computer. Depending on the inputs of your monitors and outputs of your computer’s graphics card, you may need HDMI, DisplayPort, DVI, or VGA cables. Check the ports on both the monitors and the computer to ensure compatibility.
- Connect the First Monitor: Start by connecting the first monitor. Depending on the available ports on your computer and monitor, use the corresponding cable to connect them. Insert one end of the cable into the appropriate port on the monitor and the other end into the corresponding port on your computer’s graphics card.
- Connect the Second Monitor: If you have more than one monitor, connect the second monitor using the same process as the first. Use a different port on the graphics card and ensure the cable is securely connected.
- Repeat for Additional Monitors: If you have more than two monitors, continue connecting them following the same steps. Connect each monitor to an available port on your computer’s graphics card until all monitors are connected.
- Power On the Monitors: Once all monitors are connected, power them on. Use the monitors’ power buttons or switches to turn them on. Ensure that each monitor receives power and displays the appropriate indicator lights or logos.
- Adjust Display Settings: After connecting the monitors, your computer may automatically detect them and configure the display settings. If not, go to the display settings on your operating system and adjust the monitor layout, resolution, and orientation according to your preference. Configure any additional settings specific to your setup, such as extending or duplicating the displays.
Once you have connected and configured the monitors, take a moment to ensure that each monitor is correctly displaying the content you desire. Make any necessary adjustments to the physical positioning or software settings to optimize your multiple-monitor workstation.
Now that your monitors are connected, it’s time to adjust the display settings to enhance your multitasking experience and ensure a seamless transition between monitors.
Adjusting Display Settings
After connecting the monitors to your computer, it’s important to adjust the display settings to ensure optimal performance and usability. Here are the steps to adjust the display settings for your multiple-monitor setup:
- Open Display Settings: Access the display settings on your operating system. On Windows, right-click on the desktop and select “Display settings.” On macOS, go to the Apple menu, choose “System Preferences,” and then click on “Displays.”
- Identify and Arrange Monitors: In the display settings, you should see a visual representation of your monitors. Identify each monitor by its name or number and arrange them according to their physical placement. Click and drag the monitor icons to match the actual physical layout of your multiple monitors.
- Adjust Resolution: Set the resolution for each monitor to ensure a proper display. You can choose the recommended resolution or manually adjust it to your preference. Higher resolutions offer crisper visuals but may require more processing power from your computer.
- Choose Orientation: Depending on how your monitors are physically positioned, you may need to adjust their orientation. Options typically include landscape (horizontal), portrait (vertical), or inverted (upside-down). Select the appropriate orientation for each monitor to match their physical arrangement.
- Configure Multiple Display Modes: Determine how you want your monitors to function as a multiple-display setup. The most common modes are “Extended display” and “Duplicate display.” With extended display, your desktop spans across all connected monitors, providing you with extra workspace. With duplicate display, the same content is mirrored on each monitor simultaneously.
- Primary Monitor Selection: Choose a primary monitor that will serve as the main screen for your desktop. The primary monitor will house the taskbar, desktop icons, and any applications that open by default. Select the monitor you prefer as the primary display.
- Adjust Color Calibration: If color accuracy is important for your work, consider calibrating the colors on each monitor. Use built-in calibration options or third-party software to adjust color settings such as brightness, contrast, gamma, and color temperature. This ensures that colors are consistent across all monitors.
- Test and Make Adjustments: After making the necessary changes, test the functionality and appearance of your multiple-monitor setup. Move windows between monitors, launch applications, and ensure that everything functions as expected. If needed, fine-tune the settings further until you achieve the desired display experience.
Properly adjusting the display settings is essential to maximize the effectiveness of your multiple-monitor workstation. Take the time to customize the settings according to your preferences and work requirements, allowing you to work efficiently and comfortably across all connected monitors.
Now that you have adjusted the display settings, it’s time to focus on arranging and orienting the monitors to make the most of your multiple-display setup.
Arranging and Orienting the Monitors
Once you have connected and adjusted the display settings for your multiple monitors, it’s time to arrange and orient them to create an efficient and seamless workspace. Here are some tips for arranging and orienting your monitors:
- Consider Eye Level: Position the monitors at a comfortable eye level. This helps prevent neck strain and allows for easier viewing. Adjust the height of each monitor or use adjustable stands or monitor arms to achieve the optimal eye level.
- Physical Alignment: Align the monitors to form a straight, continuous line. This makes it easier to move the cursor or windows across screens without any disjointed gaps. Minimize any physical gaps between the monitors to create a more seamless viewing experience.
- Positioning: Place the main monitor, typically the one with the taskbar and primary applications, in the center. This serves as the focal point of your workspace. Position secondary monitors on the sides to create a natural viewing and navigation flow.
- Match Display Orientation: Make sure the display orientation you set in the display settings matches the physical orientation of the monitors. If you have one monitor in landscape mode and another in portrait mode, ensure the display settings reflect this arrangement.
- Adjustment Tools: Utilize the adjustment features available on your monitors to fine-tune the positioning, angle, and tilt. This allows you to achieve the most comfortable and ergonomic setup for your specific needs.
- Virtual Screen Positioning: If necessary, use the display settings to adjust the virtual screen positioning. This feature allows you to align the monitors virtually if the physical arrangement doesn’t match the desired screen flow.
- Monitor Labels: Label your monitors in the display settings if you have trouble identifying them. This makes it easier to identify each monitor when working with multiple applications or switching between tasks.
- Test and Readjust: Once you have arranged and oriented the monitors, test the functionality and usability. Move windows between screens, open applications, and ensure that the layout and flow feel natural and efficient. Make any necessary adjustments to improve the overall experience.
Remember, the goal is to create a cohesive and ergonomic setup that enhances your productivity and workflow. Take the time to experiment with different arrangements and orientations until you find the arrangement that works best for you.
Now that you have arranged and oriented your monitors, it’s time to dive into managing windows and moving between monitors effectively.
Managing Windows and Moving between Monitors
With a multiple-monitor setup, effectively managing windows and seamlessly moving between monitors is essential for a smooth and productive workflow. Here are some tips to help you manage windows and navigate between monitors effortlessly:
- Maximize and Resize Windows: Maximize windows to take advantage of the available screen real estate. Resize windows by dragging the edges or corners to fit your desired size. You can also snap windows to specific portions of the screen using built-in operating system features for easy multitasking.
- Drag and Drop: Simply use the mouse cursor to drag and drop windows from one monitor to another. Click and hold the window’s title bar, drag it to the desired monitor, and release the mouse button to move the window.
- Keyboard Shortcuts: Learn and utilize keyboard shortcuts to quickly move windows between monitors. Examples include “Win + Shift + Left/Right Arrow” on Windows or “Control + Command + Left/Right Arrow” on macOS to move a window to the adjacent monitor.
- Taskbar Placement: Set up your taskbar to extend across all monitors. This allows you to access the taskbar and open applications from any monitor. Alternatively, you can choose to display the taskbar only on the primary monitor for a more streamlined experience.
- Virtual Desktops: Explore virtual desktop features available on your operating system. These allow you to create separate workspaces and switch between them with ease. You can dedicate certain monitors to specific tasks or projects, improving organization and focus.
- Window Management Software: Consider using window management software that provides additional features for managing windows in a multiple-monitor setup. These tools allow you to automate window positioning, create custom window layouts, and switch between monitor configurations with a single click.
- Task View (Windows) or Mission Control (macOS): Take advantage of the built-in task view or mission control features of your operating system. These tools provide an overview of all open windows and workspaces, making it easy to switch between applications and monitors with just a few clicks or gestures.
- Be Mindful of Window Placement: When working with multiple monitors, be mindful of where you position windows. Avoid placing important dialog boxes or pop-up windows on a different screen than the application it relates to. This ensures you can easily interact with them without searching for the right window.
Remember to find the workflow and window management techniques that work best for you. Experiment with different methods and tools until you develop a system that boosts your productivity and allows for seamless navigation between monitors.
Now that you have learned how to manage windows and move between monitors efficiently, let’s explore some tips for maximizing productivity in a multiple-monitor setup.
Tips for Productivity in a Multiple-Monitor Setup
A multiple-monitor setup can significantly enhance your productivity, but to make the most of it, here are some helpful tips:
- Organize Your Workspace: Keep your desktop clean and clutter-free. Utilize virtual desktops, desktop organization tools, or dedicated software to manage multiple projects and applications at once. This helps maintain focus and reduces distractions.
- Designate Each Monitor’s Purpose: Assign specific tasks or applications to each monitor to create a dedicated space for each project. For example, you can reserve one monitor for email and communication, another for design tasks, and a third for research or reference materials.
- Take Advantage of Peripheral Tools: Use additional peripheral tools like a separate keyboard, mouse, or even a drawing tablet on different monitors to streamline your workflow. This makes it easier to access specific tools or perform specialized tasks without constantly switching between applications.
- Use Multiple Browser Windows: Open multiple browser windows on different monitors to increase efficiency when researching or working with web-based tools. You can compare information side-by-side or keep important reference materials readily available without interrupting your workflow.
- Utilize Workflow-Enhancing Software: Explore software applications designed specifically for multiple-monitor setups. These tools offer features like workspace management, optimized window placement, and customizable hotkeys. They can streamline your workflow and improve productivity.
- Customize Monitor Layouts for Specific Tasks: Create custom monitor layouts or presets for different types of work. For example, you can save a layout for video editing with the video timeline on one monitor and editing tools on another. Having pre-defined layouts saves time and keeps you organized.
- Keyboard Shortcut Mastery: Learn keyboard shortcuts for frequently performed tasks and applications. This enables you to navigate between monitors, switch applications, and perform actions quickly without relying heavily on the mouse.
- Practice Window Management Discipline: Develop the discipline to close unnecessary windows and keep only the essential ones open. This reduces visual clutter and helps you stay focused on the task at hand.
- Regular Maintenance and Updates: Keep your software, operating system, and drivers up to date. Regularly check for updates and security patches to ensure optimal performance and compatibility.
- Experiment and Adapt: Everyone’s workflow is different, so don’t be afraid to experiment with different setups, layouts, applications, and tools. Adapt and refine your multiple-monitor workstation to align with your specific needs and preferences.
By implementing these tips, you can make the most of your multiple-monitor setup and leverage it to enhance your productivity, organization, and efficiency.
Now that we’ve explored various tips for boosting productivity in a multiple-monitor setup, let’s conclude this article by summarizing the key points.
Conclusion
A multiple-monitor workstation opens up a world of possibilities for professionals seeking enhanced productivity and workflow efficiency. By carefully selecting the right monitors, ensuring compatibility with your computer, and properly connecting and configuring them, you can create a seamless and powerful workspace.
With multiple monitors, you can enjoy benefits such as increased screen real estate, improved multitasking capabilities, better collaboration opportunities, and enhanced graphics and editing capabilities. By taking advantage of keyboard shortcuts, window management techniques, and customized layouts, you can navigate smoothly between monitors and manage windows effortlessly.
To maximize productivity in a multiple-monitor setup, it’s crucial to stay organized, assign specific tasks to each monitor, embrace peripheral tools, and leverage workflow-enhancing software. Making the most of keyboard shortcuts, practicing window management discipline, and regularly maintaining and updating your system further elevate your experience.
Remember, what works best for one person may not work for another, so feel free to experiment and adapt your setup to suit your unique needs and preferences.
By following the steps and tips outlined in this article, you can take full advantage of a multiple-monitor workstation and unlock new levels of productivity in your professional tasks. So, go ahead and set up your multiple monitors, arrange them for optimal usability, and harness the power of a versatile, multitasking-oriented workspace.


