Introduction
Whether you’re a photography enthusiast, an adventure seeker, or just someone with a curiosity for the skies, owning a drone can be an exciting and fulfilling experience. Drones, also known as unmanned aerial vehicles (UAVs), have become increasingly popular in recent years, thanks to advancements in technology and their wide range of applications. From capturing breathtaking aerial shots to providing a unique perspective on the world, drones offer endless possibilities.
However, setting up a drone for the first time may seem daunting, especially if you’re new to this technology. But fear not! In this guide, we will walk you through the step-by-step process of setting up your drone, ensuring a smooth and hassle-free experience from start to finish.
Whether you’ve just purchased your first drone or recently upgraded to a new model, the process of getting your drone ready for flight can be broken down into several key steps. From assembling the necessary parts to understanding the remote control settings, we will cover everything you need to know to get your drone off the ground with confidence.
Before we dive into the details, it’s important to note that every drone model may have slight variations in terms of setup and features. Therefore, it’s crucial to read the manufacturer’s instructions specific to your drone model for precise guidance. However, this guide will provide you with a general overview of the setup process, applicable to most consumer drones on the market.
So, without further ado, let’s embark on this exciting journey of setting up your drone and unlocking its full potential!
Purchasing the Drone
Before you can start setting up your drone, you need to make sure you have the right one for your needs. There are various drones available in the market, each with its own features, capabilities, and price range. Here are some factors to consider when purchasing a drone:
- Intended Use: Think about what you plan to use the drone for. Are you interested in aerial photography and videography? Or are you looking for a drone for recreational purposes? Different drones cater to different needs, so consider the features that are essential for your intended use.
- Flight Time: The flight time of a drone refers to how long it can stay in the air on a single battery charge. If you plan to capture longer videos or explore a larger area, look for drones with a longer flight time.
- Camera Quality: If aerial photography or videography is your main goal, consider drones with high-quality built-in cameras or the ability to attach your own camera. Look for drones that offer features like adjustable gimbal stabilization and various shooting modes to enhance your footage.
- Drone Size and Portability: Depending on your needs, portability may be a crucial factor. If you plan to travel with your drone or carry it on outdoor adventures, smaller and foldable drones offer greater convenience.
- Flight Range and Controls: Consider the range at which the drone can fly and the control distance between the drone and the remote. If you plan to fly in larger areas or have better control over your drone from a distance, look for models that offer a longer control range.
- Budget: Set a budget for your drone purchase and explore options within that range. Remember to consider the costs of additional batteries, spare parts, and accessories that you may need.
Once you have considered these factors and have a clear understanding of your requirements, you can start researching and comparing different drone models. Read reviews, watch video tutorials, and seek recommendations to make an informed decision. Additionally, make sure to check for any local regulations or restrictions on drone usage in your area.
Once you’ve purchased the drone that best fits your needs, you’re ready to move on to the next step – familiarizing yourself with the drone parts.
Familiarizing Yourself with the Drone Parts
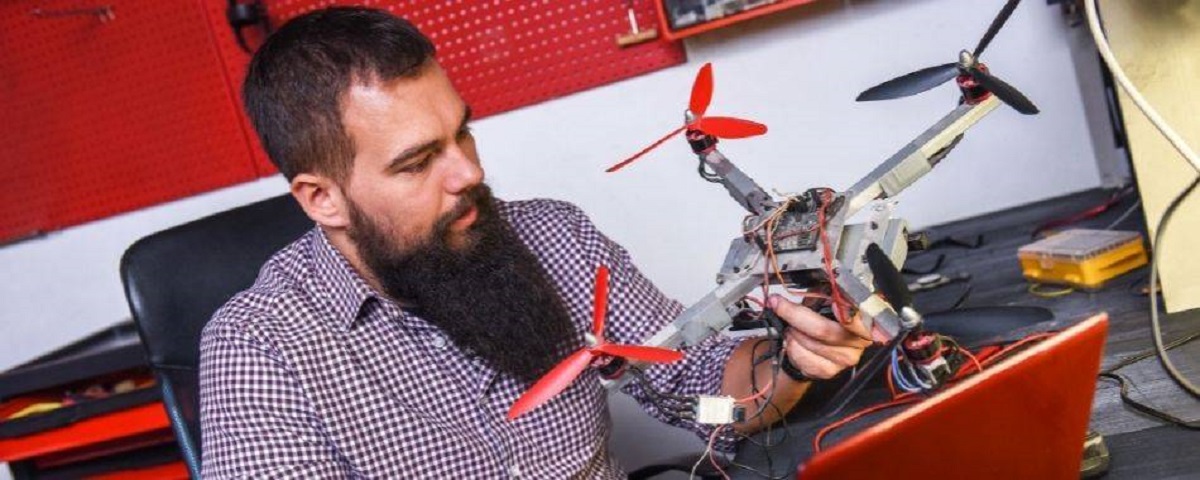
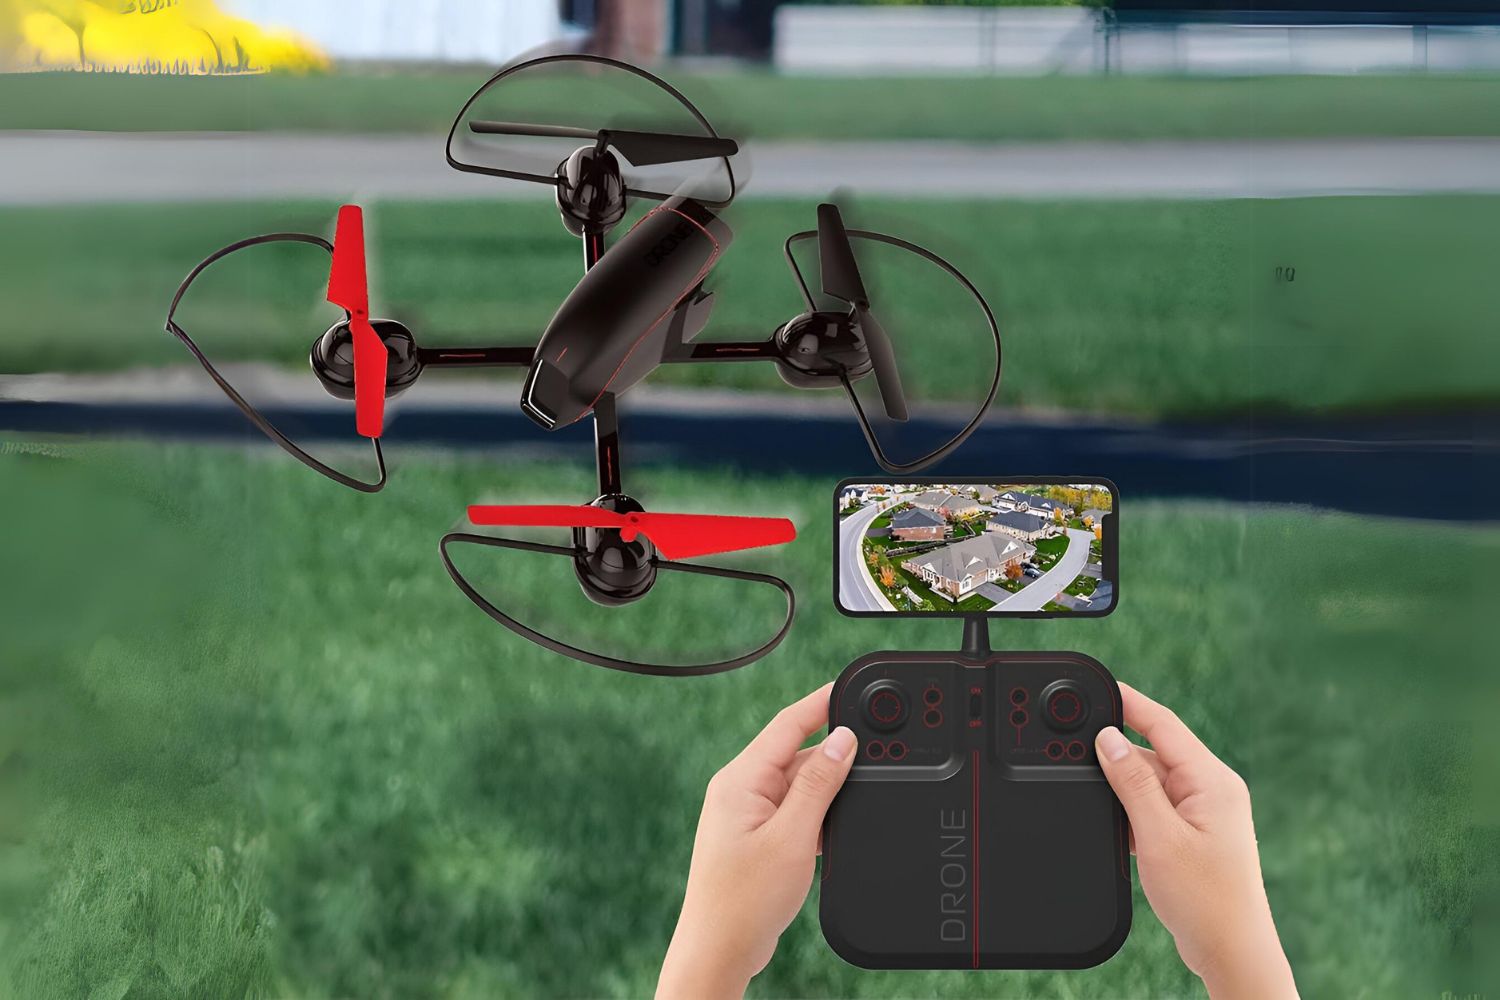
Before you can start assembling and setting up your drone, it’s important to familiarize yourself with its various components. Understanding the different parts of your drone will not only facilitate the setup process but also enable you to troubleshoot any issues that may arise later on. Here are the key components of a typical drone:
- Frame: The frame is the main structure of the drone and holds all the components together. It is usually made of lightweight materials such as plastic or carbon fiber to ensure durability and maneuverability.
- Propellers: Propellers are essential for the drone’s flight as they create the necessary lift and thrust. Most drones have four propellers, each rotating in an opposite direction. Understanding the correct placement and orientation of the propellers is crucial for stable flight.
- Motor: The motors are responsible for spinning the propellers and generating the necessary power for flight. Drones typically have four motors, one for each propeller.
- Battery: The battery provides power to the drone, allowing it to stay airborne. It is important to use the recommended battery for your drone model and follow proper charging and usage guidelines to maximize flight time.
- Camera (if applicable): Some drones come with built-in cameras, while others may allow you to attach your own camera. Familiarize yourself with the camera features, such as resolution, image stabilization, and controls if your drone has this capability.
- Flight Controller: The flight controller is the brain of the drone, handling all the flight commands and stabilizing the drone during flight. It processes input from the remote control or smartphone app and sends signals to the motors and other components to control the drone’s movement.
- Remote Control: The remote control allows you to control the drone’s flight manually. It typically consists of joysticks, buttons, and switches to adjust various flight settings and modes. Familiarize yourself with the different buttons and controls to ensure smooth flying.
- Propeller Guards (optional): Propeller guards are protective frames that surround the propellers, offering added safety and preventing damage in case of collisions. Some drones come with propeller guards, while others may offer them as an optional accessory.
Take the time to carefully examine each part of your drone, noting its functionality and how it connects to other components. Refer to the manufacturer’s manual or online resources for detailed information specific to your drone model. Understanding the various parts of your drone will give you the confidence to proceed with the next steps of the setup process.
Charging the Batteries
One of the most critical steps in setting up your drone is ensuring that the batteries are fully charged. The flight time and performance of your drone depend on the battery’s capacity, so it’s essential to follow the manufacturer’s instructions for proper charging. Here’s a step-by-step guide to help you charge your drone batteries:
- Read the Manual: Before you begin, read the manufacturer’s instructions to understand the specific requirements and safety precautions for charging the batteries of your drone model.
- Find the Battery Compartment: Locate the battery compartment on your drone. This is where you will insert and connect the battery.
- Remove the Battery: If the battery is already installed, remove it from the drone by gently disconnecting the connectors or following the instructions provided by the manufacturer.
- Set Up the Charger: Connect the charger to a power source, such as a wall outlet or a power bank. Ensure that the voltage and current settings on the charger match the requirements of your drone’s battery.
- Connect the Battery: Attach the drone’s battery to the charger. Depending on your drone model, the battery may have a dedicated charging port or require you to connect it via charging cables.
- Monitor the Charging Process: Once the battery is connected, the charger should indicate that it’s charging. Keep an eye on the charger’s indicators or LED lights to track the progress. Avoid leaving the charging batteries unattended and follow any safety guidelines provided by the manufacturer.
- Ensure Full Charge: Allow the batteries to charge until they reach full capacity. The charging time will vary depending on the battery’s capacity and the charger’s power output. Avoid overcharging the batteries, as it can affect their performance and lifespan.
- Disconnect and Secure the Battery: Once the batteries are fully charged, disconnect them from the charger. Replace the batteries securely in the drone’s battery compartment, ensuring a proper connection.
It’s recommended to have spare batteries on hand, especially if you plan on extended flights or capturing extensive footage. This will allow you to easily swap out depleted batteries and continue flying your drone.
Remember, battery safety is crucial, so always use the charger and batteries recommended by the manufacturer. Avoid exposing the batteries to extreme temperatures or leaving them unattended while charging. By following these guidelines, you’ll ensure optimal battery performance and enhance your overall drone flying experience.
Attaching the Propellers
Once you have fully charged your drone’s batteries, it’s time to attach the propellers. Properly attaching the propellers is crucial for stable and safe flight. Here’s a step-by-step guide on how to attach the propellers to your drone:
- Refer to the Manual: Start by consulting the manufacturer’s manual to ensure you understand the specific instructions for attaching the propellers to your drone model.
- Identify Propeller Types: Most drones have two different types of propellers – clockwise (marked with a “C” or color coding) and counterclockwise (marked with an “A” or color coding). Identify the correct type of propeller for each arm of your drone.
- Locate Mounting Points: Locate the mounting points on each motor of your drone. These are usually small, threaded holes where the propellers will attach.
- Match the Propeller Direction: Match the direction of the propeller with the corresponding motor. Clockwise propellers should be attached to motors rotating clockwise, and counterclockwise propellers should be attached to motors rotating counterclockwise.
- Align and Push the Propellers: Align the propeller on the mounting point, making sure it sits flush against the motor. Apply gentle pressure and push the propeller onto the mounting point until it is securely attached.
- Tighten the Propellers: Some drones may have locking mechanisms or require tightening the propellers using a tool, such as a wrench or screwdriver. Follow the manufacturer’s instructions to securely tighten the propellers in place.
- Double Check Propeller Placement: Once all propellers are attached, perform a visual inspection to ensure they are all properly installed and secured. Make sure they rotate freely without any obstructions or misalignments.
Remember, it’s essential to attach the correct propeller to each motor according to the manufacturer’s instructions. Mixing up the direction of the propellers can lead to unstable flight and potential damage to your drone.
If your drone has propeller guards, it’s advisable to attach them before attaching the propellers. Propeller guards offer extra protection and help prevent damage during accidental collisions or crashes.
After successfully attaching the propellers, you’re one step closer to getting your drone off the ground. The next section will guide you through the process of installing and calibrating the remote control.
Installing and Calibrating the Remote Control
Installing and calibrating the remote control is an essential step in setting up your drone. The remote control allows you to communicate with the drone and control its flight. Here’s a step-by-step guide to help you install and calibrate the remote control:
- Power On the Remote Control: Ensure that the remote control has sufficient battery power or is connected to a power source if it requires charging. Turn on the remote control by pressing the power button.
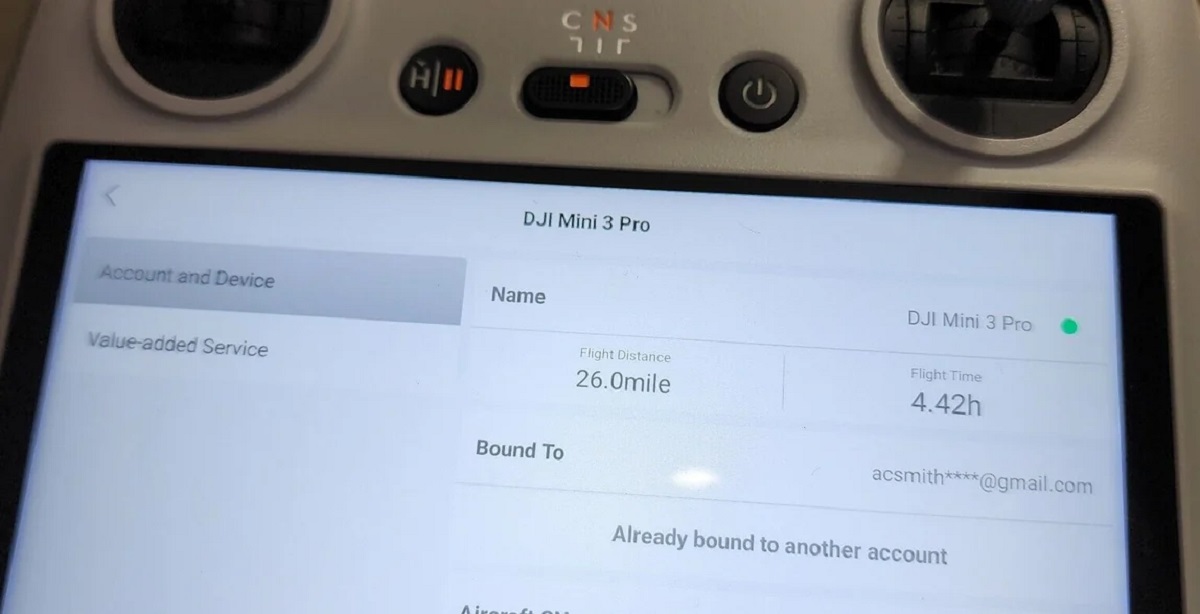
- Synchronize with the Drone: Most drones require synchronization between the remote control and the drone itself. Follow the manufacturer’s instructions to establish a connection between the two. This typically involves pressing specific buttons or following a pairing process.
- Verify the Connection: Once the remote control and drone are synchronized, verify the connection by checking the remote control’s display or LED indicators. It should indicate that it is successfully connected to the drone.
- Calibrate the Remote Control: Calibration ensures that the remote control’s gyroscope and control sticks are properly calibrated, resulting in accurate flight control. Different drones may have specific calibration processes, so refer to the manufacturer’s instructions for precise guidelines. Generally, the calibration process involves holding the control sticks in certain positions or following on-screen prompts.
- Ensure Smooth Stick Movement: Test the movement of the control sticks and ensure that they move smoothly and return to a neutral position when released. If the sticks feel rigid or do not return to the center, it may indicate a calibration issue or a problem with the remote control’s hardware.
- Configure Control Settings: Familiarize yourself with the control settings available on the remote control, such as adjusting sensitivity, flight modes, and camera controls if applicable. Consult the manufacturer’s manual or online resources to understand how to customize the control settings based on your preferences and flight requirements.
Calibrating the remote control ensures accurate and responsive control over your drone. It is important to perform this step correctly to avoid potential flight control issues and to ensure a smooth flying experience. If you encounter any difficulties during the calibration process, consult the manufacturer’s troubleshooting guide or reach out to customer support for assistance.
With the remote control installed and calibrated, you’re now ready to power on your drone and move on to the next steps of setting up your drone.
Powering On the Drone
Now that you have installed and calibrated the remote control, it’s time to power on your drone. Powering on the drone prepares it for flight and allows you to access its functionalities. Here’s a step-by-step guide to help you power on your drone:
- Find the Power Button: Locate the power button on your drone. It is usually located on the body of the drone or integrated into the battery compartment.
- Prepare the Drone: Ensure that all the propellers are properly attached, the battery is securely in place, and the drone is placed on a flat, stable surface.
- Turn on the Drone: Press and hold the power button for a few seconds or follow the manufacturer’s instructions to power on the drone. Some drones may require you to press the button multiple times or use a specific sequence.
- Observe the LED Indicators: Once the drone is powered on, observe the LED lights on the drone’s body or the remote control. The LEDs will indicate the various statuses of the drone, such as power, connectivity, or battery levels.
- Stand Clear of the Drone: After turning on the drone, it’s crucial to stand clear of it and avoid touching any controls. Give the drone a few moments to initialize and stabilize itself.
- Monitor the Initialization Process: During the initialization process, the drone’s flight controller and other components will calibrate and establish a stable connection. Be patient and avoid interfering with this process.
- Confirm Successful Power On: Once the drone has fully powered on and completed its initialization, the LED indicators should reflect the appropriate status, such as a steady green light or a specific color indication depending on your drone model. This indicates that it’s ready for flight.
It’s important to note that the power-on process may vary slightly depending on the drone model and manufacturer. Always refer to the specific instructions provided in the user manual for your drone to ensure the correct procedure.
Remember to handle and power on the drone with care, avoiding any abrupt movements or accidental tilting. By following these steps, you have successfully powered on your drone and are now ready to move forward with the setup process.
Connecting the Smartphone or Controller to the Drone
Connecting your smartphone or controller to the drone is an important step in setting up your drone. This connection allows you to access additional features, view real-time footage, and control the drone remotely. Here’s a step-by-step guide on how to connect your smartphone or controller to the drone:
- Check Compatibility: Ensure that your smartphone or controller is compatible with your drone. Most drones will have a list of compatible devices mentioned in the user manual or on the manufacturer’s website.
- Install the App: If your drone requires a specific app to interface with your smartphone, head to the app store (iOS/Android) and download and install the drone’s official app. Make sure to grant any necessary permissions during the installation process.
- Enable Bluetooth or Wi-Fi: Depending on the connectivity options of your drone, enable either Bluetooth or Wi-Fi on your smartphone or controller. Refer to the drone’s user manual for the specific connectivity method your drone supports.
- Open the App: Launch the installed app on your smartphone or controller. Some drones may require you to open the app before powering on the drone, so make sure to follow the manufacturer’s instructions.
- Connect to the Drone: The app should automatically search for and detect your drone. Once detected, tap on the “Connect” or “Pair” button within the app to establish a connection between your smartphone or controller and the drone.
- Verify Connection: After the connection is established, ensure that your smartphone or controller shows the appropriate indicators, such as “Connected” or “Signal Strength,” to confirm a successful connection to the drone.
- Explore App Features: Once connected, explore the various features and functionalities provided by the app. This may include live video streaming, in-app controls, flight data, and advanced settings. Familiarize yourself with these features to fully utilize the capabilities of your drone.
It’s important to note that the connection process may vary depending on the drone model and the app being used. Carefully refer to the manufacturer’s instructions and any additional setup guides provided with your drone to ensure a proper connection.
Connecting your smartphone or controller to the drone enhances your overall flying experience, allowing you to control and monitor the drone’s flight from a different vantage point. With a successful connection established, you are ready to move forward to the next steps of the drone setup process.
Installing and Setting Up the Drone’s App
To fully unlock the capabilities of your drone and have complete control over its features and settings, you need to install and set up the drone’s dedicated app on your smartphone or tablet. The app acts as an interface between you and your drone, providing a user-friendly platform to access various flight modes, camera settings, and more. Here’s a step-by-step guide on how to install and set up the drone’s app:
- Check Compatibility: Ensure that your smartphone or tablet meets the app’s minimum system requirements. Check the app description on the app store (iOS/Android) or the manufacturer’s website for compatibility information.
- App Installation: Visit the app store (iOS/Android) and search for the official app for your drone model. Download and install the app on your smartphone or tablet. Alternatively, you may find a QR code or direct download link provided in the drone’s user manual.
- Open the App: Once the app is installed, open it on your mobile device. The app may require certain permissions, such as access to your device’s camera or location services. Grant the necessary permissions when prompted to ensure full functionality.
- Create an Account: Some drone apps may require you to create an account to access all features and functionality. Follow the on-screen prompts to create a new account or log in with an existing account if applicable.
- Connect to the Drone: Power on your drone and establish a connection between your mobile device and the drone via Bluetooth or Wi-Fi. Most apps will guide you through the process of connecting to your specific drone model.
- Explore the App Interface: Take some time to familiarize yourself with the different sections and navigation within the app. Explore the menus, settings, and information available to understand how to navigate and utilize the features effectively.
- Calibrate Sensors (if applicable): Some apps may provide an option to calibrate the drone’s sensors for more accurate flight control. This calibration process helps to ensure stable flight and accurate readings. Refer to the app’s instructions or tutorial for the specific calibration procedure.
- Customize Settings: Dive into the app’s settings and preferences to customize various aspects of your drone’s behavior, flight modes, camera settings, and more. Adjust the settings to suit your preferences, but be mindful not to make any drastic changes without understanding their impact on flight performance.
Remember to keep the app updated to access the latest features, bug fixes, and performance improvements. Check for app updates regularly through the app store or enable automatic updates on your device.
By installing and setting up the drone’s app, you gain full control over your drone’s features and settings. This empowers you to optimize your flying experience and capture stunning aerial footage. With the app ready to go, you are now ready to explore the flight modes and settings of your drone.
Understanding the Flight Modes and Settings
Understanding the flight modes and settings of your drone is crucial for achieving the desired flight experience and capturing the best aerial footage. Each drone model offers different flight modes and settings that cater to specific needs and skill levels. Here’s a guide to help you understand the flight modes and settings of your drone:
Flight Modes:
1. Manual Mode: This mode gives you full control over the drone’s movement. You pilot the drone manually using the control sticks on the remote control, allowing for maximum freedom and flexibility. Manual mode is recommended for experienced pilots.
2. GPS/Position Hold Mode: In this mode, the drone uses GPS or other positioning technologies to hold its position in mid-air. It maintains a stable hover, even in wind conditions, allowing you to focus on capturing aerial footage or perform precise maneuvers.
3. Follow Me Mode: This mode enables the drone to track and follow a specific target, typically a GPS-enabled device or a remote control. The drone will automatically adjust its flight path to keep the target in the frame, allowing for dynamic tracking shots.
4. Waypoint Mode: With this mode, you can predefine a series of waypoints on a map within the app. The drone will autonomously fly along the designated path, allowing you to focus on capturing footage or inspecting specific areas without manual piloting.
5. Return to Home Mode: Activating this mode will command the drone to automatically return to its takeoff location or a predefined home point. It’s a useful safety feature in case of low battery, loss of signal, or emergency situations.
Camera Settings:
1. Photo and Video Resolution: Adjust the image and video resolution settings based on your desired quality and storage capacity of your device or memory card.
2. Exposure and White Balance: Control the exposure and white balance settings to achieve the desired lighting and color tones in your aerial photographs and videos.
3. Shooting Modes: Explore different shooting modes like burst mode, time-lapse, or panorama to capture unique and creative aerial imagery.
4. Gimbal Control: If your drone is equipped with a gimbal, you can control its tilt and stabilization settings to ensure smooth and steady footage in various flight conditions.
Flight Settings:
1. Flight Speed: Adjust the speed of your drone to suit your preferences and specific flight scenarios. Faster speeds are suitable for capturing action shots, while slower speeds offer more stability for smooth aerial footage.
2. Geofencing: Many drones include geofencing features that restrict the drone’s flight within predefined boundaries. Familiarize yourself with these settings to ensure compliance with local regulations and to avoid flying in restricted areas.
3. Altitude Limits: Set altitude limits to prevent the drone from flying too high or too low. This helps maintain safe and legal flight operations and prevents potential accidents.
4. Avoidance Sensors (if applicable): Some advanced drones are equipped with obstacle avoidance sensors. Understanding and enabling these settings can help your drone avoid collisions and navigate complex environments safely.
Familiarize yourself with the different flight modes and settings available for your drone. Experiment with them in controlled environments to understand their effects on flight behavior and capture unique shots. Always refer to the drone’s user manual or online resources for detailed instructions and guidelines specific to your drone model.
With a solid understanding of the flight modes and settings, you’re now ready to take off and explore the capabilities of your drone.
Taking Off and Landing Safely
Taking off and landing your drone safely is crucial for a successful flight and to prevent any damage to the drone or surrounding property. Here are some important steps to follow for safe takeoff and landing:
- Choose an Appropriate Takeoff and Landing Area: Select an open area free from obstacles, overhead obstructions, and people. Avoid areas with tall grass, loose debris, or uneven surfaces.
- Ensure Proper Drone Orientation: Before takeoff, ensure that the front of the drone is facing away from you. This helps you maintain spatial awareness and control during flight.
- Power On the Drone: Power on the drone and let it initialize and stabilize. Check the LED indicators to ensure that the drone is ready for flight.
- Hold the Throttle at a Low Position: While preparing for takeoff, keep the throttle joystick in the lowest position to prevent accidental increases in thrust.
- Arm the Motors: Follow the drone’s user manual to arm the motors. This typically involves a combination of control stick movements or switches.
- Slowly Increase Throttle: Gradually increase the throttle by gently pushing the control stick forward. The drone will start to lift off the ground. Be cautious and avoid sudden movements.
- Stabilize Hover: Once the drone is airborne, stabilize its hover by making small adjustments to the control sticks. Maintain a stable altitude and ensure that the drone is responsive to your commands.
- Monitor Battery Levels and Flight Time: Keep an eye on the battery levels and flight time during the flight. Ensure that you have enough power remaining for a safe landing and return to the takeoff point.
- Plan the Landing Spot: Look for a suitable landing spot, free from obstacles, and away from people or animals. Choose a flat area free from any potential hazards.
- Descend Slowly: Gradually reduce the throttle to descend the drone smoothly. Avoid rapid descents as they can lead to unstable landings.
- Land Gently: Once the drone is close to the ground, slowly reduce the throttle to bring it to a gentle landing. Maintain control until the motors have completely powered off.
- Power Off the Drone: After landing, power off the drone to ensure its safety and conserve battery power for future flights.
Remember, practice is key when it comes to taking off and landing your drone. Start with small controlled flights in open areas before attempting more complex maneuvers. Always adhere to local regulations and guidelines regarding safe drone operations.
By following these steps, you can ensure that your drone takes off and lands safely, minimizing the risk of accidents and ensuring a smooth flight experience.
Practicing Basic Maneuvers
Practicing basic maneuvers is essential for improving your piloting skills and gaining confidence in controlling your drone. By mastering these maneuvers, you’ll be able to maneuver your drone smoothly and capture stunning aerial shots. Here are some important basic maneuvers to practice with your drone:
- Hovering: Practice maintaining a stable hover in different situations and wind conditions. This will help you gain control over the throttle and maintain a consistent altitude.
- Forward and Backward Flight: Practice flying your drone in a straight line, both forward and backward. Focus on maintaining a steady speed and keeping the drone at a consistent altitude.
- Side-to-Side Flight: Learn to navigate your drone from left to right and vice versa. This maneuver helps you gain control over the yaw control stick and improves your ability to orient the drone correctly.
- Ascending and Descending: Practice smoothly ascending and descending with your drone. Gradually increase or decrease the throttle to maintain control and stability during vertical movements.
- Rotation: Master the rotation of your drone, also known as yaw. Practice rotating the drone in both directions, ensuring smooth and controlled movements.
- Figure 8s: Perform figure 8 patterns using your drone. This maneuver combines forward flight, sideways flight, and circular movements, enhancing your overall piloting skills.
- Banked Turns: Practice executing banked turns with your drone to create smooth and dynamic cinematic footage. Adjust the roll control stick gradually while maintaining a steady pitch and yaw.
- Navigating Obstacles: Set up obstacles like cones or markers and practice navigating your drone around them. This maneuver will help you improve your precision and spatial awareness.
- Emergency Procedures: Familiarize yourself with emergency procedures such as initiating an immediate stop, emergency landing, or safely bringing back the drone in case of signal loss or low battery situations.
- Rapid Braking: Practice bringing your drone to a quick and controlled stop. This maneuver is useful in emergency situations or when you need to abruptly change direction.
Remember to always practice these maneuvers in open and safe areas, away from people, animals, and obstacles. Start with slow and small movements, gradually increasing speed and complexity as you gain confidence and mastery of each maneuver.
Keep in mind that different drone models may have variations in responsiveness and flight characteristics, so adjust your flying techniques accordingly. Regular practice will not only improve your piloting skills but also enhance your ability to capture stunning aerial footage.
Continue practicing these basic maneuvers to become a confident drone pilot and unlock the full potential of your drone’s capabilities.
Adjusting Camera Settings (if applicable)
If your drone is equipped with a camera, adjusting the camera settings is crucial to capture high-quality photos and videos. By understanding and optimizing the camera settings, you can achieve the desired results and unleash your creativity. Here are some important camera settings to consider:
- Resolution: Adjust the resolution of your camera based on your intended use. Higher resolutions may offer more detail but consume more storage space. Balance your preference for quality and available storage.
- Frame Rate: Set the frame rate for video recording. Higher frame rates result in smoother footage, especially for fast-paced action. However, higher frame rates may also increase file size and require more processing power.
- Exposure Settings: Experiment with exposure settings, such as aperture, shutter speed, and ISO, to achieve a well-balanced image or video. Balancing these settings can help control the amount of light entering the lens and prevent overexposed or underexposed shots.
- White Balance: Adjust the white balance setting to match the lighting conditions of your surroundings. Different light sources (such as daylight, fluorescent, or incandescent) have varying color temperatures, and setting the appropriate white balance ensures accurate colors in your footage.
- Focus Mode: Choose between manual and automatic focus based on your shooting preferences. Manual focus gives you more control over the focus point, while automatic focus provides convenience in dynamic shooting scenarios.
- Image Format: Select the image format that suits your needs, such as JPEG or RAW. JPEG is more compact and suitable for everyday use, while RAW files retain more information and allow for advanced post-processing.
- Color Profiles: Some drones offer different color profiles, such as Standard, Vivid, or D-Log. Experimenting with these profiles can enhance color reproduction and dynamic range in your footage.
- Filters and Effects: Explore the possibility of using filters or built-in effects to add creative touches to your photos and videos. Filters can alter the look and mood of your footage, providing unique and artistic results.
- Gimbal Stabilization: If your drone has a gimbal, ensure that the stabilization mechanism is active. This helps in reducing unwanted camera shakes and vibrations during flight, resulting in smoother footage.
- Custom Settings: Some drones allow you to save and apply custom settings, including exposure presets, color profiles, and more. Utilize these options to streamline your workflow and quickly achieve your desired settings in various shooting conditions.
Experimenting with different camera settings and understanding their impact on your footage is key to achieving the best results. Take the time to test and adjust the settings in different lighting conditions and shooting scenarios.
Refer to the drone’s user manual, online resources, or community forums for specific instructions and recommendations on maximizing the capabilities of your drone’s camera. Regularly review your footage and make necessary adjustments to continuously improve and refine your aerial photography and videography skills.
By adjusting the camera settings creatively, you can capture stunning and professional-looking shots, elevating your drone photography to new heights.
Caring for and Maintaining your Drone
Caring for and maintaining your drone is essential to ensure its longevity, optimal performance, and safe operation. By following proper maintenance practices, you can extend the lifespan of your drone and prevent unnecessary issues. Here are some important tips for caring for and maintaining your drone:
- Read the User Manual: Start by thoroughly reading the user manual provided by the manufacturer. Familiarize yourself with the recommended maintenance procedures, warnings, and guidelines specific to your drone model.
- Inspect Before and After Flight: Perform a visual inspection of your drone before and after each flight. Check for any signs of damage, loose screws, or worn-out parts. Pay close attention to the propellers, motors, landing gear, and camera (if applicable).
- Keep it Clean: Regularly clean your drone to remove dust, dirt, and debris that can accumulate on its surface or components. Use a soft brush or compressed air to clean the motors, propellers, and other areas that may collect debris.
- Store in a Proper Case or Bag: When not in use, store your drone in a dedicated case or bag designed for its size and shape. This helps protect it from impact, dust, and moisture.
- Protect from Extreme Temperatures: Avoid exposing your drone to extreme temperatures, whether hot or cold. Sudden temperature changes can affect the battery performance and potentially damage electronic components. Store and transport your drone within the recommended temperature range.
- Keep Batteries in Good Condition: Properly store and maintain your drone’s batteries. Follow the manufacturer’s instructions for charging, discharging, and storing the batteries. Avoid overcharging or fully discharging the batteries as this can affect their performance and lifespan.
- Perform Firmware Updates: Regularly check for firmware updates for your drone and its components. Firmware updates often include bug fixes, performance improvements, and new features. Update your drone’s firmware following the manufacturer’s instructions.
- Calibrate Sensors and Compass: Follow the calibration procedures outlined in the user manual to periodically calibrate the sensors and compass of your drone. This ensures accurate flight control and reliable navigation.
- Stay Updated on Regulations: Stay informed about drone regulations in your area and adhere to them. Familiarize yourself with the latest rules regarding flight restrictions, privacy concerns, and airspace regulations. Avoid flying in restricted or prohibited areas.
- Regular Maintenance Checks: Schedule regular maintenance checks for your drone. This may include professional inspections and servicing, especially if you fly your drone frequently or in demanding environments.
Remember that proper care and maintenance play a vital role in the safety and longevity of your drone. Develop good habits from the beginning to ensure that your drone performs optimally and withstands the test of time.
Following these care and maintenance practices will not only protect your investment but also contribute to safe and enjoyable flights for years to come.
Troubleshooting Common Issues
As a drone owner, it’s important to be prepared to troubleshoot common issues that may arise during the operation of your drone. By knowing how to effectively troubleshoot and resolve these issues, you can minimize downtime and get back in the air quickly. Here are some common drone issues and their troubleshooting steps:
- Loss of Signal: If you experience a loss of signal between the drone and the remote control, try the following steps:
- Move closer to the drone and ensure there are no obstacles blocking the signal.
- Check the remote control battery level and replace it if necessary.
- Rebind or reconnect the drone and remote control as per the manufacturer’s instructions.
- Inconsistent GPS Lock: If your drone has GPS capabilities and is struggling to acquire or maintain GPS lock, try the following steps:
- Ensure you are in an open area with a clear view of the sky.
- Calibrate the drone’s compass and other sensors according to the manufacturer’s instructions.
- Update the drone’s firmware and the GPS software if available.
- Avoid flying near large structures or areas with strong electromagnetic interference.
- Unstable Hovering: If your drone struggles to maintain a stable hover, try the following steps:
- Check that the propellers are securely attached and balanced.
- Inspect the drone for any damage or loose components.
- Calibrate the drone’s gyroscope and accelerometer as per the manufacturer’s instructions.
- Avoid flying in windy conditions or adjust the flight mode to better handle wind.
- Drifting or Drifting During Flight: If your drone drifts or drifts during flight, try the following steps:
- Calibrate the drone’s sensors and compass according to the manufacturer’s instructions.
- Ensure the propellers are correctly attached and balanced.
- Perform a visual inspection for any obstructions, loose parts, or damage.
- Check for any inconsistencies in the control input and adjust the control sensitivity as needed.
- Poor Battery Life: If you notice that your drone’s battery life is significantly shorter than usual, try the following steps:
- Ensure the batteries are fully charged before each flight.
- Check for any damage or swelling on the batteries. Replace them if necessary.
- Avoid flying in extreme temperatures, as it can shorten battery life.
- Reduce the overall weight of the drone by removing any unnecessary accessories or payload.
Remember, these troubleshooting steps are general guidelines, and specific resolutions may vary depending on your drone model and manufacturer. Refer to the drone’s user manual, online resources, or the manufacturer’s customer support for detailed troubleshooting instructions tailored to your drone.
By equipping yourself with the knowledge to troubleshoot common drone issues, you can overcome challenges and ensure smooth and successful flights.
Conclusion
Congratulations on completing the setup and familiarization process for your drone! Through this guide, we have walked you through the essential steps of purchasing, setting up, and maintaining your drone. By following these steps, you can ensure a smooth and enjoyable flight experience while capturing stunning aerial footage.
Remember, safety should always be a top priority when flying your drone. Familiarize yourself with local regulations, practice responsible flying, and respect privacy and airspace restrictions. Regularly update your knowledge on drone laws and guidelines to stay informed.
Continued practice and experience will enhance your piloting skills and creativity. Experiment with different flight modes, camera settings, and maneuvers to unlock the full potential of your drone. And don’t forget to have fun along the way!
Additionally, always stay up-to-date with firmware updates for your drone and periodically review your drone’s maintenance needs. By caring for and maintaining your drone, you can ensure its longevity and optimal performance.
Should you encounter any issues, refer to the troubleshooting steps provided in this guide or consult the manufacturer’s resources for specific troubleshooting instructions.
Above all, enjoy the amazing perspectives and possibilities that your drone brings. Whether you’re capturing breathtaking footage, exploring new landscapes, or unleashing your creativity, the world of drones opens up exciting opportunities.
So, get ready to take flight and experience the thrill of piloting your drone while capturing incredible moments from the sky!


