Introduction
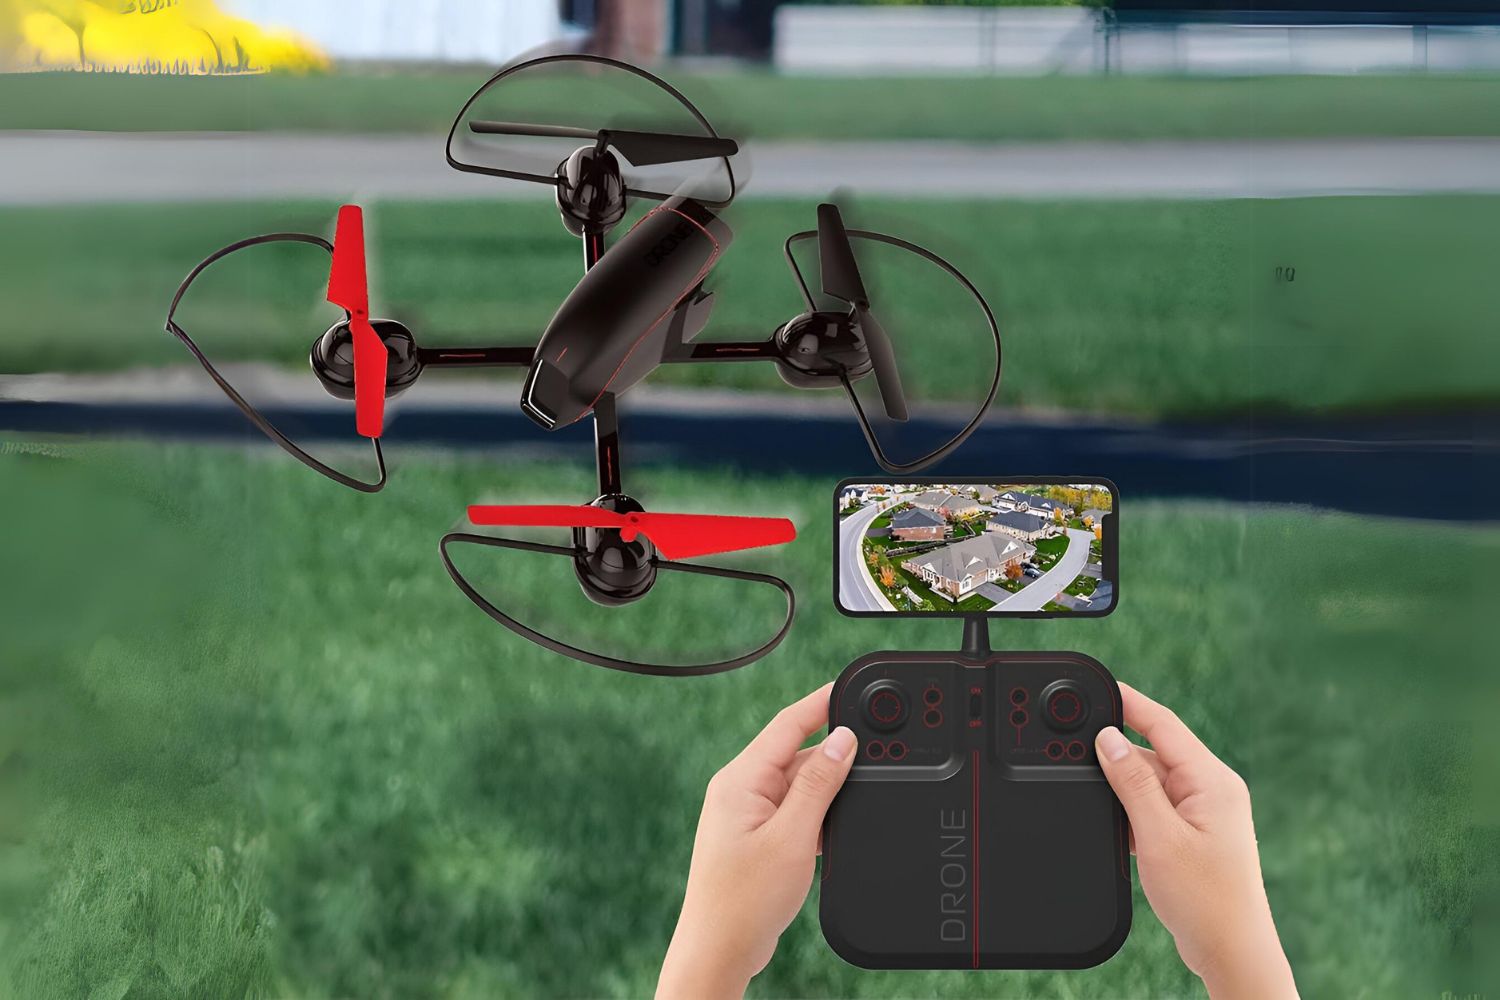
Welcome to this guide on how to connect your Dx-3 drone to your phone. The Dx-3 drone is a popular choice for drone enthusiasts and beginners alike, offering a range of features and functionalities. With the ability to connect the drone to your phone, you can take control and experience a whole new level of aerial exploration. Whether you want to capture stunning photos or record breathtaking videos, connecting your Dx-3 drone to your phone will allow you to do just that.
The process of connecting your Dx-3 drone to your phone may seem daunting at first, but fear not! With this step-by-step guide, we will walk you through every stage of the process. From downloading the necessary app to pairing your drone and phone, you’ll be up and flying in no time.
Before we dive into the steps, it’s important to note that the exact process may vary slightly depending on the specific model and operating system of your phone. However, the general principles and procedures will remain the same, so you can apply this guide to most Dx-3 drone models and smartphones.
So, if you’re ready to take your drone flying experience to the next level and connect your Dx-3 drone to your phone, let’s get started!
Step 1: Download the App
The first step to connecting your Dx-3 drone to your phone is to download the dedicated app. The app is essential for controlling the drone and accessing its features. Here’s how to do it:
- Open the app store on your phone. If you’re using an iPhone, go to the App Store. If you’re using an Android device, go to the Google Play Store.
- Search for the Dx-3 drone app. The app is usually available under the name of the manufacturer or the specific model of the drone.
- Once you find the app, click on the “Download” or “Install” button to download it onto your phone.
- Wait for the app to finish downloading and installing. This process may take a few minutes depending on your internet connection speed.
- Once the app is installed, you can find it on your home screen or in the app drawer. Tap on the app icon to open it.
Now that you have successfully downloaded the Dx-3 drone app, you are one step closer to connecting your drone to your phone. In the next step, we will guide you through turning on your Dx-3 drone.
Step 2: Turn on the Dx-3 Drone
Now that you have downloaded the app, it’s time to turn on your Dx-3 drone. Follow these simple steps:
- Locate the power button on your Dx-3 drone. It is usually situated on the top or side of the drone, depending on the model.
- Press and hold the power button until you see the indicator lights on the drone turn on. This indicates that the drone has been successfully powered on.
- Allow a few seconds for the drone to initialize and stabilize. During this time, the drone will go through a self-check process to ensure all systems are functioning properly.
- Once the drone is ready, you will hear a series of beeps or see the indicator lights stabilize. This signals that the drone is now in standby mode.
Your Dx-3 drone is now powered on and ready to be connected to your phone. In the next step, we will guide you through the process of connecting your phone to the Wi-Fi network of the drone.
Step 3: Connect to the Drone’s Wi-Fi Network
In order to establish a connection between your phone and the Dx-3 drone, you need to connect your phone to the drone’s Wi-Fi network. Here’s how to do it:
- Open the settings on your phone and navigate to the Wi-Fi settings.
- You should see a list of available Wi-Fi networks. Look for the network name that corresponds to your Dx-3 drone. The network name is usually displayed on a sticker or in the user manual.
- Tap on the drone’s Wi-Fi network to connect to it. Your phone may prompt you for a password. If so, enter the password provided with your drone.
- Wait for your phone to establish a connection with the drone’s Wi-Fi network. Once connected, you will see the Wi-Fi symbol in the status bar of your phone.
By connecting your phone to the drone’s Wi-Fi network, you are now ready to establish a communication channel between the two devices. In the next step, we will guide you through opening the Dx-3 drone app on your phone.
Step 4: Open the App on Your Phone
Now that you have connected your phone to the Dx-3 drone’s Wi-Fi network, it’s time to open the dedicated app on your phone. Follow these steps to do so:
- Go to your phone’s home screen or app drawer and locate the Dx-3 drone app that you downloaded earlier.
- Tap on the app icon to open it. The app may take a few seconds to load, depending on your device’s processing speed.
- Once the app is open, you may be prompted to grant certain permissions, such as access to your phone’s camera or location. Grant these permissions to ensure that the app functions properly.
- After granting the necessary permissions, you should see the main screen of the Dx-3 drone app. This screen will display important information and options for controlling your drone.
Opening the Dx-3 drone app on your phone establishes a direct connection between your phone and the drone. This connection allows you to access the full range of features and controls that the app provides. In the next step, we will guide you through the process of pairing your Dx-3 drone and your phone.
Step 5: Pair the Drone and the Phone
Now that you have opened the Dx-3 drone app on your phone, it’s time to pair your drone and your phone. Pairing allows the app to establish a secure connection with the drone and enables you to control it from your phone. Follow these steps to pair your Dx-3 drone and your phone:
- In the app, look for the option to connect or pair the drone. This option is usually located in the settings or connectivity section of the app.
- Tap on the option to start the pairing process. The app will scan for available devices and display a list of drones that it can connect to.
- Select your Dx-3 drone from the list. The app will attempt to establish a connection with the drone.
- During the pairing process, the app may prompt you to enter a unique code or verify the connection. Follow the on-screen instructions to complete the pairing process.
- Once the pairing is successful, you will see a confirmation message or indicator in the app, indicating that your Dx-3 drone is now connected to your phone.
Pairing your Dx-3 drone with your phone is an important step as it allows you to control the drone’s movements, access camera functions, and utilize various features through the app. In the next step, we will guide you through the process of calibrating the gyroscope.
Step 6: Calibrate the Gyroscope
Calibrating the gyroscope of your Dx-3 drone is an essential step to ensure accurate and stable flight control. The gyroscope helps the drone maintain its stability and orientation in the air. Follow these steps to calibrate the gyroscope:
- Make sure your drone is placed on a flat and level surface.
- In the Dx-3 drone app, navigate to the settings or calibration section.
- Look for the option to calibrate the gyroscope and select it.
- Follow the on-screen instructions to initiate the calibration process.
- Typically, the calibration process involves holding the drone steady and rotating it along the specified axis.
- Once the calibration is complete, you will receive a confirmation message in the app.
Calibrating the gyroscope ensures that your Dx-3 drone can accurately determine its position and orientation. This is crucial for stable flight and smooth control. It’s important to perform gyroscope calibration regularly, especially if you notice any flight instability or erratic behavior while controlling the drone. In the next step, we will guide you through accessing the drone controls through the app.
Step 7: Access the Drone Controls
Now that your Dx-3 drone is connected to your phone and the gyroscope is calibrated, it’s time to access the drone controls through the app. The app provides a user-friendly interface that allows you to control the drone’s movements, adjust camera settings, and access various flight modes. Here’s how to access the drone controls:
- In the main screen of the Dx-3 drone app, you will find a control panel or dashboard that displays important information about the drone’s status, such as battery life, signal strength, and altitude.
- Explore the app’s interface to find the different control options. This may include virtual joysticks, buttons, or sliders.
- To control the drone’s movement, use the virtual joysticks. The left joystick typically controls the altitude and rotation, while the right joystick controls the direction and speed.
- Take some time to familiarize yourself with the app’s controls and settings. This will allow you to optimize your flying experience and make adjustments as needed.
- Additionally, you can access camera controls through the app. This enables you to capture photos or record videos with ease.
By accessing the drone controls through the app, you have full command over the Dx-3 drone’s movements and functionalities. Take your time to practice and get comfortable with the controls before embarking on more adventurous flights. In the next step, we will guide you through starting the recording or capturing photos with your Dx-3 drone.
Step 8: Start Recording or Taking Photos
One of the exciting features of the Dx-3 drone is the ability to capture stunning aerial photos and videos. Once you have mastered the drone controls, you can start recording or taking photos to document your flights. Follow these steps to start recording or taking photos with your Dx-3 drone:
- Ensure that your drone is in a stable and desired position for capturing the footage or photo.
- In the app, look for the camera icon or the option to start recording.
- If you want to capture photos, tap on the camera icon. The drones’s camera will capture an image when you press the button.
- If you want to record videos, tap on the video recording icon. The drone’s camera will start recording once you press the button, and it will continue until you stop the recording.
- Monitor the live feed from the drone’s camera on your phone to ensure you capture the desired shot.
- Once you have finished recording or taking photos, look for the option to save or stop the recording in the app.
Remember to respect privacy laws and regulations when capturing photos or videos with your drone. Also, it’s a good practice to review and edit your footage or photos before sharing them with others. Now that you have learned how to start recording or taking photos with your Dx-3 drone, you are ready to embark on new aerial adventures!
Conclusion
Connecting your Dx-3 drone to your phone opens up a world of possibilities for aerial exploration and capturing breathtaking footage. By following the steps outlined in this guide, you can establish a seamless connection between your drone and your phone, allowing you to take full control and access a range of features.
Starting with downloading the dedicated Dx-3 drone app, you can then turn on your drone and connect your phone to its Wi-Fi network. Opening the app gives you access to the drone’s controls, where you can utilize virtual joysticks and buttons to maneuver the drone with ease. Make sure to calibrate the gyroscope for stable flight control, and then you’re ready to start recording stunning videos and capturing captivating photos.
Remember, safety and responsibility are essential when flying your drone. Always familiarize yourself with local laws and regulations regarding drone usage, respect the privacy of others, and fly your drone in designated areas. Regularly update the drone’s firmware and stay informed about any new features or updates from the manufacturer.
We hope this guide has been helpful in connecting your Dx-3 drone to your phone. With this connection, you can unlock the true potential of your drone and create unforgettable aerial experiences. So, get out there, explore the skies, and capture amazing moments with your Dx-3 drone and your phone!