Setting Up Your Fire Tablet
Getting started with your new Fire Tablet is an exciting experience. Follow these simple steps to set up your device and start exploring all its amazing features.
1. Power on your device: Press and hold the power button until the screen lights up. Your tablet will boot up and guide you through the setup process.
2. Select your language and region: Choose your preferred language and select the region where you are located.
3. Connect to Wi-Fi: To access the internet and download updates, you’ll need to connect your tablet to a Wi-Fi network. Select your network from the available options and enter the password if required.
4. Sign in with your Amazon account: If you already have an Amazon account, sign in with your email address and password. If not, you can create a new account directly from your tablet.
5. Set up additional user profiles: If you’re sharing the tablet with other family members, you can create separate profiles for each user. This allows everyone to have their own personalized settings and access to their own content.
6. Manage your notifications: During the setup process, you’ll have the option to customize your notification settings. Choose whether you want to receive alerts for emails, messages, and other app notifications.
7. Enable device backup: Protect your data by enabling device backup. This allows your tablet to automatically back up your settings, app data, and photos to the cloud.
8. Explore the tutorial: Once you’ve completed the setup, take a moment to explore the tutorial that provides an overview of your Fire Tablet’s features and functionality. This will help you get acquainted with the different gestures and navigation options.
That’s it! You’re all set up and ready to start using your Fire Tablet. Take the time to personalize your device by customizing the wallpaper, organizing your apps, and rearranging the home screen. Now you can enjoy all the entertainment, productivity, and convenience that your Fire Tablet has to offer.
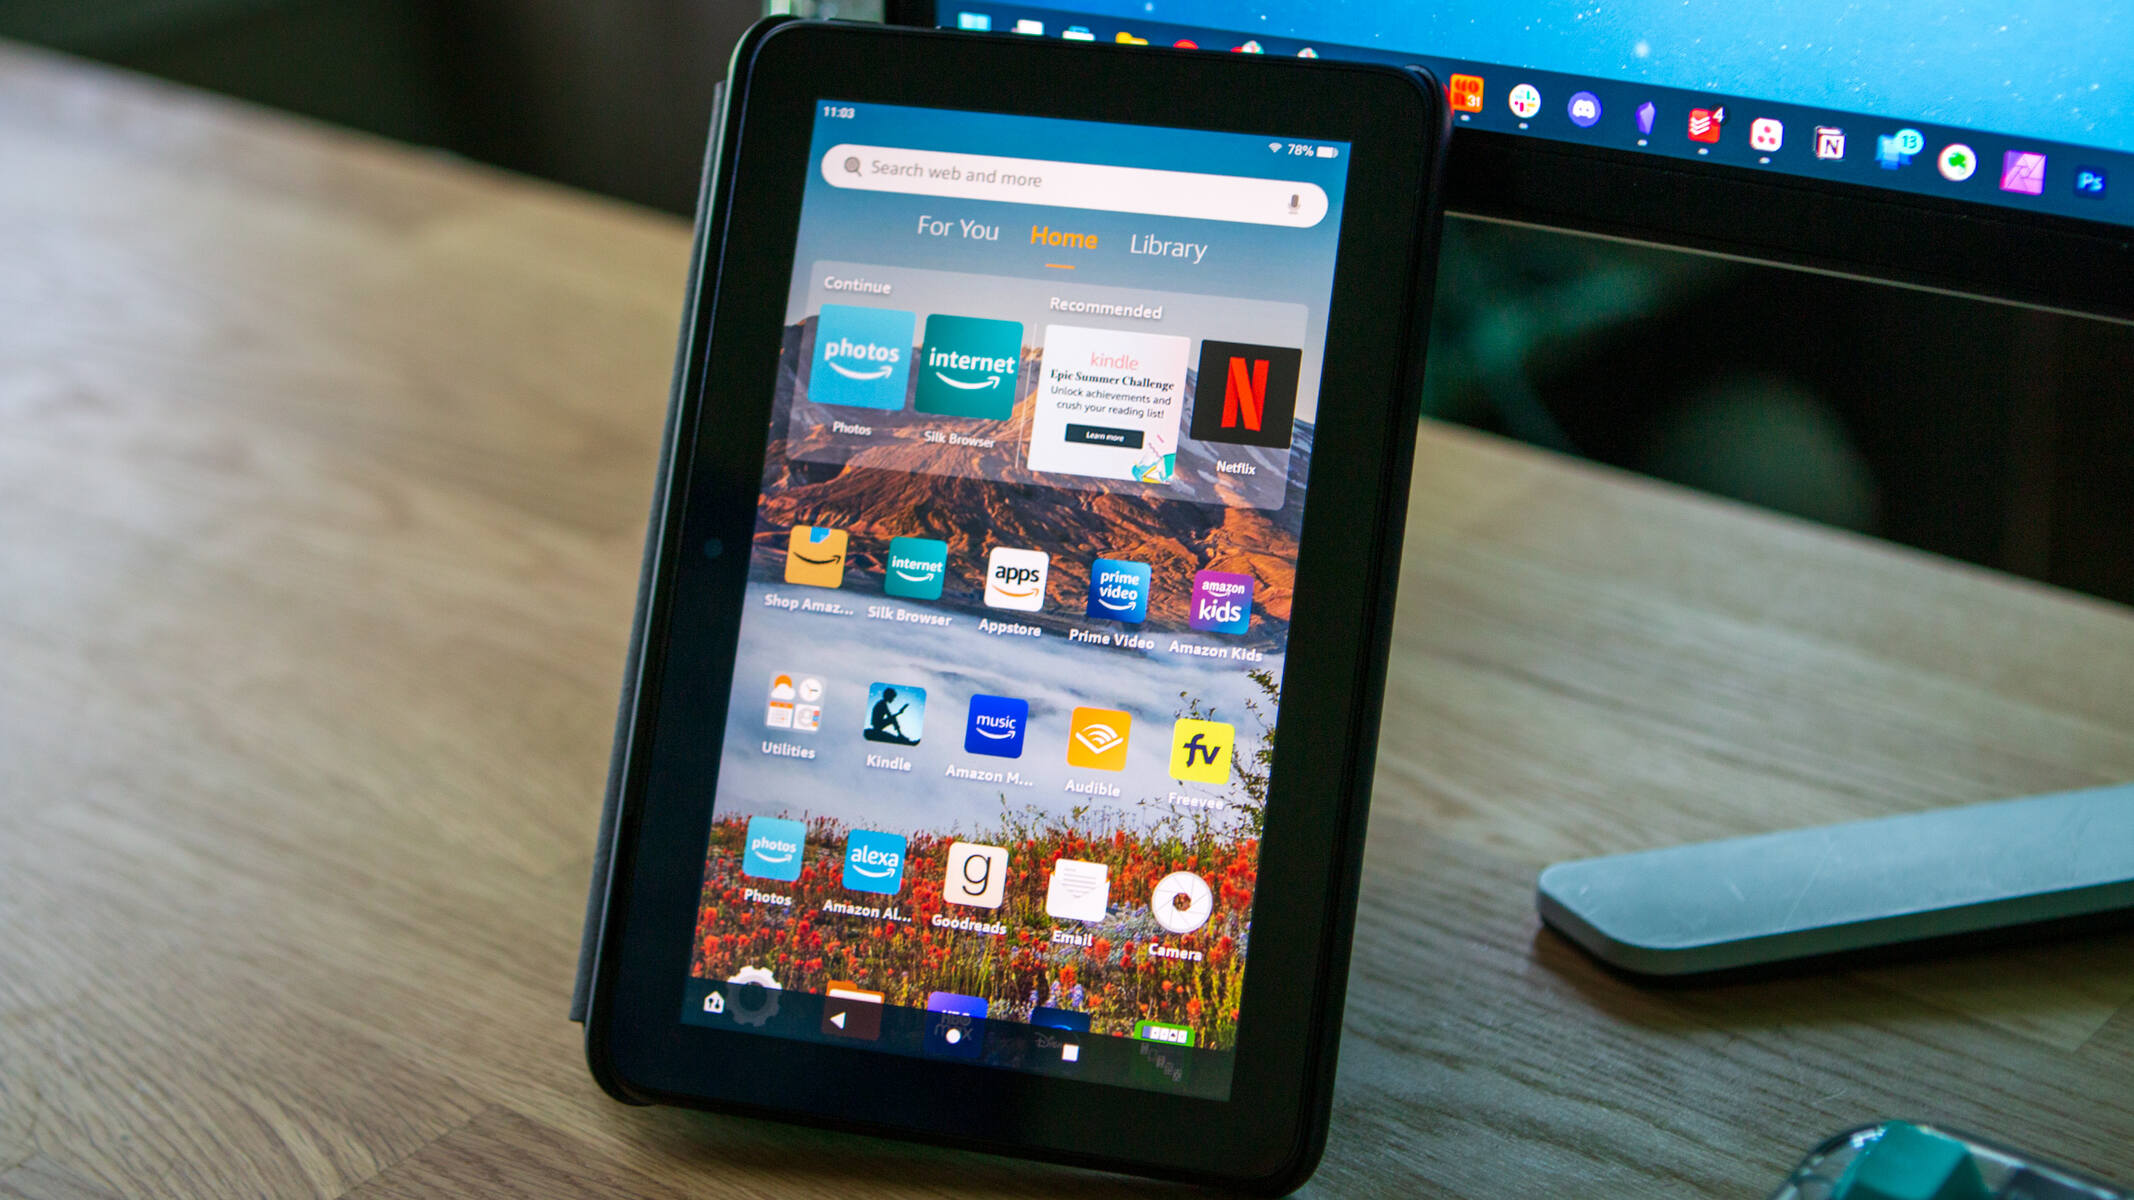
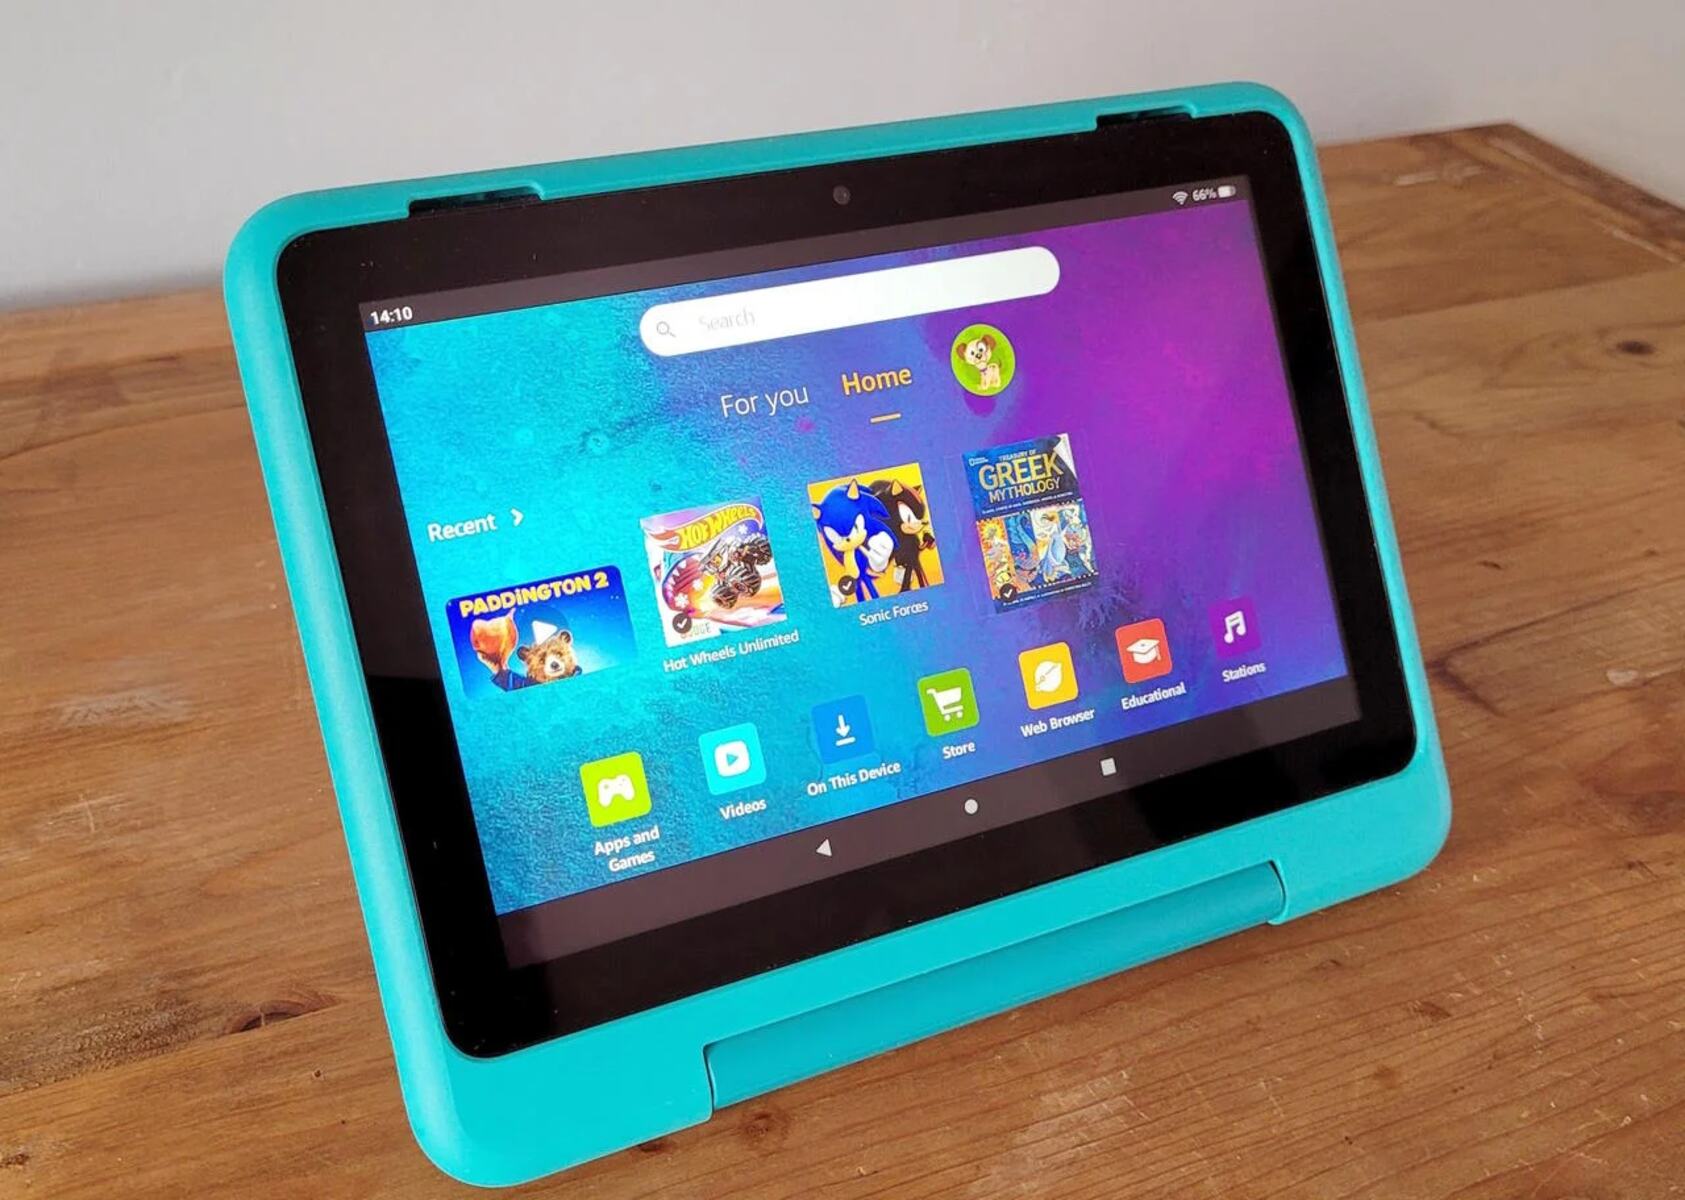
Navigating the Home Screen
The home screen of your Fire Tablet is where you’ll find all your apps, games, and content. It’s important to familiarize yourself with the layout and navigation options to make the most out of your device.
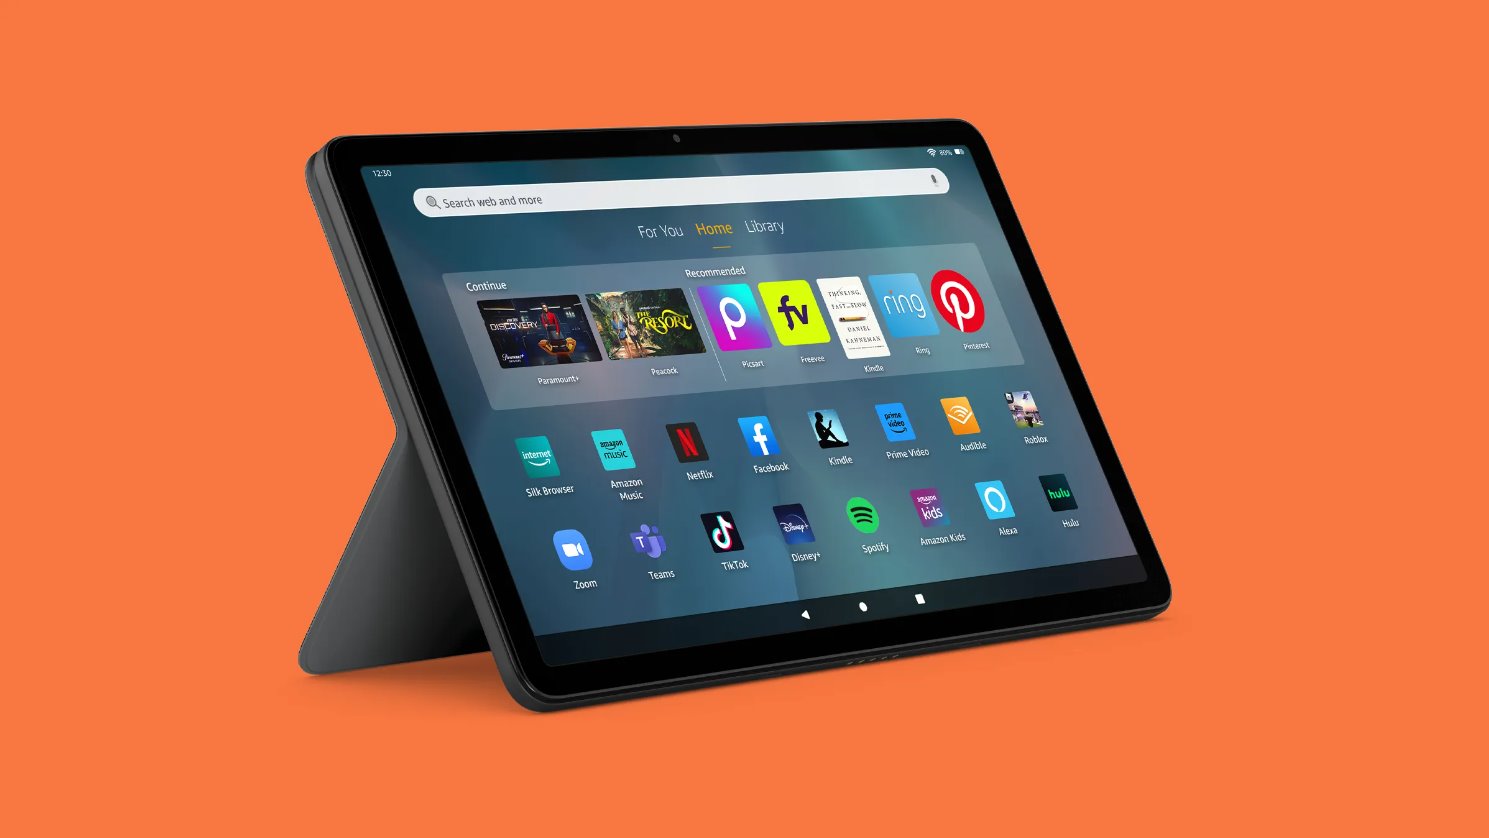
1. App Grid: The main part of the home screen is occupied by the app grid, where you’ll find icons representing all your apps and games. Swipe up and down to scroll through the grid and find the app you want to open.
2. Quick Settings: Swipe down from the top of the screen to access the Quick Settings panel. Here, you can control various settings like Wi-Fi, brightness, and sound volume. You can also enable or disable airplane mode, access the camera, and more.
3. Status Bar: At the top of the screen, you’ll find the status bar, which displays the time, battery level, and notifications. Swipe down from the top of the screen to view your notifications in detail.
4. Search Bar: Located at the top of the home screen, the search bar allows you to quickly find apps, games, books, and more by typing in keywords or phrases. Simply tap on the search bar, enter your search query, and the results will be displayed below.
5. Carousel: The carousel is a dynamic section located above the app grid. It displays recently accessed apps, books, videos, and websites. Swipe left or right to navigate through the carousel and tap on an item to open it.
6. Folders: You have the option to create folders on your home screen to organize your apps. Simply tap and hold an app icon, then drag it onto another app to create a folder. You can name the folder and add more apps to it.
7. Widgets: Widgets provide quick access to specific features or information. To add a widget to your home screen, press and hold on an empty space, then tap on “Widgets.” Choose the widget you want and drag it to your desired location on the home screen.
8. App Dock: The app dock is found at the bottom of the home screen and contains a selection of frequently used apps. You can customize the apps in the dock by tapping and holding an app icon, then dragging it to or from the dock.
That’s how you navigate the home screen of your Fire Tablet. Take the time to organize your apps, create folders, and customize the layout to suit your preferences. With a little exploration and personalization, you’ll be able to efficiently access all your favorite apps and content.
Customizing Your Preferences
One of the great benefits of owning a Fire Tablet is the ability to customize it according to your preferences. Whether it’s adjusting the display settings, changing the device theme, or customizing the sound options, here are some ways to make your tablet truly yours.
1. Display Settings: To adjust the display settings, swipe down from the top of the screen and tap the Settings icon. From there, select “Display & Brightness” to customize options like brightness level, font size, screen timeout, and more. You can also enable features like Blue Shade to reduce eye strain in low light conditions.
2. Device Theme: Change the look and feel of your tablet by selecting a different device theme. From the Settings menu, go to “Display & Brightness” and tap on “Device Theme.” You’ll have the option to choose between light, dark, or adaptive themes, allowing you to personalize the overall appearance according to your preference.
3. Sound Options: Access the sound options by going to the Settings menu and selecting “Sound.” Here, you can adjust the volume, enable or disable vibration, and customize notification sounds. You can also set a personalized ringtone for incoming calls.
4. Wallpaper: Customize your tablet’s background by changing the wallpaper. Long press on an empty space on the home screen and tap on “Wallpaper.” Choose from the preset wallpapers or select a photo from your gallery. You can also set different wallpapers for the lock screen and home screen.
5. Accessibility Features: If you have specific accessibility needs, you can enable various features to enhance usability. In the Settings menu, select “Accessibility” to enable options like Text-to-Speech, Magnifier, Closed Captions, and more. These features can make your tablet more inclusive and user-friendly.
6. Device Security: Protect your tablet and your data by utilizing the available security features. From the Settings menu, go to “Security & Privacy” to set up a lock screen password, enable fingerprint or facial recognition, and configure other security settings. This will provide an extra layer of protection for your device.
7. Language and Input: If you prefer using a different language or want to customize your keyboard options, you can do so in the Language and Input settings. Access it from the Settings menu, select “Language & Input,” and explore the available options to personalize your language and keyboard preferences.
Remember, these are just a few examples of the customization options available on your Fire Tablet. Feel free to explore the Settings menu and experiment with different settings to make your tablet uniquely yours. By customizing your preferences, you can create a personalized and enjoyable user experience that aligns with your needs and style.
Installing and Managing Apps
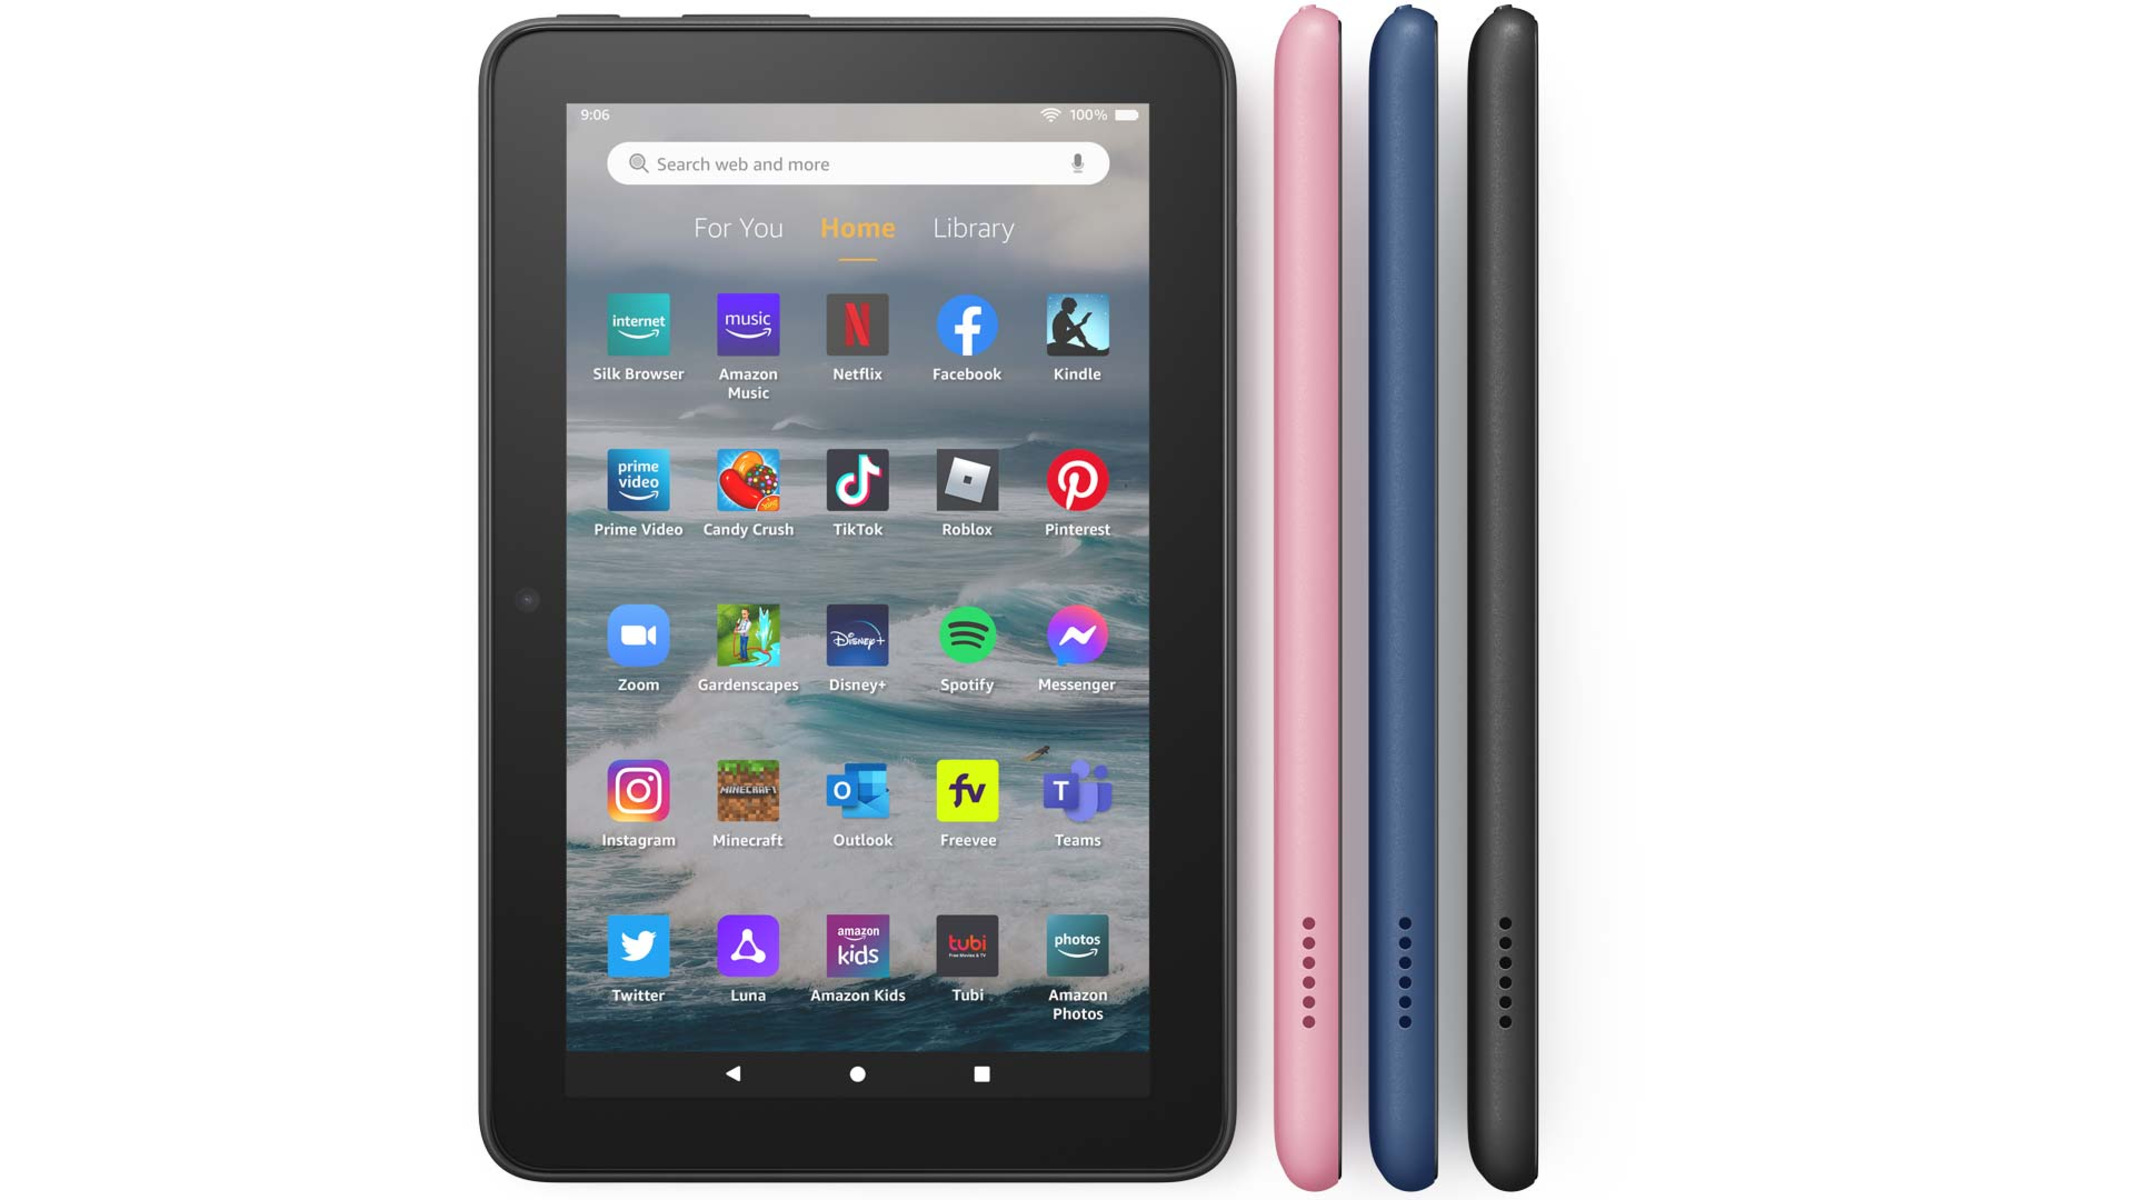
One of the main advantages of owning a Fire Tablet is the vast selection of apps available for download. From productivity tools to entertainment apps, here’s how you can easily install and manage apps on your device.
1. Amazon Appstore: Your Fire Tablet comes preloaded with the Amazon Appstore, which is the primary source for downloading and installing apps. Open the Appstore from the home screen and explore the various categories to find the app you want. Tap on the app’s icon, then select “Get” or “Download” to install it.
2. App Permissions: When installing apps, you’ll be prompted to grant certain permissions, such as accessing your camera or location. Take a moment to review the permissions requested by the app and decide if you are comfortable with them. If you’re unsure, you can always research the app or check user reviews before proceeding.
3. Managing Installed Apps: To manage your installed apps, go to the home screen and tap on the “Apps” tab. This will display all the apps installed on your device. You can organize them by category, alphabetically, or most recently used. Tap and hold an app icon to access options such as moving it to a different screen, removing it from the home screen, or uninstalling it.
4. App Updates: Regularly check for app updates to ensure you have the latest features and bug fixes. Open the Amazon Appstore and tap on the menu icon (three horizontal lines). From there, go to “App Updates” to see if any updates are available for your installed apps. You can choose to update them individually or update all at once.
5. App Recommendations: The Appstore also provides personalized app recommendations based on your usage patterns and preferences. Explore the “Recommended for You” section to discover new apps that might align with your interests.
6. Managing App Subscriptions: Some apps require subscription services for full access or additional features. To manage your app subscriptions, go to the Amazon Appstore, tap the menu icon, and select “Subscriptions.” Here, you can view and manage active subscriptions, cancel auto-renewals, and update billing information.
7. Sideloading Apps: If there’s an app you want to install that’s not available on the Amazon Appstore, you can sideload it onto your Fire Tablet. Sideloading involves manually downloading the app’s APK file and installing it. However, please note that sideloading carries some risks, as the app might not be compatible or may come from an untrusted source. Exercise caution and research before sideloading any apps.
By following these steps, you can easily install, manage, and update apps on your Fire Tablet. Keep exploring the Amazon Appstore to discover new apps that enhance your tablet experience. With a wide range of apps available, you can customize your device to suit your interests and make the most out of your Fire Tablet.
Connecting to Wi-Fi
Connecting your Fire Tablet to a Wi-Fi network is essential to access the internet, download apps, and stream content. Here’s a step-by-step guide to help you easily connect your device to Wi-Fi.
1. Open the Wi-Fi settings: Swipe down from the top of the screen to access the Quick Settings panel. Tap on the Wi-Fi icon to open the Wi-Fi settings.
2. Enable Wi-Fi: Make sure the Wi-Fi toggle at the top of the Wi-Fi settings page is turned on. If it’s already on, you’ll see a list of available networks below.
3. Select a Wi-Fi network: Tap on the name of the Wi-Fi network you want to connect to. A lock icon indicates a secured network that requires a password.
4. Enter the Wi-Fi password: If the network is secured, enter the password using the on-screen keyboard. Make sure to enter it accurately. If you’re unsure of the password, contact the network administrator or refer to the router documentation.
5. Connect to the network: After entering the password, tap on “Connect” or “Join” to connect to the Wi-Fi network. If the credentials are correct, your Fire Tablet will establish a connection with the network.
6. Wi-Fi signal strength: The Wi-Fi icon in the status bar at the top of the screen indicates the signal strength of the connected network. A full Wi-Fi icon indicates a strong signal, while a partially filled or empty icon indicates a weaker signal. Stay within the optimal range of the Wi-Fi router for a stable and reliable connection.
7. Forget a Wi-Fi network: If you no longer want to connect to a particular Wi-Fi network, you can choose to forget it. From the Wi-Fi settings page, tap on the network’s name, then select “Forget.” Your device will no longer automatically connect to that network.
8. Advanced Wi-Fi settings: For more advanced Wi-Fi settings, tap on “Advanced” at the bottom of the Wi-Fi settings page. Here, you can configure options like Wi-Fi frequency band, Wi-Fi optimization, and network proxy settings.
Remember to connect to a trusted and secure Wi-Fi network, especially when accessing sensitive information or making online transactions. Additionally, keep in mind that the availability and strength of Wi-Fi networks may vary depending on your location.
By following these steps, you can easily connect your Fire Tablet to a Wi-Fi network. Enjoy the benefits of a stable and fast internet connection, allowing you to browse the web, download apps, and stream your favorite content with ease.
Understanding the Different Gestures
Mastering the various gestures on your Fire Tablet will significantly enhance your navigation experience and allow you to interact with your device more intuitively. Here’s a guide to help you understand and utilize the different gestures available.
1. Tap: The most basic gesture, a single tap on the screen is used to select or activate an item. Simply touch the screen with your finger to perform a tap.
2. Swipe: A swipe involves moving your finger across the screen in a horizontal or vertical direction. Swiping can be used to scroll through pages, switch between apps, or dismiss notifications. It’s a quick and fluid motion that allows for seamless navigation.
3. Pinch: This gesture involves placing two fingers on the screen and slowly bringing them together. Pinching is commonly used to zoom out, making content appear smaller. For example, you can pinch to zoom out on a webpage or an image.
4. Spread: The opposite of pinching, spreading involves placing two fingers on the screen and slowly moving them apart. This gesture is used to zoom in, making content appear larger. You can use a spread gesture to zoom in on maps or to enlarge images.
5. Long press: To perform a long press, press and hold your finger on an item for an extended period. This gesture is often used to access additional options or bring up context menus. For example, a long press on an app icon may display options to uninstall or move the app.
6. Double tap: Double tapping involves quickly tapping the screen twice in succession. This gesture is commonly used to zoom in on text or images. Double tap on a column of text to automatically adjust the zoom level and make it easier to read.
7. Rotate: Some apps and features allow you to rotate the screen orientation. To rotate the screen, simply turn your device horizontally or vertically. The screen will automatically adjust to the new orientation.
8. Scroll: To scroll through content, place your finger on the screen and swipe in a vertical or horizontal direction. This gesture is commonly used to navigate through long webpages, emails, or lists. The content will move accordingly as you swipe.
Understanding and utilizing these gestures will greatly enhance your interaction with your Fire Tablet. Whether you’re zooming in on images, switching between apps, or scrolling through content, mastering these gestures will allow for a smooth and effortless user experience.
Using the On-Screen Keyboard
The on-screen keyboard on your Fire Tablet allows you to type and enter text into various applications and fields. Whether you’re composing an email, typing a document, or searching the web, understanding how to use the on-screen keyboard efficiently is essential. Here’s a guide to help you make the most out of your typing experience.
1. Accessing the Keyboard: Whenever you need to enter text, the on-screen keyboard will automatically appear on the screen. If the keyboard does not appear, tap on a text field to bring it up.
2. Typing: Tap on the keys of the on-screen keyboard to enter text. As you type, the characters will appear in the text field or application you’re using. The keyboard supports both portrait and landscape orientations, allowing you to choose the most comfortable typing position.
3. Capitalization: To capitalize a letter, simply tap the shift or caps lock key. The shift key will toggle uppercase letters for the next keystroke, while the caps lock key will keep all letters capitalized until you toggle it off.
4. Numerals and Symbols: The on-screen keyboard provides access to numerals, symbols, and special characters. To access them, tap on the number/symbol key, usually located on the keyboard’s bottom row. You can then choose the desired character by swiping or tapping on the appropriate key.
5. Predictive Text: Your Fire Tablet’s keyboard will suggest words based on what you’re typing. These suggestions appear in a row above the keyboard. To accept a suggested word, simply tap on it. To ignore the suggestion and continue typing, just keep typing as usual.
6. Auto-Correct: The on-screen keyboard’s auto-correct feature automatically corrects misspelled words as you type. If you make a mistake, you can either tap on the corrected word or continue typing to override the auto-correct suggestion. To disable auto-correct or customize its settings, go to the Keyboard settings in the device settings menu.
7. Emoji: To express yourself with emojis, tap on the emoji key, usually located next to the spacebar. This will open a panel of various emojis and emoticons. Scroll through the options and tap on an emoji to insert it into your text.
8. Keyboard Settings: You can customize various aspects of the on-screen keyboard in the device settings menu. This includes enabling or disabling features like auto-correct, auto-capitalization, and keyboard sounds. You can also change the keyboard language or add additional languages for multilingual typing.
By familiarizing yourself with the on-screen keyboard and its features, you’ll be able to type quickly and accurately on your Fire Tablet. Take advantage of the keyboard’s predictive text, auto-correct, and convenient layout to enhance your productivity and communication on the device.
Managing Your Files and Folders
Understanding how to manage your files and folders is essential for staying organized and accessing your documents, photos, and other files efficiently on your Fire Tablet. Here’s a guide to help you effectively manage and organize your digital files.
1. File Explorer: On your Fire Tablet, you can use the built-in File Explorer app to navigate and manage your files and folders. Locate the File Explorer app in your app drawer or on the home screen, and tap on it to launch the application.
2. Browsing Folders: In the File Explorer app, you’ll see a hierarchical view of folders. Tap on a folder to open it and view its contents. You can navigate through folders by tapping on the back arrow or by swiping right to left.
3. Creating Folders: To create a new folder, tap on the three-dot menu icon in the top right corner of the File Explorer app, then select “New Folder.” Enter a name for the folder and tap “OK.” The new folder will be created in the current directory.
4. Moving and Copying Files: To move or copy a file or folder to a different location, long press on the file or folder you want to move or copy. Tap on the icons for “Move” or “Copy” that appear in the top action bar. Navigate to the destination folder, and then tap “Move Here” or “Copy Here” to complete the action.
5. Deleting Files and Folders: To delete a file or folder, long press on it, then tap on the delete/trash bin icon in the top action bar. Confirm the deletion by tapping “OK.” Be cautious when deleting files, as they cannot be recovered once deleted.
6. Sorting and Renaming: In the File Explorer app, you can sort files and folders by name, date modified, or file size. Tap on the three-dot menu icon, select “Sort by,” and choose your preferred sorting option. To rename a file or folder, long press on it, then tap on the rename icon in the top action bar.
7. Cloud Storage Integration: If you use cloud storage services like Amazon Drive, Dropbox, or Google Drive, you can integrate them with your Fire Tablet. Install the respective apps from the Amazon Appstore, sign in to your account, and access your cloud storage directly from the File Explorer app.
8. External Storage: If you have a microSD card inserted in your tablet, you can use it to expand your device’s storage capacity. Files stored on the microSD card can be managed and accessed through the File Explorer app.
With these file management tips, you’ll have the tools and knowledge to effectively organize and manage your files and folders on your Fire Tablet. Take advantage of the File Explorer app and its features to keep your digital files in order and easily accessible whenever you need them.
Browsing the Web
Your Fire Tablet offers a convenient way to browse the web, access information, and stay connected. With a built-in web browser, you can explore websites, search for content, and bookmark your favorite pages. Here’s a guide to help you make the most out of your web browsing experience.
1. Opening the Web Browser: Locate the web browser icon, usually labeled “Internet” or “Browser,” on your tablet’s home screen or app drawer. Tap on it to launch the browser.
2. Entering a URL: Tap on the address bar at the top of the browser window to enter a URL. Type the web address you want to visit or perform a web search by entering keywords. The browser will suggest matching URLs and search terms as you type.
3. Navigation and Tabs: Once you’re on a website, you can navigate by scrolling up or down, swiping left or right, or tapping on links. To open a link in a new tab, press and hold the link, then tap “Open in New Tab.” You can switch between tabs by tapping on the tab icon, usually located at the top or bottom of the browser window.
4. Bookmarks: To bookmark a webpage for easy access in the future, tap on the bookmark icon, usually represented by a star or a flag. You can organize your bookmarks into folders, edit or delete bookmarks, and sync them across multiple devices if necessary.
5. Private Browsing: If you want to browse the web privately, the browser offers a private browsing mode. Open a new tab, tap on the menu icon (three dots), and select “New Private Tab” or “Incognito Mode.” In private browsing mode, your browsing history, cookies, and form data won’t be saved.
6. Zoom and Reader View: To zoom in or out on a webpage, pinch in or out using two fingers. Some websites may also offer a reader view option, which presents the page’s content in a clean and easy-to-read format. Look for the reader view icon in the address bar and tap on it to activate this feature.
7. Settings and Preferences: Explore the browser settings to customize your browsing experience. You can adjust options like default search engine, homepage, font size, and privacy settings. Access the browser’s settings by tapping on the menu icon (three dots) and selecting “Settings” or a similar option.
8. Downloading Files: If you come across a file you want to download, such as a PDF or an image, tap and hold the link to bring up a menu of options. Select “Save Link” or “Download Link” to save the file to your device. You can view and manage downloaded files in the Downloads folder.
By following these tips, you’ll be able to enjoy a seamless and productive web browsing experience on your Fire Tablet. Whether you’re reading articles, watching videos, or conducting research, make the most of the browsefircswser’s features to access the information you need with ease.
Using the Camera and Taking Photos
Your Fire Tablet comes equipped with a built-in camera that allows you to capture photos and record videos. Whether you want to document a special moment or simply take a quick snapshot, here’s a guide to help you make the most out of your tablet’s camera functionality.
1. Accessing the Camera: Locate the Camera app on your tablet’s home screen or app drawer. Tap on it to launch the camera.
2. Camera Modes: The Camera app offers different modes to suit various scenarios. You can switch between photo, video, panorama, and HDR modes by tapping on the icons usually located at the top or bottom of the screen.
3. Focus and Exposure: To ensure your subject is in focus, simply tap on the area of the screen where you want the camera to focus. You can also adjust the exposure by tapping and dragging the brightness slider that appears after tapping to focus.
4. Capturing Photos: Once you have your subject in focus, tap the camera shutter button to take a photo. Try to hold the tablet steady to avoid camera shake and ensure a clear and sharp image.
5. Using the Timer: If you want to include yourself in the photo or need a few seconds to compose your shot, use the camera timer. Open the camera settings, usually accessible through the gear icon, and select the desired timer duration. Once the timer is set, tap the shutter button and the camera will automatically take the photo after the specified delay.
6. Recording Videos: To start recording a video, tap the video record button. Hold the tablet steady while recording and tap the record button again to stop recording. You can adjust video resolution and other settings in the camera settings menu.
7. Selfie Mode: Switch to the front-facing camera to capture selfies. Tap on the camera icon with arrows or use a gesture (such as swiping up from the bottom) to switch between the rear and front-facing cameras. Utilize the focus and exposure adjustments for better results in selfie mode as well.
8. Accessing Photos and Editing: After capturing photos or videos, tap on the preview thumbnail that appears in the corner of the screen to view them. From there, you can swipe through your media, delete unwanted photos or videos, or access editing tools to enhance your images.
Remember to regularly transfer your photos and videos from your Fire Tablet to a computer, cloud storage, or other backup sources to prevent accidental loss of your precious memories. With practice and experimentation, you’ll be able to capture stunning photos and videos using your Fire Tablet’s camera.
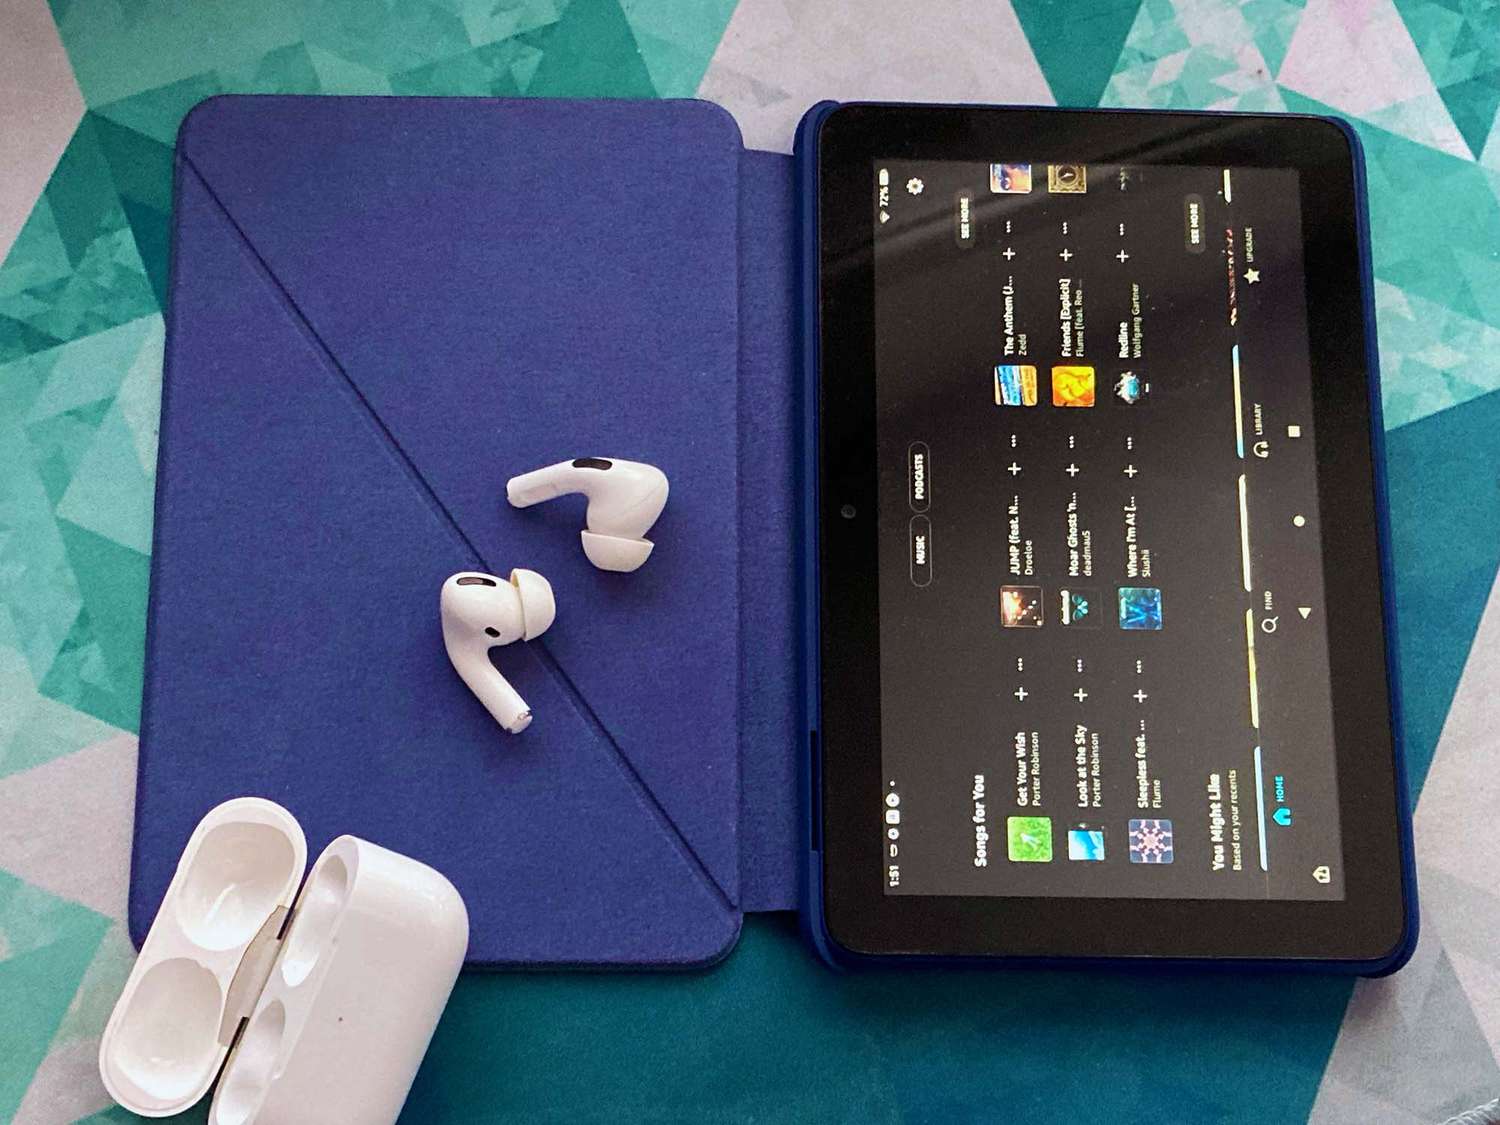
Listening to Music and Watching Videos
Your Fire Tablet provides a great platform for entertainment, allowing you to listen to music and watch videos on the go. Whether you want to enjoy your favorite tunes or relax with a movie, here’s a guide to help you make the most out of your tablet’s music and video playback capabilities.
1. Music: Your tablet comes preloaded with the Amazon Music app, which provides easy access to a vast library of songs and albums. Open the app, sign in to your Amazon account, and start streaming music. You can also download songs for offline playback by tapping the download icon next to the desired track or album.
2. Video: The Fire Tablet also comes with the Prime Video app, giving you access to a wide range of TV shows, movies, and original content. Open the Prime Video app, sign in with your Amazon account, and start exploring the available content. You can stream videos directly or download them for offline viewing.
3. Headphones or Speakers: For an enhanced audio experience, consider using headphones or connecting your tablet to external speakers via Bluetooth or a headphone jack. This is especially useful in situations where you want to enjoy music or videos without disturbing others or in environments with background noise.
4. Equalizer Settings: Customize the audio output by adjusting the equalizer settings on your tablet. You can access these settings by going to the device Settings menu, selecting “Sound,” and then choosing “Equalizer.” Experiment with the different preset options or manually adjust the sliders to find the sound profile that suits your preferences.
5. Screen Orientation: Depending on your preference and the content you’re viewing, you can adjust the screen orientation to landscape or portrait mode. Simply rotate the tablet, and the screen will automatically adjust accordingly. This allows for a more immersive viewing experience.
6. Video Streaming Services: Aside from the Prime Video app, you can also download additional video streaming apps from the Amazon Appstore. Services like Netflix, Hulu, and Disney+ offer a wide range of movies and TV shows for streaming. Simply search for these apps, install them, and sign in with your account credentials to access their content libraries.
7. Creating Playlists: Use the music app on your Fire Tablet to create playlists according to your mood, genre, or specific themes. This allows you to easily organize and access your favorite songs. You can add or remove songs from your playlists and re-order them as desired.
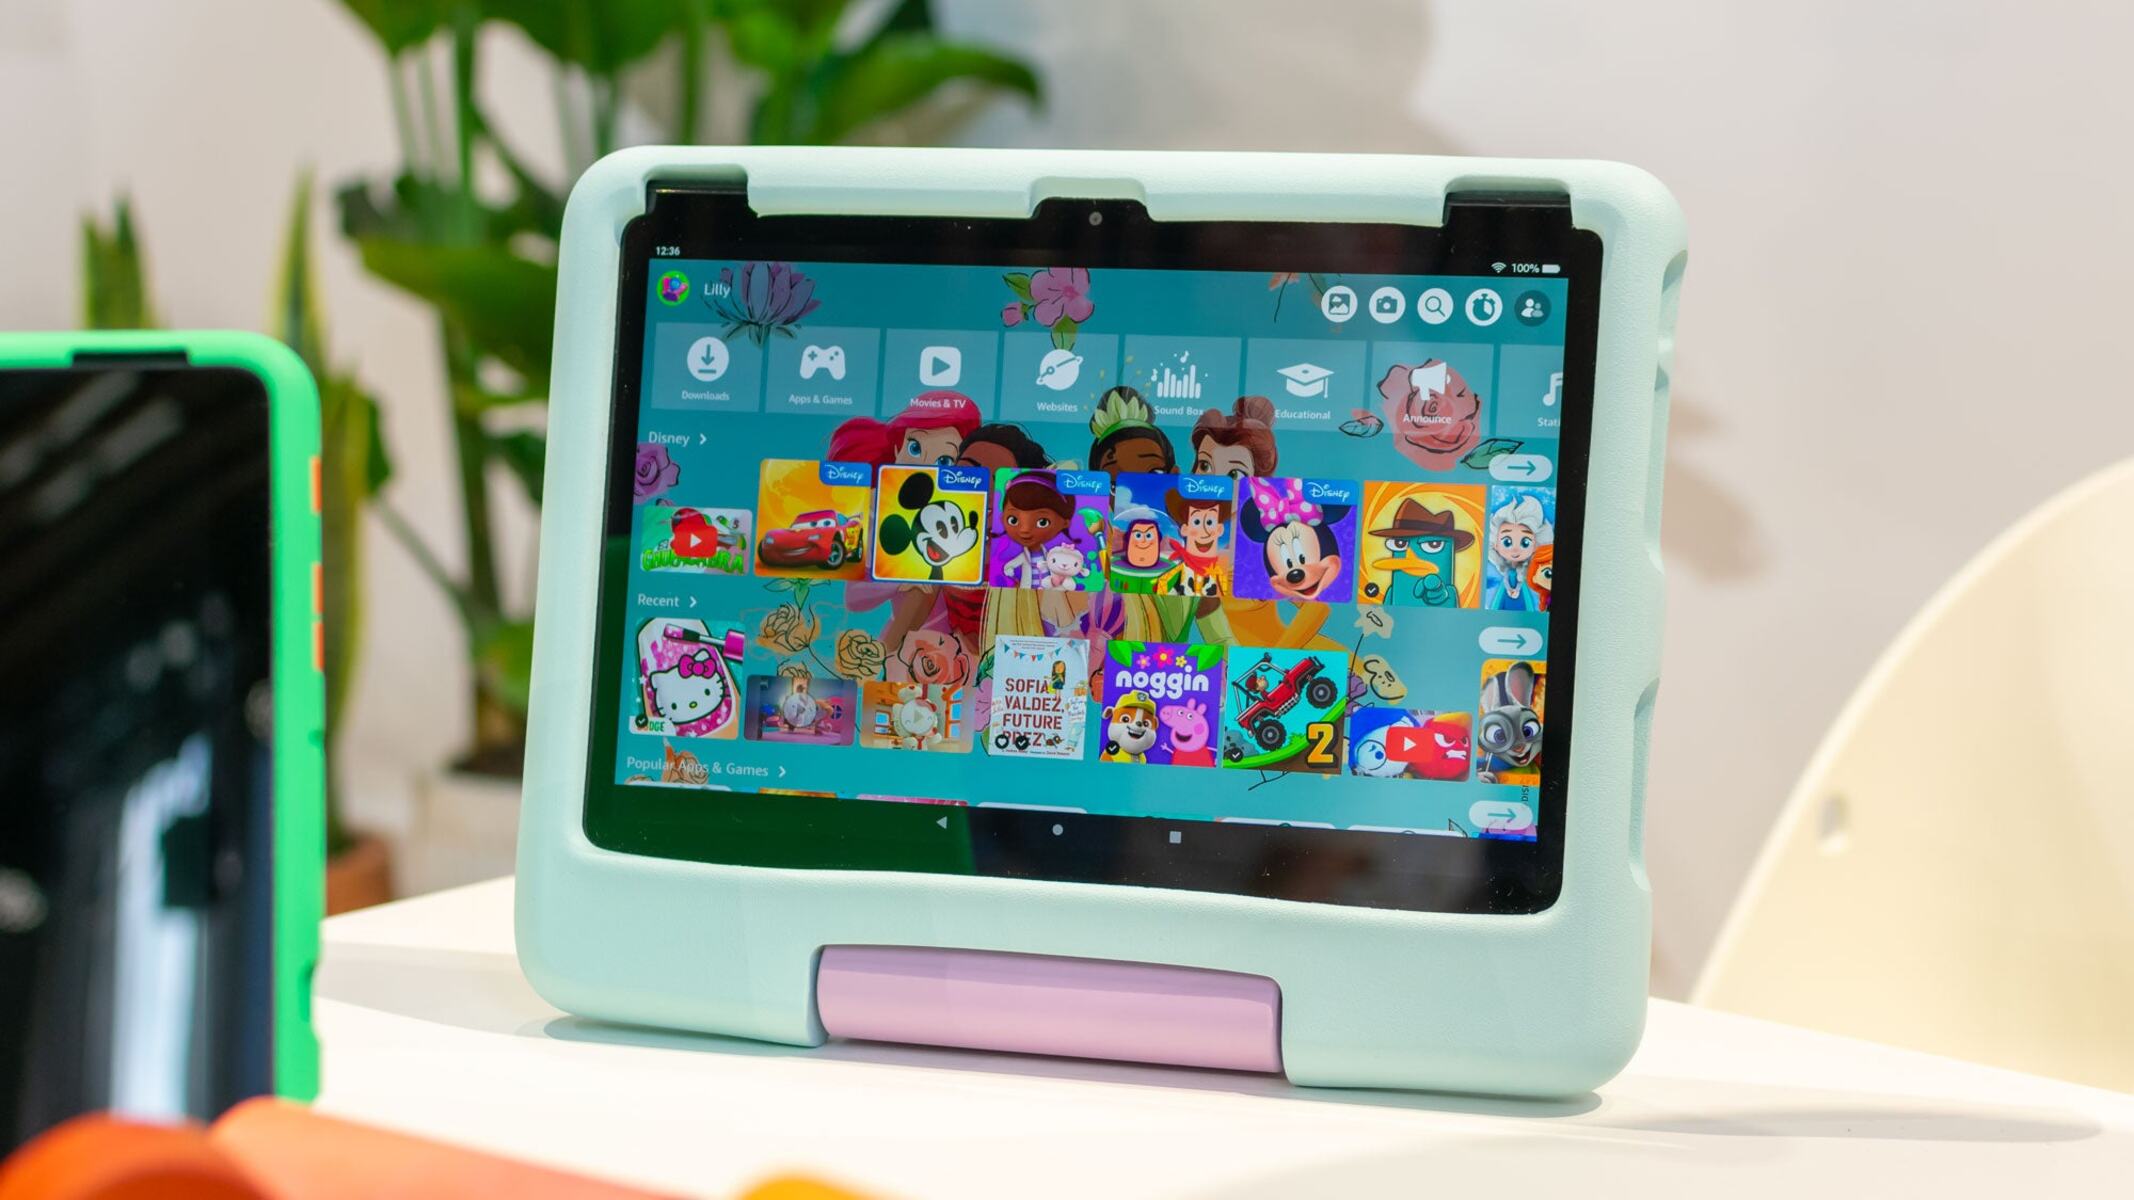
8. Parental Controls: If you have children using your tablet, make use of the parental control settings to ensure they have access to age-appropriate content. Set up a profile specifically for them, enable parental controls, and restrict access to certain apps, music, videos, and other content.
With these tips, you’ll be able to fully enjoy the music and video playback features of your Fire Tablet. Whether you’re listening to music on the go or binge-watching your favorite shows, take advantage of the entertainment options available on your tablet for a truly immersive and enjoyable experience.
Reading Books and Magazines
Your Fire Tablet offers a convenient and immersive platform for reading books and magazines, allowing you to access a vast digital library anytime, anywhere. Whether you prefer best-selling novels or the latest issue of your favorite magazine, here’s a guide to help you make the most out of your tablet’s reading capabilities.
1. Kindle App: The Fire Tablet comes with the Kindle app preloaded, providing access to a wide selection of eBooks. Open the app, sign in with your Amazon account, and start browsing the Kindle Store. You can purchase and download books directly to your tablet, or access previously purchased titles from your Kindle library.
2. Book Formats: The Kindle app supports various eBook formats, including Kindle’s proprietary format (AZW) and other common formats like EPUB and PDF. This allows you to read books from different sources, including those obtained from third-party websites or libraries.
3. Reading Experience: Adjust the reading settings in the Kindle app to customize your reading experience. You can change the font type, size, and color, adjust the screen brightness, and enable features like page flip and continuous scrolling. These settings help create a comfortable and personalized reading environment.
4. Bookmarks and Highlights: Use the bookmark feature to mark a page and easily return to it later. To highlight specific passages or make notes, simply tap and hold the text to activate the highlighting tool. You can access your bookmarks and highlights from the “My Notebook” section within the Kindle app.
5. Whispersync and X-Ray: Take advantage of Whispersync to synchronize your progress across devices. This allows you to seamlessly switch between reading on your Fire Tablet and other devices, such as your Kindle e-reader or smartphone, without losing your place. X-Ray is another useful tool that provides information about key characters, locations, and terms within a book.
6. Magazine Subscriptions: Explore the Newsstand section on your tablet to access a variety of magazines and newspapers. You can purchase individual issues or subscribe to your favorite titles. Many magazines offer interactive features, including embedded videos, hyperlinks, and image galleries.
7. Font Accessibility: If you have visual impairments, utilize the accessibility options in the Kindle app to improve readability. Adjust settings like font size, spacing, and the OpenDyslexic font to suit your needs. You can also enable the VoiceView screen reader for auditory support.
8. Library Borrowing: If you’re a member of a local library, take advantage of digital lending services. Many libraries offer access to eBooks and audiobooks through platforms like OverDrive or Libby. Simply sign in with your library credentials to borrow titles and read them on your Fire Tablet.
With these tips, you’ll be able to dive into a world of literature and enjoy immersive reading experiences on your Fire Tablet. Whether you’re engrossed in a riveting novel or flipping through the pages of your favorite magazine, make the most of the tablet’s reading capabilities for endless hours of enjoyable reading.
Accessing Your Emails and Messages
Your Fire Tablet allows you to easily access and manage your emails and messages in one convenient place. Whether you use a web-based email service or prefer a dedicated email app, here’s a guide to help you stay connected and organized.
1. Email Apps: Your tablet comes with a built-in email app called “Email.” This app supports various email providers, including Gmail, Yahoo Mail, and Microsoft Outlook. Open the app and follow the on-screen prompts to set up your email accounts. Alternatively, you can download and install other email apps from the Amazon Appstore.
2. Account Setup: When setting up your email accounts, provide the necessary information, such as your email address and password. The app will attempt to automatically configure the settings for popular email providers. If your provider is not recognized, you might need to manually enter the incoming and outgoing server settings.
3. Inbox and Folders: Once your email account is set up, the app will display your inbox, including received emails. You can navigate between different email folders, such as Inbox, Sent, Drafts, and Spam. To switch between folders, tap on the menu icon (usually three horizontal lines) and select the desired folder.
4. Reading and Responding: To read an email, simply tap on it from the inbox or folder view. You can scroll through the email content and tap on any links or attachments. To respond, tap on the reply icon to compose a reply, or use the options provided to forward or delete the email.
5. Managing Emails: Use various management options to keep your inbox organized. Archive or delete emails to declutter your inbox, and use folders or labels to categorize important emails. You can also create custom folders or apply filters to automatically sort incoming messages.
6. Syncing and Notifications: Ensure that your email accounts are set to sync regularly to receive new emails in real time. Adjust the sync frequency and notification settings in the email app’s settings menu to stay updated with incoming messages.
7. Messaging Apps: In addition to email, you can also utilize messaging apps to stay connected and communicate with friends and family. Install messaging apps like WhatsApp, Facebook Messenger, or Skype from the Amazon Appstore for instant messaging, voice calls, or video chats.
8. Security and Privacy: Protect your email and messaging accounts by enabling two-factor authentication and choosing strong, unique passwords. Be cautious when opening email attachments or clicking on links from unknown senders to avoid potential security risks.
With these tips, you can effectively manage your emails and messages on your Fire Tablet, allowing you to stay connected and organized while on the go. Keep your communication channels organized and secure, ensuring that you never miss an important email or message.
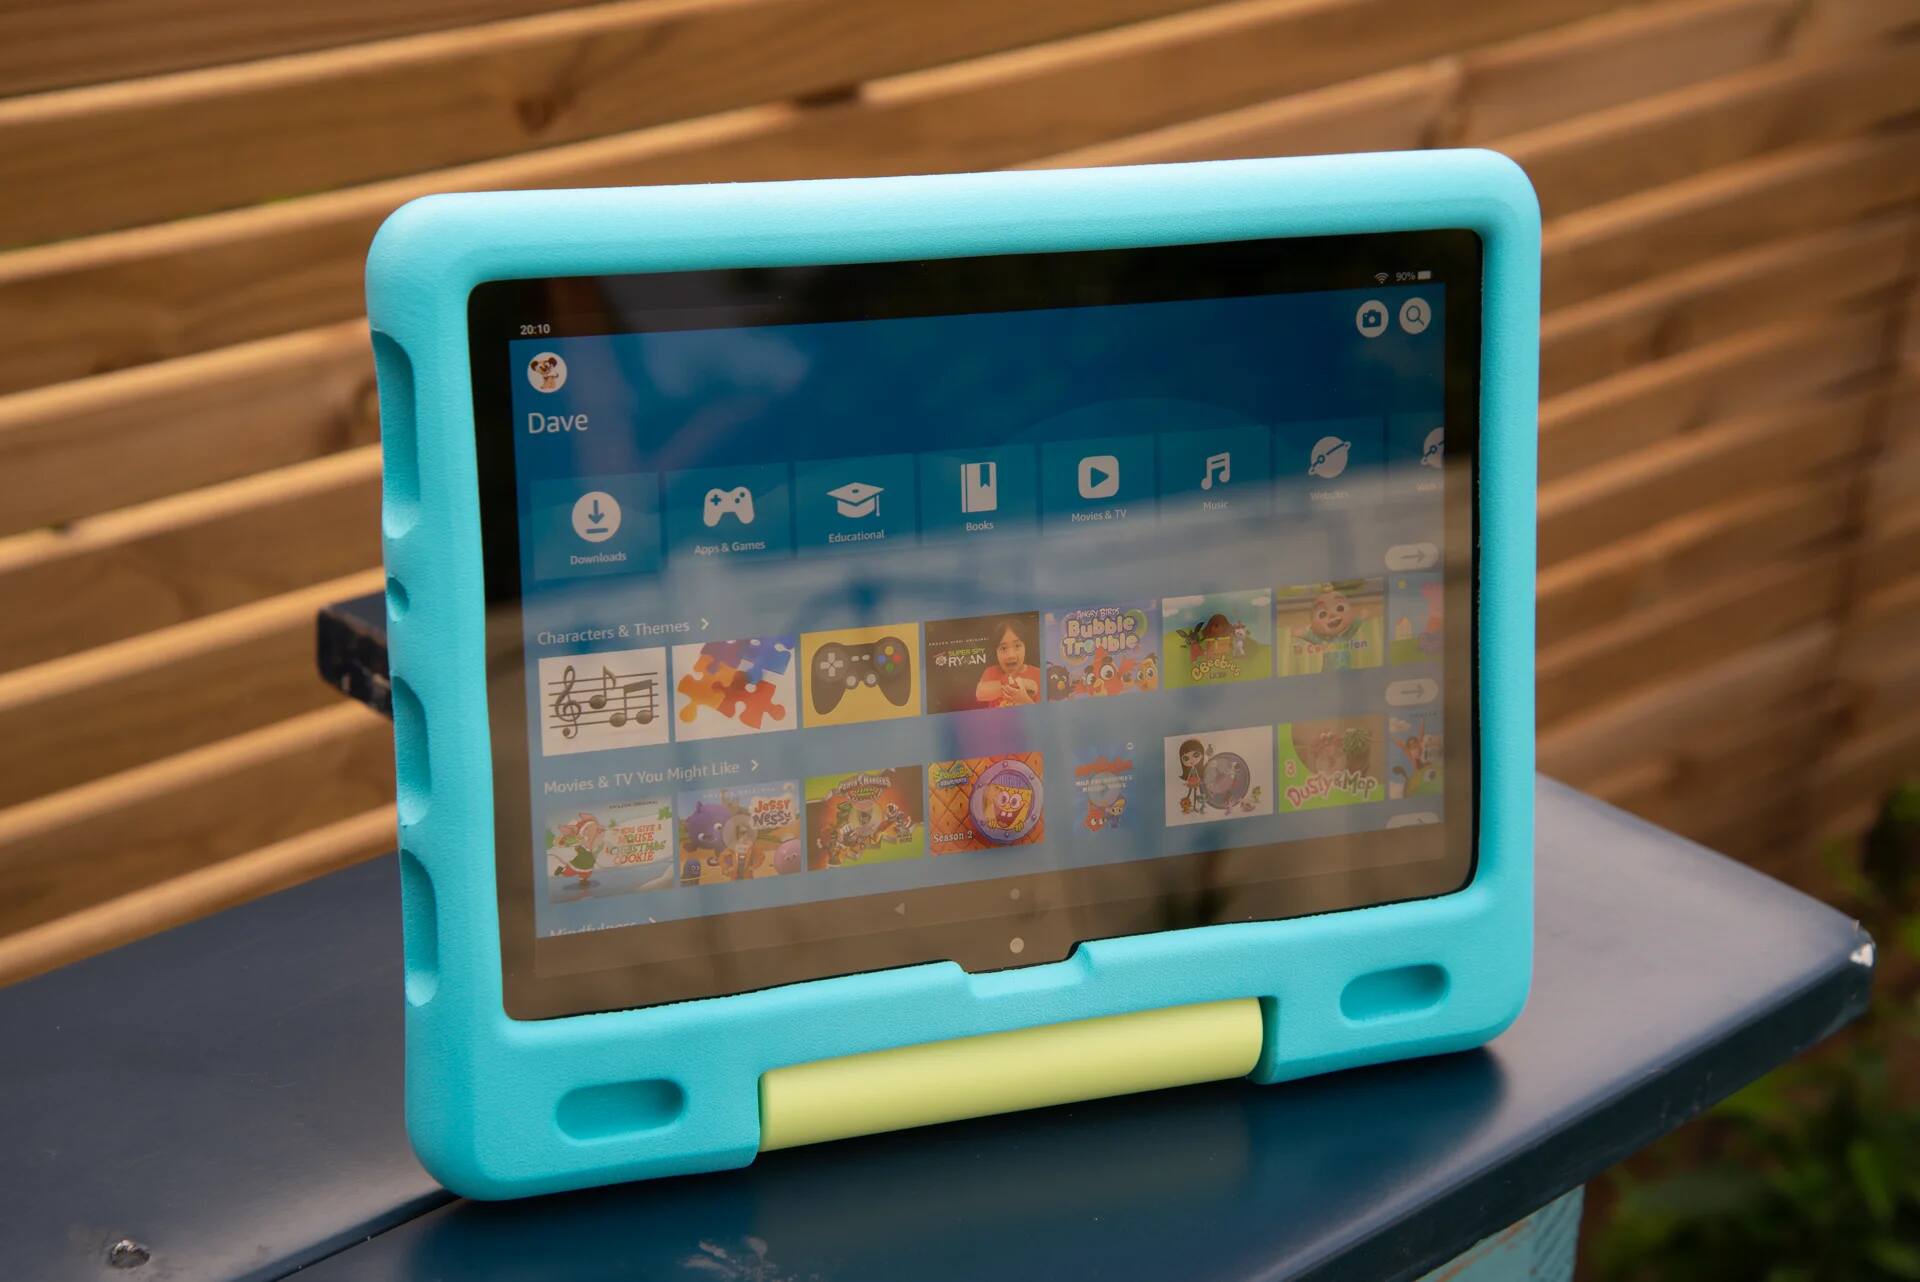
Setting Up Parental Controls
Your Fire Tablet offers robust parental control features, allowing you to create a safe and age-appropriate digital environment for your children. By setting up parental controls, you can manage their access to apps, restrict content, and monitor their device usage. Here’s a guide to help you set up and customize parental controls on your Fire Tablet.
1. Accessing Parental Controls: Go to the Settings menu on your tablet and select “Parental Controls” or “Parental Controls & Family Library.” Tap on “Enable Parental Controls” to get started. You’ll be prompted to create a PIN or password to ensure only authorized users can make changes to these settings.
2. Filtering Content: Use content filters to control what types of media your child can access on the tablet. Toggle on the appropriate age range or select specific categories to filter. The tablet will restrict access to content that exceeds the chosen age range or is categorized as inappropriate.
3. Blocking Specific Apps: If you want to prevent your child from using certain apps, tap on “Manage Apps” or a similar option. Here, you can select specific apps that you want to block entirely.
4. Setting Time Limits: To manage your child’s screen time, tap on “Set Daily Goals & Time Limits” or a similar option. Choose the maximum amount of time your child can use the tablet each day or set specific time limits for individual apps or activities.
5. Managing Web Browsing: If you want to restrict your child’s web browsing, toggle on “Web Browser Settings” or a similar option. Choose the level of content filtering you want to apply, such as blocking adult websites or allowing access only to specific websites you approve.
6. Approving Purchases: If your child has their own Amazon account, you can enable purchase restrictions to prevent unauthorized purchases. Go to “Parental Controls” and select “Amazon Store & Prime Video Restrictions.” Here, you can set a requirement for a parental approval code for purchasing apps, games, or other content.
7. Tracking and Monitoring: To monitor your child’s device usage, go to the parental controls settings and select “Activity.” This will give you an overview of the apps or content your child has accessed and the amount of time spent on the tablet. Use this information to ensure compliance with your established rules.
8. Personalizing Profiles: If your child has their own user profile on the tablet, tailor the settings specifically for them. You can set age ranges, content filters, and time limits for each profile to ensure appropriate usage for each individual.
By setting up parental controls on your Fire Tablet, you can provide a safe and controlled digital experience for your child. Regularly review the settings and make adjustments as your child grows and their needs change. Parental controls allow you to strike a balance between allowing your child to explore the digital world while maintaining a secure and age-appropriate environment.
Troubleshooting Common Issues
While your Fire Tablet is designed to provide a seamless user experience, occasional issues may arise. Understanding and troubleshooting these common problems can help you quickly resolve them and get back to enjoying your device. Here are some common issues you may encounter and how to troubleshoot them:
1. Device Not Turning On: If your tablet doesn’t power on, ensure that the battery is charged. Connect it to a power source using the original charger and cable. If the problem persists, try a hard reset by pressing and holding the power button for about 20 seconds. Release the button and wait for the device to restart.
2. Wi-Fi Connection Issues: If you’re experiencing Wi-Fi connectivity problems, ensure that your tablet is within range of a strong and stable Wi-Fi signal. Restart your router and tablet, and then try reconnecting to the Wi-Fi network. If the issue persists, go to the Wi-Fi settings, forget the network, and re-enter the Wi-Fi password to establish a fresh connection.
3. App Crashes or Freezes: If an app freezes or crashes frequently, try closing and reopening it. If the problem continues, clear the app’s cache and data in the device Settings menu. If the issue persists, uninstall and then reinstall the app from the Amazon Appstore.
4. Touchscreen Issues: If the touchscreen is unresponsive or isn’t registering touches accurately, first ensure that your hands and the screen are clean and free from any moisture. Remove any screen protector or case that may obstruct proper touch detection. If the issue persists, perform a soft reset by holding the power button for 20 seconds or until the device restarts.
5. Battery Draining Quickly: If your tablet’s battery drains faster than expected, check for any background apps consuming excessive power. Close unused apps and restrict background activity for power-hungry apps. Lower the screen brightness, disable unnecessary wireless connections (such as Bluetooth), and consider enabling battery-saving modes in the device Settings menu.
6. Storage Space Issues: If you’re running out of storage space, consider uninstalling unused or unnecessary apps. Transfer photos, videos, and other media to cloud storage or a computer. Delete old files and clear cache data in the device Settings menu. Alternatively, consider expanding storage using a microSD card.
7. Audio or Speaker Problems: If you’re experiencing audio-related issues, ensure that the volume is turned up and not muted. Check the audio output by plugging in headphones or connecting to external speakers. If there’s no sound, try restarting the device and checking the audio settings. If the problem persists, contact customer support for further assistance.
8. Software Updates: Regularly check for software updates and install them to ensure your tablet has the latest security patches and bug fixes. Go to the device Settings menu, select “Device Options” or a similar option, and choose “System Updates.” Follow the on-screen prompts to download and install any available updates.
By troubleshooting these common issues, you can resolve most problems that arise with your Fire Tablet. If the issue persists or you encounter a different problem, refer to the device’s user manual or contact customer support for further assistance. Enjoy uninterrupted and trouble-free use of your tablet by addressing any issues promptly.