Introduction
Welcome to the world of HP Ultrabook Dx1104! This sleek and powerful device is equipped with advanced features and functionalities to cater to your computing needs. Whether you are a professional requiring a fast and efficient laptop for work or a tech-savvy individual looking to personalize your device, accessing the BIOS settings is essential.
The Basic Input/Output System (BIOS) is a crucial component of your HP Ultrabook Dx1104. It acts as a bridge between the hardware and the operating system, enabling communication and control over various system configurations. By accessing the BIOS settings, you can modify important parameters, such as boot order, power settings, and hardware configurations, to optimize your device’s performance.
In this guide, we will walk you through the process of accessing the BIOS settings on your HP Ultrabook Dx1104. We will explore the steps involved and provide detailed instructions to ensure a smooth and hassle-free experience. Whether you need to change the boot sequence, overclock your CPU, or update the firmware, this guide will equip you with the necessary knowledge to navigate the BIOS menu and make the desired modifications.
Please note that accessing the BIOS settings requires caution and responsibility. Modifying the wrong settings or making incorrect changes can result in system malfunctions or even data loss. It is important to follow the instructions carefully and make informed decisions while accessing and modifying the BIOS settings.
So, without further ado, let us dive into the world of BIOS settings and unlock the full potential of your HP Ultrabook Dx1104!
Step 1: Start or Restart Your HP Ultrabook Dx1104
Before you can access the BIOS settings on your HP Ultrabook Dx1104, you need to start or restart the device. Follow the steps below to begin:
- Ensure that your HP Ultrabook Dx1104 is connected to a power source or has sufficient battery charge to avoid any interruptions during the process.
- If your device is turned off, press the power button to start it. If the device is already on, save any unsaved work and proceed to restart it. You can restart your device by clicking on the “Start” menu and selecting the “Restart” option.
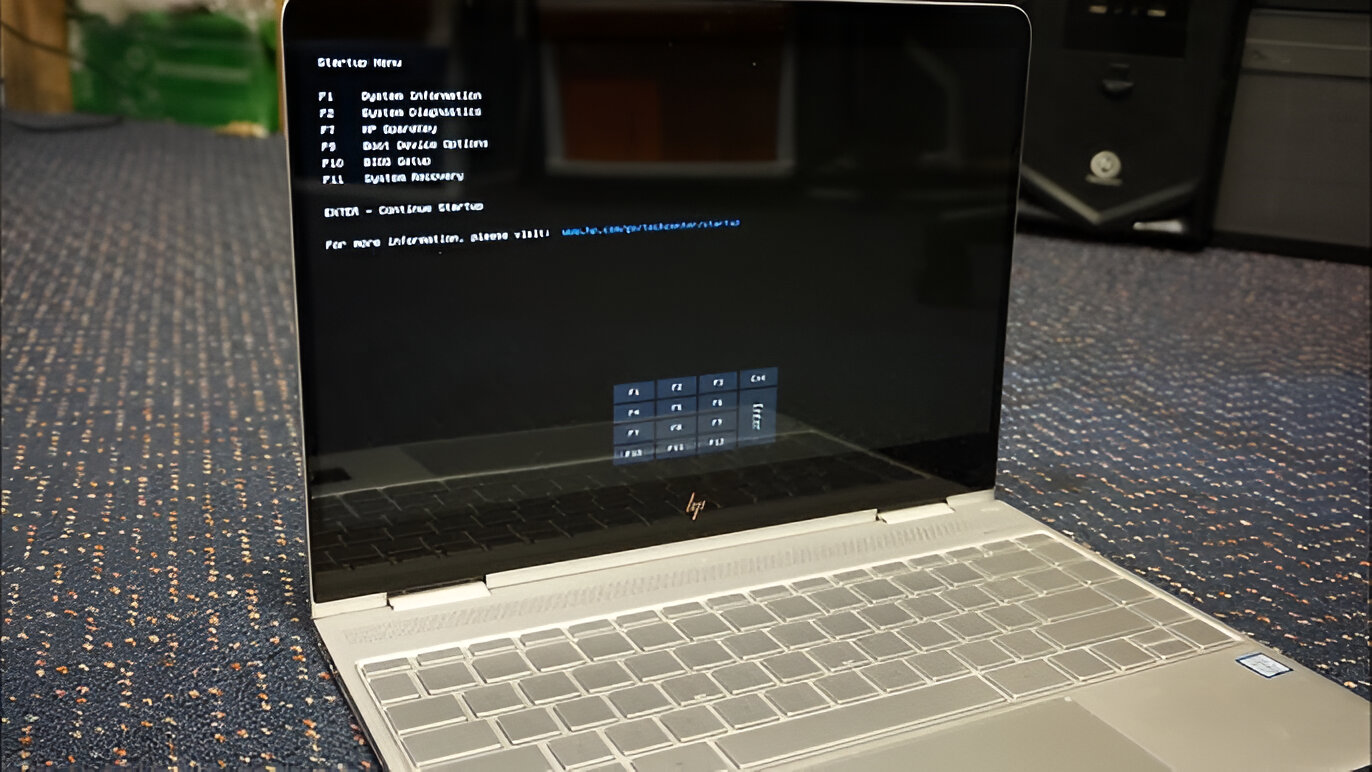
- As the device restarts, keep a close eye on the initial startup screen. Depending on your device’s configuration, you may need to press a specific key or combination of keys to access the BIOS settings.
In most cases, the key or combination of keys required to access the BIOS settings is displayed on the initial startup screen, often referred to as the splash screen. Look out for a message such as “Press [Key] to enter Setup” or “Press [Combination of Keys] to access BIOS.”
Commonly used keys to access the BIOS settings include F1, F2, Del, Esc, or a combination of keys like Ctrl + Alt + Esc. However, the specific key or combination can vary depending on the manufacturer and model of your HP Ultrabook Dx1104, so be sure to check the startup screen for the correct information.
Once you have identified the necessary key or combination of keys, you are ready to proceed to the next step of accessing the BIOS settings.
Remember, timing is crucial in this step. You need to press the required key or combination of keys at the right moment during the startup process. If you miss the opportunity or press the key(s) too late, the device will continue to boot into the operating system, and you will need to restart and try again.
With Step 1 complete, you are now ready to access the BIOS settings on your HP Ultrabook Dx1104. In the next section, we will guide you through the process of navigating the BIOS menu to make the necessary modifications.
Step 2: Access the BIOS Settings
Now that your HP Ultrabook Dx1104 is started or restarted, it’s time to access the BIOS settings. Follow the instructions below to gain entry:
- As your device starts up, pay attention to the startup screen. Look for the key or combination of keys required to access the BIOS settings. It’s usually mentioned as “Press [Key] to enter Setup” or “Press [Combination of Keys] to access BIOS.”
- Press the designated key(s) immediately and repeatedly to ensure it is registered by the system. You may need to press it multiple times as the device boots up.
- The screen will transition from the initial startup screen to the BIOS setup screen. This screen will contain various options for configuring your HP Ultrabook Dx1104.
It’s important to note that the BIOS setup screen may vary in appearance depending on the manufacturer and model of your device. However, the general layout and options should be similar.
If you’re unsure about which key(s) to press or the exact timing, refer to the user manual or search for your specific model’s instructions online. Manufacturers often provide detailed guides on accessing the BIOS settings for their devices.
Once you’ve successfully accessed the BIOS settings, you’re ready to explore and customize the various options available.
It’s worth mentioning that the BIOS settings are a powerful tool, and modifying them without proper knowledge can lead to issues with your device’s functionality. Proceed with caution and only make changes that you understand and deem necessary.
With Step 2 complete, you’ve successfully accessed the BIOS settings on your HP Ultrabook Dx1104. In the next section, we’ll guide you through navigating the BIOS menu and making modifications to optimize your device’s performance.
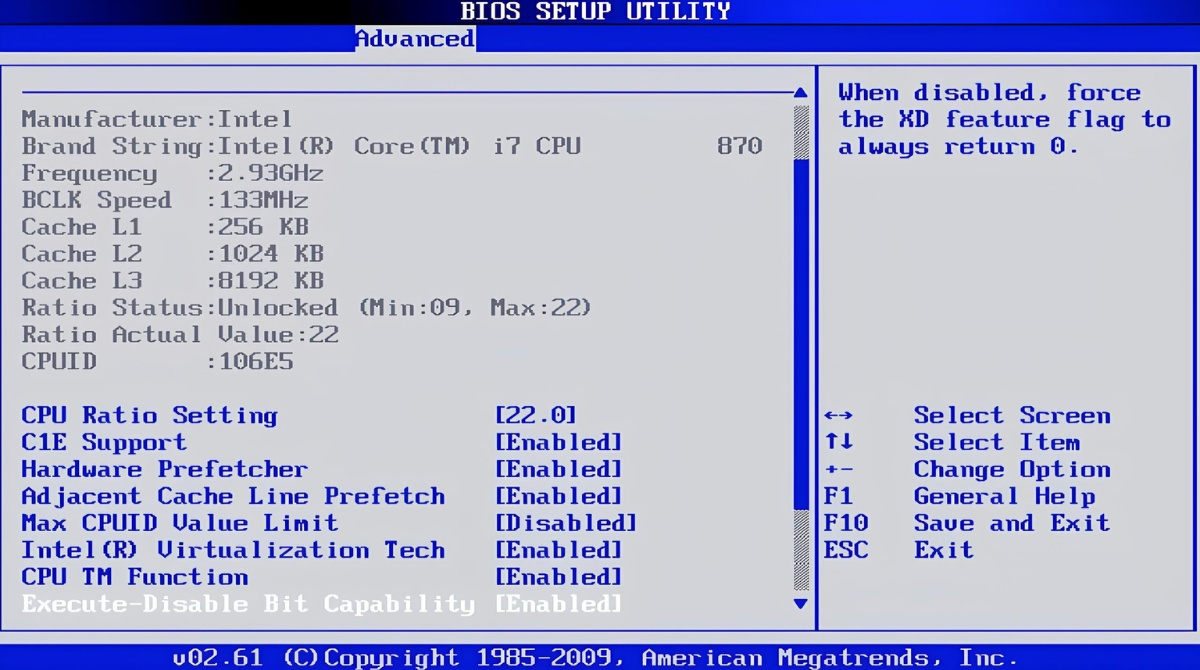
Step 3: Navigating the BIOS Menu
Now that you have accessed the BIOS settings on your HP Ultrabook Dx1104, it’s time to familiarize yourself with the BIOS menu. The menu will contain various options and settings that you can modify. Follow the instructions below to navigate the BIOS menu:
- Use the arrow keys on your keyboard, such as the up and down arrows, to move through the different options in the BIOS menu. The options will be displayed on the screen, organized into categories or tabs.
- Press the Enter key to select a specific option or enter a submenu. This will allow you to further explore and modify the settings within that option. Some options may have submenus or additional settings that you can access by pressing Enter.
- Use the arrow keys to navigate within the submenus and select the desired settings. Once you’ve made your selection, press Enter again to apply the changes.
- If you need to go back to a previous menu or exit a submenu without making any changes, look for an option like “Back” or “Exit.” Use the arrow keys to select the option and press Enter.
- Keep in mind that some BIOS menus may have additional navigation keys or shortcuts. These shortcuts are often displayed at the bottom of the screen. Take a moment to review these shortcuts to navigate the BIOS menu more efficiently.
It’s essential to take your time and carefully explore each option in the BIOS menu. Read the descriptions or tooltips provided to gain a better understanding of what each setting does. This will help you make informed decisions when customizing the BIOS settings.
Remember, the BIOS menu can vary depending on the manufacturer and model of your device. Certain settings may be more advanced or specific to the hardware configuration of your HP Ultrabook Dx1104. If you’re unsure about a particular option, consult the user manual or search for additional resources online.
With Step 3 completed, you now know how to navigate the BIOS menu. In the next section, we’ll guide you through modifying the BIOS settings to optimize your device’s performance.
Step 4: Modifying BIOS Settings
With access to the BIOS menu on your HP Ultrabook Dx1104, you can now modify the settings to customize and optimize your device’s performance. Follow the instructions below to make the necessary changes:
- Navigate through the BIOS menu using the arrow keys on your keyboard, as mentioned in the previous step.
- Select the specific option or setting you want to modify by highlighting it and pressing Enter. This will open a submenu or provide you with a list of available options.
- Use the arrow keys to navigate within the submenu or list of options. Each option may have different values that you can select or modify.
- Make the desired changes to the selected option. This can include adjusting values, enabling or disabling features, or selecting different options.
- Once you’ve made your modifications, navigate to the “Save” or “Apply Changes” option within the BIOS menu. Press Enter to save the changes and exit the submenu or option.
- Some BIOS menus may require you to confirm your changes before they are applied. If prompted, select the “Yes” or “Confirm” option to proceed.
While modifying the BIOS settings, it’s important to exercise caution and be mindful of the changes you make. Incorrect settings or modifications can potentially lead to system instability or improper functioning. Therefore, it’s recommended to research and understand the implications of each setting before making any adjustments.
Common settings that you may consider modifying in the BIOS menu include the boot order, power management options, CPU settings, memory configurations, and hardware detection settings.
If you’re unsure about a particular setting or need more information, consult the user manual for your HP Ultrabook Dx1104 or search for resources specific to your device model online. Understanding the impact of each setting will help you make informed decisions and optimize your device’s performance.
With Step 4 complete, you have successfully modified the BIOS settings on your HP Ultrabook Dx1104. In the next step, we’ll guide you through the process of saving your changes and exiting the BIOS.
Step 5: Saving and Exiting the BIOS
After making the desired changes to the BIOS settings on your HP Ultrabook Dx1104, it’s crucial to save the modifications and exit the BIOS menu properly. Follow the instructions below to complete this final step:
- Navigate to the “Save Changes” or “Exit” option in the BIOS menu. This option is usually located at the bottom or top of the menu.
- Select the “Save Changes and Exit” option and press Enter to save your modifications and exit the BIOS. Some BIOS menus may provide additional options like “Save and Restart” or “Exit Without Saving.” Choose the appropriate option based on your preference.
- If prompted, confirm your action by selecting “Yes” or “Confirm” to save the changes and exit the BIOS menu.
- Your HP Ultrabook Dx1104 will reboot, applying the modified settings you have made in the BIOS. Your device will now start up with the updated configurations.
It is important to note that saving and exiting the BIOS will differ between manufacturers and models. Some BIOS menus may automatically save your modifications without a separate “Save Changes and Exit” option. Always read the on-screen instructions carefully to ensure that your changes are saved correctly.
Once your device restarts, verify that your modifications have been successfully applied. You can check the changes you made, like the boot order or specific settings, to confirm that they are functioning as intended.
Remember, if you encounter any issues or undesired results after modifying the BIOS settings, you can always revert to the default settings or make further adjustments to fine-tune your device’s configuration.
Congratulations! You have successfully saved your changes and exited the BIOS menu on your HP Ultrabook Dx1104. You are now ready to enjoy a personalized and optimized computing experience.
Conclusion
Accessing and modifying the BIOS settings on your HP Ultrabook Dx1104 is an essential step in optimizing your device’s performance and customizing its functionalities. By following the steps outlined in this guide, you have gained the knowledge and understanding to navigate the BIOS menu confidently.
The BIOS settings allow you to configure various aspects of your device, including boot order, power management, CPU settings, and more. However, it is crucial to approach these settings with caution and make informed decisions to avoid any unintended consequences.
Remember to consult your device’s user manual or search for specific instructions tailored to your HP Ultrabook Dx1104 model if you encounter any difficulties or require additional guidance. Manufacturer-provided resources are invaluable in understanding the intricacies of your BIOS settings and ensuring a smooth and effective modification process.
With patience and careful consideration, you can tailor your device to meet your unique needs and preferences. From optimizing performance to personalizing hardware configurations, the BIOS settings are a powerful tool at your disposal.
Keep in mind that modifying advanced settings requires a thorough understanding of their implications. If you are unsure about a particular setting, consult relevant resources or seek expert advice to ensure that your modifications align with your goals and desired outcomes.
With this guide, you are now equipped with the knowledge to confidently access, navigate, and modify the BIOS settings on your HP Ultrabook Dx1104. Take full advantage of this capability to enhance your device’s performance and unlock its full potential.
Happy computing!