Introduction
When it comes to personalizing your Android device, one great way to add some flair is by setting a custom ringtone. The default ringtones on your Android phone may not always reflect your unique style or personality. By setting a custom ringtone, you can add a personal touch every time your phone rings.
Setting a ringtone on an Android device may seem like a daunting task, but no need to worry! With the help of this guide, you’ll be able to set the perfect ringtone on your Android phone in just a few simple steps. Whether you want to use one of your favorite songs or a sound effect of your choice, we will walk you through the process.
In this article, we will cover everything from downloading a ringtone app to setting your custom ringtone as the default for all incoming calls. We will also discuss how to assign specific ringtones to individual contacts, allowing you to identify who’s calling without even looking at your phone.
So, if you’re ready to add some personalization and make your phone truly yours, let’s get started with setting a ringtone on your Android device!
Step 1: Download a Ringtone App
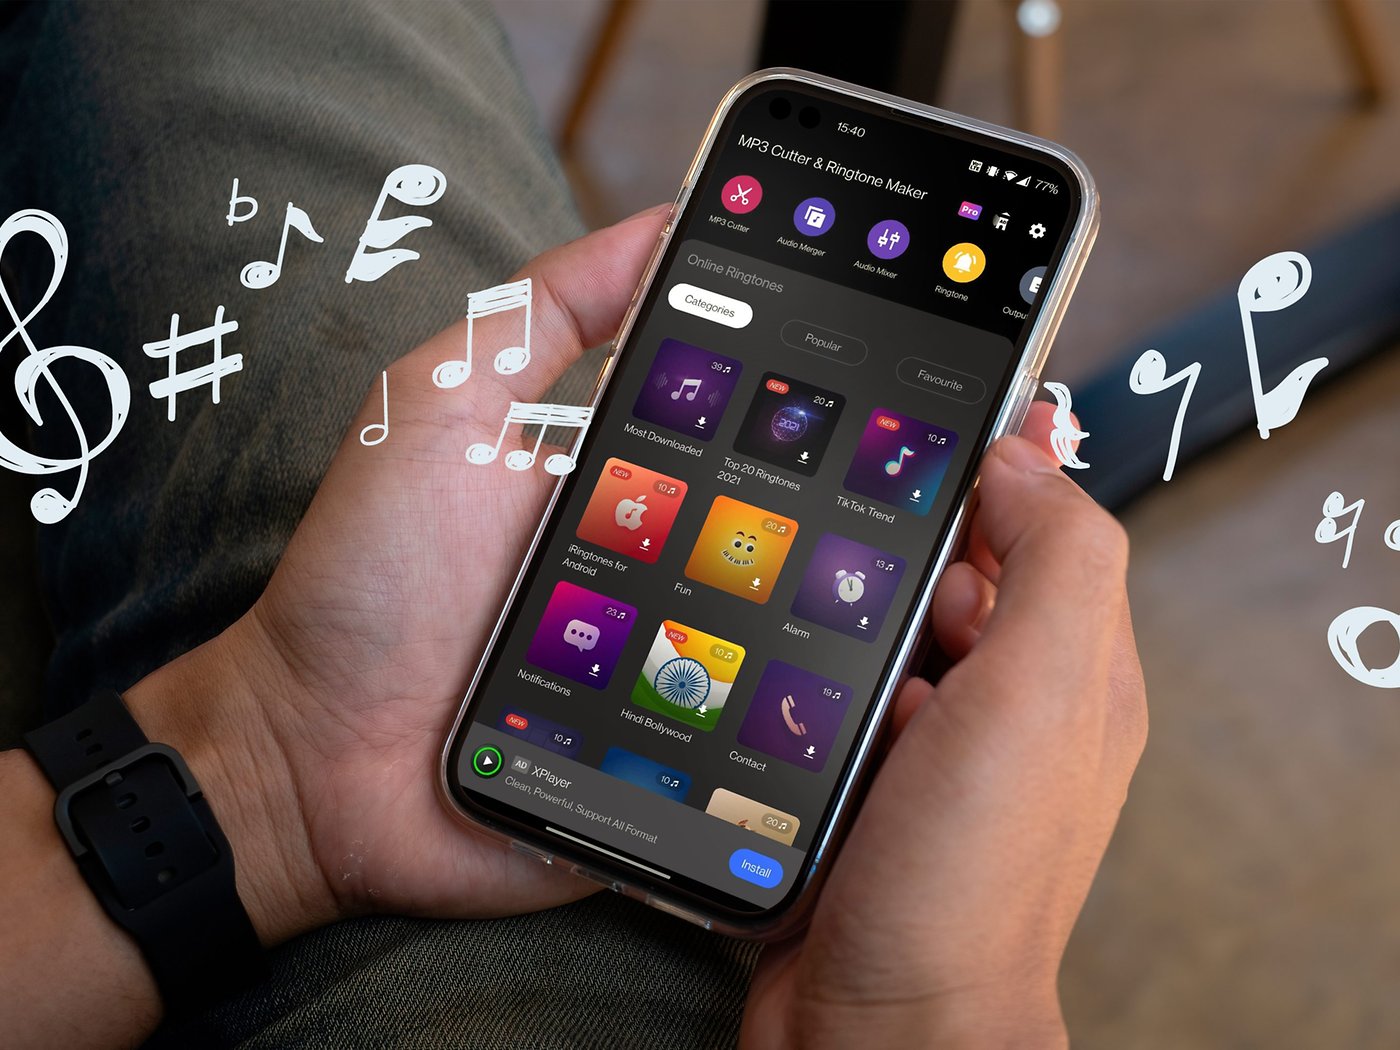
The first step in setting a custom ringtone on your Android device is to download a ringtone app from the Google Play Store. There are several great ringtone apps available that provide a wide selection of ringtones to choose from, both free and paid.
To download a ringtone app, follow these steps:
- Open the Google Play Store on your Android device.
- In the search bar, type “ringtone app” and tap the search icon.
- From the list of results, browse through the various ringtone apps available.
- Select the app that best suits your preferences and tap on it.
- Tap the “Install” button to download and install the app on your device.
Once the ringtone app is downloaded and installed, you’re ready to move on to the next step of choosing a ringtone that resonates with you.
It’s important to note that some Android devices may come with a pre-installed ringtone app, so you might not need to download one separately. In that case, you can skip this step and proceed to the next one.
Step 2: Choose a Ringtone
Now that you have a ringtone app installed on your Android device, it’s time to choose the perfect ringtone that reflects your personality and style. The ringtone app will provide a wide variety of options, including music, sound effects, and even voice recordings.
To choose a ringtone, follow these steps:
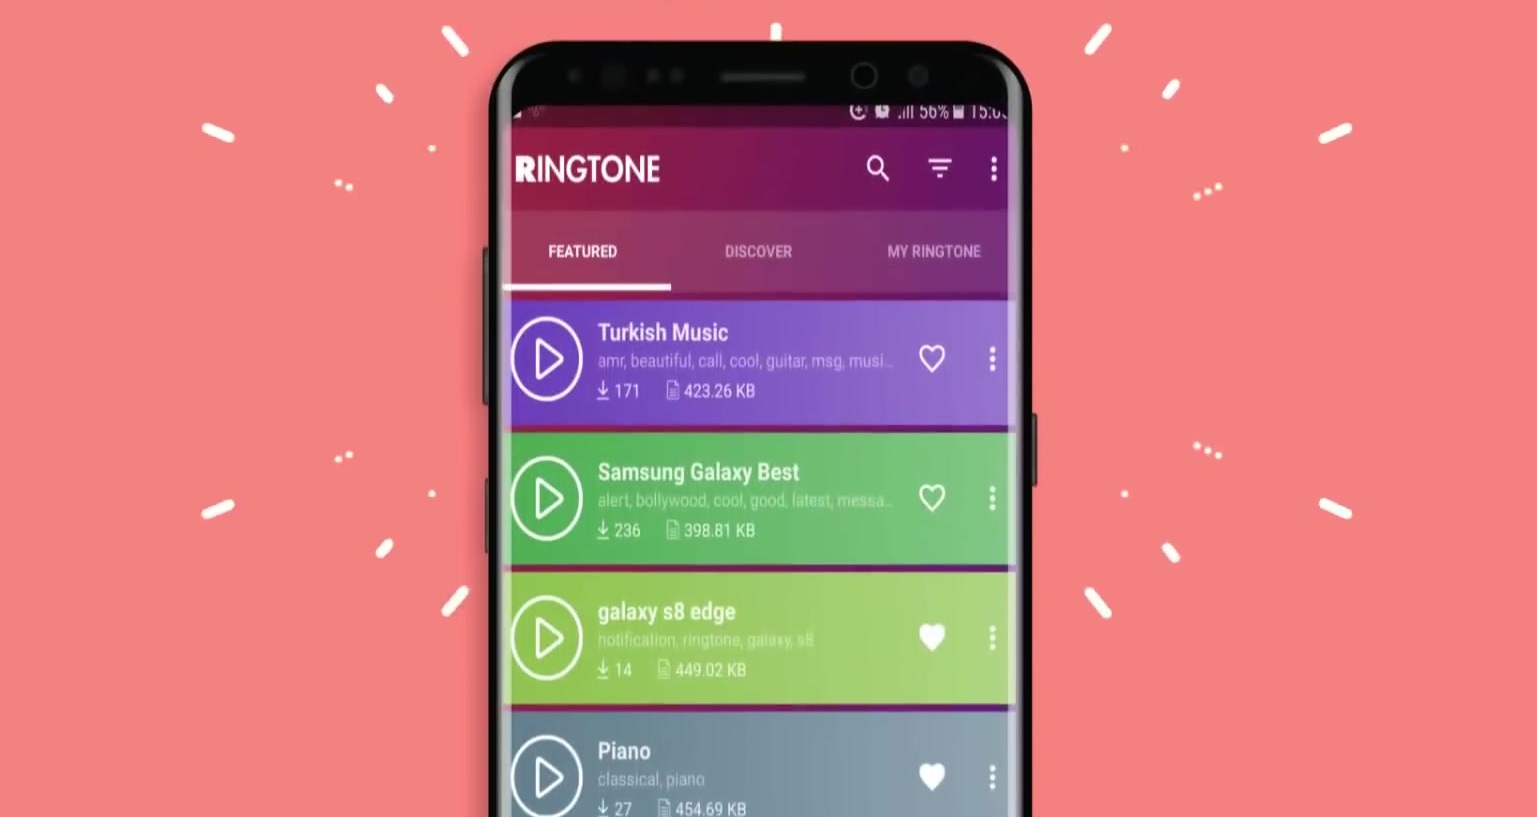
- Open the ringtone app that you downloaded from the Google Play Store.
- Browse through the different categories or use the search bar to find a specific type of ringtone.
- Once you find a ringtone that catches your attention, tap on it to listen to a preview.
- If you like the ringtone, tap the “Set as Ringtone” or “Use” button. Some apps might have slightly different labels, but the idea is the same.
Alternatively, some ringtone apps also allow you to set a custom ringtone by uploading your own audio files. If you have a specific sound or song in mind that you want to set as your ringtone, check if the app supports this feature.
Take your time to explore the different options and listen to the previews before making a decision. You can always go back and change your ringtone later if you decide you want something different.
Once you have chosen your desired ringtone, it’s time to move on to the next step of setting it as the default ringtone for all incoming calls on your Android device.
Step 3: Set the Ringtone as Default
After choosing the perfect ringtone from the ringtone app, the next step is to set it as the default ringtone for all incoming calls on your Android device. This ensures that your custom ringtone plays whenever someone calls you.
To set the ringtone as the default, follow these steps:
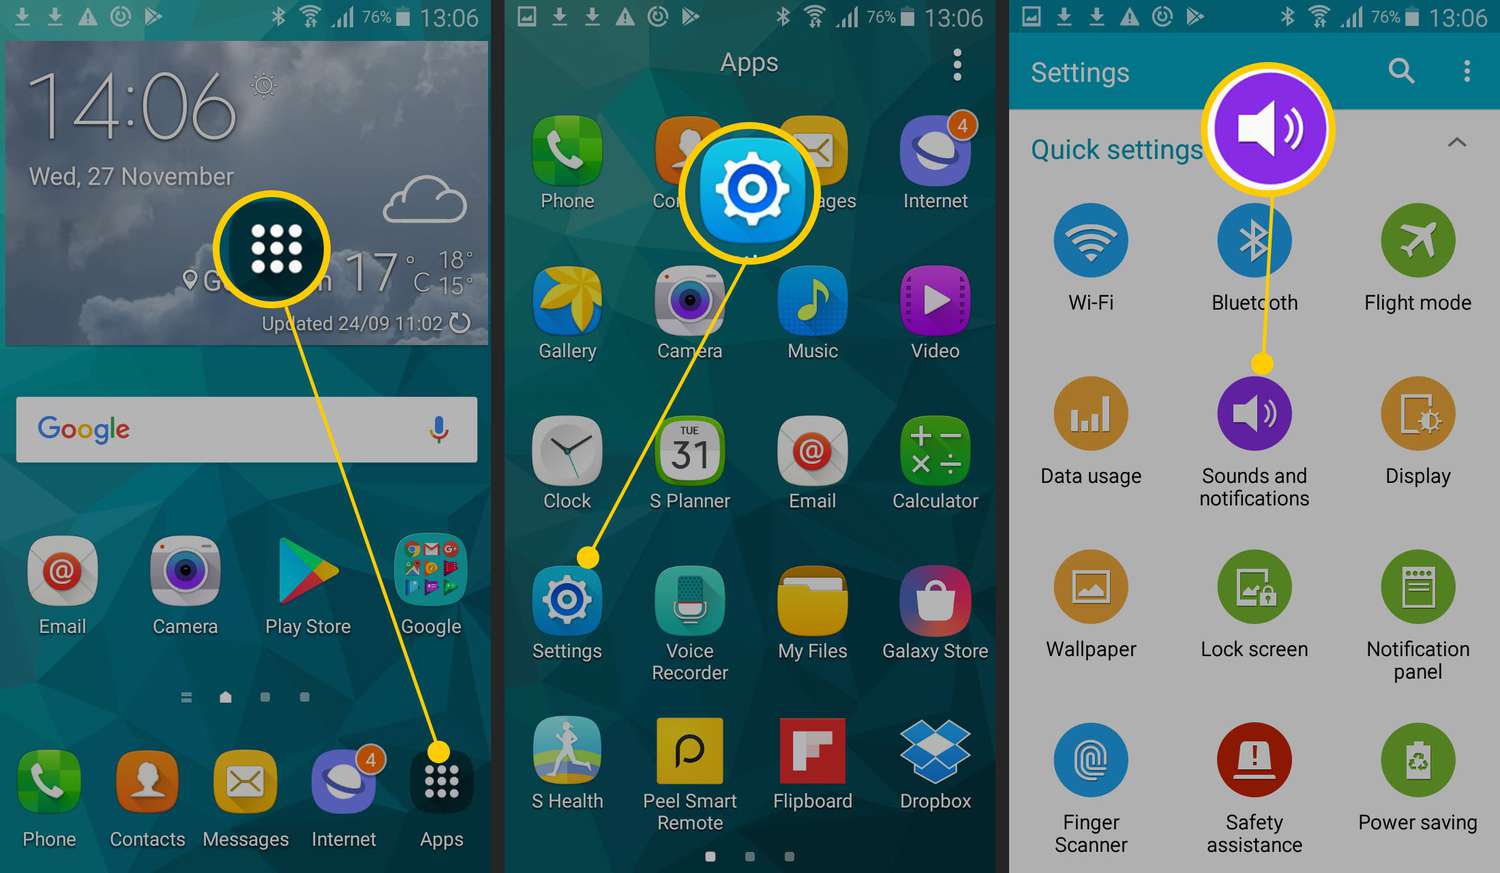
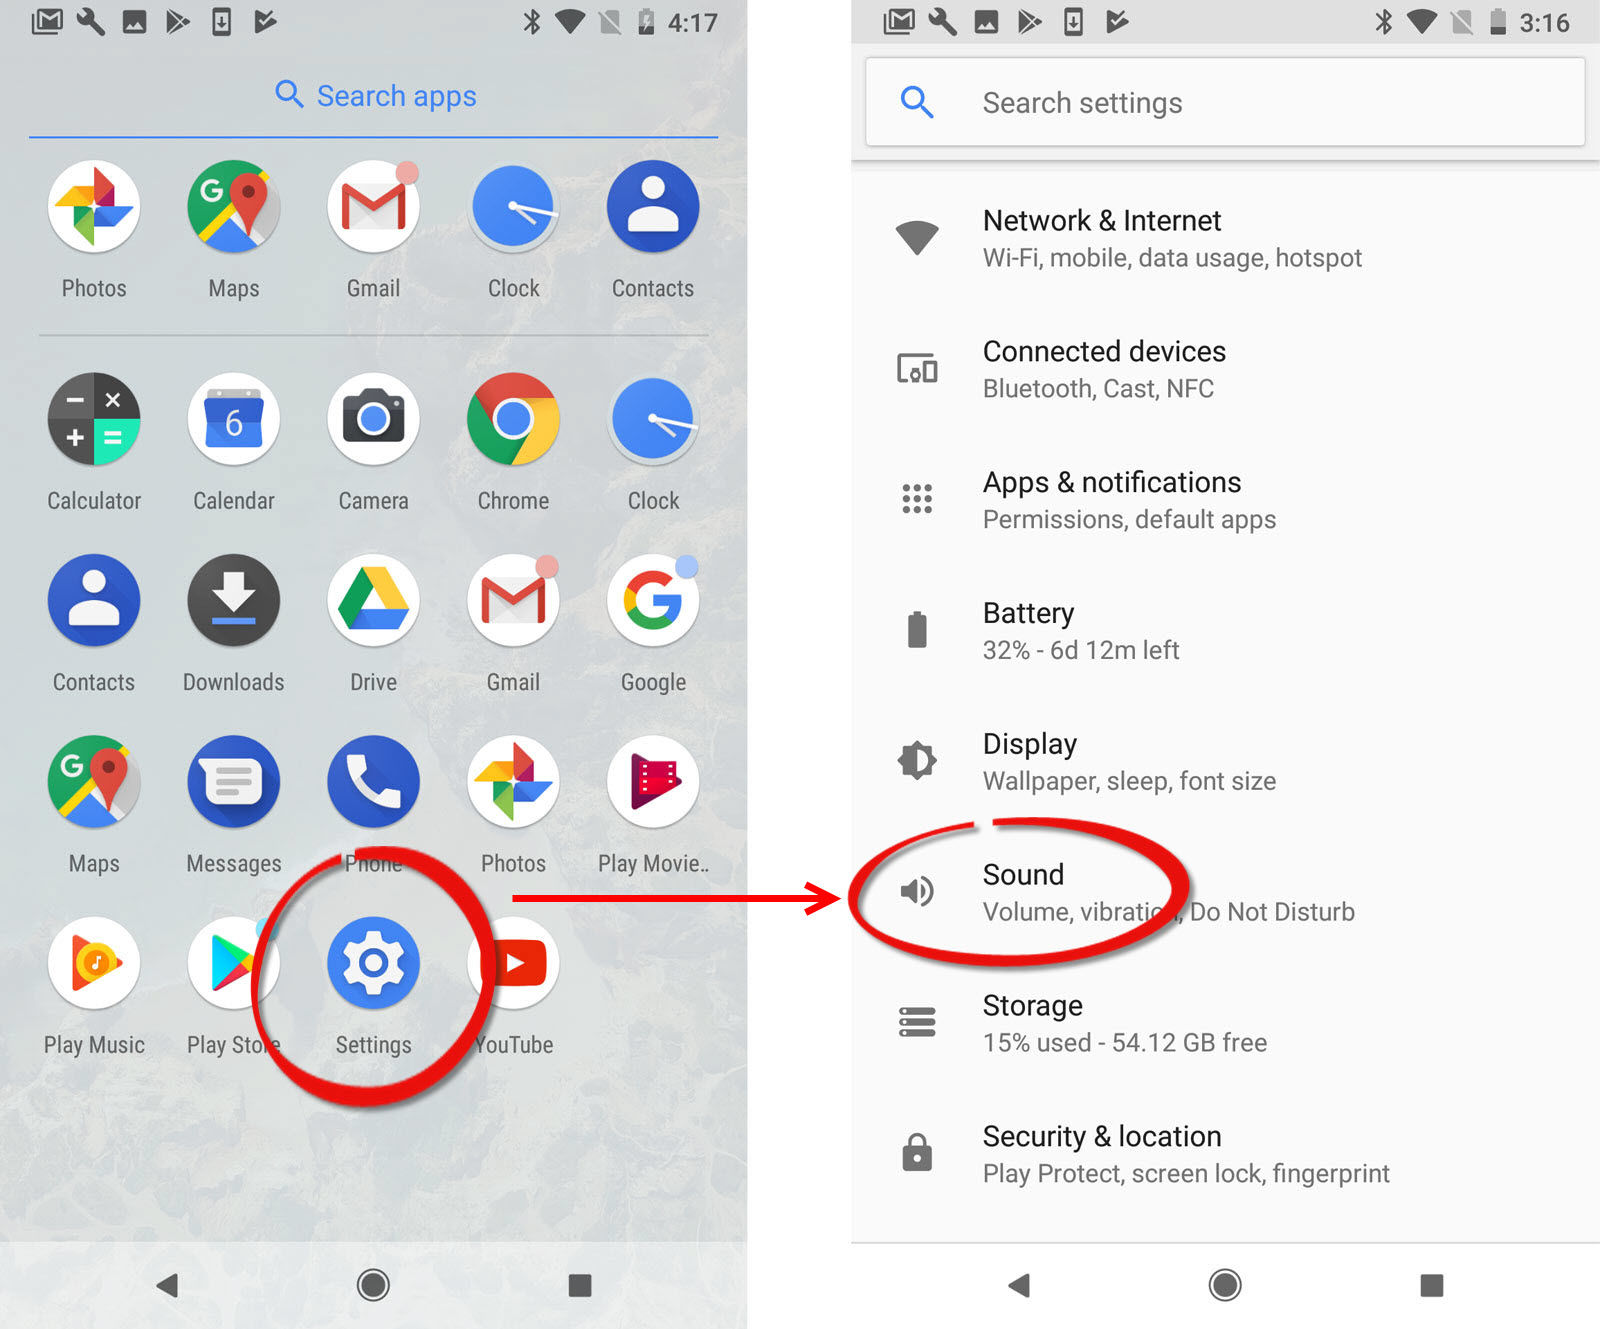
- Open the “Settings” app on your Android device. You can usually find it in the app drawer or by swiping down on the notification panel and tapping the gear icon.
- Scroll down and find the “Sound” or “Sound & vibration” option and tap on it.
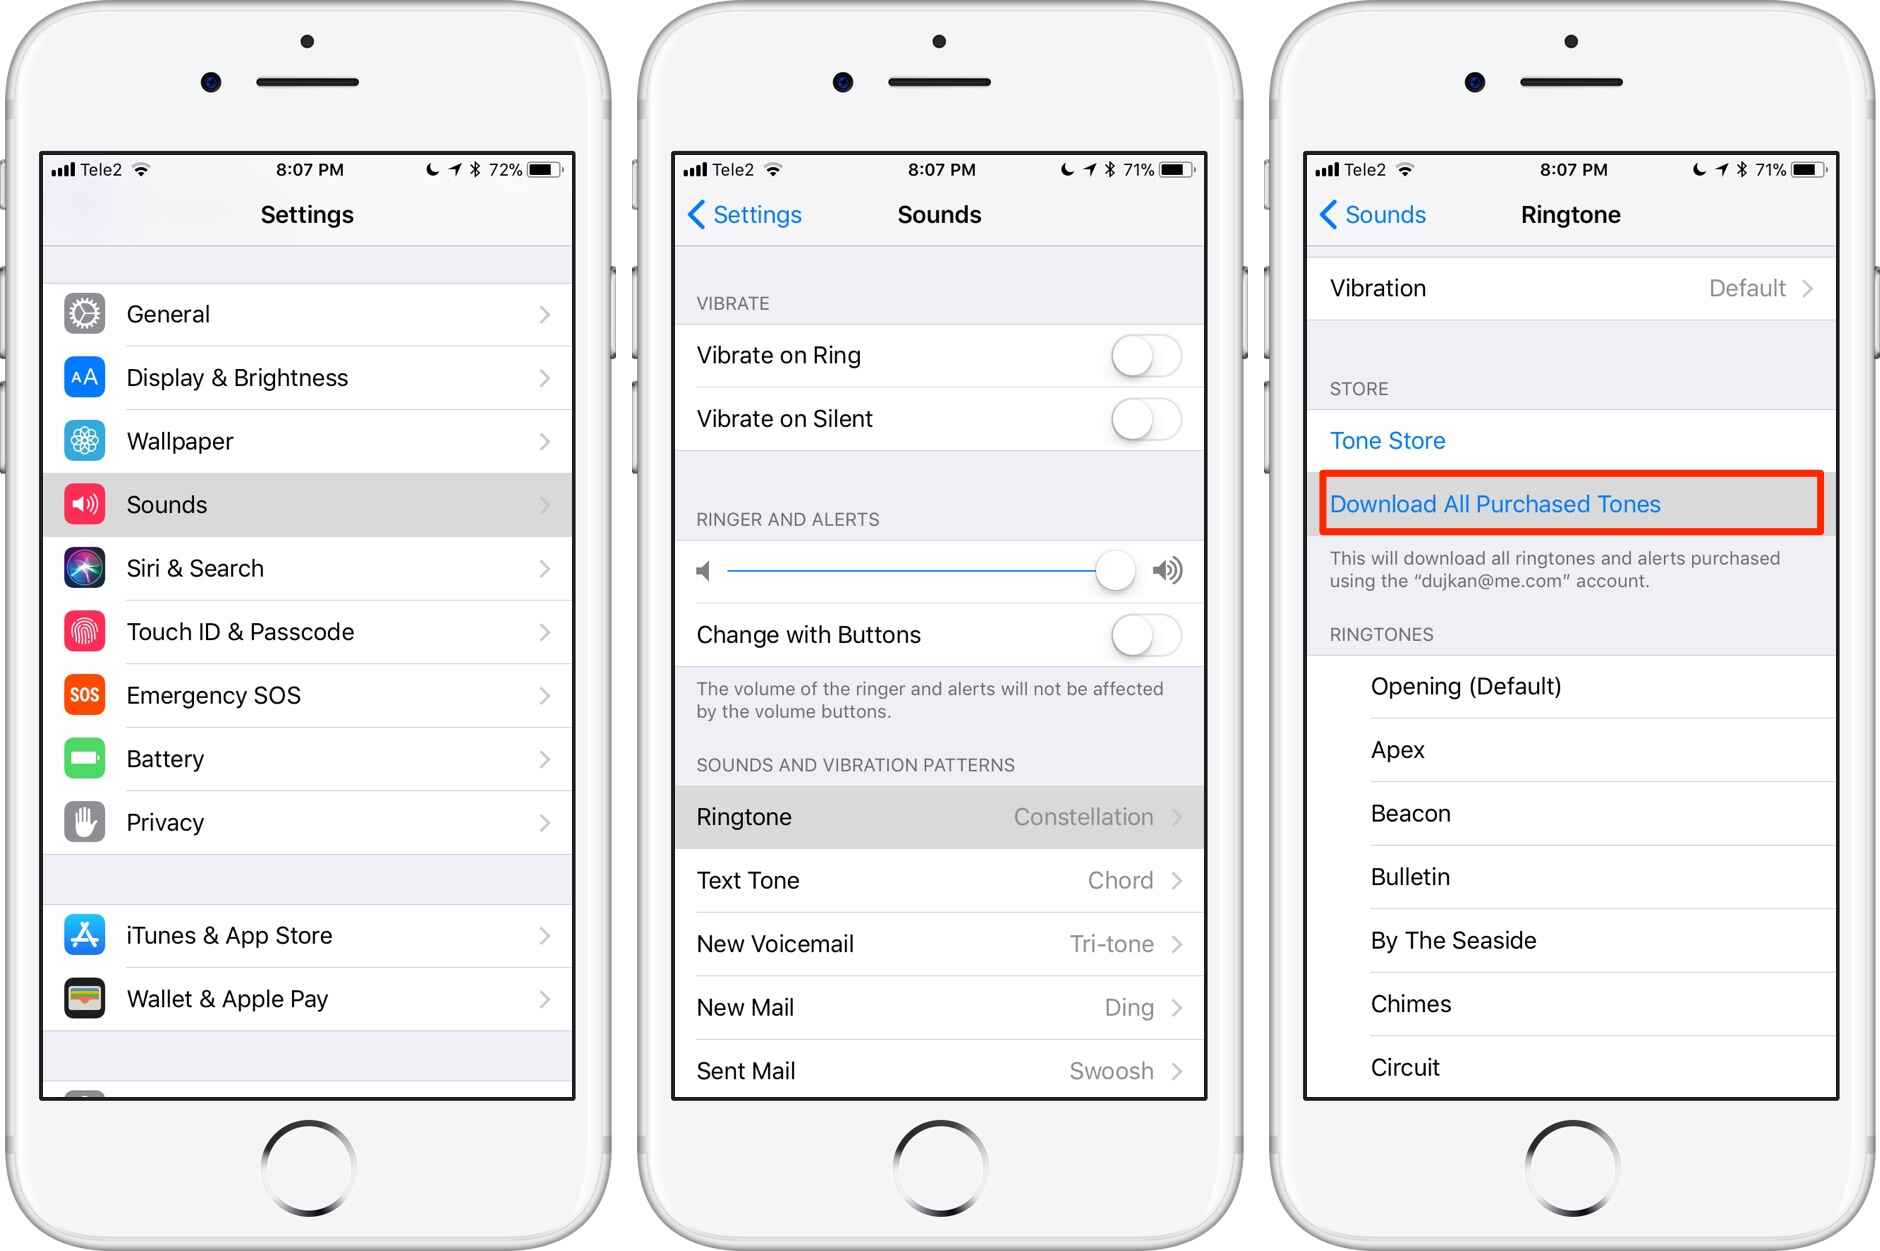
- Look for the “Phone ringtone” or “Ringtone” option and tap on it.
- A list of available ringtones will appear. Scroll through the list or look for the option to select a ringtone from your ringtone app.
- Select the ringtone that you previously downloaded or set as a default within the ringtone app.
- Once you have selected the desired ringtone, tap the “OK” or “Save” button to set it as the default for all incoming calls.
Now, whenever someone calls you, the custom ringtone you have chosen will play, giving your phone a personalized touch. It’s worth mentioning that the steps to set the default ringtone may vary slightly depending on the Android version and device manufacturer.
Congratulations! You have successfully set the ringtone as the default for all incoming calls on your Android device. But, if you want to take it a step further and assign specific ringtones to individual contacts, then proceed to the next step.
Step 4: Customize your Ringtone
Setting a custom ringtone is not limited to the options provided by the ringtone app. You can also customize your ringtone by using a specific section of a song or creating a unique sound. This allows you to add a personal touch and make your ringtone even more special.
To customize your ringtone, follow these steps:
- Open the ringtone app or any audio editing app on your Android device.
- If you want to use a specific section of a song, choose a song from your music library.
- In the audio editing app, trim the song to the desired portion by selecting the start and end points. Make sure the duration is not too long to ensure it plays smoothly as a ringtone.
- Save the trimmed portion as a new audio file. Some apps may have a “Save as Ringtone” or similar option.
- In the ringtone settings of your device, locate the custom ringtone option and select the newly created audio file.
If you want to create a unique sound for your ringtone, you can use sound effects or recording features available in audio editing apps. Experiment with different sounds and effects until you find the perfect one.
Remember to save the customized ringtone as a new audio file and then proceed to set it as the default ringtone or assign it to specific contacts using the methods described in the previous steps.
By customizing your ringtone, you can truly make it your own and stand out from the crowd. Enjoy the personalization and uniqueness that comes with a tailor-made ringtone.
Step 5: Assign Specific Ringtones to Contacts
If you want to add an extra level of personalization to your Android device, you can assign specific ringtones to individual contacts. This way, you can identify who is calling you without even looking at your phone.
To assign specific ringtones to contacts, follow these steps:
- Open the “Contacts” app on your Android device.
- Select the contact to whom you want to assign a custom ringtone.
- Tap on the “Edit” or “More” button, which usually appears as three vertical dots or lines.
- Scroll down and look for the “Ringtone” or “Set ringtone” option and tap on it.
- A list of available ringtones will appear. Scroll through the list or choose a ringtone from your ringtone app.
- Select the desired ringtone for that specific contact.
- Save the changes by tapping the “Save” or “Done” button.
Repeat these steps for each contact to whom you want to assign a custom ringtone. This way, you can easily distinguish different callers by the unique ringtone you’ve selected for them.
Assigning specific ringtones to contacts is not only fun but also practical. You can assign different ringtones for family members, friends, or important contacts, making it easier to prioritize or identify their calls.
With this step completed, you have fully customized your Android device’s ringing experience. Now, every time a specific contact calls you, their personalized ringtone will play, adding a touch of familiarity and individuality to your phone.
Conclusion
Setting a custom ringtone on your Android device allows you to add a personal touch and make your phone reflect your unique style and personality. With the help of a ringtone app and a few simple steps, you can easily customize your Android device’s ringing experience.
In this article, we covered the step-by-step process of setting a custom ringtone on your Android device. We started by downloading a ringtone app from the Google Play Store, then went on to choose the perfect ringtone that resonates with you. We also discussed how to set the ringtone as the default for all incoming calls and how to customize the ringtone using specific sections of songs or creating unique sounds.
Furthermore, we explored the option of assigning specific ringtones to individual contacts, allowing you to identify who’s calling without even looking at your phone. This added level of personalization enhances your overall calling experience and makes your Android device truly yours.
Now that you have mastered the process of setting a custom ringtone, go ahead and give your Android device a personal touch. Explore the wide range of ringtone options available and choose the one that best represents your style and preferences.
Remember to have fun with the customization process and regularly switch up your ringtone to keep things fresh. Whether you prefer a catchy song, a sound effect, or a unique sound you created yourself, let your ringtone reflect your individuality.
So, what are you waiting for? Start personalizing your Android device’s ringing experience today and make every call a little more special.