Introduction
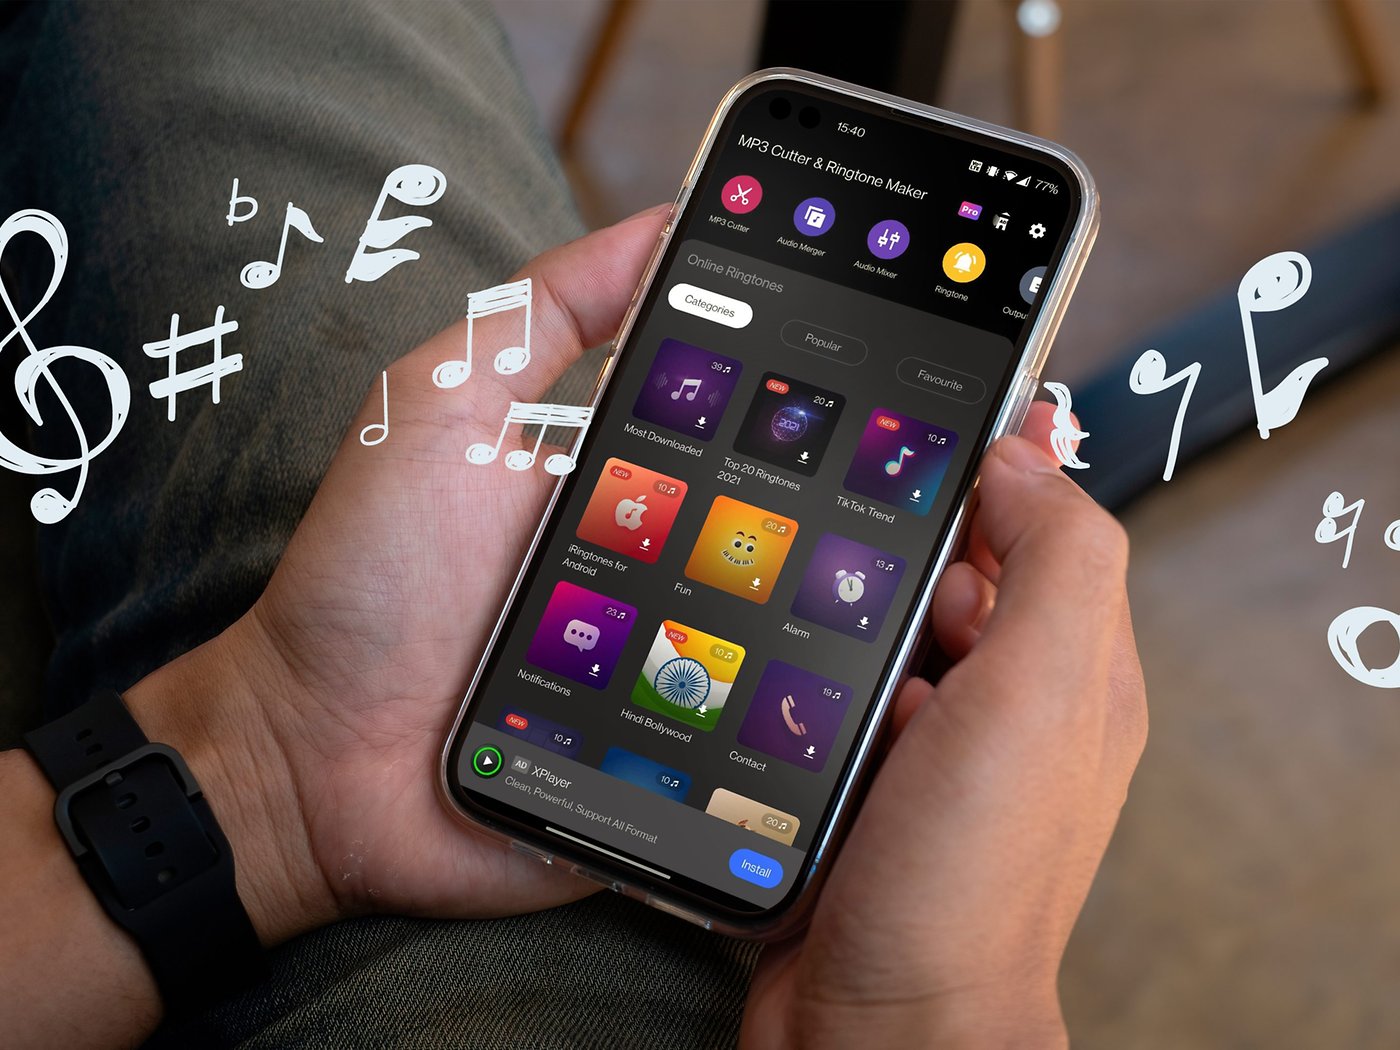
Welcome to the world of personalized ringtones! Your Android device allows you to add a touch of personal flair by setting a unique ringtone that reflects your individual style and preferences. Whether you prefer a catchy tune, a famous movie quote, or a soothing melody, there are plenty of options available for you to choose from.
In this article, we’ll guide you through the process of downloading a ringtone on your Android device. We’ll cover everything from finding a reputable ringtone website to setting your downloaded ringtone as the default tone. So, let’s dive in and give your phone a fresh sound!
Before we get started, it’s important to note that downloading ringtones may incur data charges, depending on your internet connection. It’s recommended to connect to a Wi-Fi network to avoid any additional costs.
Now, without further ado, let’s explore the steps to download and set up a new ringtone on your Android device.
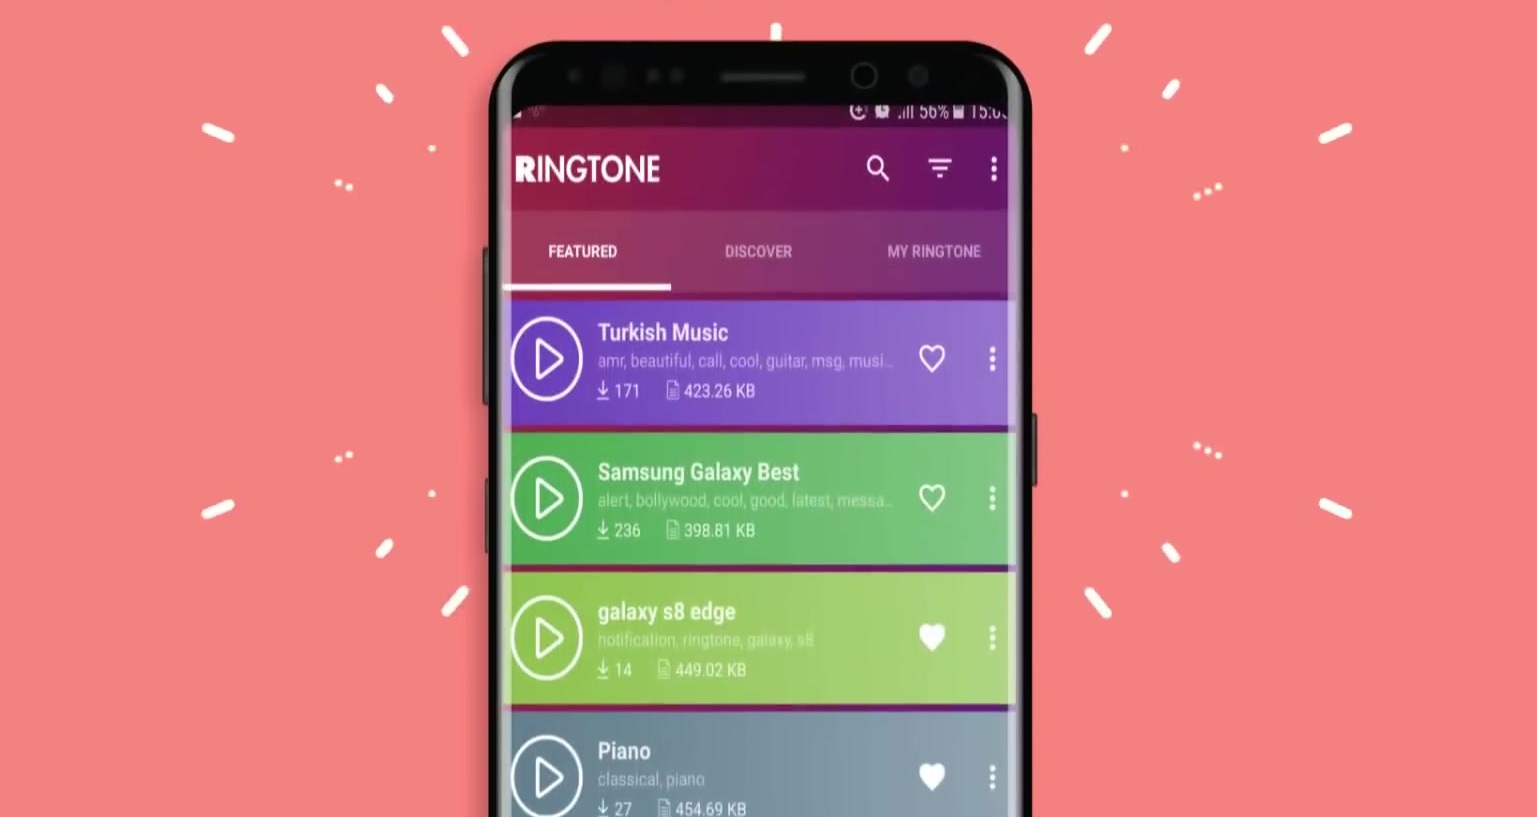
Step 1: Find a reputable ringtone website
The first step in downloading a ringtone for your Android device is to find a reputable website that offers a wide selection of high-quality ringtones. There are several websites available that specialize in providing free and paid ringtones. Here’s how you can go about finding a trustworthy ringtone website:
- Do a quick online search: Start by doing a search on popular search engines to find a list of ringtone websites. Look for websites that have positive user reviews and high ratings.
- Read user reviews: Once you have a list of potential websites, take the time to read user reviews and testimonials. This will give you valuable insights into the reliability and quality of the website’s ringtones.
- Check for a diverse collection: Look for a website that offers a diverse collection of ringtones across different genres and categories. This ensures that you’ll find a ringtone that suits your preferences.
- Verify the website’s legitimacy: It’s essential to ensure that the ringtone website is legitimate and safe to use. Check if the website displays proper contact information, terms of service, and a privacy policy.
- Avoid sketchy websites: Be cautious of websites that require you to provide personal information or ask for payment details upfront. Legitimate ringtone websites usually offer free downloads or provide clear pricing information.
By following these steps, you can narrow down your options and find a reputable ringtone website that will provide you with a safe and enjoyable downloading experience. Once you’ve found a trustworthy website, you’re ready to move on to the next step: choosing a ringtone category.
Step 2: Choose a ringtone category
Now that you’ve found a reputable ringtone website, it’s time to explore the various categories available and choose the type of ringtone that suits your taste. Ringtone websites typically offer a wide range of categories, including:
- Top Charts: This category features the most popular and trending ringtones of the moment. It’s a great place to discover new and popular songs that you’d like to set as your ringtone.
- Genres: If you have a specific music genre that you enjoy, such as pop, rock, hip-hop, or classical, you can browse through the genres section to find ringtones that match your musical preferences.
- Movie/TV Themes: This category includes ringtones that are inspired by popular movies or TV shows. You can find iconic theme songs, memorable dialogue snippets, or sound effects related to your favorite films or series.
- Instrumental: If you prefer a more soothing and instrumental tone, this category offers a selection of calm melodies or instrumental covers of popular songs. It’s perfect if you want a less intrusive ringtone.
- Funny/Entertainment: For those who like to add a touch of humor or entertainment to their incoming calls, this category provides funny ringtones, joke snippets, or sound effects that will bring a smile to your face.
Take your time to explore the different categories and listen to the available ringtones. You can usually preview the ringtones before downloading them to ensure they match your preferences. Once you’ve chosen a category and found a ringtone that captivates you, you’re ready to proceed to the next step: downloading the desired ringtone to your Android device.
Step 3: Select the desired ringtone
Now that you have explored the different categories and have an idea of the type of ringtone you want, it’s time to select your desired ringtone from the options available on the chosen website. Here’s how you can do it:
- Browse through the category: Navigate to the category where you think your desired ringtone would be located. For example, if you’re looking for a pop song as your ringtone, head over to the “Pop” or “Top Charts” category.
- Preview the ringtone: Most ringtone websites allow you to preview the ringtone before downloading it. Click on the ringtone or the play button to listen to a short clip of the audio. This will give you an idea of how it sounds and whether it matches your expectations.
- Check for compatibility: Ensure that the ringtone you choose is compatible with your Android device. Some websites offer a wide range of formats to cater to different phone models. Select the format that is compatible with your device (usually MP3 or M4R for Android).
- Consider your preferences: While browsing through the available ringtones, consider your personal preferences. It could be a specific song, artist, or mood that resonates with you. Choose a ringtone that you can connect with and that will bring a smile to your face whenever it rings.
- Additional features: Some ringtone websites offer additional features like selecting the length of the ringtone or the ability to customize it. Explore these options if you’re interested in adding a personalized touch to your chosen ringtone.
Once you have found the perfect ringtone, you are now ready to proceed to the next step: downloading the ringtone to your Android device.
Step 4: Download the ringtone to your Android device
Now that you have selected the perfect ringtone, it’s time to download it to your Android device. Follow these steps to successfully download the ringtone:
- Click the download button: On the ringtone website, locate the download button or link associated with the chosen ringtone. It is usually labeled as “Download” or represented by a downward arrow icon. Click on it to initiate the download process.
- Select download location: After clicking the download button, you may be prompted to choose the download location. Select a location on your Android device where you can easily locate the downloaded file, such as the “Downloads” folder.
- Wait for the download to complete: Depending on the size of the ringtone file and your internet connection speed, the download process may take a few seconds or longer. Be patient and wait for the download to finish.
- Access the downloaded ringtone: Once the download is complete, open the file manager on your Android device and navigate to the location where you saved the downloaded ringtone file. It should be in the folder you selected in the previous step.
- Confirm the file format: Ensure that the downloaded file is in a compatible format for Android, such as MP3 or M4R. If it is not in the correct format, you may need to convert it using a file conversion tool or an audio editing app.
Now that you have successfully downloaded the ringtone to your Android device, you are ready to proceed to the next step: setting the downloaded ringtone as your default ringtone.
Step 5: Set the downloaded ringtone as your default ringtone
After downloading the desired ringtone to your Android device, it’s time to set it as your default ringtone. Follow these steps to customize your device’s ringtone:
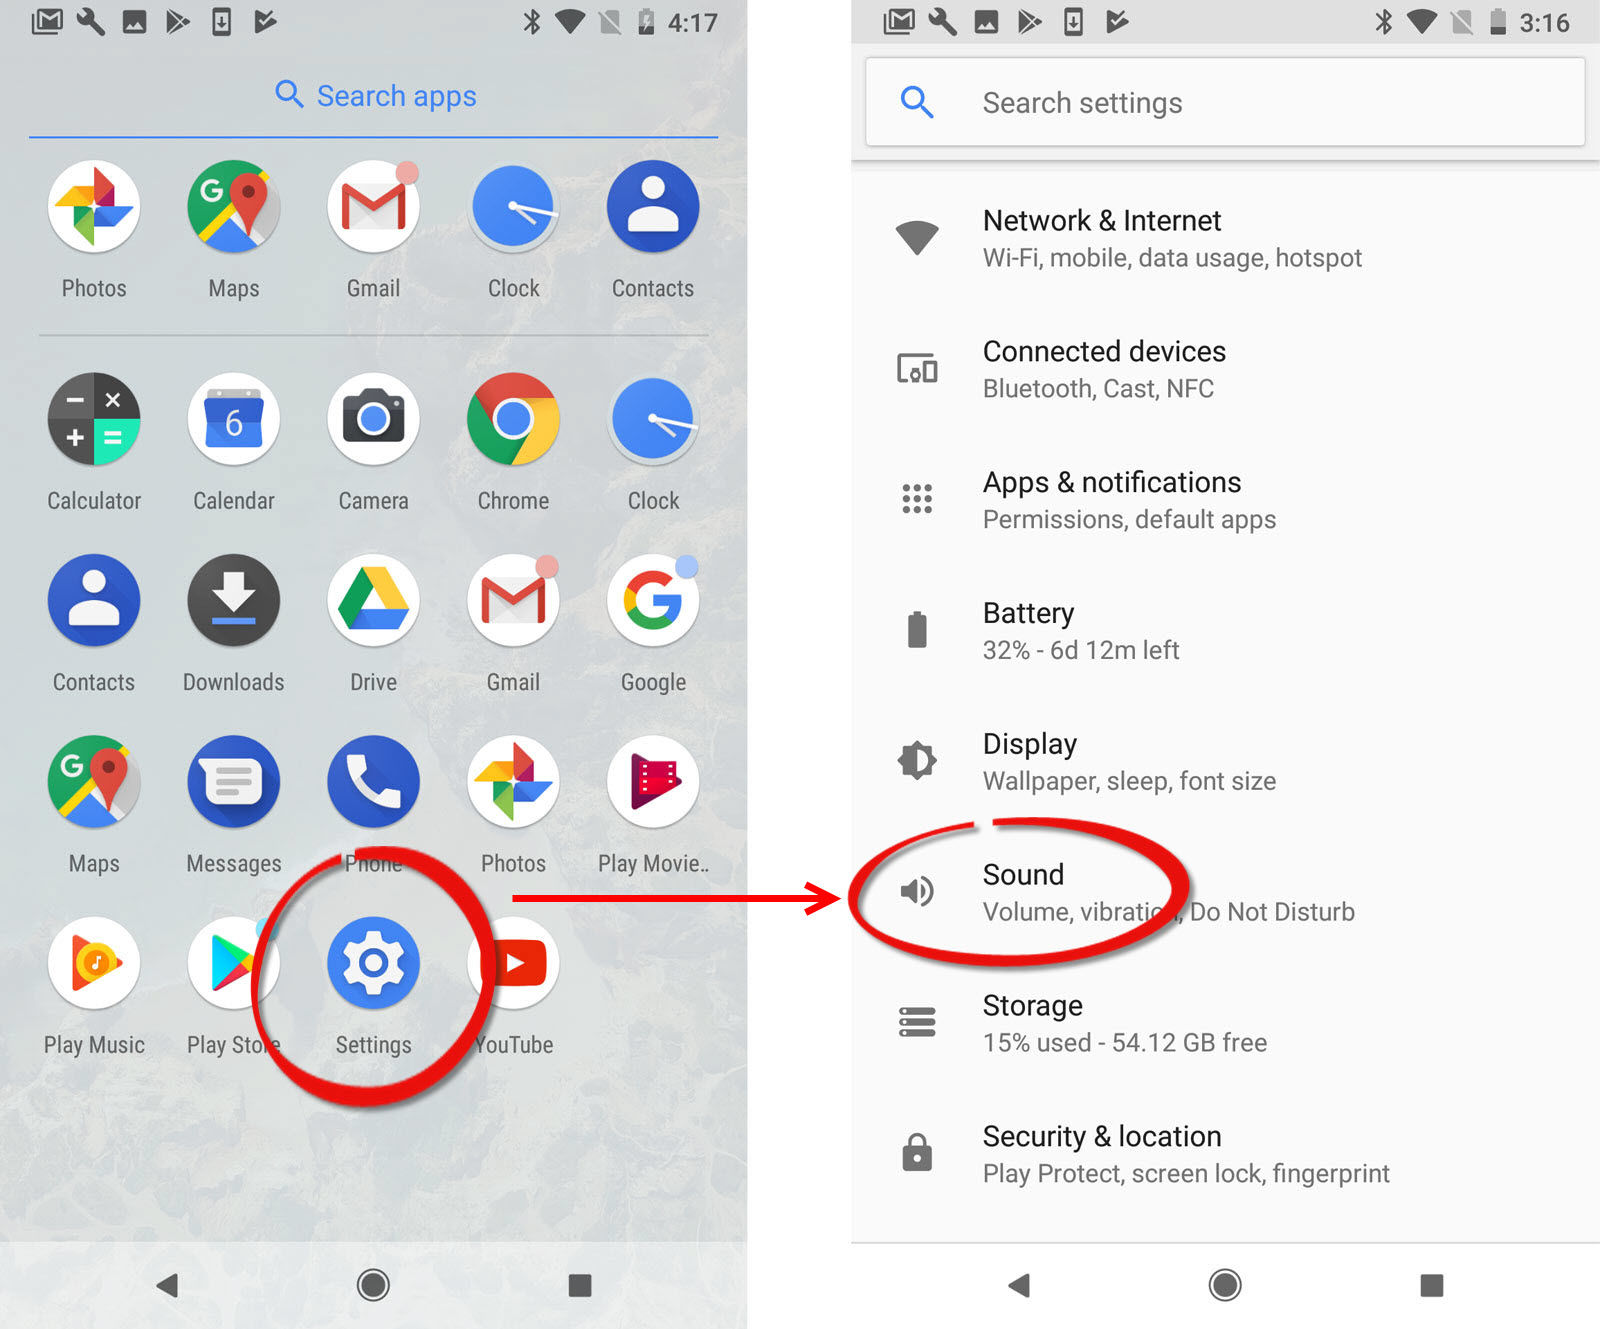
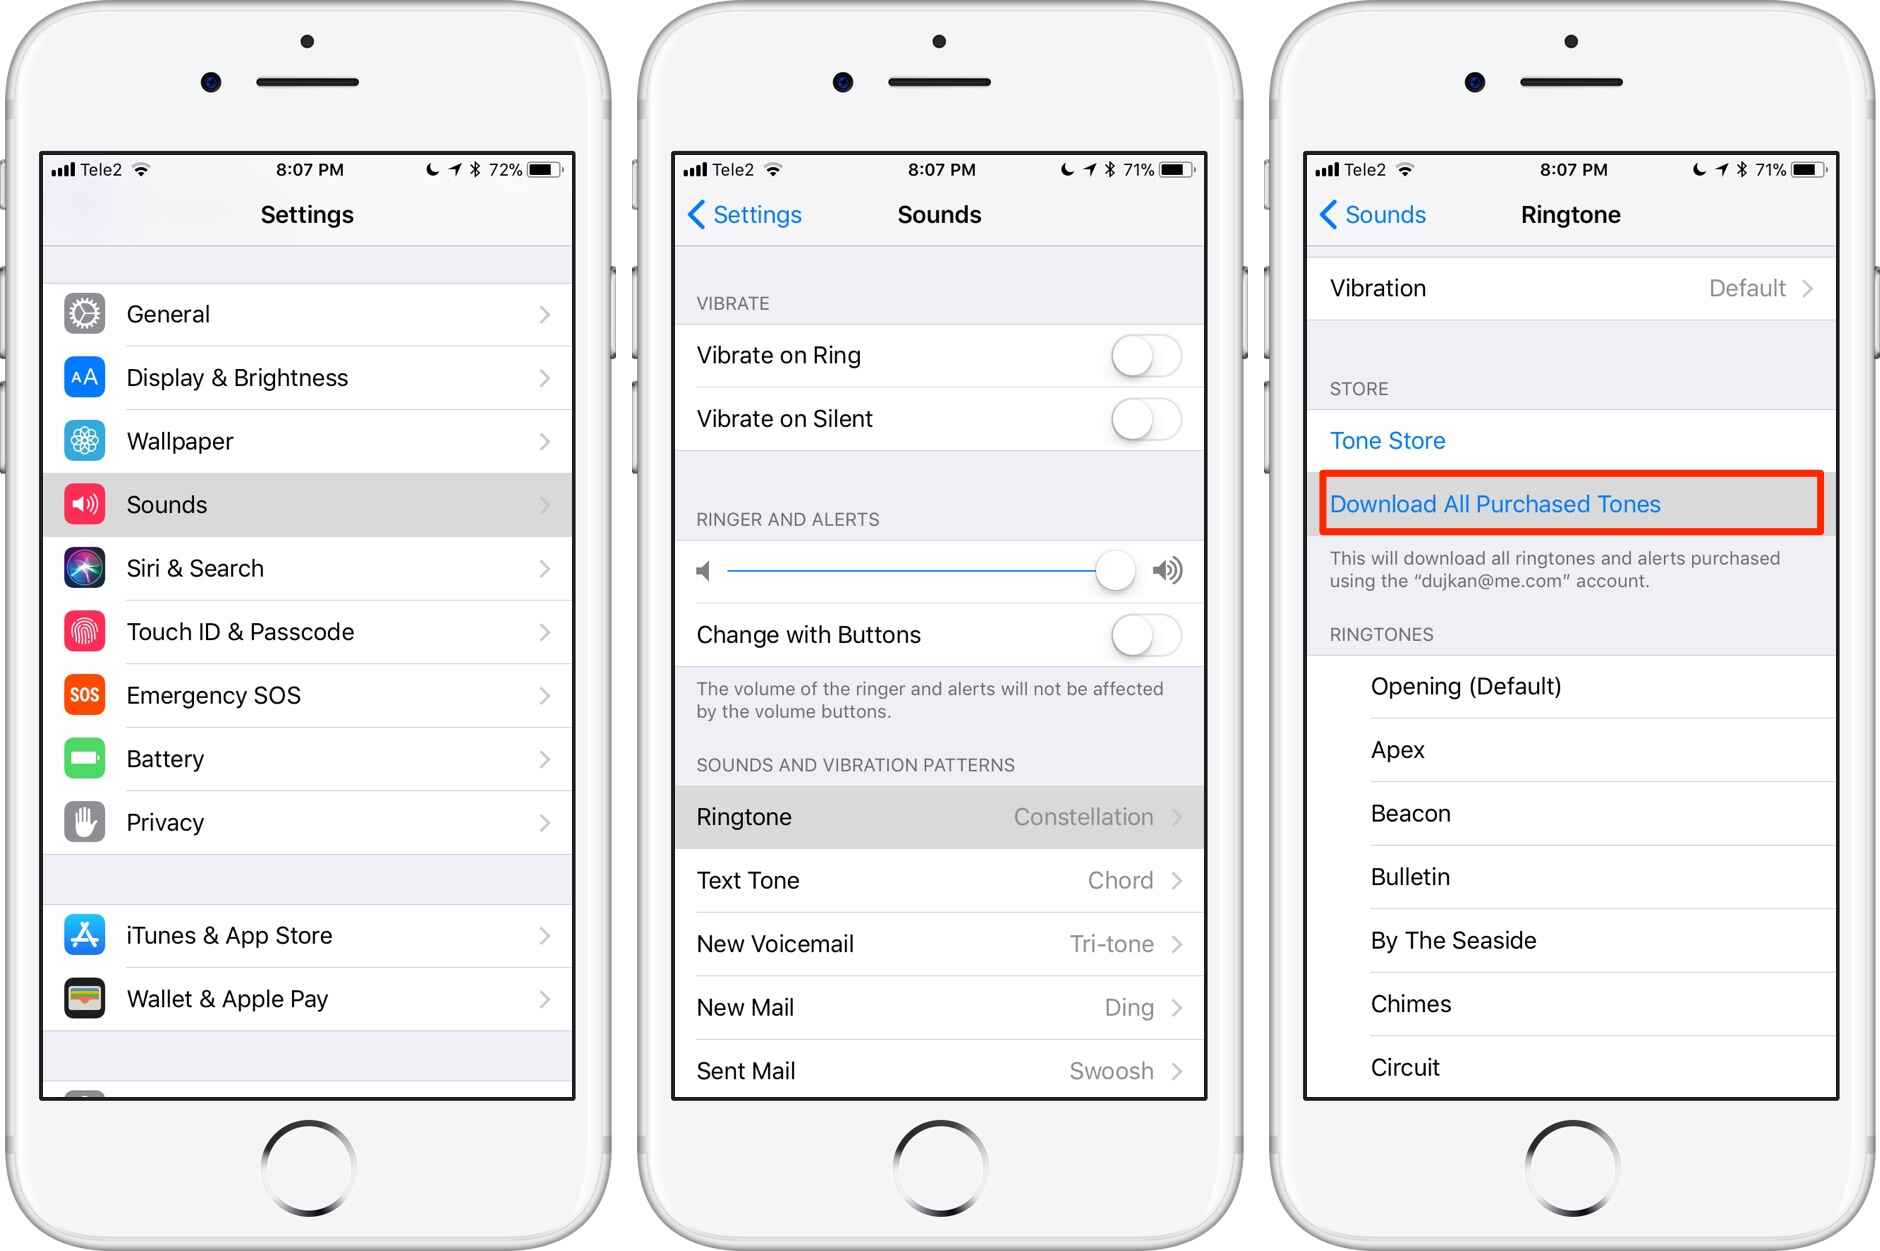
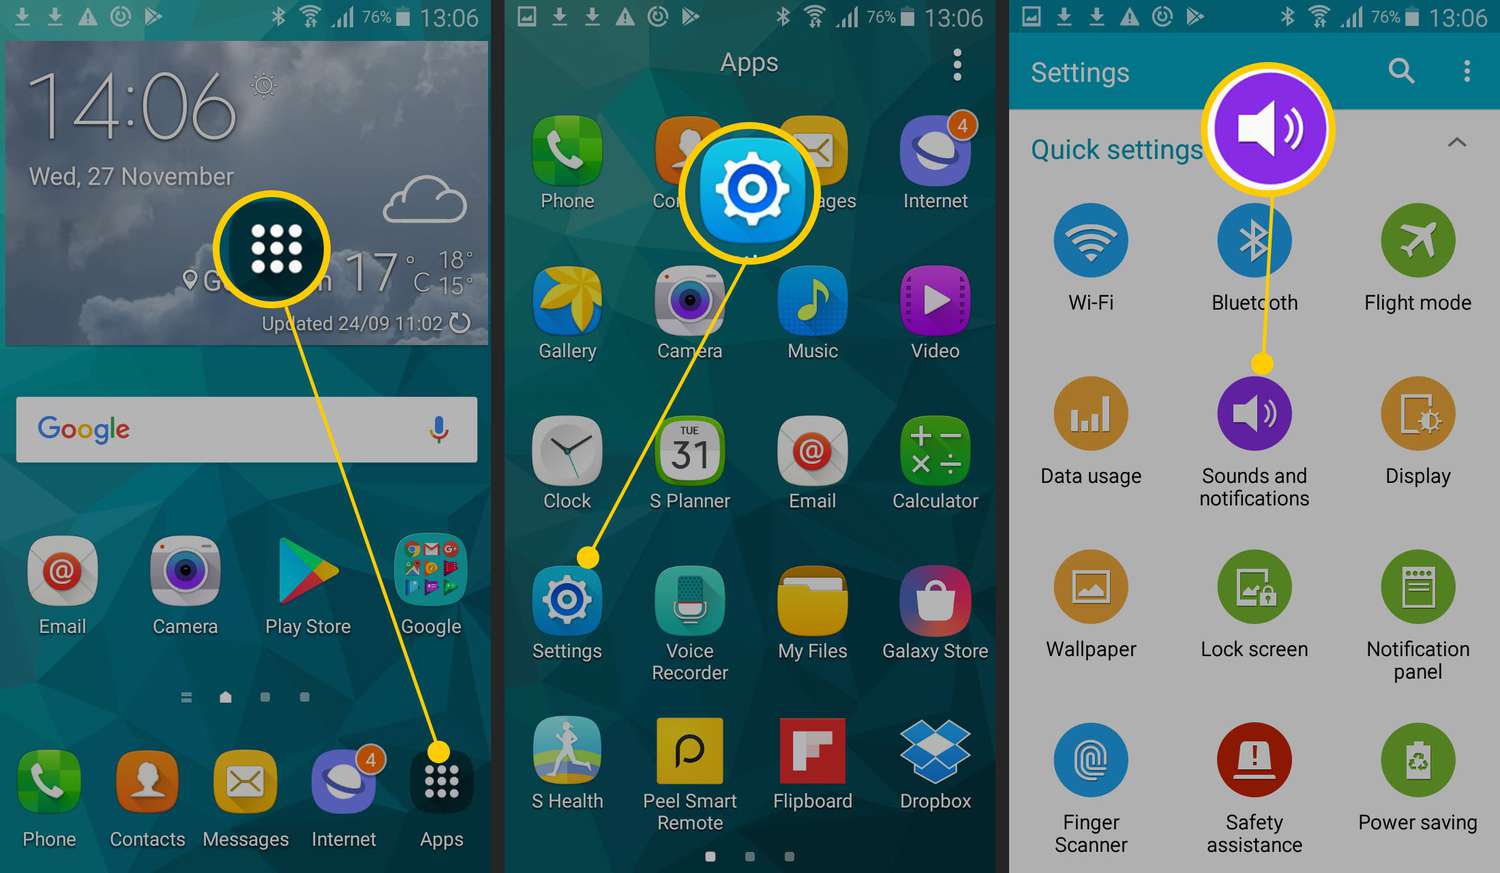
- Open the Settings app: Launch the Settings app on your Android device. It is usually represented by a gear icon and can be found in your app drawer or the quick settings panel.
- Navigate to the Sound settings: In the Settings menu, scroll down or search for the “Sound” or “Sound & Notification” option. Tap on it to access the sound settings for your device.
- Select the Ringtone option: Within the Sound settings, locate the “Ringtone” option. This allows you to set the default ringtone for incoming calls.
- Browse and locate the downloaded ringtone: Tap on the Ringtone option to open the list of available ringtones. Scroll through the list or tap on the “Add” or “Custom” button to browse your device’s storage for the downloaded ringtone file.
- Select the downloaded ringtone: Find the downloaded ringtone file that you want to set as your default ringtone. Tap on it to select it as your new default ringtone.
- Save the changes: Once you have selected the downloaded ringtone, tap on the “Save” or “Apply” button to save the changes. Your Android device will now use the selected ringtone as the default tone for incoming calls.
Congratulations! You have successfully set your downloaded ringtone as the default ringtone on your Android device. Now, whenever you receive a call, you’ll hear your chosen ringtone playing.
Note: The steps to set the default ringtone may slightly vary depending on the Android device manufacturer or the specific version of the operating system. However, the basic process remains the same.
Now that you have customized your default ringtone, you can further personalize your ringtone settings and explore additional customization options, which we’ll cover in the next step.
Step 6: Customize ringtone settings
Once you have set your downloaded ringtone as the default tone on your Android device, you may want to further customize your ringtone settings to suit your preferences. Here are some additional customization options you can explore:
- Assign specific ringtones to contacts: To personalize your experience even more, you can assign specific ringtones to individual contacts. This allows you to identify who is calling without even looking at your phone. To do this, open your Contacts app, select a contact, choose the “Edit” option, and set a custom ringtone for that contact.
- Set different ringtones for different apps: Some Android devices allow you to customize notification sounds for individual apps. This means you can have a unique ringtone for your messaging app, email app, or social media notifications. To do this, go to the app settings and look for the notification or sound settings to customize the ringtone.
- Adjust ringtone volume: If you find that your ringtone is too loud or too quiet, you can adjust the ringtone volume in your device’s sound settings. Some devices even offer the option to set different volume levels for different situations, such as silent mode, vibrate, or normal mode.
- Use a ringtone manager app: If you want more advanced ringtone management features, you can consider installing a ringtone manager app from the Google Play Store. These apps offer additional options for organizing, editing, and creating custom ringtones.
By exploring these customization options, you can truly make your ringtone experience personalized and tailored to your preferences. Have fun experimenting with different settings and creating a unique audio experience on your Android device.
With the completion of these steps, you have successfully downloaded, set, and customized a ringtone on your Android device. Enjoy the new sound whenever your phone rings!
Conclusion
Congratulations! You have successfully learned how to download, set, and customize a ringtone on your Android device. By following the steps outlined in this article, you are now able to add a touch of personalization to your phone and make it truly yours.
We began by finding a reputable ringtone website, ensuring its legitimacy and variety of options available. Then, we moved on to choosing a ringtone category that suits your preferences, whether it’s a popular song, a movie theme, or a funny soundbite. Once you found the perfect ringtone, you learned how to download it to your device and confirm its compatibility.
Afterwards, we guided you through the process of setting the downloaded ringtone as your default tone for incoming calls. This step involved accessing the sound settings on your Android device and selecting the downloaded ringtone from the list of available options. By doing so, you added a personal touch to your device’s ringtone and made it more unique.
Lastly, we explored additional customization options, such as assigning specific ringtones to contacts and adjusting the ringtone volume. These options allow you to further personalize your ringtone experience and make it tailored to your preferences.
Now, whenever your Android device rings, you’ll hear your chosen ringtone, adding a touch of personal flair and making it easier to identify incoming calls. Don’t forget to explore other customization features and ringtone manager apps available in the Google Play Store to take your ringtone experience to the next level.
Thank you for following along with this guide, and we hope you enjoy your new customized ringtone experience on your Android device!