Introduction
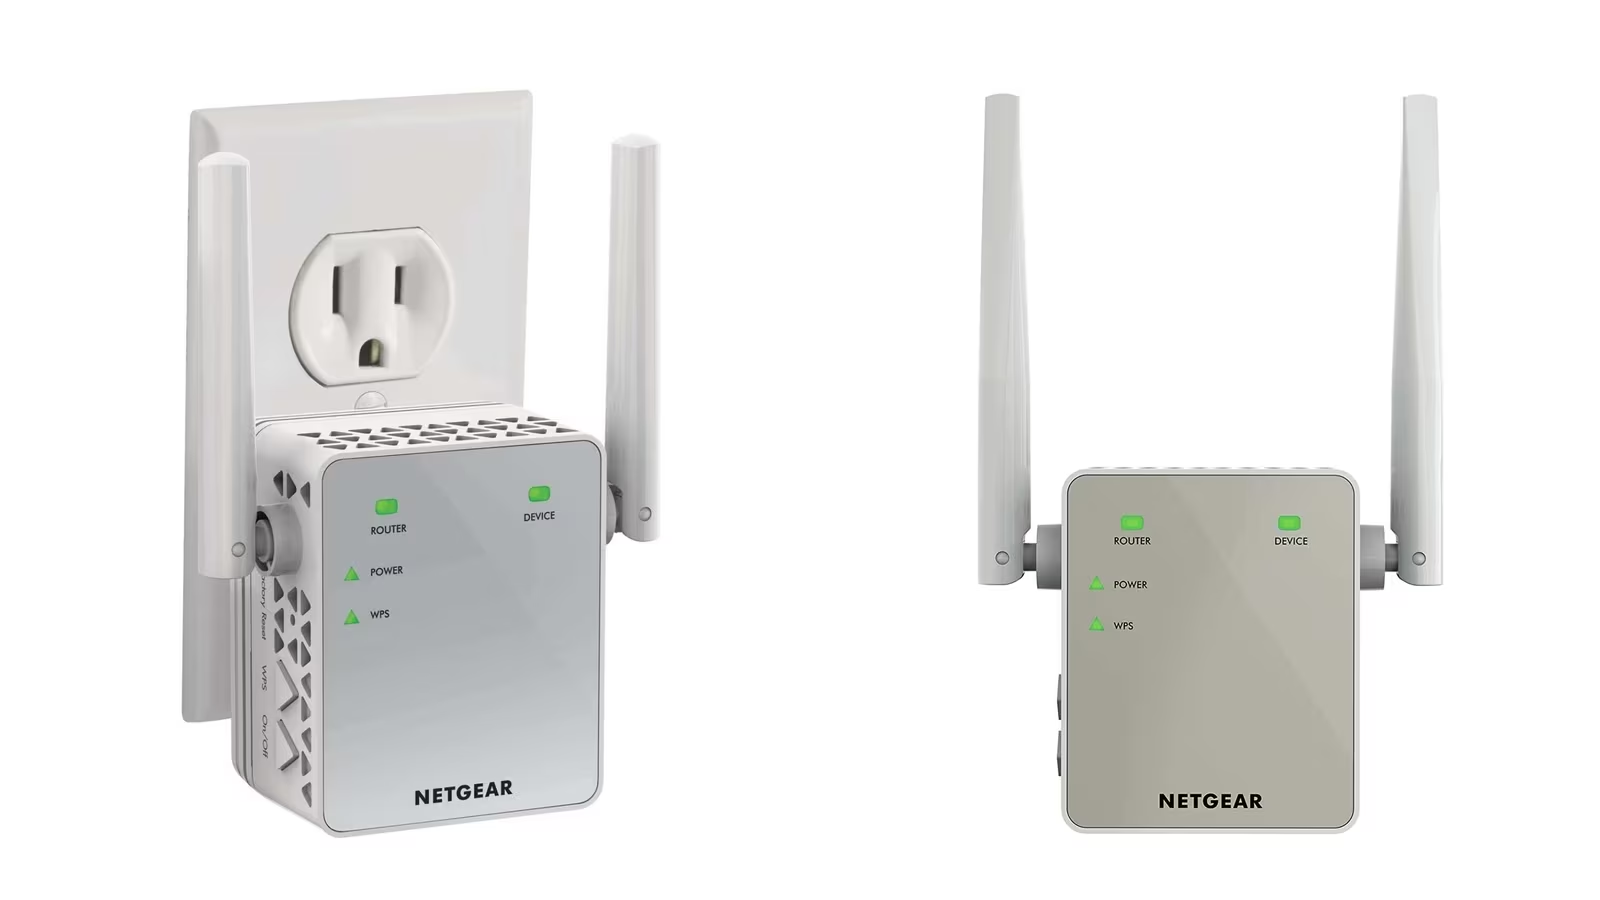
A Wi-Fi extender, also known as a range extender, is a device that boosts the Wi-Fi signal in your home or office, allowing you to enjoy a stronger and more reliable internet connection. However, there may be instances where you need to reset your Wi-Fi extender due to connectivity issues or to remove any unwanted settings. Resetting the Wi-Fi extender will restore the device to its default settings, allowing you to start fresh and resolve any connection problems.
In this article, we will explore the reasons why you might need to reset your Wi-Fi extender and provide step-by-step instructions for different methods of resetting. We will also share some tips on troubleshooting common issues that may arise during the process.
Before we dive into the resetting process, it’s important to note that each Wi-Fi extender may have slightly different reset procedures. It is recommended to consult the user manual or the manufacturer’s website for specific instructions tailored to your device.
Reasons to Reset a Wi-Fi Extender
There are various reasons why you might need to reset your Wi-Fi extender. Here are some common scenarios where a reset can be beneficial:
- Connection Issues: If you are experiencing frequent drops in your Wi-Fi signal or if the extender is not providing the desired coverage, a reset can help resolve these problems.
- Network Configuration Changes: If you have made changes to your network settings, such as a new router, changing network passwords, or modifying other network parameters, resetting the Wi-Fi extender can ensure that it properly syncs with the updated network configuration.
- Forgotten Settings: In case you have forgotten the login credentials or other custom settings of the extender, performing a reset will revert the device back to its default settings, allowing you to start fresh.
- Device Malfunction: If your Wi-Fi extender is experiencing issues or not functioning correctly, a reset can help troubleshoot and potentially resolve the problem.
- Security Concerns: If you suspect unauthorized access to your Wi-Fi extender or if you want to reinforce the security of your network, performing a factory reset can remove any unauthorized settings and restore the extender to its default secure state.
Regardless of the reason, resetting your Wi-Fi extender can often be an effective and straightforward solution to resolve connectivity issues and restore optimal performance.
Steps to Reset a Wi-Fi Extender
Resetting a Wi-Fi extender may vary depending on the model and manufacturer. Here are three common methods you can try:
Method 1: Using the Reset Button
- Locate the reset button on your Wi-Fi extender. It is typically a small, recessed button that may require a pin or paperclip to press.
- Ensure that the extender is powered on. Press and hold the reset button for approximately 10-15 seconds.
- Release the reset button once the indicator lights on the extender start flashing. This indicates that the reset process has begun.
- Wait for the extender to complete the reset process. This may take a few moments.
- Once the reset is complete, the extender will reboot and return to its factory default settings.
Method 2: Using the Web Interface
- Connect your computer or mobile device to the Wi-Fi network of the extender.
- Open a web browser and enter the IP address of the extender. You can find this information in the user manual or on the manufacturer’s website.
- Enter the login credentials for the extender’s web interface. If you haven’t changed them, the default username and password can also be found in the user manual or on the manufacturer’s website.
- Navigate to the settings or administration section of the web interface.
- Look for the option to reset the extender to factory default settings. Click on it and confirm the reset action.
- Wait for the reset process to complete, and then the extender will reboot with the default settings.
Method 3: Factory Reset
If the above methods do not work or if your Wi-Fi extender does not have a reset button or web interface, you can try a factory reset:
- Locate the power button or switch on the extender and turn it off.
- Disconnect the extender from the power source.
- Wait for a few seconds and then reconnect the extender to the power source.
- Power on the extender and wait for it to complete the booting process.
- The extender should now be reset to its factory default settings.
Remember to consult your device’s user manual or the manufacturer’s website for specific instructions tailored to your Wi-Fi extender model.
Method 1: Using the Reset Button
This method involves using the reset button on your Wi-Fi extender to perform a reset. Here are the steps:
- Locate the reset button on your Wi-Fi extender. It is usually located on the back or bottom of the device. It is a small, recessed button that may require a pin or paperclip to press.
- Ensure that the extender is powered on and connected to a power source.
- Using a pin or paperclip, press and hold the reset button for approximately 10-15 seconds. You may feel a slight click when the button is pressed.
- While holding the reset button, you may notice the indicator lights on the extender flashing. This indicates that the reset process has started.
- After 10-15 seconds, release the reset button.
- Wait for the extender to complete the reset process. This may take a few moments.
- Once the reset is complete, the extender will automatically reboot and return to its factory default settings.
It’s important to note that the exact duration for holding the reset button may vary depending on your Wi-Fi extender model. Refer to the user manual or the manufacturer’s website for specific instructions.
Performing a reset using the reset button can be particularly useful when you are unable to access the web interface or if the extender is not responding to other reset methods. It effectively clears all configurations and settings, allowing you to start fresh with the default setup.
Method 2: Using the Web Interface
If your Wi-Fi extender has a web interface, you can reset it by accessing the settings through a web browser. Follow these steps:
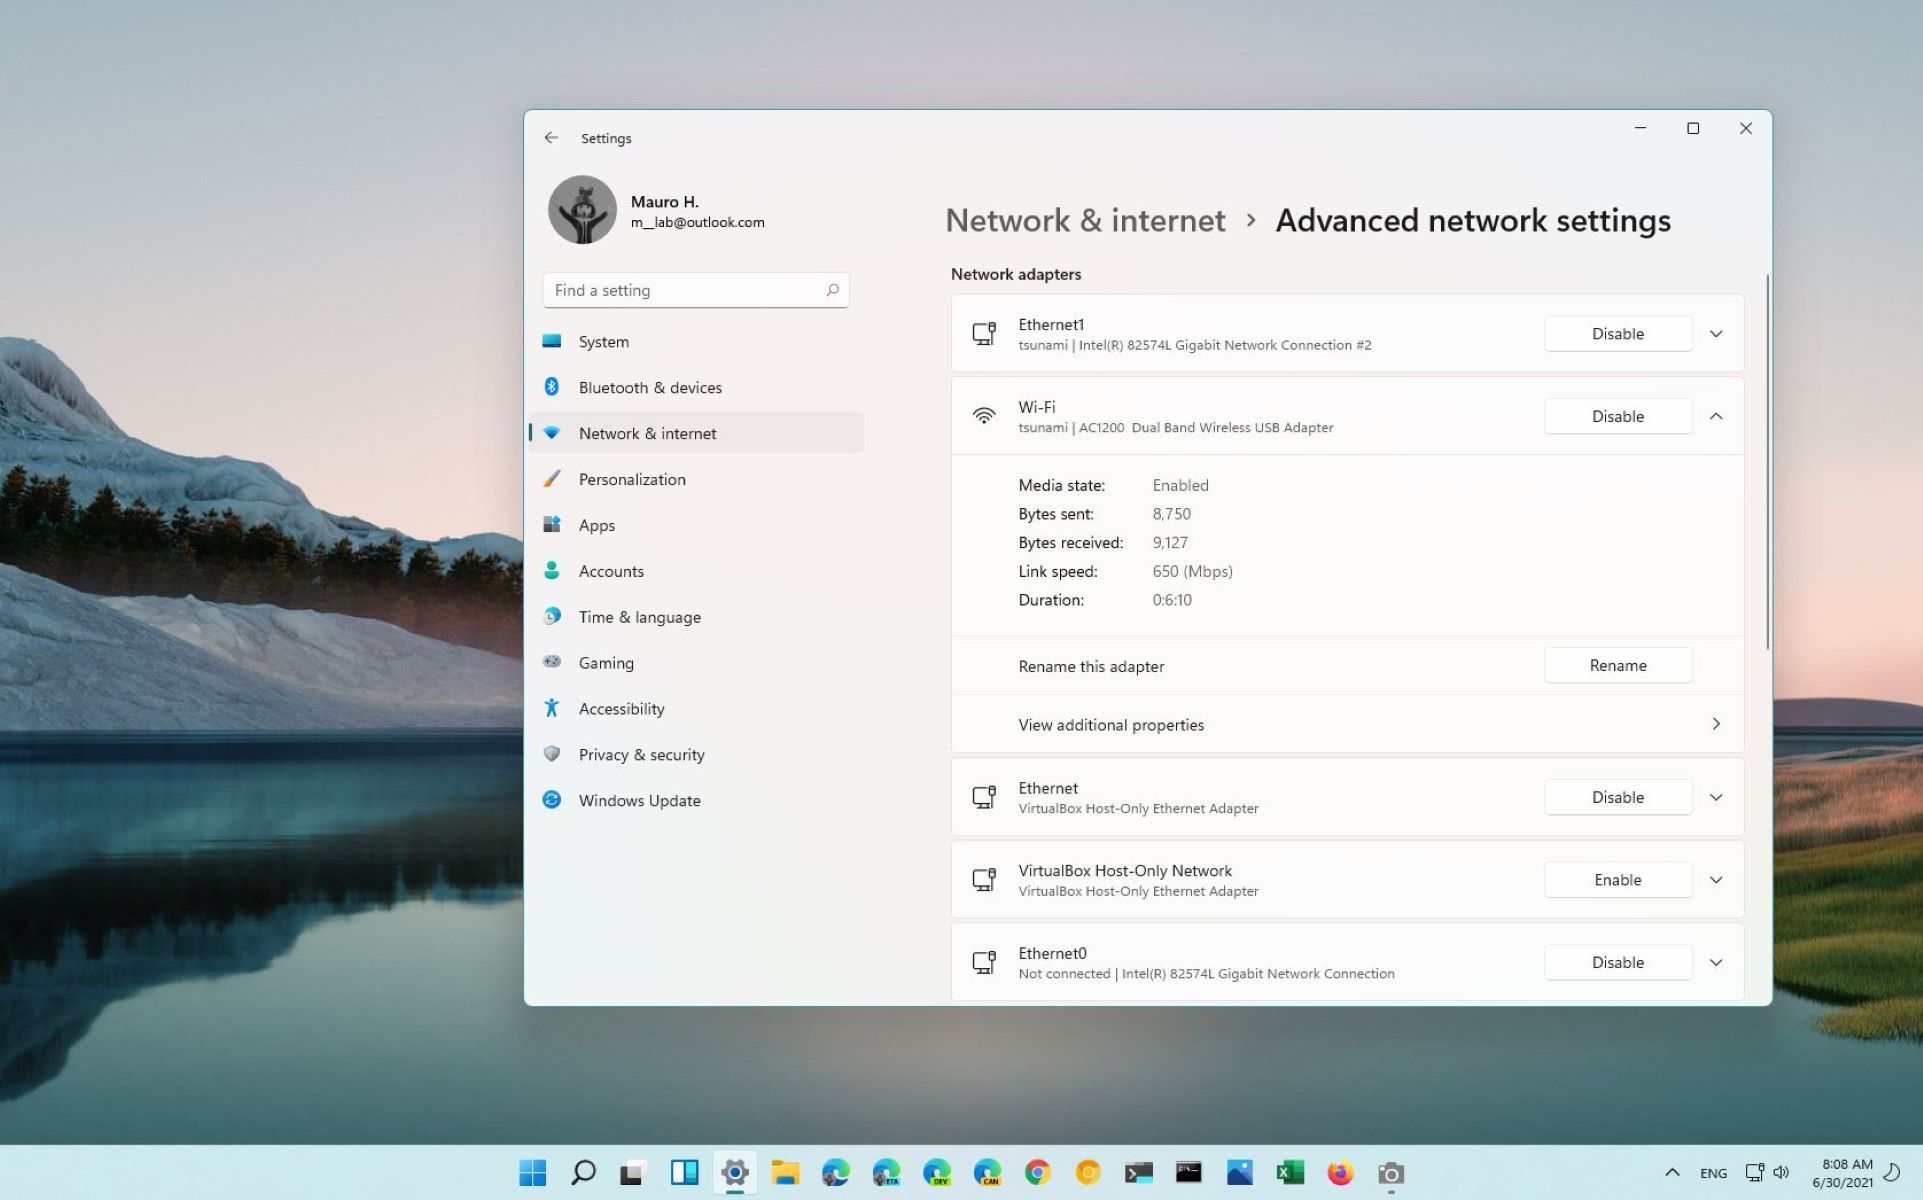
- Connect your computer or mobile device to the Wi-Fi network of the extender. Ensure that it is properly connected and has internet access.
- Open a web browser such as Chrome, Firefox, or Safari on your device.
- In the address bar of the browser, enter the IP address of the extender. The IP address is typically provided in the user manual or can be found on the manufacturer’s website.
- Press Enter or click on the “Go” button to access the web interface of the extender.
- A login page will appear. Enter the username and password to access the settings. If you haven’t changed the login credentials, you can find the default username and password in the user manual or on the manufacturer’s website.
- Once logged in, navigate to the settings or administration section of the web interface.
- Look for the option to reset the extender to factory default settings. This option can typically be found under the System or Maintenance tab.
- Click on the reset option and confirm the action when prompted.
- Wait for the reset process to complete. The extender may restart automatically, or you may need to manually reboot it.
- Once the extender has restarted, it will be restored to its factory default settings.
Remember that the steps provided above are general guidelines. The exact process may differ depending on the extender model and its web interface. Refer to the user manual or the manufacturer’s website for specific instructions tailored to your device.
Using the web interface to reset the Wi-Fi extender is convenient and allows you to customize and manage various settings in addition to performing the reset. It is particularly useful when you have access to the extender’s network and can interact with it through a computer or mobile device.
Method 3: Factory Reset
If your Wi-Fi extender does not have a reset button or a web interface, you can try performing a factory reset. Here are the steps to follow:
- Locate the power button or switch on the Wi-Fi extender.
- Turn off the extender by pressing the power button or flipping the switch to the “Off” position.
- Disconnect the Wi-Fi extender from the power source.
- Wait for a few seconds to ensure that any residual power is drained from the device.
- Reconnect the Wi-Fi extender to the power source.
- Turn on the extender by pressing the power button or flipping the switch to the “On” position.
- Wait for the extender to complete the booting process. This may take a few moments.
- After the extender has finished booting, it will be restored to its factory default settings.
Performing a factory reset essentially sets the extender back to its original out-of-the-box state. It erases all stored configurations and settings, allowing you to start anew.
Keep in mind that the steps provided above offer a general guideline for performing a factory reset. The exact process may vary depending on the Wi-Fi extender model. Consult the user manual or the manufacturer’s website for specific instructions tailored to your device.
Performing a factory reset is a useful option when other methods of resetting are not applicable or if you are experiencing issues with the extender’s functionality. It provides a clean slate to start afresh and troubleshoot any persisting problems.
Tips to Troubleshoot Common Issues
While resetting your Wi-Fi extender can often resolve connectivity issues, there are some additional troubleshooting steps you can try before resorting to a reset. Here are some tips to help troubleshoot common issues:
- Check Placement: Ensure that your Wi-Fi extender is placed in a central location between your router and the areas where you need a stronger Wi-Fi signal. Avoid placing it near obstructions or in areas with interference.
- Verify Power and Connections: Make sure the extender is properly connected to a power source and that the cables are securely plugged in. Check for any loose connections or damaged cables.
- Reboot: Sometimes, a simple reboot can resolve temporary issues. Power off the extender, wait for a few seconds, and then power it back on.
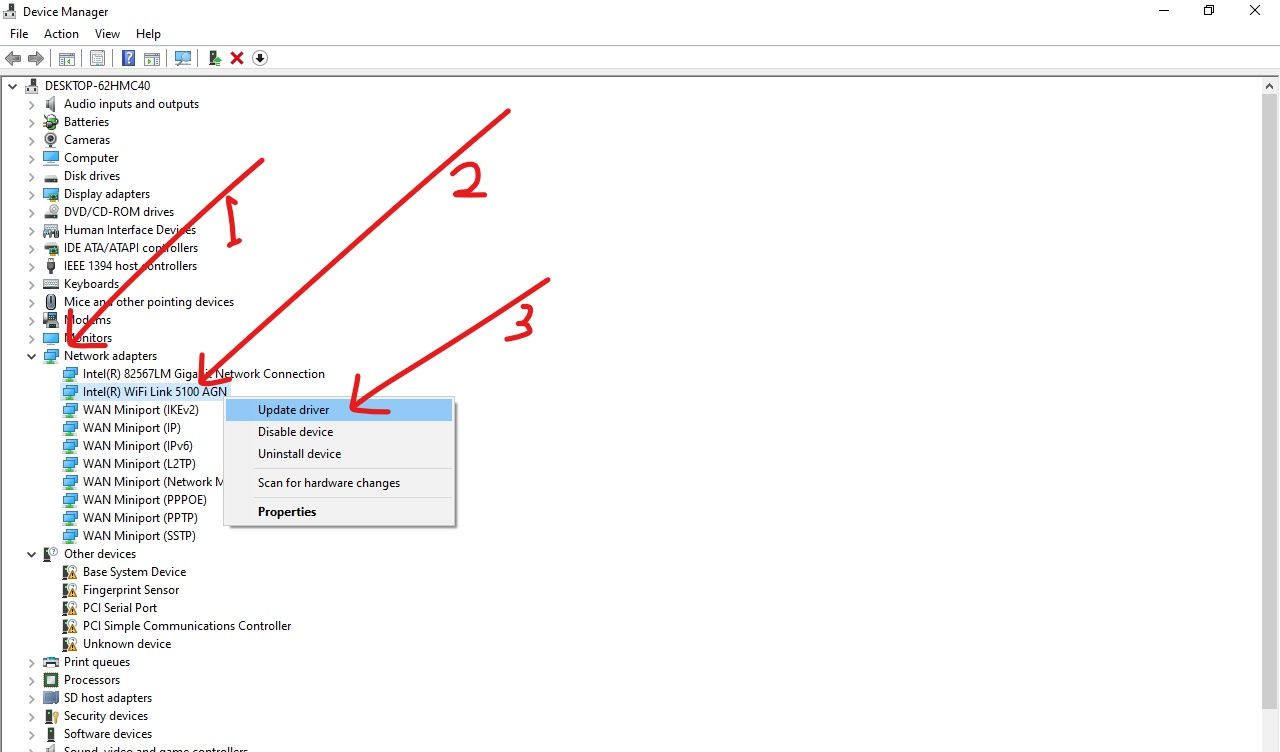
- Update Firmware: Check if there is a firmware update available for your Wi-Fi extender. Firmware updates often include bug fixes and performance improvements.
- Adjust Channel Settings: Interference from other devices can affect Wi-Fi performance. Access the extender’s web interface, navigate to the wireless settings, and try changing the channel to reduce interference.
- Reset Network Settings: If you continue to experience issues, try resetting the network settings on your router and extender. This can help synchronize the settings and resolve any conflicts.
- Ensure Compatibility: Double-check that your Wi-Fi extender is compatible with your router and that they support the same Wi-Fi standards (e.g., 802.11ac, 802.11n).
- Contact Manufacturer Support: If all else fails, reach out to the manufacturer’s support team for further assistance. They can provide specific troubleshooting steps or advice based on your extender model.
Remember to refer to the user manual or manufacturer’s website for detailed instructions and guidance specific to your Wi-Fi extender model.
By following these troubleshooting tips, you can often resolve common connectivity issues and improve the performance of your Wi-Fi extender without needing to perform a reset.
Conclusion
Resetting a Wi-Fi extender can be a helpful solution to resolve connectivity issues, restore default settings, and troubleshoot common problems. In this article, we discussed three different methods to reset a Wi-Fi extender:
- Using the reset button on the extender
- Accessing the web interface of the extender
- Performing a factory reset
Remember to consult the user manual or the manufacturer’s website for specific instructions tailored to your Wi-Fi extender model.
In addition to resetting, we also provided some troubleshooting tips to help you address common issues without the need for a reset. These tips include checking the placement of the extender, verifying power and connections, rebooting the device, updating firmware, adjusting channel settings, resetting network settings, ensuring compatibility, and seeking support from the manufacturer.
By following these steps and tips, you can improve the performance and reliability of your Wi-Fi extender, ensuring a stronger and more reliable internet connection throughout your home or office.
Remember that resetting a Wi-Fi extender will remove any customized settings, so it is important to take note of any special configurations or passwords before performing a reset.
If you encounter persistent issues or if resetting does not resolve the problem, it is recommended to seek assistance from the manufacturer’s support team for further guidance.