Introduction
Welcome to the comprehensive guide on how to set up your TP-Link WiFi extender. If you’re struggling with poor WiFi signal in certain areas of your home or office, a WiFi extender can be an excellent solution to extend the range and coverage of your wireless network. TP-Link is a trusted brand known for its reliable and user-friendly networking devices, making it an ideal choice for your WiFi extender needs.
Setting up a TP-Link WiFi extender may sound daunting, but have no fear! We will walk you through the entire process, step by step. Whether you’re a tech-savvy individual or a beginner, this guide will provide you with the necessary knowledge and instructions to get your extender up and running in no time.
Before we dive into the technical details, it’s important to note that the process may vary slightly depending on the specific model of your TP-Link extender. However, the overall steps and concepts remain the same, so you’ll be able to adapt them to your device.
In the next few sections, we will cover everything from the initial setup to connecting your devices to the extender. We’ll also walk you through the process of configuring the extender’s settings to optimize performance. Additionally, we’ll provide some troubleshooting tips to help you overcome any obstacles you may encounter during the setup process.
So, grab your TP-Link WiFi extender, prepare yourself for an adventure in boosting your WiFi signal, and let’s get started!
Step 1: Getting Started
Before setting up your TP-Link WiFi extender, there are a few things you need to gather to ensure a smooth and successful installation. Follow these steps to get started:
1.1 Check Compatibility: Ensure that your WiFi extender is compatible with your existing router. Consult the user manual or TP-Link’s website to verify compatibility. It’s also recommended to have a stable internet connection during the setup process.
1.2 Find an Ideal Location: Look for an optimal location where you plan to place your extender. It should be within a reasonable distance from your router to maintain a strong signal. Avoid areas with obstructions like thick walls or metallic objects that can interfere with the signal strength.
1.3 Power Supply: Locate a nearby power outlet to connect your extender. Make sure the outlet is easily accessible and not behind any furniture or objects that can block the signal.
1.4 Equipment Check: Ensure you have all the necessary equipment, including your TP-Link WiFi extender, an Ethernet cable (usually provided with the extender), and a device (laptop or smartphone) with wireless capabilities for the setup process.
1.5 Reset the Extender: If you’ve used the extender previously or purchased it used, it’s a good idea to perform a factory reset to start with a clean slate. Locate the reset button on the extender and use a paperclip or a small tool to press and hold it for 10-15 seconds until the lights on the extender flash.
By following these preliminary steps, you’ll have everything in place to begin the physical setup of your TP-Link WiFi extender. In the next section, we’ll guide you through the process of connecting the extender to your existing network. Let’s move on to Step 2!
Step 2: Physical Setup
Now that you’re ready to set up your TP-Link WiFi extender, let’s move on to the physical setup. Follow these steps to ensure a proper physical installation:
2.1 Plug in the Extender: Locate a convenient power outlet near your router and plug in the TP-Link extender. Ensure that the extender powers on and the indicator lights are illuminated.
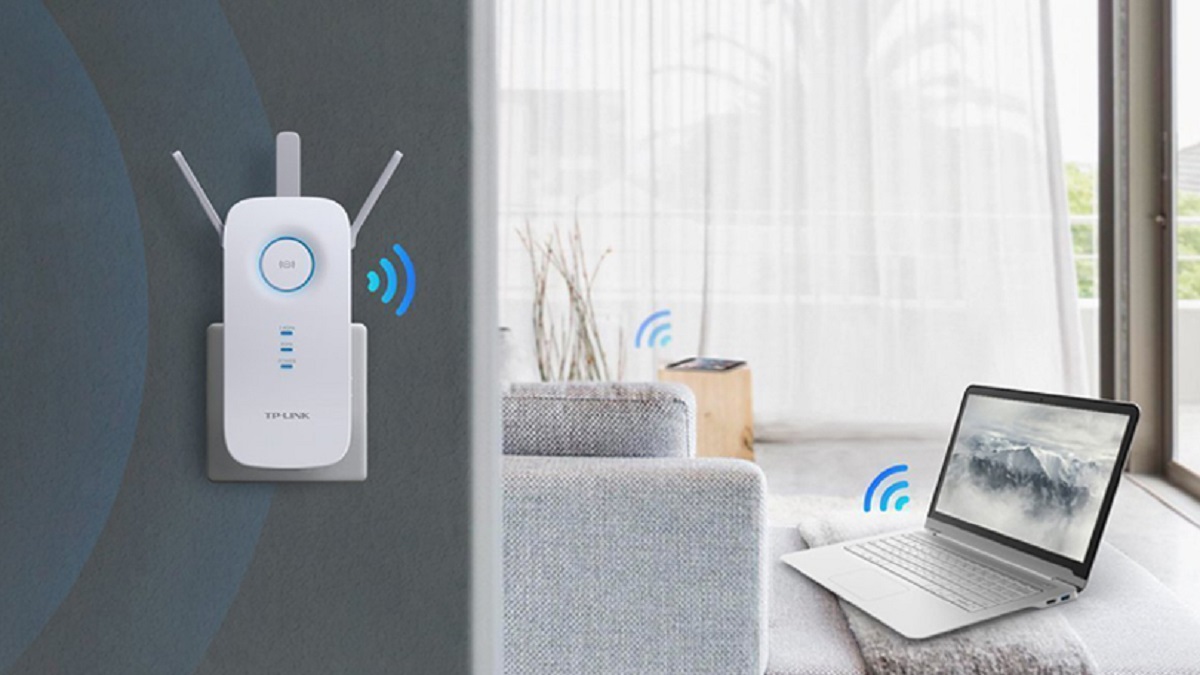
2.2 Positioning: Find a suitable location for the extender, ideally halfway between your router and the area with weak WiFi coverage. This will help optimize the signal distribution. Keep in mind that the extender’s position plays a crucial role in extending the network range effectively.
2.3 Ethernet Connection (Optional): If your extender supports an Ethernet port, you can use an Ethernet cable to connect it directly to your router. This can provide a more stable and reliable connection. However, keep in mind that this step may not be necessary for all models, so refer to the user manual for guidance.
2.4 Verify Connectivity: Confirm that the extender is successfully connected to a power source and check for any LED indicators that indicate proper power and connectivity. These indicators may vary depending on the model but typically include power, WiFi signal strength, and Ethernet connection (if applicable).
2.5 Reset your Router (Optional): If you encounter any connectivity issues, you may consider resetting your router. This step can help ensure a clean connection between your router and extender. Refer to your router’s manual or contact your internet service provider for instructions on how to reset it.
By following these physical setup steps, you’ll have your TP-Link WiFi extender positioned correctly and ready to establish a connection with your existing network. In the next section, we’ll guide you through the process of connecting to the extender. Let’s move on to Step 3!
Step 3: Connecting to the Extender
Now that your TP-Link WiFi extender is properly set up and positioned, it’s time to connect your devices to the extender. Follow these steps to establish a connection:
3.1 Access Network Settings: On your device (laptop, smartphone, etc.), navigate to the wireless network settings. This can usually be found in the settings menu or by clicking on the network icon in the taskbar.
3.2 Scan for Networks: In the network settings, scan for available WiFi networks. You should see your TP-Link extender listed as a separate network. The name of the extender’s network will typically include the brand name, model, or a variation of it.
3.3 Connect to the Extender’s Network: Click or tap on the extender’s network name to connect to it. If prompted, enter the password for the extender’s network. The default password can usually be found on a sticker placed on the extender itself or in the user manual.
3.4 Wait for Connection: Once you’ve entered the password, wait for your device to establish a connection with the extender’s network. This may take a few moments. You can monitor the connection status in the network settings or by clicking on the network icon in the taskbar.
3.5 Verify Connection: Once connected, open a web browser on your device and try visiting a website to ensure that you have internet access through the extender. If the webpage loads successfully, it means you’ve successfully connected to the TP-Link extender.
By following these steps, you should now be connected to your TP-Link WiFi extender, allowing you to enjoy improved WiFi coverage in the previously weak signal areas. In the next section, we’ll guide you through the process of setting up the TP-Link extender to optimize its performance. Let’s move on to Step 4!
Step 4: Setting up the TP-Link Extender
Now that you are connected to your TP-Link WiFi extender, it’s time to configure its settings to ensure optimal performance. Follow these steps to set up the extender:
4.1 Open the Web Browser Configuration Page: Launch a web browser on your connected device and enter the default IP address of the extender in the address bar. The default IP address can be found in the extender’s user manual or on the manufacturer’s website.
4.2 Log in to the Configuration Page: Once the IP address is entered, you will be directed to the login page of the extender’s configuration interface. Enter the default login credentials provided in the user manual. You may be prompted to create a new password for added security.
4.3 Choose a Network Name: In the extender’s configuration interface, you will have the option to change the network name (SSID) of the extender. Consider giving it a unique and identifiable name to distinguish it from your main router’s network. This can help you easily identify and connect to the extender’s network in the future.
4.4 Set a Password: It is important to set a strong password for your extender’s network to prevent unauthorized access. Look for the Wi-Fi security settings section in the configuration interface and choose a password that is both secure and memorable. Make sure to follow any password requirements provided.
4.5 Apply and Save the Settings: After making any necessary changes to the extender’s configuration, click on the “Apply” or “Save” button to save the settings. The extender may reboot after applying the changes, so be patient during this process.
4.6 Reconnect to the Extender’s Network: Once the extender has rebooted, you may need to reconnect your devices to the newly configured extender network. Follow the instructions from Step 3 to connect to the network using the new network name (SSID) and password.
By following these setup steps, you have successfully configured your TP-Link WiFi extender to optimize its performance. In the next section, we’ll cover the final steps to complete the setup process. Let’s move on to Step 5!
Step 5: Finalizing the Setup
Congratulations! You’re almost done with the setup of your TP-Link WiFi extender. Follow these final steps to complete the process:
5.1 Test the WiFi Signal: With the extender fully configured, test the WiFi signal in previously weak coverage areas. Move to different rooms or areas of your home or office that had poor signal strength before setting up the extender. Check if you now have a stronger and more reliable WiFi connection in those locations.
5.2 Adjust Extender Placement: If you encounter any areas with weaker signal coverage, try adjusting the position of the TP-Link extender. Move it closer to the problem areas or experiment with different placement options to improve the signal strength and coverage. Repeat the testing process to ensure the desired performance.
5.3 Update Firmware (If Available): It’s a good practice to check for any available firmware updates for your TP-Link extender. These updates often include bug fixes, performance improvements, and new features. Visit the manufacturer’s website, find your extender’s model, and download any available firmware updates. Follow the instructions provided to update the firmware.
5.4 Additional Configuration (Optional): Depending on your specific needs and the features of your TP-Link extender, you may explore additional configuration options. For example, you can set up guest networks, enable parental controls, or adjust wireless frequency bands. Refer to the user manual or the manufacturer’s website for detailed instructions on advanced configuration settings.
5.5 Enjoy Enhanced WiFi Coverage: Now that your TP-Link WiFi extender is fully set up and optimized, you can enjoy the extended WiFi coverage throughout your home or office. Connect all your devices to the extender’s network, and experience a stable and reliable internet connection, even in areas that previously had weak WiFi signal.
By following these final setup steps, you have successfully completed the installation and configuration of your TP-Link WiFi extender. Congratulations on improving your WiFi coverage! If you encounter any issues or have further questions, refer to the extender’s user manual or reach out to TP-Link’s customer support for assistance.
Troubleshooting Tips
While setting up your TP-Link WiFi extender, you may encounter some common issues. Don’t worry – we’ve got you covered with these troubleshooting tips to help you overcome any challenges:
1. Signal Strength: If you notice weak signal strength from your extender, try adjusting its position. Move it closer to the router or experiment with different locations to find the optimal placement for maximum signal coverage.
2. Device Disconnects: If your devices keep disconnecting from the extender’s network, check if the extender is placed too far from the devices. Also, ensure that the extender’s firmware is up to date, as outdated firmware can cause connectivity issues.
3. Incorrect Password: Double-check that you entered the correct password for the extender’s network. The password is case-sensitive, so ensure that you’ve correctly capitalized any uppercase letters.
4. Slow Internet Speed: If you experience slow internet speed after setting up your extender, verify that your internet service provider is delivering the promised speed. You can also try restarting both your router and extender to refresh the connection.
5. Interference: Nearby electronics and appliances can interfere with the extender’s signal. Keep the extender away from devices like cordless phones, microwave ovens, and Bluetooth devices to minimize interference.
6. Incompatible Router: In some cases, certain router models may not be compatible with TP-Link extenders. Ensure that your router is compatible with the extender model you’re using. Consider updating your router’s firmware or contacting TP-Link support for further assistance.
7. Resetting the Extender: If you continue to experience issues, performing a factory reset on the extender can help resolve any configuration problems. Refer to the user manual for instructions on how to reset your specific TP-Link extender model.
8. Customer Support: If troubleshooting steps do not resolve the issue, reach out to TP-Link’s customer support. They have a skilled team of experts who can provide further assistance and guidance based on your specific situation.
By following these troubleshooting tips, you can overcome common challenges and ensure a smooth and successful setup of your TP-Link WiFi extender. If you encounter any other issues or have additional questions, don’t hesitate to seek support from TP-Link or refer to the user manual for further guidance.
Conclusion
Congratulations on successfully setting up your TP-Link WiFi extender! By following the steps outlined in this guide, you have extended the range and improved the coverage of your wireless network. Now you can enjoy a stronger and more reliable WiFi signal in areas of your home or office that were previously experiencing weak connectivity.
Remember, the key to a successful setup is proper positioning of the extender and configuring its settings to optimize performance. Take the time to find the ideal location for the extender and adjust its placement if needed. Additionally, make sure to update the extender’s firmware to access the latest features and bug fixes.
If you encounter any issues during the setup process or face connectivity challenges, don’t hesitate to refer to the troubleshooting tips provided. These tips can help you identify and resolve common problems that may arise. And if all else fails, reach out to TP-Link’s customer support for further assistance.
We hope this guide has been helpful in guiding you through the setup of your TP-Link WiFi extender. Improved WiFi coverage means a smoother internet experience for all your devices. Enjoy seamless browsing, streaming, gaming, and more, thanks to the enhanced signal provided by your extender.
Thank you for choosing TP-Link for your networking needs. If you have any questions or want to explore more advanced configuration options, be sure to consult the user manual or visit TP-Link’s website for additional resources. Here’s to a stronger WiFi connection and better online experiences!