Introduction
Welcome to our comprehensive guide on how to install a WiFi extender! If you’ve been struggling with weak or unreliable WiFi signals in certain areas of your home or office, a WiFi extender can be a game-changer. By amplifying and extending your existing WiFi network, these devices provide enhanced coverage and improved connectivity throughout your space.
Whether you need to stream HD videos in the backyard, connect multiple devices in the living room, or get a stable connection in the far corners of your office, a WiFi extender can help. It’s a cost-effective solution that eliminates dead zones and ensures a seamless online experience.
In this step-by-step guide, we’ll walk you through the process of installing a WiFi extender from start to finish. From selecting the right extender for your needs to optimizing its performance, we’ll cover it all.
Even if you’re not tech-savvy, don’t worry! We’ll explain everything in simple, easy-to-understand terms, so you can follow along effortlessly. So, let’s get started and empower you to enjoy a strong and reliable WiFi connection wherever you go!
Step 1: Understand the Function of a WiFi Extender
Before diving into the installation process, it’s important to have a clear understanding of what a WiFi extender does and how it can benefit you. A WiFi extender, also known as a WiFi repeater or booster, is a device that amplifies and extends the range of your existing wireless network. Essentially, it acts as a bridge between your router and the devices that are located further away, allowing for a stronger and more reliable WiFi connection.
How does it work? A WiFi extender receives the existing WiFi signal from your router and rebroadcasts it, creating an extended network that covers a larger area. It essentially takes the existing signal and boosts it, filling in the gaps and eliminating dead zones.
One important thing to note is that a WiFi extender doesn’t create a new network or increase the speed of your internet connection. It simply extends the coverage area of your existing network, ensuring that all devices within that extended area have access to a strong and stable WiFi signal.
WiFi extenders are particularly useful in larger homes or office spaces where the WiFi signal from the router may not reach certain areas due to obstacles like walls or distance. By strategically placing WiFi extenders throughout your space, you can ensure that every corner is covered with a strong and reliable WiFi signal.
Now that you understand the function of a WiFi extender, you’re ready to move on to the next step: choosing the right WiFi extender for your needs. It’s important to select a WiFi extender that is compatible with your router and offers the features and specifications necessary to meet your specific requirements. Don’t worry, in the next step, we’ll guide you through the selection process, making it easy for you to find the perfect WiFi extender for your setup.
Step 2: Choose the Right WiFi Extender for your Needs
Now that you understand the function of a WiFi extender, it’s time to choose the right one for your specific requirements. With so many options available on the market, it can be overwhelming to make the right choice. Fortunately, we’re here to help you navigate through the selection process.
The first thing to consider is the compatibility of the WiFi extender with your existing router. Check the specifications of the extender to ensure it is compatible with your router’s WiFi standard (e.g., 802.11ac, 802.11n, etc.) and frequency band (2.4GHz or 5GHz). This ensures that the extender can effectively communicate with your router and provide seamless connectivity.
Next, consider the coverage range of the WiFi extender. Think about the area you want to cover and choose an extender that offers sufficient coverage to eliminate any dead zones. Keep in mind that walls and other physical obstacles can affect signal strength, so it’s better to opt for an extender with a bit more coverage than you think you’ll need.
Additionally, consider the speed and performance features of the WiFi extender. Look for an extender that supports high-speed data transfer rates. If you plan to use the WiFi extender for bandwidth-intensive activities like streaming HD videos or online gaming, ensure that it has features like dual-band support and beamforming technology, which can enhance speed and performance.
Some WiFi extenders also offer additional features such as Ethernet ports or multiple antennas for better signal range and stability. Consider your specific needs and choose an extender that offers the features that are important to you.
Lastly, take into account your budget. WiFi extenders come in a range of price points, so it’s important to determine how much you’re willing to spend. Set a budget and look for options within that range that meet your requirements.
By considering compatibility, coverage range, speed, performance features, and budget, you can narrow down your options and choose the right WiFi extender for your needs. In the next step, we’ll guide you through the process of preparing the equipment you’ll need to install the WiFi extender.
Step 3: Prepare the Required Equipment
Before you can install your WiFi extender, it’s important to gather all the necessary equipment to ensure a smooth setup process. Here’s a list of the essential items you’ll need:
- WiFi Extender: Make sure you have the WiFi extender that you’ve chosen in the previous step. Ensure it’s in good working condition and any firmware updates are installed.
- Wireless Network Information: Take note of your existing wireless network name (SSID) and password. You’ll need this information to configure the WiFi extender later in the process.
- Power Source: Ensure you have access to a nearby electrical outlet where you can plug in the WiFi extender. It’s important to position the extender in a location where it can receive a strong WiFi signal from your router.
- Computer or Mobile Device: You’ll need a laptop, desktop computer, smartphone, or tablet to access the WiFi extender’s configuration settings. Make sure the device you choose is connected to the existing WiFi network.
It’s also a good idea to have a pen and paper handy to jot down any important information during the installation process. This way, you can easily refer back to it if needed.
Once you have gathered all the necessary equipment, ensure that you have a clear understanding of your network information and have a device connected to the existing WiFi network. This will ensure a smooth and uninterrupted installation process.
With all the required equipment at hand, you’re now ready to move on to the next step: finding the optimal location for your WiFi extender. In the following step, we’ll guide you through the process of identifying the best spot to place your extender for optimal coverage and performance.
Step 4: Find the Optimal Location for your WiFi Extender
Finding the optimal location for your WiFi extender is crucial for maximizing its coverage and performance. By strategically placing the extender, you can ensure that the amplified signal reaches all the areas you need, eliminating any dead zones. Here are some tips to help you find the ideal spot:
- Distance from the Router: Position the WiFi extender within a reasonable distance from your main router. Aim for a location where the extender can still receive a strong WiFi signal from the router. This will ensure the best signal quality and performance.
- Avoid Obstacles: Ensure that there are no physical barriers obstructing the signal between the router, extender, and the areas you want to cover. Walls, furniture, and large objects can weaken the signal strength, so try to minimize the number of obstacles between the devices.
- Central Location: Place the WiFi extender in a central location between the router and the area where you need the extended signal. This will help distribute the signal evenly and provide coverage to all areas.
- Height Placement: In general, placing the extender at a higher elevation, such as on a shelf or mounted on a wall, can help improve the signal coverage. Experiment with different heights to find the best position for your specific setup.
- Signal Strength: Check the signal strength of your existing WiFi network using a WiFi analyzer app or the signal bars on your device. This can help you identify areas with weak signal coverage and guide you in placing the extender to improve those areas.
Take some time to experiment with different locations and observe the signal strength in the areas you want to improve. You can test the signal on your device as you move around the space to find the best coverage. Don’t be afraid to try different positions and angles to find the sweet spot for optimal performance.
Once you have found the ideal location for your WiFi extender, you’re ready to move on to the next step: connecting the extender to a power source. In the following step, we’ll guide you through the simple process of powering up your WiFi extender.
Step 5: Connect the WiFi Extender to a Power Source
Now that you have found the optimal location for your WiFi extender, it’s time to connect it to a power source. This simple step will provide the required electricity to power up the extender and allow it to function properly. Follow these steps:
- Locate an electrical outlet: Ensure that you have access to a nearby electrical outlet in close proximity to the chosen location of your WiFi extender.
- Connect the extender: Take the power cable provided with your WiFi extender and plug one end into the corresponding port on the extender. Then, plug the other end into the electrical outlet.
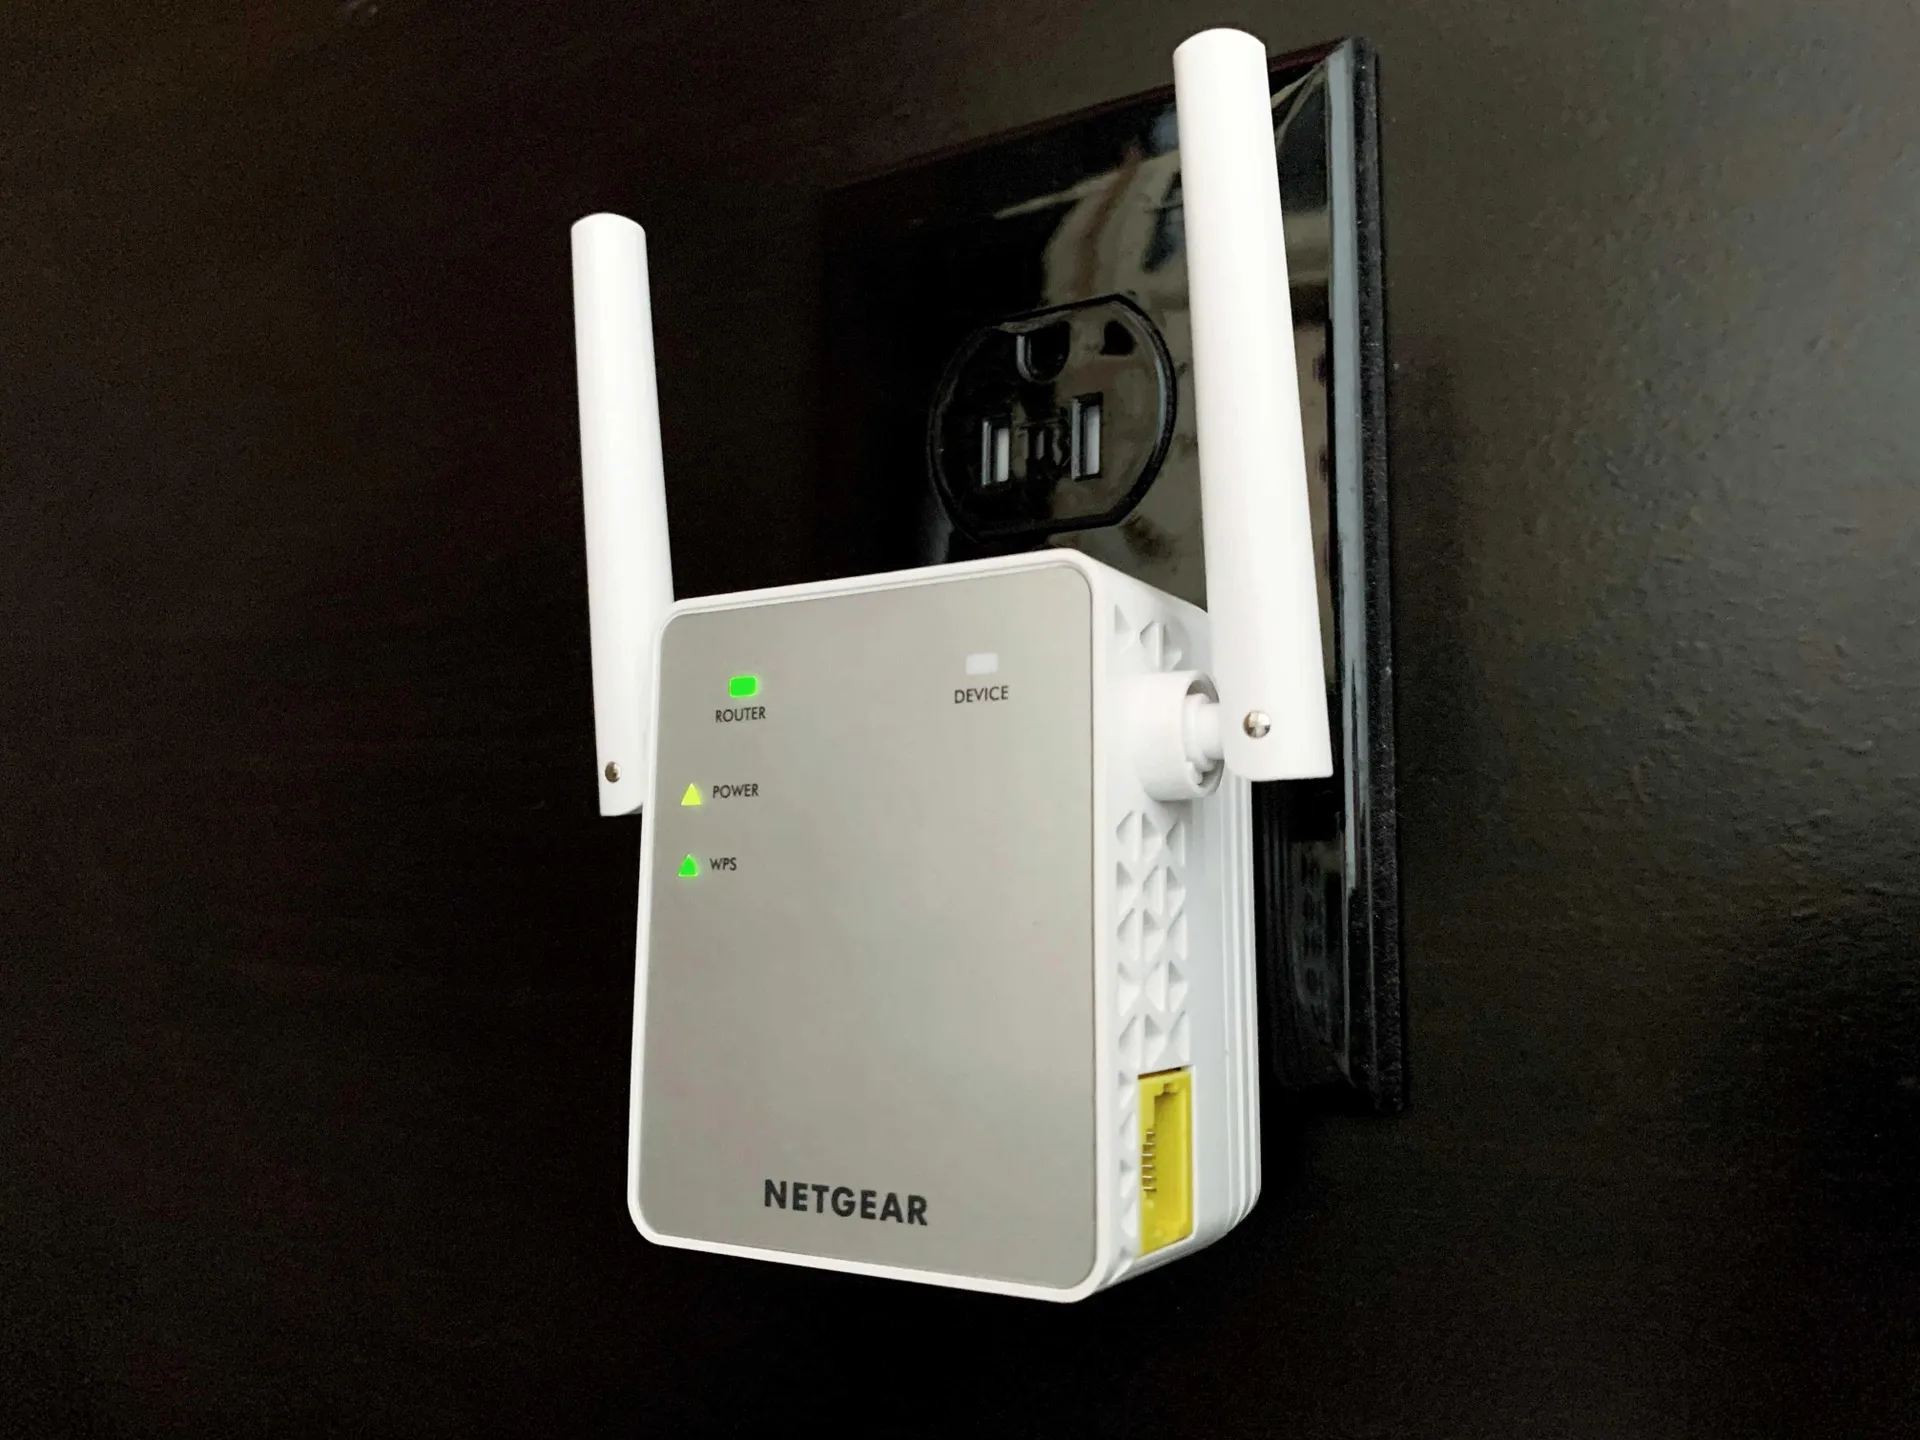
- Power on the extender: Once the extender is connected to the power source, locate the power button or switch on the extender and turn it on. Some extenders may power on automatically once connected to the power source.
- Wait for the power LED: After turning on the extender, wait for the power LED indicator light to illuminate. This indicates that the extender has successfully powered on and is ready for further configuration.
It is important to note that different WiFi extenders may have slightly different power-up procedures. Refer to the user manual provided with your specific WiFi extender for any additional instructions or specific steps that may be required.
With your WiFi extender now connected to a power source, you’re ready to move on to the next step: connecting your computer or mobile device to the extender. In the following step, we’ll guide you through the process of establishing a connection between your WiFi extender and your device of choice.
Step 6: Connect your Computer or Mobile Device to the WiFi Extender
Once you have successfully connected your WiFi extender to a power source, the next step is to establish a connection between your computer or mobile device and the extender. This connection will allow you to access the extender’s configuration settings for further setup. Follow these steps to connect your device to the WiFi extender:
- Locate the WiFi settings: On your computer or mobile device, navigate to the WiFi settings menu. This can usually be found in the system tray on a computer or in the settings app on a mobile device.
- Scan for networks: In the WiFi settings menu, scan for available WiFi networks. Wait for a few moments as the device searches for nearby networks.
- Select the extender’s network: Look for a WiFi network name (SSID) that corresponds to your WiFi extender. This network name will typically contain the extender’s brand or model name. Select this network to connect to it.
- Enter the network password (if prompted): If the extender’s network is secured with a password (which is usually the case), enter the password when prompted. This password is typically provided in the user manual or on a label attached to the extender.
- Wait for the connection: Once you have entered the correct password, wait for your device to establish a connection with the extender’s network. This may take a few moments.
- Confirm the connection: After successfully connecting to the extender’s network, you should see an indication on your device that it is connected. This may be represented by a WiFi icon or signal strength indicator.
Congratulations! You have now established a connection between your computer or mobile device and the WiFi extender. This connection will allow you to access the extender’s configuration settings and further customize it to suit your network’s needs.
In the next step, we’ll guide you through the process of accessing the WiFi extender’s configuration page, where you can make the necessary settings adjustments to ensure optimal network performance.
Step 7: Access the WiFi Extender’s Configuration Page
With your computer or mobile device successfully connected to the WiFi extender, it’s now time to access the extender’s configuration page. This is where you can make the necessary settings adjustments to customize the extender for optimal network performance. Follow these steps to access the configuration page:
- Open a web browser: Launch your preferred web browser on your connected computer or mobile device. Examples include Google Chrome, Mozilla Firefox, Safari, or Microsoft Edge.
- Enter the extender’s IP address: In the address bar of your web browser, enter the IP address of the WiFi extender. This IP address is usually provided in the user manual or on a label attached to the extender. It typically begins with “192.168.” followed by a series of numbers.
- Press Enter or Go: After entering the IP address, press the Enter key on your computer’s keyboard or tap the Go button on your device’s screen. This will initiate a connection to the extender’s configuration page.
- Log in to the configuration page: Once the connection is established, you will be prompted to log in to the extender’s configuration page. Enter the username and password for the extender, which can also be found in the user manual or on a label attached to the extender. Note that the default username and password are often “admin” for most extenders, but this can vary.
- Explore the configuration options: After logging in, you will have access to the WiFi extender’s configuration page. This page allows you to adjust various settings, such as network name (SSID), security settings, channel selection, and more. Take some time to familiarize yourself with the options and make the necessary adjustments based on your network requirements.
Remember to save any changes you make on the configuration page before closing the web browser. This ensures that the changes are applied and take effect in your WiFi extender’s settings.
In the next step, we’ll guide you through the process of configuring the WiFi extender for your network, including connecting it to your existing WiFi network.
Step 8: Configure the WiFi Extender for your Network
After accessing the configuration page of your WiFi extender, it’s time to configure it for your specific network. This step involves connecting the extender to your existing WiFi network and adjusting other settings to optimize its performance. Follow these steps to configure your WiFi extender:
- Locate the network settings: In the extender’s configuration page, locate the network settings section. This may be labeled as “Wireless Settings,” “Network Setup,” or something similar.
- Connect to your existing WiFi network: Within the network settings, find the option to connect your extender to your existing WiFi network. This is usually labeled as “Connect to Existing Network” or “Join Existing Network.” Select this option and enter your existing network’s SSID (network name) and password.
- Choose a WiFi network name (SSID) for the extender: In the configuration page, you’ll also have the option to set a unique SSID for your WiFi extender. This allows you to differentiate it from your main network. Choose a name that is easily identifiable but not confusing.
- Configure security settings: Adjust the security settings for your WiFi extender. Make sure to choose a strong and unique password to protect your extender’s network from unauthorized access.
- Additional settings: Depending on the specific model and features of your WiFi extender, there may be additional settings you can customize. These can include options for adjusting signal strength, channel selection, and more. Take the time to explore these settings and make any necessary adjustments.
- Save and apply the settings: After configuring all the necessary settings, be sure to save and apply the changes you made in the configuration page. Look for a “Save” or “Apply” button and click on it to finalize the setup.
Once you have saved the settings, your WiFi extender will reboot and apply the changes. This may take a few moments, so be patient. After the reboot, your extender will be fully configured and ready to provide an extended and amplified WiFi signal throughout your space.
In the next step, we’ll guide you through the process of testing and optimizing the performance of your WiFi extender to ensure you’re getting the best possible experience.
Step 9: Test and Optimize the WiFi Extender’s Performance
With your WiFi extender fully configured, it’s time to test and optimize its performance to ensure you’re getting the best possible WiFi signal throughout your space. Follow these steps to test and optimize the performance of your WiFi extender:
- Test signal strength: Move around your space with a WiFi-enabled device and check the signal strength in different areas. Make note of any weak spots or areas with poor signal coverage.
- Reposition the extender: If you notice areas with weak signal strength, try repositioning your WiFi extender to improve coverage in those areas. Experiment with different locations and heights to find the optimal spot.
- Adjust antenna positions (if applicable): If your WiFi extender has antennas, try adjusting their positions to optimize signal reception. Experiment with different angles and orientations to find the best configuration.
- Check interference sources: Identify and eliminate any sources of interference that may be affecting your WiFi signal. Common sources of interference include other electronic devices, appliances, or neighboring WiFi networks on the same channel.
- Switch WiFi channels: If you’re experiencing interference from neighboring WiFi networks, switch to a less crowded WiFi channel. Most WiFi extenders have an option to automatically select the optimal channel or allow you to manually choose a channel with less interference.
- Monitor network performance: Keep an eye on your network’s performance by conducting regular speed tests and checking for any dropouts or interruptions. If you experience any issues, revisit the configuration page of your WiFi extender to make any necessary adjustments.
- Update firmware (if available): Check the manufacturer’s website for firmware updates for your WiFi extender. Updating the firmware can provide bug fixes, security enhancements, and performance improvements for your device.
By testing and optimizing the performance of your WiFi extender, you can ensure that you’re enjoying a strong and reliable WiFi signal throughout your space. Remember, network environments can change over time, so it’s a good idea to periodically revisit these steps to maintain optimal performance.
In the final step, we’ll guide you through common troubleshooting techniques to help you address any issues you may encounter with your WiFi extender.
Step 10: Troubleshoot Common Issues
While WiFi extenders are designed to enhance your wireless network coverage, you may encounter occasional issues that require troubleshooting. Here are some common issues you might face with your WiFi extender and how to troubleshoot them:
- No Signal or Weak Signal: If you’re not receiving a signal or experiencing a weak signal from your WiFi extender, try repositioning it closer to your router and away from any potential interference. Also, ensure that the extender is correctly plugged into a power source.
- Authentication Failure: If you’re unable to connect to your WiFi extender’s network or experiencing authentication failures, double-check the network name (SSID) and password you entered. Ensure they match the information configured in your extender’s settings.
- Intermittent Connection: If your WiFi extender intermittently disconnects or has a spotty connection, try rebooting both your router and extender. Updating the firmware of your extender may also address any compatibility issues.
- Slow Speeds: If you’re experiencing slow speeds with your WiFi extender, check to see if there are any firmware updates available for your device. Additionally, ensure that your extender is positioned in an optimal location to receive a strong signal from the router.
- Device Compatibility Issues: If you’re having trouble connecting specific devices to your WiFi extender, ensure that those devices are within the supported WiFi standards of your extender. Some older devices may only support older WiFi standards, which may not be compatible with your extender.
- Router Compatibility Issues: In some cases, certain routers may not be fully compatible with WiFi extenders. If you’re experiencing persistent issues, you may need to consider upgrading your router or contacting technical support for further assistance.
If you’ve tried troubleshooting these common issues and are still unable to resolve the problem, it may be helpful to consult the user manual of your WiFi extender or reach out to the manufacturer’s customer support for specific guidance.
By troubleshooting common issues, you can ensure that your WiFi extender is operating optimally and providing the extended coverage and improved connectivity you desire.
Congratulations! You have successfully installed and configured your WiFi extender, and now you can enjoy a strong and reliable WiFi signal throughout your home or office. Remember to periodically revisit the configuration page of your extender to make any necessary adjustments as your network needs change.
Conclusion
Congratulations on successfully installing and configuring your WiFi extender! By following the step-by-step guide, you have empowered yourself to enhance the coverage and reliability of your wireless network. Now, you can enjoy a strong and consistent WiFi signal throughout your home or office.
We began by understanding the function of a WiFi extender, which acts as a bridge between your router and devices, amplifying and extending the existing WiFi signal. We then discussed the importance of choosing the right WiFi extender for your needs, considering compatibility, coverage range, speed, performance features, and budget.
Preparing the required equipment was the next step, ensuring you had everything on hand to facilitate a smooth installation process. After finding the optimal location for the WiFi extender, you connected it to a power source and established a connection between your computer or mobile device and the extender.
Accessing the WiFi extender’s configuration page allowed you to customize it to suit your network’s requirements, including connecting to your existing WiFi network and adjusting settings such as the network name, security settings, and channel selection. Then, you tested and optimized the extender’s performance by evaluating signal strength, repositioning the extender, addressing interference sources, and monitoring network performance.
In the final step, we discussed common troubleshooting techniques to address issues like no signal, weak signal, authentication failures, intermittent connections, slow speeds, and device or router compatibility problems.
Remember, while WiFi extenders can greatly improve your network coverage, it’s essential to periodically revisit the configuration settings and troubleshoot any issues that may arise to maintain optimal performance.
Thank you for following our comprehensive guide on how to install a WiFi extender. We hope this information has been valuable to you, and that you now enjoy a strong and reliable WiFi connection throughout your space.