Introduction
Having a stable and reliable internet connection is crucial, especially when using a laptop for work, streaming, or online gaming. However, it can be frustrating when your laptop keeps disconnecting from WiFi. This issue can disrupt your online activities and cause unnecessary delays. Understanding the common causes behind this problem and knowing how to troubleshoot it can help you maintain a seamless internet connection.
There could be several reasons why your laptop keeps disconnecting from WiFi. It could be due to a weak WiFi signal, outdated WiFi drivers, power-saving settings, network conflicts, interference, or even an issue with your router or modem. By identifying the underlying cause, you can effectively resolve the problem.
In this article, we will explore some of the common causes of a laptop disconnecting from WiFi and provide troubleshooting steps to help you fix the issue. Whether you are experiencing intermittent or frequent disconnects, following these steps will hopefully restore your connection and improve your overall internet experience.
Common causes of laptop disconnecting from WiFi
There are various reasons why your laptop may keep disconnecting from WiFi. Understanding these common causes can help you identify the underlying issue and take appropriate steps to resolve it. Here are some possible reasons:
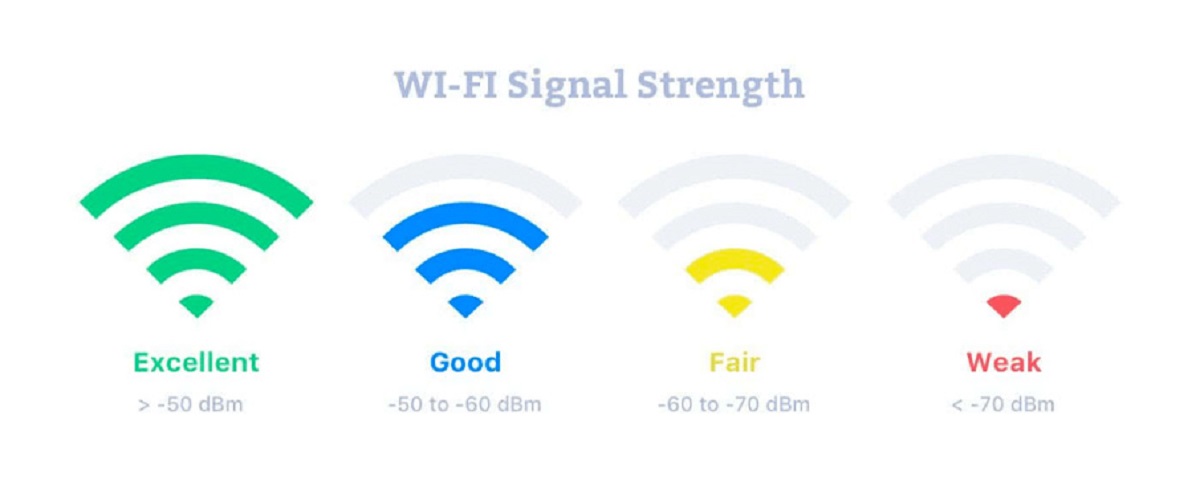
- Weak WiFi signal: If your laptop is located far away from the WiFi router or there are obstructions like walls or furniture, it can weaken the WiFi signal, leading to frequent disconnections.
- Outdated WiFi drivers: Outdated or incompatible WiFi drivers can cause connectivity issues. It is essential to regularly update your WiFi drivers to ensure compatibility with the latest software updates and maintain a stable connection.
- Power-saving mode: Some laptops have power-saving settings that can turn off or reduce WiFi connectivity to conserve battery life. This feature may cause your laptop to disconnect from WiFi when idle for extended periods.
- Network conflicts: Other devices on your network, such as smartphones, tablets, or even neighboring WiFi networks, can cause interference and disrupt the connection of your laptop.
- Wireless interference: Household appliances, electronic devices, and even walls can interfere with WiFi signals, leading to intermittent disconnections. Microwave ovens, cordless phones, and Bluetooth devices are known to cause interference.
- Router or modem issues: Sometimes, the problem may lie with your WiFi router or modem. Factors like outdated firmware, overheating, or hardware malfunctions can lead to dropped connections.
Identifying the specific cause of your laptop disconnecting from WiFi is crucial for troubleshooting. Once you understand the root cause, you can then take appropriate steps to address the issue and restore a stable internet connection.
Troubleshooting steps
If your laptop keeps disconnecting from WiFi, there are several troubleshooting steps you can take to resolve the issue. By following these steps, you can identify and fix the underlying problem. Here are some effective troubleshooting steps to consider:
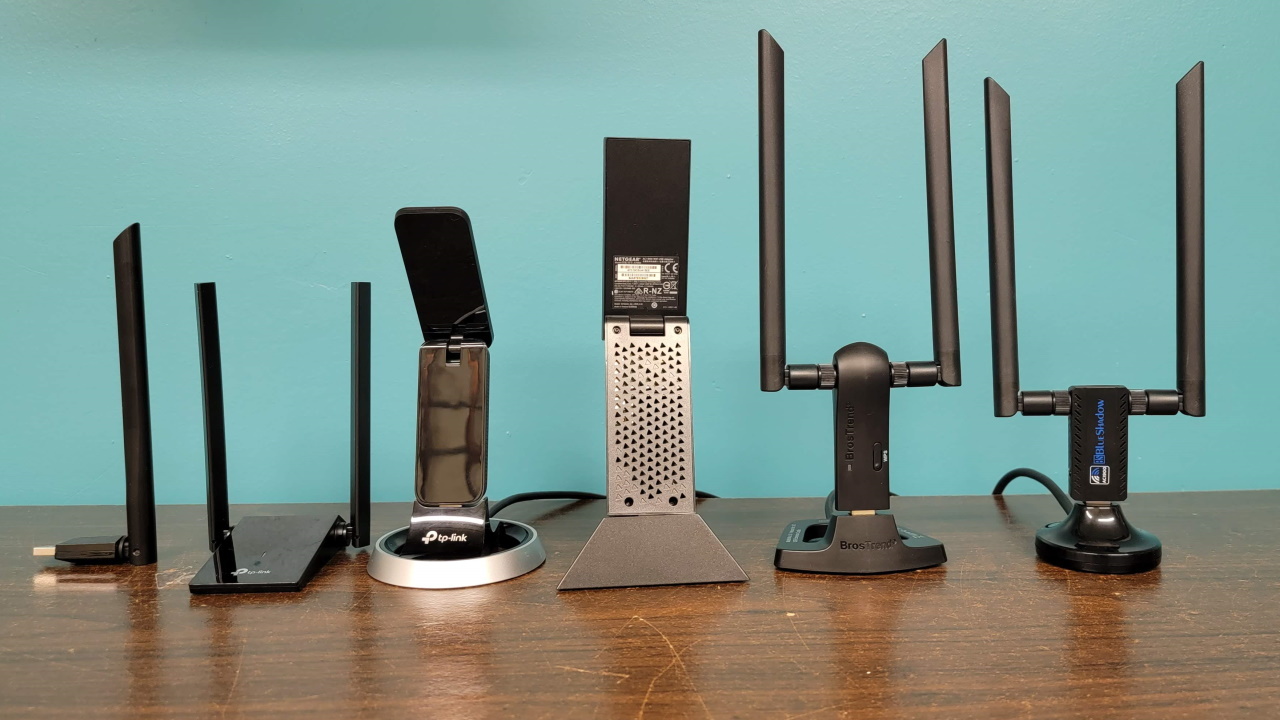
- Check WiFi signal strength: Ensure that your laptop is within range of the WiFi router. If the signal strength is weak, try moving closer to the router or using a WiFi range extender to boost the signal.
- Update WiFi drivers: Visit the manufacturer’s website or use automatic driver update software to ensure your WiFi drivers are up to date. Outdated drivers can often cause connectivity problems.
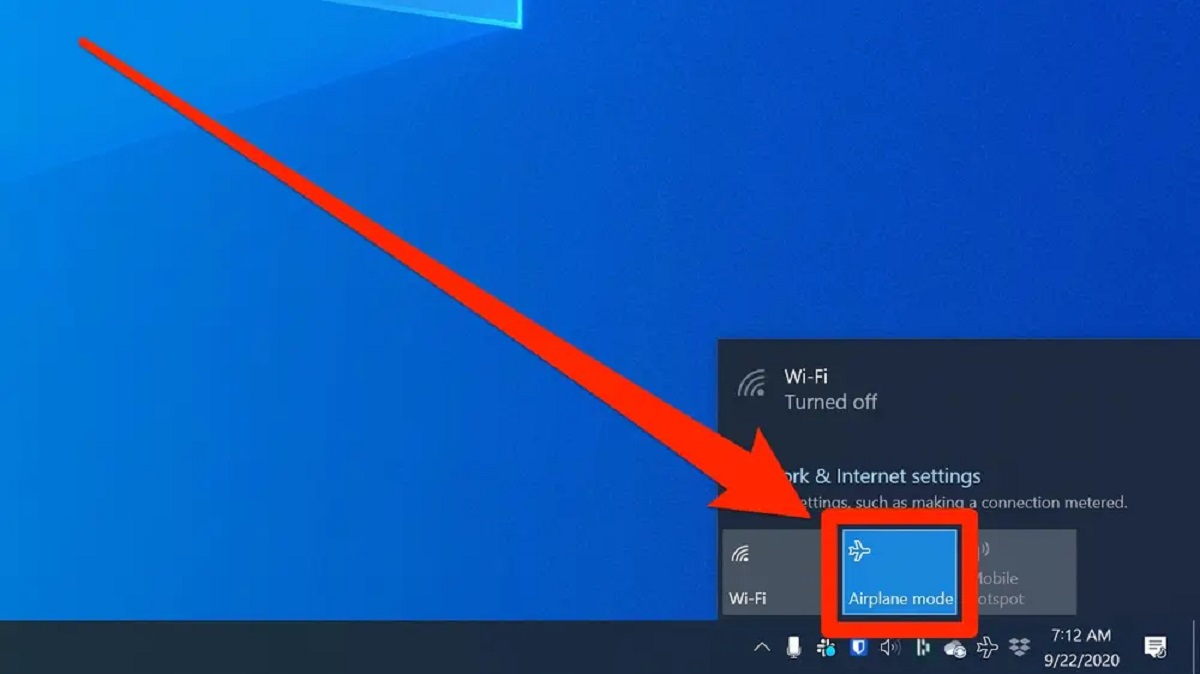
- Disable power saving mode: Adjust your power-saving settings to prevent the WiFi from automatically turning off or reducing its power. This can help maintain a stable connection, especially during periods of inactivity.
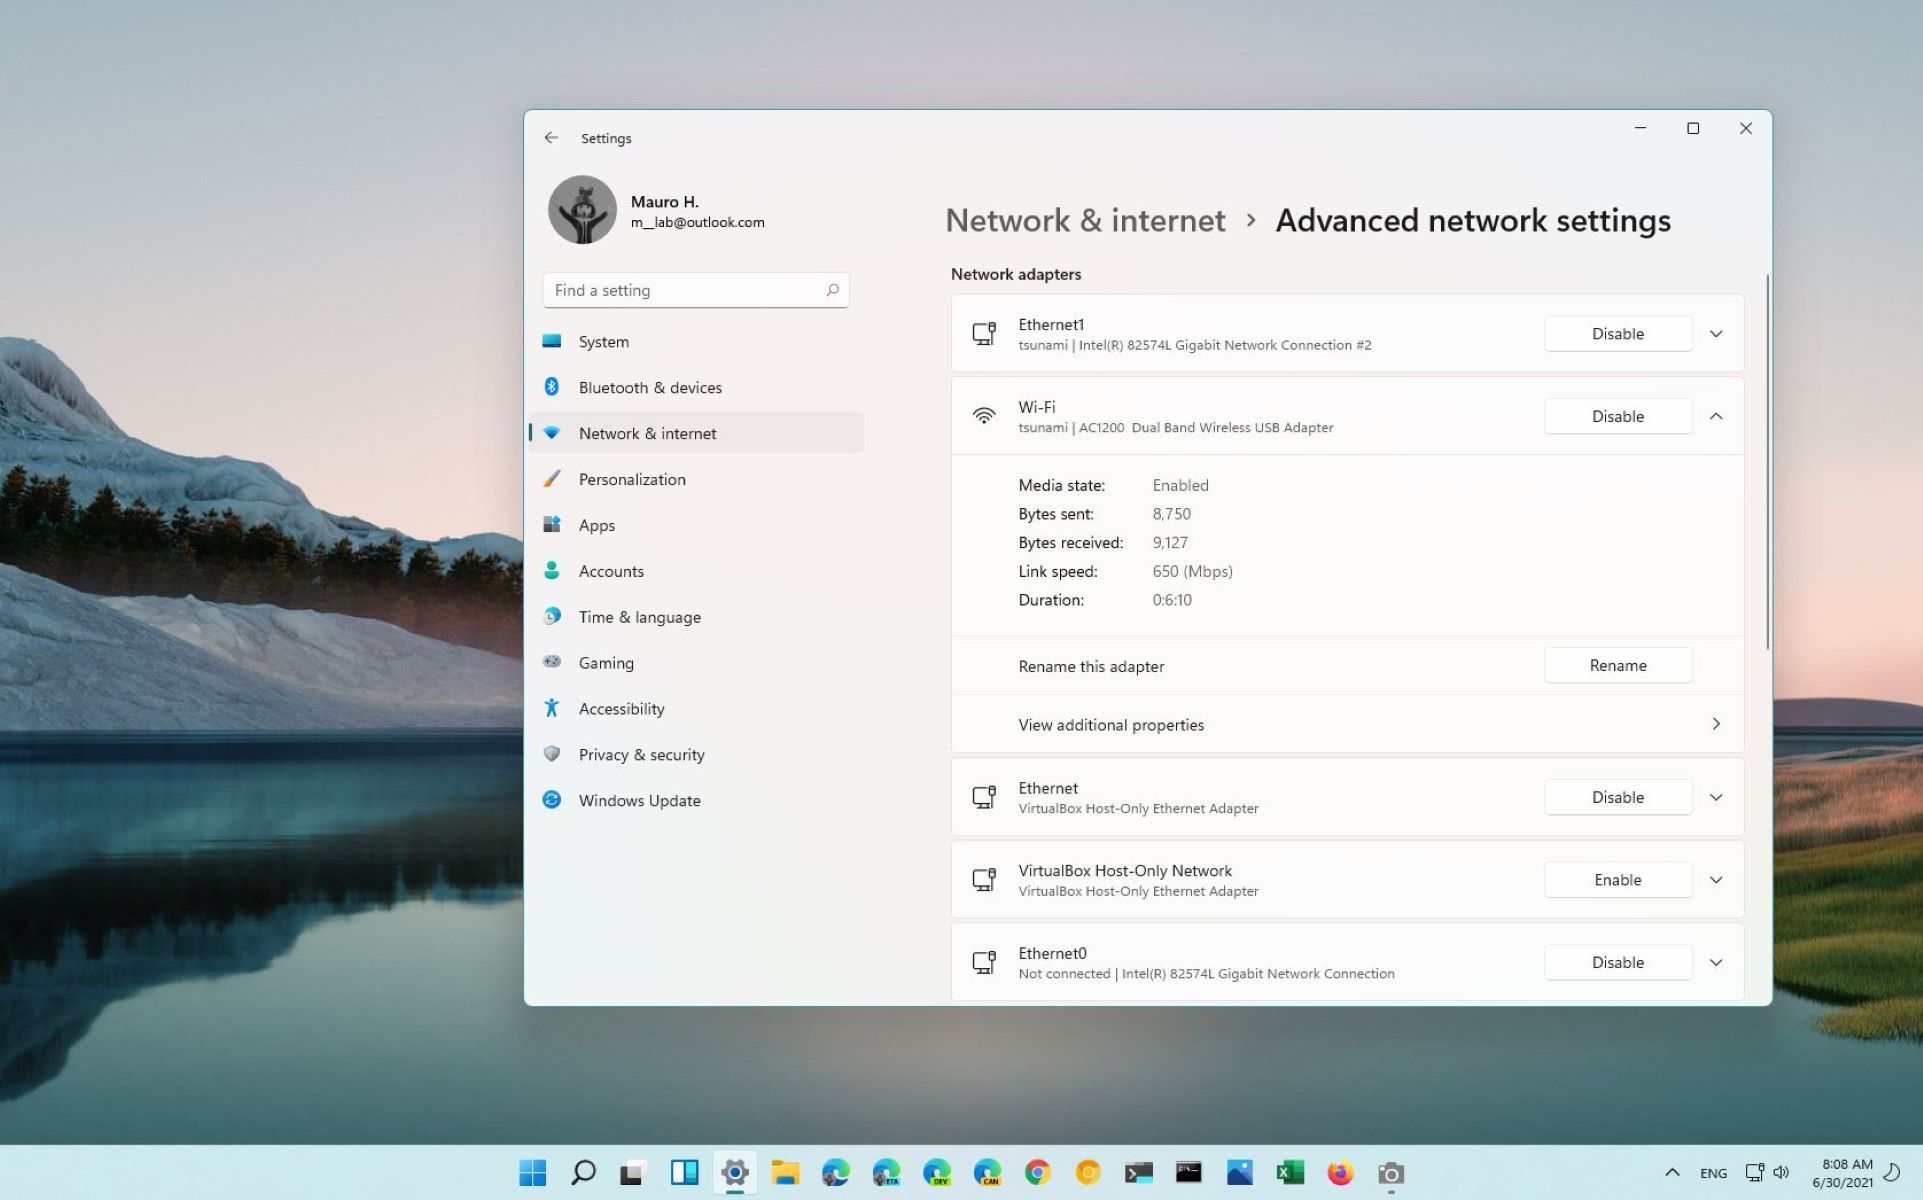
- Reset network settings: Resetting your network settings can help resolve any configuration issues that might be causing the disconnections. Open the network settings on your laptop and choose the option to reset or refresh the network settings.
- Disable conflicting apps or software: Certain apps or software programs on your laptop may interfere with your WiFi connection. Temporarily disable any antivirus software or VPNs to see if they are causing the issue.
- Check for interference: Move electronic devices and appliances away from your WiFi router to minimize interference. Avoid placing the router near walls or objects that can obstruct the WiFi signal.
- Reset router or modem: Restarting the router or modem can often resolve connectivity problems. Unplug the power source, wait for a few seconds, then plug it back in. Allow the router or modem to restart and establish a fresh connection.
- Contact your Internet Service Provider (ISP): If none of the above steps resolve the issue, it’s possible that the problem lies with your ISP. Contact them for assistance in troubleshooting or resolving any connectivity problems.
It’s important to carefully go through these troubleshooting steps in sequence to find the solution that works for you. Keep in mind that the specific steps may vary depending on your laptop’s operating system and the router you are using.
Check WiFi signal strength
One of the common causes of a laptop disconnecting from WiFi is a weak signal. If your laptop is located far away from the WiFi router or there are obstacles like walls and furniture blocking the signal, it can result in frequent disconnections. To address this issue, you need to check and improve your WiFi signal strength. Here’s what you can do:
- Move closer to the router: If you are experiencing disconnects, try moving closer to the WiFi router. Being in close proximity to the router can help strengthen the signal and improve the overall connection stability.
- Remove obstructions: Physical obstructions such as walls, floors, and large furniture can weaken the WiFi signal. Ensure that there are no such obstacles between your laptop and the router. Consider relocating the router to a central location in your home for better coverage.
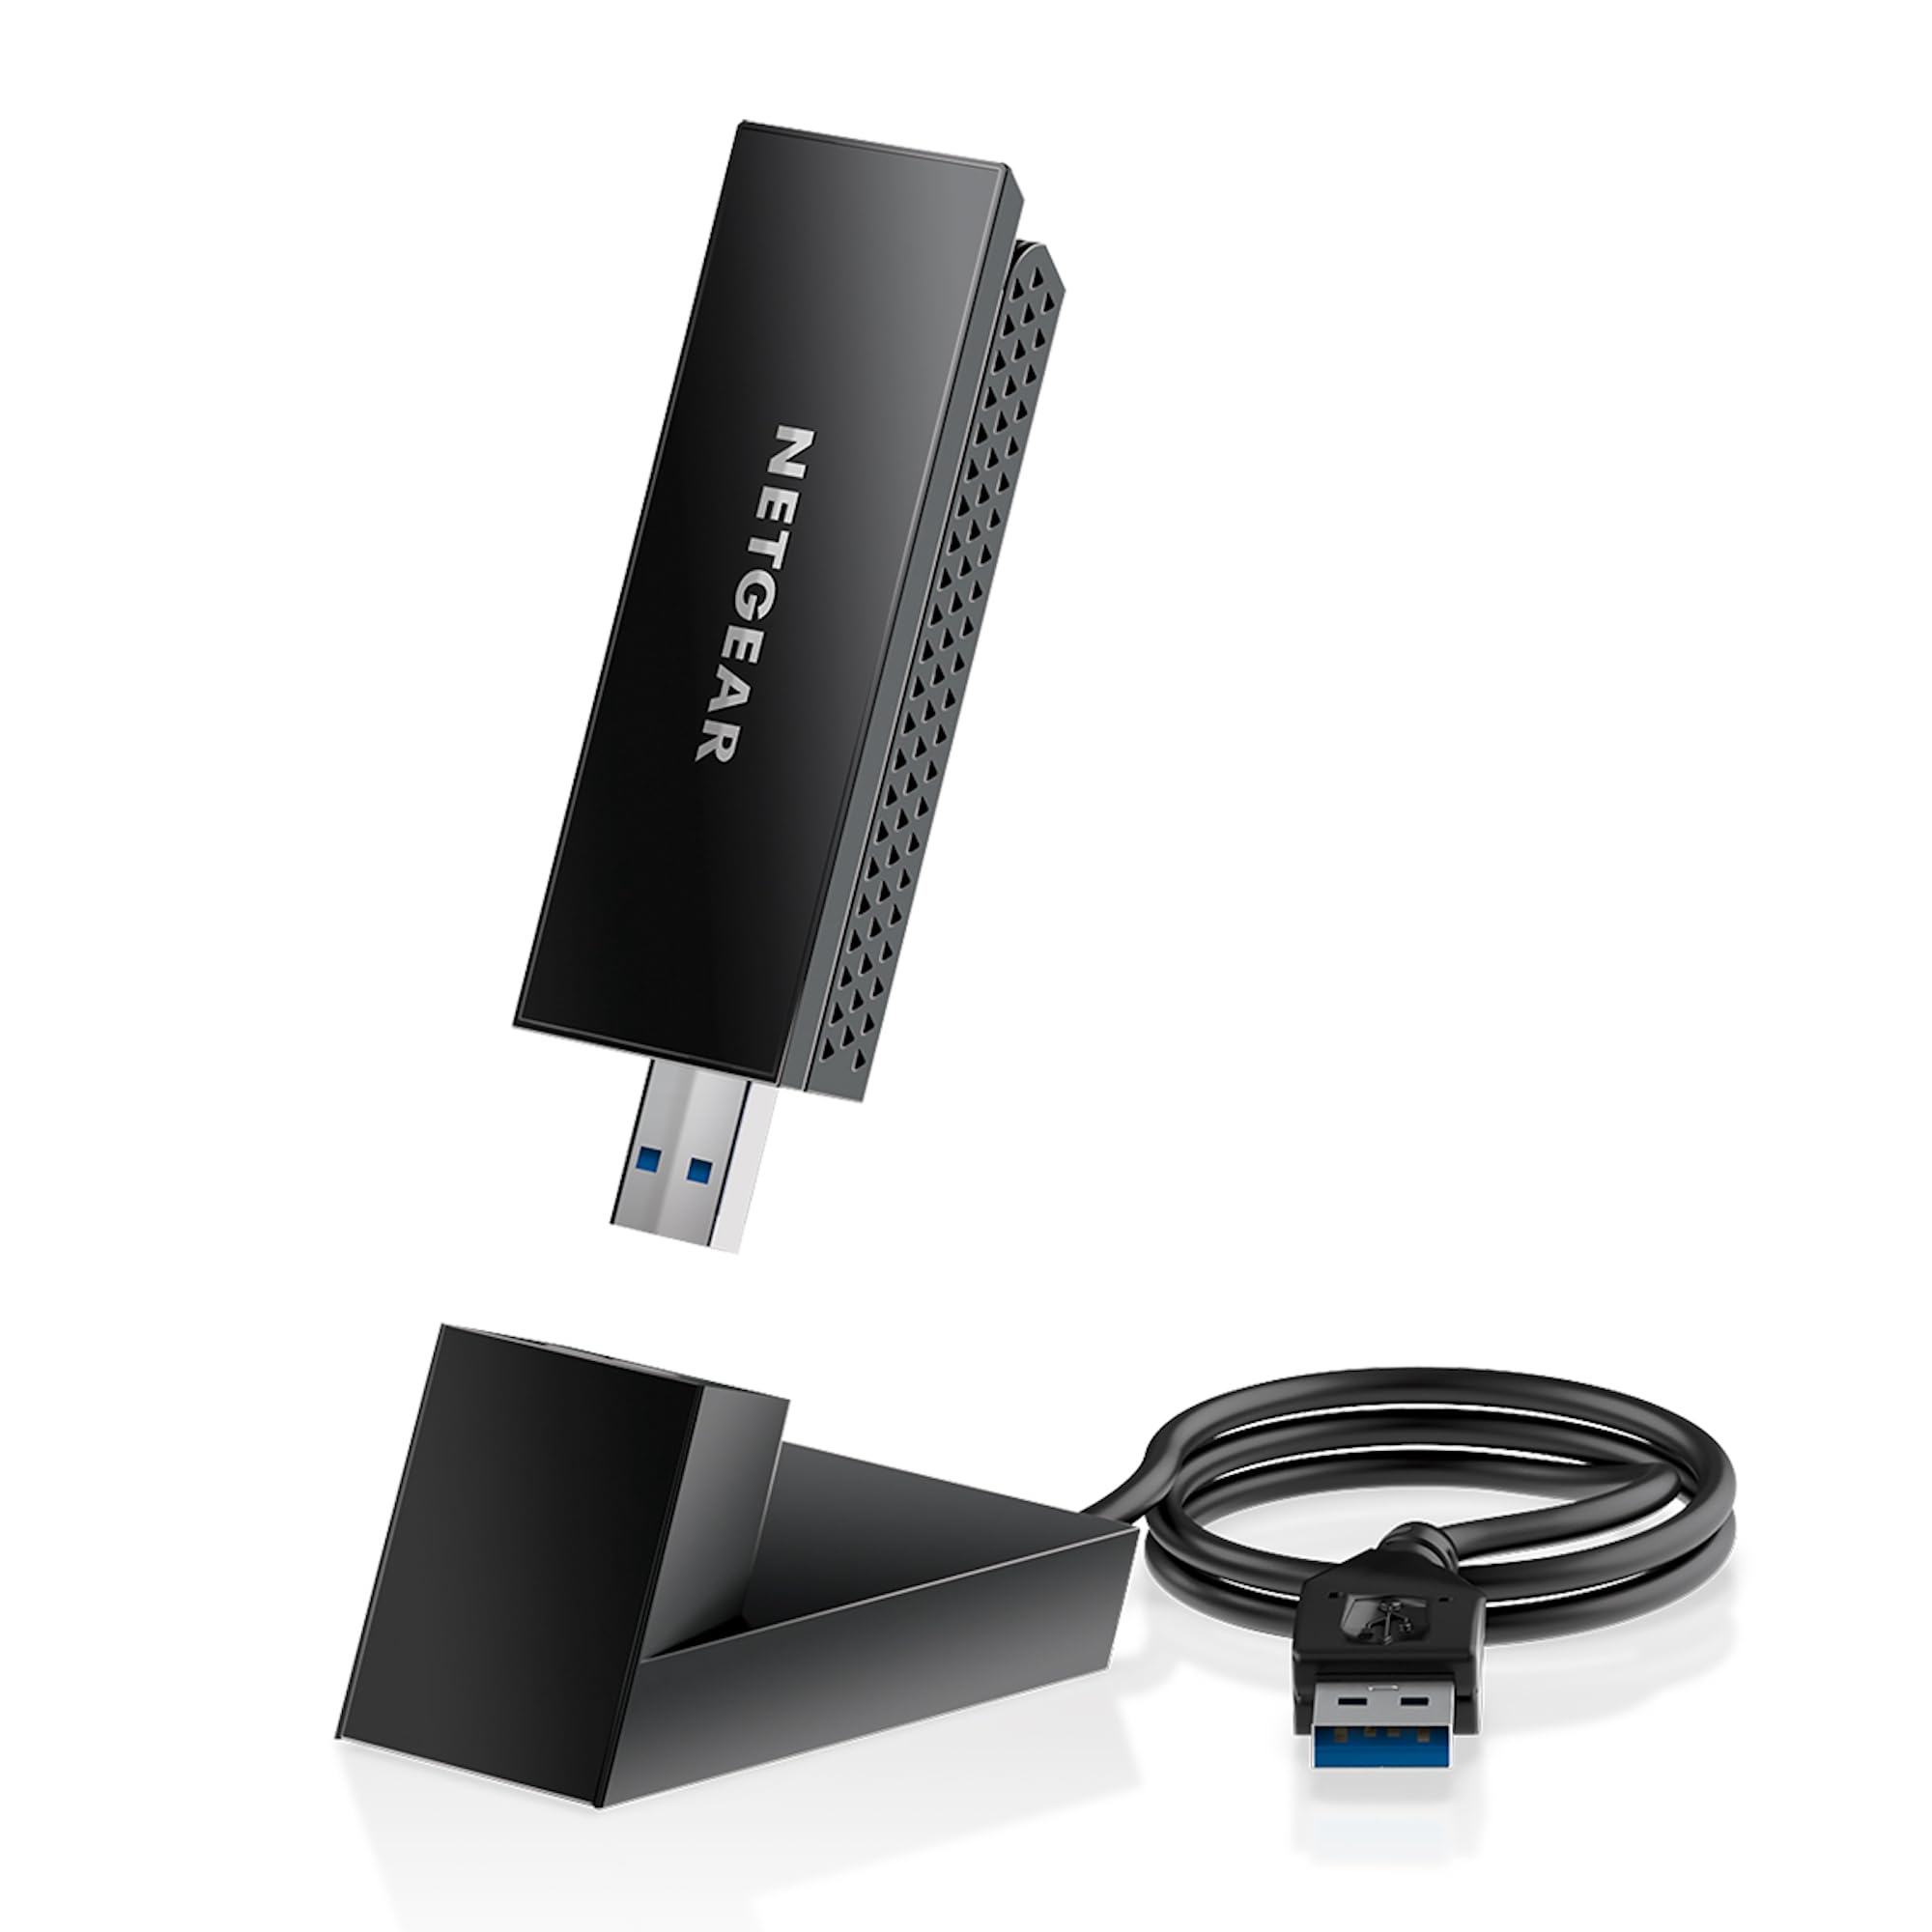
- Use a WiFi range extender: If your laptop is located far away from the router and moving closer is not an option, consider using a WiFi range extender. A range extender amplifies the WiFi signal and extends its coverage, allowing you to connect from a greater distance with better signal strength.
- Check for interference: Other electronic devices, such as cordless phones, baby monitors, or microwave ovens, can interfere with WiFi signals. Keep your laptop away from such devices to prevent signal interference and improve connectivity.
- Adjust router’s antenna: If your router has adjustable antennas, try positioning them to maximize signal strength. Experiment with different angles or orientations to find the optimal position for better coverage.
- Upgrade to a better router: If all else fails and you consistently experience poor signal strength, it may be time to consider upgrading your WiFi router. Modern routers offer improved range and signal strength, ensuring a more stable connection throughout your home or office.
By taking these measures, you can address the issue of weak WiFi signal and enhance the stability of your laptop’s connection. Remember, a strong and consistent signal is essential for maintaining a seamless internet experience.
Update WiFi drivers
Outdated WiFi drivers can often cause connectivity issues and lead to your laptop disconnecting from WiFi. It’s essential to regularly update your WiFi drivers to ensure compatibility with the latest software updates and maintain a stable connection. Follow these steps to update your WiFi drivers:
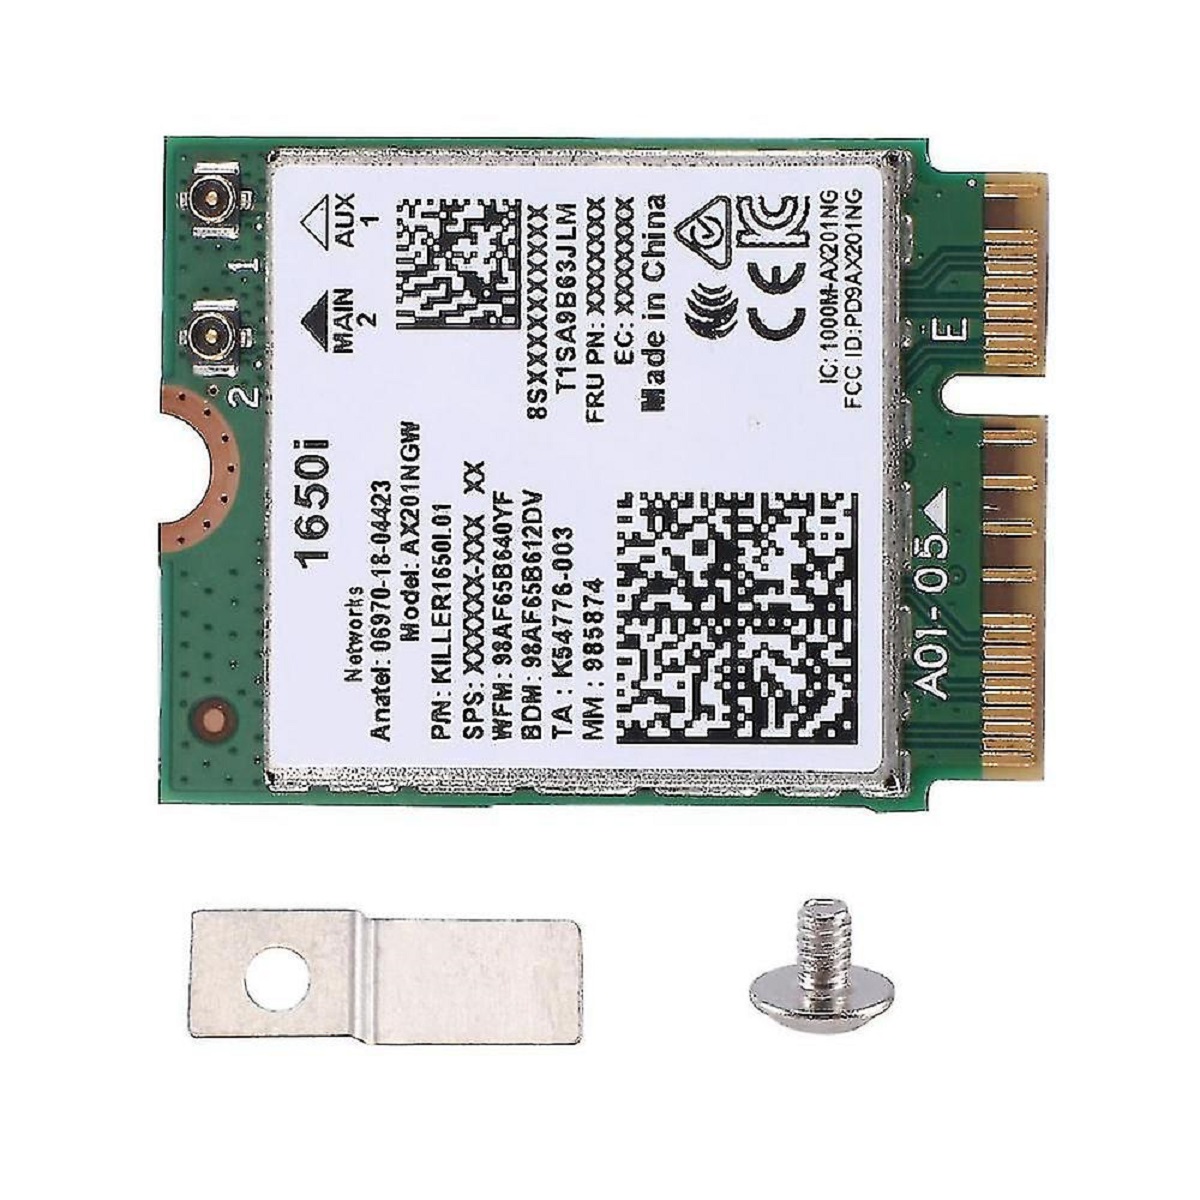
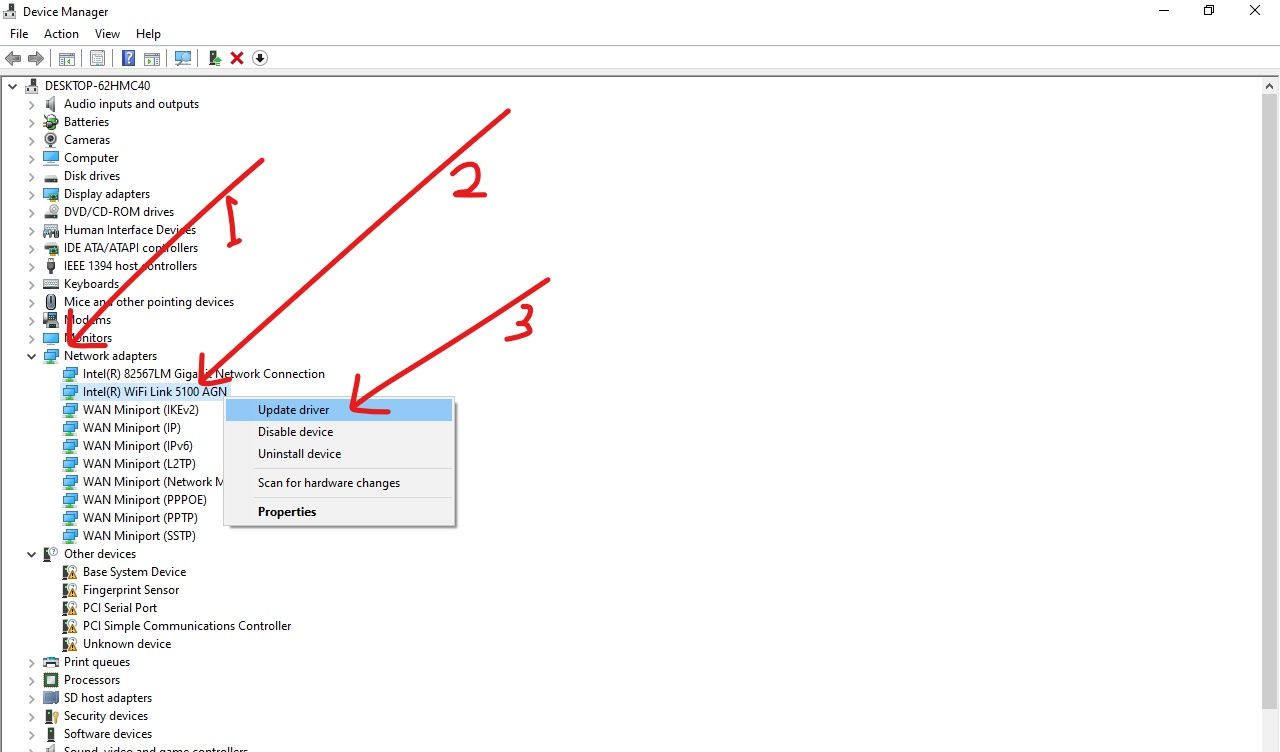
- Identify the WiFi adapter: First, you need to identify the model and manufacturer of your WiFi adapter. You can do this by opening the Device Manager on your laptop.
- Visit the manufacturer’s website: Once you have the information about your WiFi adapter, visit the manufacturer’s website. Look for the “Support” or “Downloads” section.
- Find the latest driver: Navigate to the driver downloads section on the manufacturer’s website and search for the latest driver for your WiFi adapter model. Download the driver to your laptop.
- Install the driver: Open the downloaded driver file and follow the on-screen instructions to install it. Restart your laptop if prompted to complete the installation process.
- Automatic driver update: If you prefer a more convenient option, you can use automatic driver update software. These programs scan your laptop, detect outdated drivers, and automatically update them with the latest versions. Popular software options include Driver Booster, Driver Talent, and Snappy Driver Installer.
- Windows update: Another way to ensure that your WiFi drivers are up to date is by running Windows Update. Windows Update often includes driver updates as part of its regular system updates. Go to your laptop’s Settings, navigate to Windows Update, and check for any available updates.
Updating your WiFi drivers can address compatibility issues and improve the overall stability of your wireless connection. It’s a simple yet effective step to take when troubleshooting WiFi connectivity problems on your laptop.
Disable power saving mode
Power-saving settings on your laptop can sometimes interfere with WiFi connectivity, causing frequent disconnections. To ensure a stable and uninterrupted connection, it’s important to disable power-saving mode for the WiFi adapter. Here’s how you can do it:
- Open power options: Go to the Control Panel on your laptop and search for “Power Options.” Click on the search result to open the Power Options settings.
- Select the power plan: In the Power Options window, you will see a list of power plans. Choose the one that is currently active on your laptop. Typically, it will be the “Balanced” or “Power saver” plan.
- Change plan settings: Click on the “Change plan settings” link next to the selected power plan. This will allow you to modify the power-saving settings.
- Adjust advanced power settings: In the next window, click on the “Change advanced power settings” link. This will open the Advanced Power Options window.
- Expand the Wireless Adapter Settings: In the Advanced Power Options window, locate and expand the “Wireless Adapter Settings” section.
- Change power-saving mode: Under “Power Saving Mode,” there will be different options like “Maximum Performance,” “Medium Power Saving,” and “Maximum Power Saving.” Select the “Maximum Performance” option to disable power-saving mode for the WiFi adapter.
- Apply and save changes: Click on the “Apply” button to save the changes you made. Close all the windows, and your power settings will be updated.
Disabling power-saving mode for the WiFi adapter ensures that it stays active and connected, even during idle periods. This can prevent unexpected disconnections and provide a more consistent WiFi experience on your laptop.
Reset network settings
If your laptop continues to disconnect from WiFi, it might be due to misconfigurations in the network settings. Resetting the network settings can help resolve any conflicts or errors that may be causing the disconnections. Here’s how you can reset network settings on your laptop:
- Open Network settings: Go to the Control Panel on your laptop and search for “Network and Sharing Center.” Click on the search result to open the Network and Sharing Center.
- Click on “Change adapter settings”: In the Network and Sharing Center, you will see different options. Look for the “Change adapter settings” link on the left-hand side and click on it.
- Select WiFi adapter: In the Network Connections window, you will see a list of network adapters. Right-click on the WiFi adapter that you are currently using and select “Disable”. Wait for a few seconds and then right-click on the same adapter again and select “Enable”. This will reset the network adapter.
- Flush DNS cache: Open the Command Prompt on your laptop by searching for “Command Prompt” in the Start menu. Right-click on it and select “Run as administrator”. In the Command Prompt, type “ipconfig /flushdns” and press Enter. This will flush the DNS cache, which can help resolve DNS-related issues.
- Restart your laptop: After resetting the network settings and flushing the DNS cache, restart your laptop. This will ensure that all the changes take effect.
By resetting the network settings, you can clear any potential configuration issues that might be causing your laptop to disconnect from WiFi. This process essentially gives your network connection a fresh start, potentially resolving the connectivity problems you are experiencing.
Disable conflicting apps or software
Certain apps or software programs installed on your laptop can interfere with your WiFi connection, leading to frequent disconnects. To troubleshoot this issue, it’s important to identify and disable any conflicting apps or software. Here’s what you can do:
- Identify potential conflicting apps: Review the list of apps or software programs installed on your laptop. Look for any apps that are known to cause WiFi connectivity issues or conflicts. Antivirus software, VPN clients, or firewall applications are common culprits.
- Temporarily disable antivirus software: If you suspect that your antivirus software may be causing the disconnections, try temporarily disabling it. Most antivirus programs have an option to disable protection for a specified period. Enable this temporary disablement feature and check if the WiFi connection becomes stable.
- Pause or turn off VPNs: If you are using a VPN client, pause or turn off the VPN to see if it resolves the WiFi disconnect issue. Sometimes, VPNs can interfere with the normal functioning of network protocols and cause disruptions in WiFi connectivity.
- Modify firewall settings: If you have a firewall installed, check its settings to ensure that it is not blocking incoming or outgoing connections from your WiFi adapter. Temporarily disable the firewall or create a rule to allow connections for your WiFi adapter.
- Check for app updates: If you suspect a specific app is causing the issue, check for any available updates. Developers often release updates to address bugs or conflicts that may impact WiFi connectivity. Update the app to its latest version and check if the problem persists.
- Uninstall conflicting apps or software: If you have identified a particular app or software program that consistently causes WiFi disconnections, consider uninstalling it. Removing the conflicting software can eliminate the potential for further conflicts and restore a stable WiFi connection.
By disabling or removing conflicting apps or software, you can eliminate potential sources of interference and troubleshoot the WiFi disconnect issue on your laptop. Remember, it’s important to carefully evaluate and test the impact of disabling or uninstalling these programs before making any permanent changes.
Check for interference
Interference from other devices or sources can disrupt your WiFi signal, leading to frequent disconnects. It’s essential to identify and mitigate any sources of interference to improve the stability of your WiFi connection. Here are some steps you can take to check for interference:
- Move electronic devices away from the router: Other electronic devices, such as cordless phones, baby monitors, or microwave ovens, can interfere with WiFi signals. Keep your laptop and WiFi router away from these devices to minimize signal interference and improve connectivity.
- Change WiFi channel: WiFi routers operate on different channels to communicate with devices. If neighboring WiFi networks are using the same channel, it can cause interference. Access your router’s settings and change the WiFi channel to a less congested one to reduce interference.
- Keep WiFi router away from walls or obstructions: Physical barriers like walls, floors, and large furniture can weaken WiFi signals. Place your WiFi router in a central location and away from walls or other obstructions to allow for better signal propagation.
- Adjust the placement of the router’s antennas: Some WiFi routers have adjustable antennas. Experiment with different positions and angles to maximize signal strength and minimize interference. A vertical position or a 45-degree angle is often recommended for optimal coverage.
- Consider upgrading to a dual-band router: Dual-band routers support both 2.4 GHz and 5 GHz frequency bands. The 5 GHz band is usually less crowded and offers faster speeds with less interference. Upgrading to a dual-band router can potentially reduce the impact of external interference on your WiFi connection.
- Use WiFi analyzer tools: WiFi analyzer tools are software applications or smartphone apps that can help you analyze WiFi networks in your vicinity. These tools can provide information about nearby networks, signal strengths, and channel overlap, allowing you to make informed decisions to avoid interference.
By actively managing sources of interference and optimizing your WiFi router’s placement and settings, you can minimize disruptions and improve the overall stability of your WiFi connection. Remember to regularly monitor for any changes in interference, especially in crowded environments or areas with numerous electronic devices.
Reset router or modem
If all else fails and your laptop continues to disconnect from WiFi, it may be necessary to reset your router or modem. Resetting the router or modem can help resolve any configuration issues or temporary glitches that could be causing the connectivity problem. Here’s how you can reset your router or modem:
- Locate the reset button: Look for a small reset button on your router or modem. Usually, it is located at the back or bottom of the device. Use a paperclip or a small pointed object to press and hold the reset button.
- Hold the reset button: Press and hold the reset button for about 10-15 seconds. During this time, you will notice the lights on the router or modem flashing or turning off momentarily.
- Release the reset button: After holding the reset button for the specified time, release it. The router or modem will restart, and the lights will stabilize, indicating that the reset process is complete.
- Wait for the router or modem to reconnect: Give your router or modem a few minutes to establish a new connection. Once it has connected to your Internet Service Provider (ISP), your WiFi should be up and running again.
- Reconnect your devices: After the router or modem has fully restarted, reconnect your laptop and other devices to the WiFi network. Enter the correct WiFi password if prompted.
Resetting your router or modem essentially restores it to its default settings, eliminating any potential configuration issues that may have been causing the WiFi disconnects. It can help refresh the connection and provide a clean slate for establishing a stable WiFi connection.
Note that resetting the router or modem will also erase any custom settings or configurations you have made. You may need to reconfigure settings such as WiFi network name (SSID), password, and port forwarding after the reset.
Contact your Internet Service Provider (ISP)
If you have tried all the troubleshooting steps mentioned earlier and your laptop still keeps disconnecting from WiFi, it may be time to reach out to your Internet Service Provider (ISP) for assistance. Your ISP can help determine if the issue is related to your internet connection or the equipment provided by them. Here’s what you can do:
- Gather necessary information: Before contacting your ISP, make sure to gather relevant information such as your account details, the make and model of your modem or router, and a description of the problem you are facing.
- Call customer support: Look for the customer support number or contact information for your ISP. Call their customer support and explain the issue you are experiencing with your WiFi connection. Provide them with the necessary details and answer any questions they may have.
- Follow their instructions: The customer support representative may guide you through additional troubleshooting steps specific to your ISP’s network or equipment. Follow their instructions carefully and provide them with any requested information.
- Schedule a technician visit: If the issue cannot be resolved over the phone, your ISP may schedule a technician visit to your location. The technician will inspect your equipment, perform line tests, and address any issues with the connection or infrastructure.
- Ask for equipment replacement: If the technician determines that the issue lies with the router or modem provided by your ISP, they may replace the faulty equipment with a new one.
- Keep track of the issue: In case the problem persists even after contacting your ISP, make note of the dates, times, and duration of the WiFi disconnections. This information will be helpful in escalating the issue with your ISP and requesting further assistance.
Remember, your ISP is in the best position to diagnose and resolve issues related to your internet connection. Reach out to them for support, as they have the expertise and resources to investigate and address the problem.
Make sure to communicate any troubleshooting steps you have already taken, as this will help your ISP in troubleshooting the issue more efficiently. They will work with you to find a solution and ensure a stable and reliable WiFi connection for your laptop.
Conclusion
Dealing with a laptop that keeps disconnecting from WiFi can be frustrating, but fortunately, there are several troubleshooting steps you can take to resolve the issue. By identifying the common causes and following the steps outlined in this article, you can significantly improve the stability and reliability of your WiFi connection.
We discussed common causes such as weak WiFi signal, outdated drivers, power-saving mode, network conflicts, interference, and router or modem issues. By understanding these causes, you can pinpoint the specific problem and apply the appropriate troubleshooting steps.
We explored various troubleshooting steps, including checking WiFi signal strength, updating WiFi drivers, disabling power-saving mode, resetting network settings, disabling conflicting apps or software, checking for interference, resetting the router or modem, and contacting your ISP for further assistance.
It’s important to note that the effectiveness of these troubleshooting steps may vary depending on your specific situation. It may be necessary to try multiple steps or combine them to find the solution that works best for your laptop.
Remember to test your WiFi connection after each step to see if the issue has been resolved. Keep track of your actions and the results to help in further troubleshooting or when seeking assistance from your ISP.
By following these troubleshooting steps, you can increase the chances of resolving the WiFi disconnect issue and enjoy a stable and uninterrupted internet connection on your laptop.