Introduction
Welcome to the digital age where having a stable and reliable internet connection has become essential for our daily activities. Whether it’s for work, entertainment, or staying connected with loved ones, a strong Wi-Fi signal is crucial. However, it can be frustrating when your Wi-Fi suddenly stops working, leaving you unable to access the internet. In this article, we will explore some common issues that can cause Wi-Fi problems and provide practical tips to help you troubleshoot and resolve these issues quickly.
There could be several reasons why your Wi-Fi connection is not working as expected. It could be due to problems with your internet connection, router settings, interference from other devices, or issues with your connected devices. By understanding and identifying the root cause of the problem, you can take the necessary steps to get your Wi-Fi up and running again.
Before delving into the technical solutions, it’s important to remember that troubleshooting Wi-Fi issues requires a systematic approach. Start by checking the basics such as if other devices are experiencing similar problems, ensuring that you are within range of the Wi-Fi signal, and verifying that your device is connected to the correct network. It’s also a good idea to restart your devices and the router to rule out any temporary glitches.
Now, let’s dive deeper into the various factors that can lead to Wi-Fi problems and the steps you can take to resolve them. By following these troubleshooting techniques, you can diagnose and fix common Wi-Fi issues without the need for professional assistance. So, let’s get started!
Common WiFi Problems
Wi-Fi problems can be frustrating, but they are not uncommon. Understanding the common issues that can arise will help you better troubleshoot and resolve them. Here are some of the most frequent Wi-Fi problems:
1. Weak or unstable Wi-Fi signal: This is a common issue that can result in slow internet speeds or frequent disconnections. It may be caused by the distance between your device and the router, physical obstructions, or interference from other electronic devices.
2. Interference from neighboring networks: If you live in an apartment or densely populated area, neighboring Wi-Fi networks can interfere with your signal. This can lead to a slowdown in internet speeds and connectivity issues.
3. Outdated router firmware: Keeping your router’s firmware updated is essential for optimal performance. Outdated firmware can cause compatibility issues, security vulnerabilities, and performance problems.
4. Network congestion: When too many devices are connected to a Wi-Fi network simultaneously, it can result in network congestion. This can lead to decreased internet speeds and intermittent connectivity.
5. Wrong network name or password: If you recently changed your Wi-Fi network settings, it’s possible that you may have entered an incorrect network name or password, leading to authentication issues.
6. Device-specific problems: Sometimes, the problem may lie with the device you are trying to connect to the Wi-Fi network. Outdated drivers, incompatible hardware, or software glitches can all contribute to connectivity problems.
7. Physical obstructions: Wi-Fi signals can be obstructed by walls, floors, and other physical objects. The signal strength may decrease significantly, especially if there are multiple obstacles between your device and the router.
Now that we have identified some common Wi-Fi problems, let’s move on to the troubleshooting steps to help resolve these issues and get your Wi-Fi up and running smoothly again.
Checking Your Internet Connection
When experiencing Wi-Fi problems, the first step is to determine whether the issue lies with your internet connection. Here are some steps you can take to check your internet connection:
1. Restart your modem: Begin by turning off your modem, waiting for a few seconds, and then turning it back on. This simple step can often resolve temporary internet connection issues.
2. Check other devices: Test the internet connection on other devices such as smartphones, tablets, or other computers. If all devices are unable to connect to the internet, it is likely a problem with your internet service provider (ISP). Contact them for further assistance.
3. Verify modem lights: Take a look at the lights on your modem. They usually indicate the status of your internet connection. If any lights are blinking or showing an error, consult your modem’s manual or contact your ISP for assistance.
4. Connect via Ethernet cable: If your Wi-Fi is not working, try connecting your device directly to the modem using an Ethernet cable. This will help determine if the issue is with the Wi-Fi signal or the internet connection itself.
5. Run a speed test: Use an online speed test tool to check your internet speed. Compare the results with your internet plan’s advertised speed. If there is a significant difference, contact your ISP to troubleshoot further.
6. Contact your ISP: If you have followed the above steps and still cannot connect to the internet, contact your ISP’s customer support for assistance. They can guide you through additional troubleshooting steps specific to your internet service.
Remember, a stable internet connection is essential for a reliable Wi-Fi experience. By checking your internet connection and resolving any issues, you can eliminate one potential cause of your Wi-Fi problems. Once you have confirmed that your internet connection is working correctly, move on to the next troubleshooting steps to resolve Wi-Fi issues specific to your router and network settings.
Restarting Your Router
One of the first troubleshooting steps to try when experiencing Wi-Fi problems is to restart your router. Restarting your router can help resolve temporary glitches and restore your Wi-Fi connection. Here’s how to do it:
1. Locate your router: Find your Wi-Fi router, which is usually a small box with multiple antennae. It is typically located near your internet modem.
2. Power off the router: Locate the power button or unplug the power cord from the back of the router. Wait for at least 10-15 seconds to ensure that the router completely powers down.
3. Power on the router: Plug the power cord back into the router or press the power button to turn it on. Wait for a few minutes to allow the router to fully initialize.
4. Connect your devices: Once the router is powered on and connected to the internet, reconnect your devices to the Wi-Fi network. Go to the Wi-Fi settings on your device, select your network, and enter the password if prompted.
5. Test the connection: After reconnecting to the Wi-Fi network, test your internet connection by opening a web browser or using any internet-based app. Check if your Wi-Fi connection is now stable and functioning properly.
If restarting your router resolves the Wi-Fi issue, it was likely caused by a temporary internal glitch or overload. However, if the problem persists, you may need to explore other troubleshooting steps such as checking your network settings, updating your router’s software, or adjusting the position of your router to improve signal strength.
Keep in mind that periodically restarting your router can help maintain a stable Wi-Fi connection. If you frequently experience Wi-Fi problems, consider creating a regular schedule to restart your router, such as once a week or every few days.
Now that you have restarted your router and verified its functionality, proceed to the next troubleshooting steps to further diagnose and resolve any remaining Wi-Fi issues.
Checking Your WiFi Network Name and Password
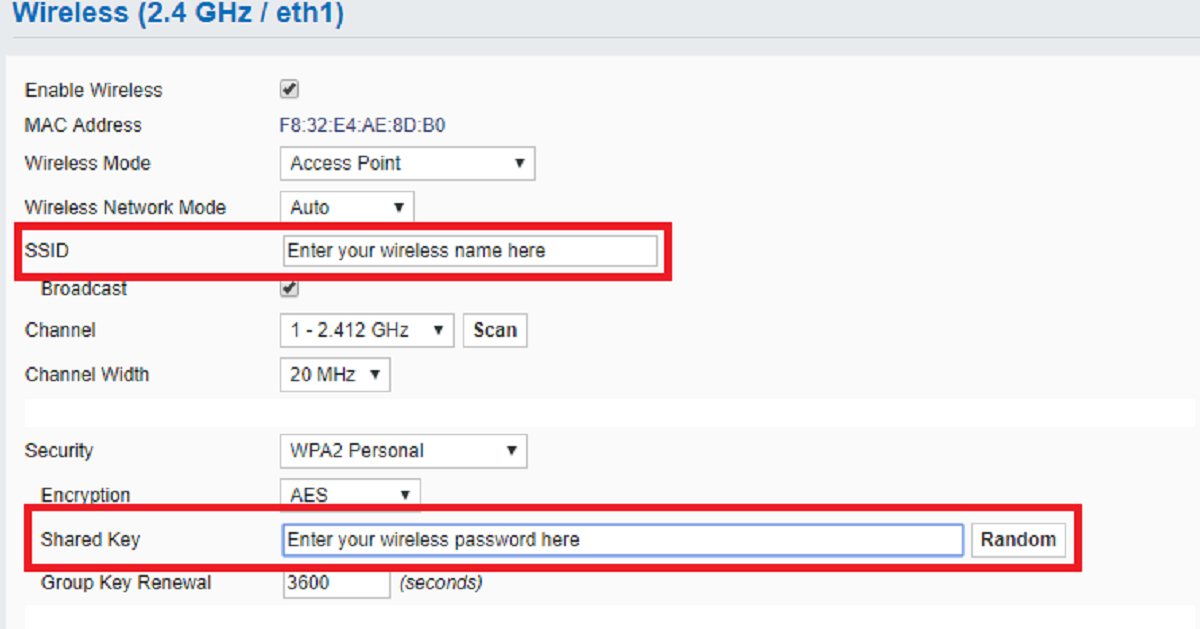
When troubleshooting Wi-Fi problems, it’s important to verify that you have the correct network name (SSID) and password. Issues with incorrect network credentials can prevent devices from connecting to your Wi-Fi network. Here’s what you can do to check your network name and password:
1. Locate your network details: On your device, go to the Wi-Fi settings and look for the list of available networks. Find the network name (SSID) of your Wi-Fi network. It should be the same as the network name you set up for your router.
2. Verify the network name: Compare the network name displayed on your device with the one you originally set up for your Wi-Fi network. Make sure there are no typos or spacing issues. If the network name differs, select the correct network from the list.
3. Check the password: If you have recently changed the Wi-Fi password, ensure that you are entering the new password correctly on your device. Pay attention to uppercase and lowercase letters, special characters, and numbers. Remember that passwords are case-sensitive.
4. Reset the network settings: If you are certain that the network name and password are correct but still can’t connect, try resetting your network settings. On your device, go to the Wi-Fi settings and select the option to forget the network. Then, reconnect to the network and enter the password again.
5. Test with another device: Use another device, if available, to connect to your Wi-Fi network. This can help determine if the issue is device-specific or if there is an issue with your network settings.
By checking and ensuring the accuracy of your network name and password, you can eliminate any potential authentication issues that may be causing connectivity problems. If you still cannot connect to the Wi-Fi network after confirming that the network name and password are correct, proceed to the next troubleshooting steps to further diagnose the issue.
Resetting Your Router
If you’re still experiencing Wi-Fi problems after trying other troubleshooting steps, resetting your router can help resolve more complex issues. Resetting your router will restore it to its default factory settings, eliminating any potential configuration problems that may be causing Wi-Fi connectivity issues. Here’s how you can reset your router:
1. Locate the reset button: Find the reset button on your router. It is usually a small, recessed button located on the back or bottom of the router. You may need to use a paperclip or a small pointed object to press the button.
2. Press and hold the reset button: Press and hold the reset button for about 10-15 seconds. Make sure to keep it pressed for the entire duration.
3. Observe the indicator lights: While holding the reset button, pay attention to the indicator lights on the router. They may start flashing or turning off and on. This indicates that the router is being reset.
4. Release the reset button: After 10-15 seconds, release the reset button. The router will restart and restore the default factory settings.
5. Reconfigure your router: Once the router has finished rebooting, you will need to reconfigure it. This includes setting up your network name (SSID) and password, as well as any other customization settings you had previously configured.
It’s important to note that resetting your router will remove any personalized settings you may have configured, including port forwarding, firewall settings, and device-specific configurations. Make sure you have a backup or a record of your previous settings before initiating a reset.
Resetting your router can often resolve persistent Wi-Fi issues by clearing any configuration errors or conflicts. However, if the problem persists even after resetting the router, further troubleshooting steps may be necessary, such as updating the router’s software, checking for interference, or contacting your internet service provider (ISP) for assistance.
Now that you have reset your router, proceed to reconfigure it and check if your Wi-Fi connectivity has improved.
Updating Your Router’s Software
Updating your router’s software, also known as firmware, is an essential step in troubleshooting Wi-Fi issues. Firmware updates often include bug fixes, security enhancements, and performance improvements that can help resolve connectivity problems. Here’s how you can update your router’s software:
1. Access your router’s settings: Open a web browser on a device connected to your Wi-Fi network. Enter your router’s IP address in the browser’s address bar. The IP address is usually printed on a label on the back or bottom of the router. If you’re unsure of the IP address, refer to the router’s manual or manufacturer’s website.
2. Enter login credentials: You will be prompted to enter your router’s administrative login credentials. If you have never changed the default credentials, check the router’s manual or refer to the manufacturer’s website for the default username and password. If you have changed the credentials and forgotten them, you may need to reset the router to its factory settings.
3. Locate the firmware update section: Once logged in, look for the firmware or software update section. The location and labeling may vary depending on the router model and manufacturer. It may be under a “System” or “Administration” tab.
4. Check for available updates: Within the firmware update section, check for available updates. Some routers have an option to automatically check for updates, while others may require manual checking.
5. Update the firmware: If an update is available, follow the prompts to initiate the firmware update. This process may take a few minutes and could temporarily interrupt your internet connection. It’s important to let the update process complete without interruption.
6. Restart the router: After the firmware update is complete, restart your router. This will ensure that the updated firmware is properly loaded and applied.
Updating your router’s software can address compatibility issues, security vulnerabilities, and performance limitations that may be causing Wi-Fi problems. It’s recommended to periodically check for firmware updates and install them to keep your router running smoothly.
If you encounter difficulties during the firmware update process or are unable to locate the update section, consult your router’s manual or visit the manufacturer’s website for specific instructions. Additionally, always ensure that you download firmware updates from official and trustworthy sources.
Now that you have updated your router’s software, continue to monitor your Wi-Fi connection and assess whether the update has resolved any connectivity issues.
Checking for Interference
Interference from other devices can cause disruptions in your Wi-Fi signal, resulting in slower connection speeds or frequent disconnections. Identifying and minimizing interference can help improve your Wi-Fi performance. Here are some steps to check for and minimize interference:
1. Assess your surroundings: Take a look around your Wi-Fi router and identify potential sources of interference. Common culprits include cordless phones, baby monitors, microwave ovens, wireless speakers, and other electronics that operate on similar frequencies as Wi-Fi.
2. Move your router: If possible, relocate your router away from devices that could cause interference. Keeping a distance between your router and these devices can help minimize signal interference.
3. Change Wi-Fi channel: Wi-Fi routers operate on specific channels within the wireless spectrum. Other nearby routers or electronic devices may be operating on the same channel, causing interference. Access your router’s settings and change the Wi-Fi channel to a less crowded one to reduce interference.
4. Use the 5GHz frequency band: Most modern routers support both the 2.4GHz and 5GHz frequency bands. The 5GHz band is less congested, so switching to this band can reduce interference from other devices.
5. Monitor signal strength: Use a Wi-Fi analyzer app or software to identify areas with weak Wi-Fi signal strength. This can help you determine potential interference spots or areas where your Wi-Fi signal may be blocked by walls or obstructions.
6. Reposition antennas: If your router has adjustable antennas, experiment with different positions to optimize signal reception. You can try pointing the antennas in different directions or positioning them vertically or horizontally.
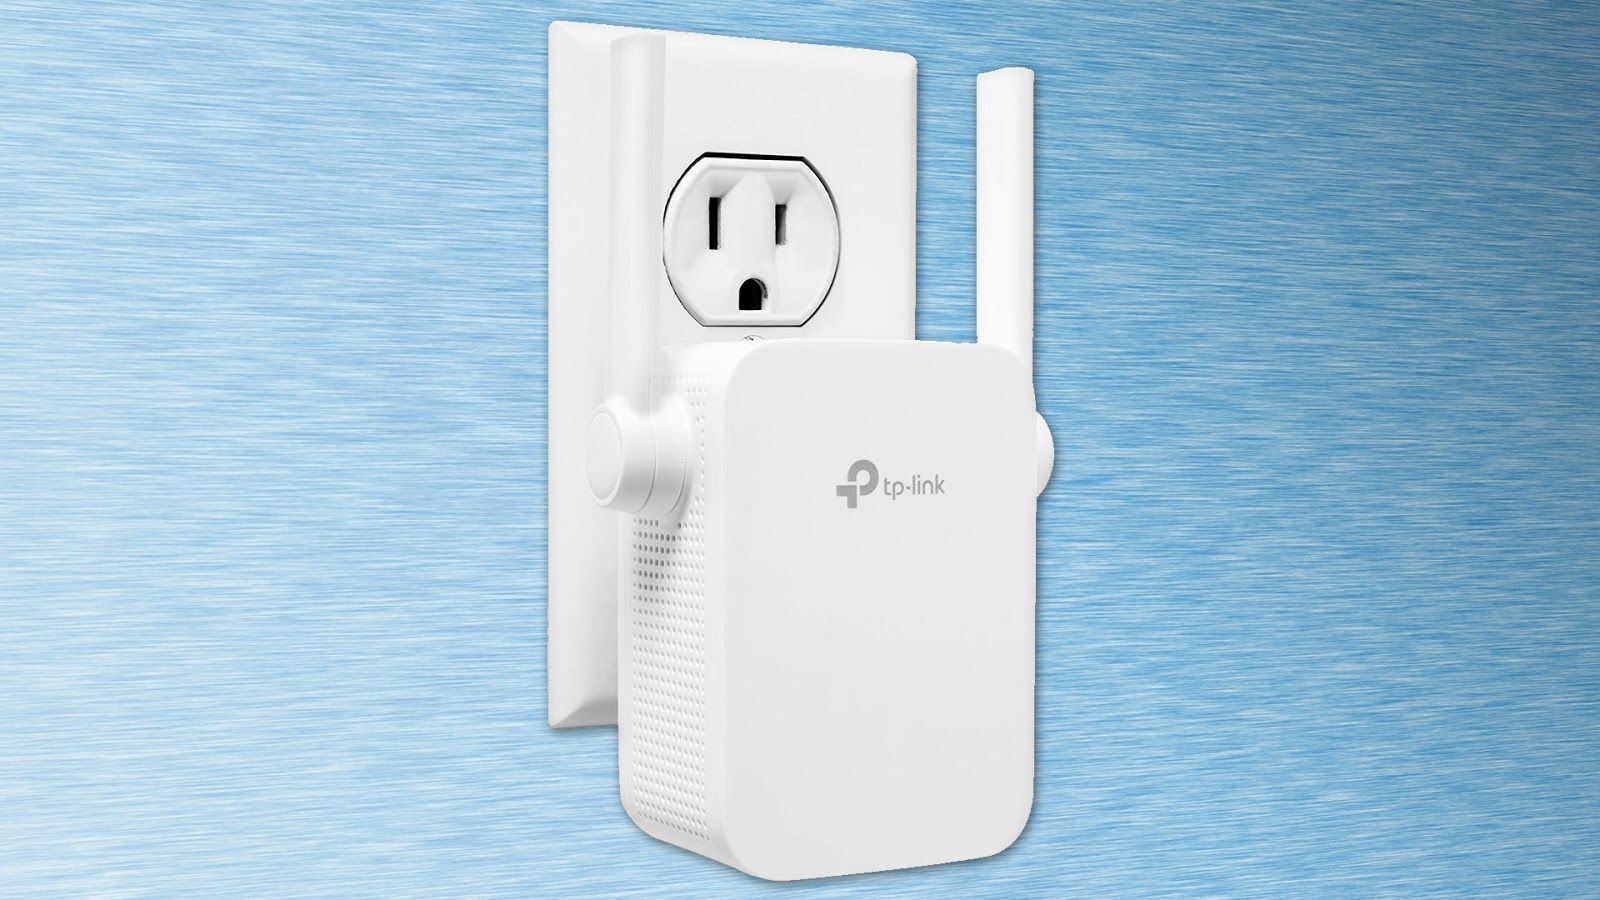
7. Consider Wi-Fi extenders or mesh systems: If your Wi-Fi signal is consistently weak due to interference, consider using Wi-Fi extenders or a mesh Wi-Fi system. These devices can improve signal strength and coverage by extending the Wi-Fi network throughout your home or office.
By checking for interference and taking measures to reduce it, you can enhance your Wi-Fi signal quality and minimize disruptions. Keep in mind that the effectiveness of these measures may vary depending on the specific interference sources and your environment.
Continue to monitor your Wi-Fi performance and assess if these interference reduction measures have resulted in improved connectivity. If you are still experiencing Wi-Fi problems, proceed to the next troubleshooting steps for further diagnosis and resolution.
Adjusting the Position of Your Router
The placement of your Wi-Fi router plays a crucial role in determining the strength and quality of your Wi-Fi signal. By adjusting the position of your router, you can optimize the signal coverage and minimize any potential obstacles that may be affecting your Wi-Fi performance. Here are some tips for positioning your router:
1. Centralize the router: Place your router in a central location within your home or office. This will help distribute the Wi-Fi signal evenly in all directions, improving coverage throughout the space.
2. Elevate the router: Position your router on a higher surface like a shelf or desk. This can help extend the Wi-Fi signal’s reach, as the signal travels better in open spaces without obstructions.
3. Avoid obstructions: Keep your router away from physical obstructions such as walls, furniture, large appliances, and metal objects. These can block or weaken the Wi-Fi signal. Aim for a clear line of sight between the router and your connected devices.
4. Minimize interference: Position your router away from other electronic devices like cordless phones, baby monitors, Bluetooth devices, and microwave ovens. These devices can interfere with the Wi-Fi signal and cause disruptions.
5. Angle the antennas: If your router has adjustable antennas, experiment with their angle and direction. Try pointing them vertically and horizontally to determine which position provides the best signal coverage.
6. Consider a Wi-Fi extender: If you have a large home or office and are struggling with Wi-Fi coverage in certain areas, consider using a Wi-Fi extender or repeater. These devices can expand the range of your Wi-Fi signal by amplifying and repeating the signal.
7. Regularly monitor signal strength: Use a Wi-Fi analyzer app or software to monitor the signal strength in various areas of your home or office. This can help you determine the ideal positioning for your router to achieve the best signal coverage.
Remember, the ideal position for your router may vary depending on your specific environment and the layout of your space. It may require some trial and error to find the optimal location that provides the best Wi-Fi coverage and minimizes signal obstructions.
After adjusting the position of your router, monitor your Wi-Fi performance to see if there are any noticeable improvements. If you are still experiencing connectivity issues, proceed to the next troubleshooting steps to further diagnose and resolve the Wi-Fi problems.
Checking for Device Issues
Wi-Fi problems may not always be caused by issues with your router or network settings. Sometimes, the problem can lie with the device you are using to connect to the Wi-Fi network. Here are some steps to check for device-related issues:
1. Restart your device: Just like routers, devices can experience temporary glitches. Restart your smartphone, tablet, laptop, or any other device experiencing Wi-Fi connectivity issues. This simple step can often resolve minor software or configuration problems.
2. Verify Wi-Fi settings: Double-check the Wi-Fi settings on your device to ensure that you are trying to connect to the correct network. Confirm that the network name (SSID) and password are entered correctly.
3. Try connecting other devices: Connect other devices, if available, to your Wi-Fi network. If these devices can connect without any issues, it indicates that the problem may be specific to the device you were initially troubleshooting.
4. Update device software and drivers: Ensure that your device is running the latest software updates. Outdated software can sometimes cause compatibility issues with Wi-Fi networks. Additionally, update the drivers for your wireless network adapter if applicable.
5. Disable third-party apps or firewalls: Some third-party apps or firewall settings can interfere with Wi-Fi connectivity. Temporarily disable any antivirus or firewall programs on your device to see if they are causing the issue.
6. Forget and reconnect: On your device, forget the Wi-Fi network you are trying to connect to, and then reconnect to it. This can help refresh the connection and resolve any authentication or configuration issues.
7. Perform a factory reset: If all other troubleshooting steps fail and Wi-Fi connectivity issues persist on a specific device, you may need to perform a factory reset. This will erase all data and settings on the device, restoring it to its original factory state. Note that this should be considered a last resort and should be done with caution, as it will erase all data on the device.
By checking for device-related issues and taking appropriate steps to resolve them, you can eliminate any potential faults caused by your device. If these troubleshooting steps do not resolve the Wi-Fi problems, it may be necessary to contact your device manufacturer’s support or consult with a professional for further assistance.
Contacting Your Internet Service Provider
If you have exhausted all troubleshooting steps and are still experiencing persistent Wi-Fi problems, it may be time to reach out to your Internet Service Provider (ISP) for further assistance. Your ISP has resources and expertise to help diagnose and resolve issues related to your internet connection. Here’s what you can do when contacting your ISP:
1. Collect necessary information: Before contacting your ISP, gather relevant information about your Wi-Fi setup and the problems you are experiencing. Note down your router make and model, the configuration settings you have applied, and any error messages or specific symptoms you have observed.
2. Call customer support: Look up the customer support number for your ISP and give them a call. Be prepared to provide them with the information you collected. Explain the steps you have taken to troubleshoot the issue and the results you observed.
3. Follow troubleshooting guidance: Your ISP’s customer support will guide you through further troubleshooting steps that are specific to their services and network infrastructure. They may remotely access your router or perform tests on their end to identify any issues affecting your Wi-Fi connection.
4. Schedule a technician visit: If the problem cannot be resolved over the phone, your ISP may schedule a technician visit to your location. The technician can conduct a more in-depth assessment of your internet connection and address any physical or technical issues that may be causing the Wi-Fi problems.
5. Ask about service outage or maintenance: In some cases, Wi-Fi issues may be caused by service outages or scheduled maintenance in your area. Check with your ISP to see if there are any known service disruptions that may be affecting your connectivity.
6. Consider upgrading your service: If you consistently experience slow speeds or connectivity issues, you may consider discussing the possibility of upgrading your internet service plan with your ISP. They can provide information on available options that may better suit your needs.
Remember to be patient and polite when interacting with your ISP’s customer support. They are there to assist you and provide solutions to your Wi-Fi problems. Keeping clear communication and providing specific details about your issue will help them better understand and address the problem.
By contacting your ISP, you can leverage their expertise and resources to troubleshoot and resolve complex Wi-Fi issues that may be beyond your control. Together with your ISP, you can work towards achieving a stable and reliable Wi-Fi connection.
Conclusion
Dealing with Wi-Fi problems can be frustrating, but by following the troubleshooting steps outlined in this article, you can effectively diagnose and resolve common Wi-Fi issues. Whether it’s checking your internet connection, restarting your router, adjusting the position of your router, or contacting your Internet Service Provider (ISP), each step brings you closer to a stable and reliable Wi-Fi connection.
Remember to start with the basics, such as checking your internet connection and restarting your devices and router. Then, proceed to troubleshoot specific issues like verifying your network name and password, updating your router’s software, checking for interference, and adjusting the position of your router. These steps help eliminate potential problems and improve your Wi-Fi performance.
In some cases, you may need to contact your ISP for advanced troubleshooting or schedule a technician visit if the issues persist. Your ISP can provide specialized support and expertise to further diagnose and resolve complex Wi-Fi problems.
By understanding the common Wi-Fi problems and implementing the appropriate troubleshooting steps, you can quickly regain a stable and reliable Wi-Fi connection. Don’t hesitate to experiment with different solutions and seek professional help when needed.
Remember, a strong Wi-Fi signal is essential for smooth internet browsing, video streaming, online gaming, and staying connected in today’s digital world. With a little patience and diligent troubleshooting, you can overcome Wi-Fi problems and enjoy uninterrupted internet access.