Introduction
Resetting a Nabi tablet can be a useful solution when you encounter issues such as freezing, slow performance, or forgotten passwords. By performing a factory reset, you can restore your Nabi tablet to its original settings, wiping out any personal data or modifications you have made.
There are several methods to reset a Nabi tablet, and in this article, we’ll explore them in detail. Whether you’re using the settings menu, the volume and power buttons, the Nabi Parental Controls app, or the Nabi Sync Utility, we’ve got you covered.
It’s important to note that performing a factory reset will erase all data and settings on the tablet, including apps, accounts, and personal files. Therefore, it is important to back up any important data before proceeding. Keep in mind that these instructions are specific to Nabi tablets and may not apply to other Android devices.
Before we delve into the step-by-step instructions for each method, it’s worth mentioning a few key considerations. First, make sure your tablet is connected to a power source or has a fully charged battery. This will prevent any interruptions during the reset process. Secondly, it’s always a good idea to update your tablet’s software to the latest version before performing a reset. This can help resolve any software-related issues that may be causing problems.
Finally, please note that while a factory reset can often solve common issues, it may not fix hardware problems or issues with specific apps. In such cases, you may need to seek additional support or contact the Nabi customer service team for further assistance.
Now that we understand the importance of backing up data and updating the software, let’s move on to the step-by-step instructions for resetting your Nabi tablet using different methods.
Factory Reset Method 1: Using the Settings Menu
One of the most common ways to perform a factory reset on a Nabi tablet is through the settings menu. This method is relatively straightforward and can be done in a few simple steps.
To begin, navigate to the “Settings” app on your Nabi tablet. You can usually find it in the app drawer or by swiping down from the top of the screen and tapping the gear icon.
Once you’re in the “Settings” app, scroll down and look for the “Backup & Reset” option. It is typically located under the “Personal” or “System” section.
Tap on “Backup & Reset,” and you will see a list of options related to resetting your device. Look for the “Factory Data Reset” option and tap on it.
Before proceeding, it’s essential to understand that performing a factory reset will erase all data on your tablet. If you haven’t already done so, make sure to back up any important files or documents.
Once you’re ready to proceed with the factory reset, you may be prompted to enter your Nabi tablet’s security code or pattern. This is an added security measure to prevent accidental resets. Enter the code or pattern correctly to continue.
After confirming your security code, you will be presented with a warning message indicating that all data on the device will be erased. Read the message carefully and ensure you have backed up any necessary information.
If you are ready to proceed, tap on the “Reset Tablet” or “Delete All” button. Your Nabi tablet will then start the reset process, which may take a few minutes. It will reboot automatically once the process is complete.
After the reboot, your Nabi tablet will be restored to its factory settings, free from any personal data or modifications you had made. You can now set it up as you did when you first purchased it.
It’s worth noting that if you have a child account set up on your Nabi tablet, performing a factory reset will not remove the child account. To remove the child account, you will need to navigate to the “Parental Controls” section in the settings menu separately.
Resetting your Nabi tablet through the settings menu is a convenient method that can be done without the need for any additional tools or software. However, if you encounter any issues or difficulties with this method, there are alternative methods you can try, which we will explore in the following sections.
Factory Reset Method 2: Using the Volume and Power Buttons
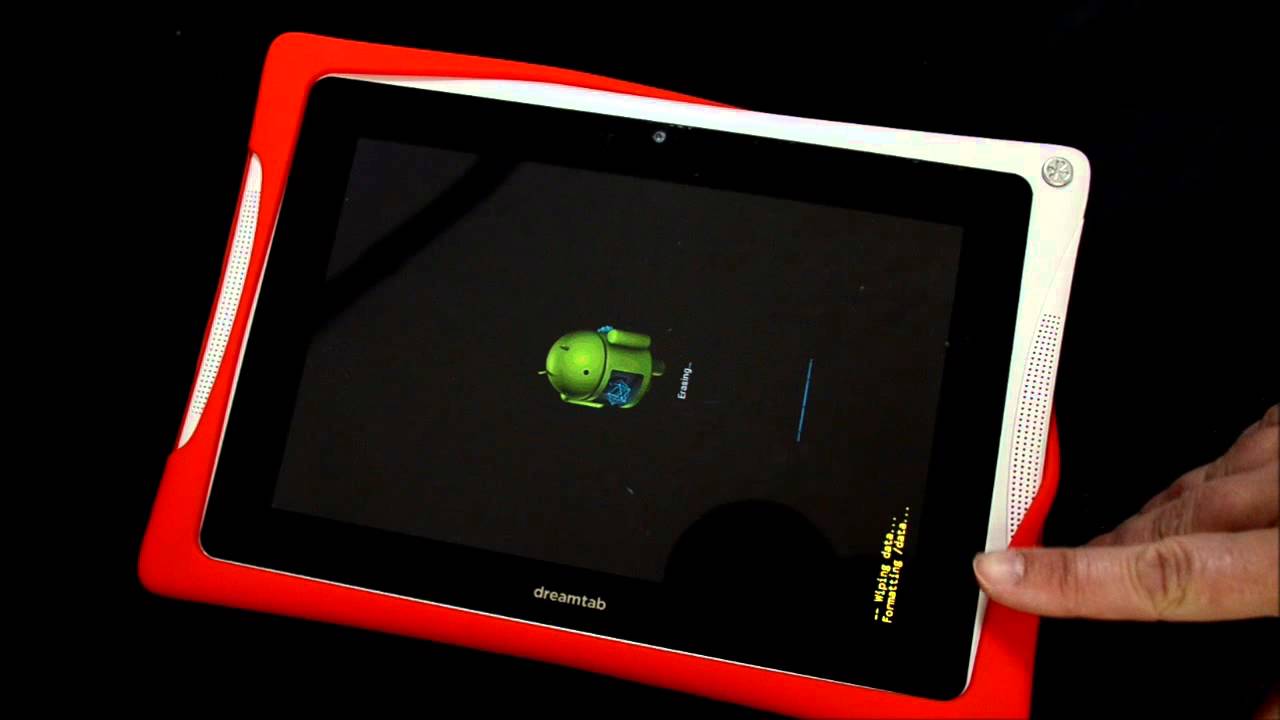
If you’re unable to access the settings menu on your Nabi tablet, or if the device is unresponsive, you can perform a factory reset using the volume and power buttons. This method allows you to bypass any software issues and initiate the reset directly from the device’s bootloader.
To begin, ensure that your Nabi tablet is powered off. If it’s currently on, press and hold the power button until the device shuts down completely.
Once the tablet is powered off, locate the volume up button and the power button. In most Nabi tablets, the volume up button is located on the right side of the device, while the power button is usually on the top or side. Familiarize yourself with the position of these buttons before proceeding.
Press and hold the volume up button and the power button simultaneously. Keep holding the buttons until the Nabi logo appears on the screen. This will indicate that you have successfully entered the bootloader mode.
In the bootloader mode, you will see a menu of options. Use the volume up and volume down buttons to navigate through the menu, and use the power button to select an option.
Look for an option that says “Factory Reset” or “Wipe Data/Factory Reset.” This may vary depending on the model of your Nabi tablet. Once you have highlighted the factory reset option, press the power button to select it.
You may be prompted to confirm the factory reset. Read the message carefully, as it will inform you that all data on the tablet will be erased. If you’re ready to proceed, select the “Yes” option to confirm and initiate the reset process.
The factory reset process may take a few minutes to complete. Once it’s finished, you will be taken back to the bootloader menu. Use the volume buttons to navigate to the “Reboot System Now” option and press the power button to select it.
Your Nabi tablet will now reboot, and you will be greeted with the initial setup screen. Follow the on-screen instructions to set up your tablet as you did when you first purchased it.
Using the volume and power buttons to perform a factory reset is a useful method when you’re unable to access the settings menu. However, it’s important to be cautious when navigating the bootloader menu and selecting options, as selecting the wrong option may have unintended consequences.
If you encounter any difficulties or issues while performing a factory reset using this method, don’t worry. There are alternative methods you can try, which we will explore in the following sections.
Factory Reset Method 3: Using the Nabi Parental Controls App
The Nabi Parental Controls app provides an additional method to perform a factory reset on your Nabi tablet. This method is particularly useful if you have enabled parental controls on the device and want to reset it without accessing the settings menu or using physical buttons.
To begin, open the Nabi Parental Controls app on your tablet. This app is usually pre-installed on Nabi tablets and can be found either on the home screen or in the app drawer. If you can’t find it, try searching for “Nabi Parental Controls” in the app drawer.
Once you’ve opened the app, you will need to enter your four-digit Parent Mode PIN. This PIN is required to access the parental controls settings. If you haven’t set a PIN yet, you can do so by tapping on the “Change PIN” option and following the on-screen instructions.
After entering the correct PIN, you will be taken to the Parental Controls settings menu. Here, you will find various options to manage and customize the parental controls on your Nabi tablet.
Look for the “Factory Reset” option within the settings menu. It is usually located towards the bottom of the menu, under the “Device” or “System” section. Tap on the “Factory Reset” option to proceed.
You will be prompted to confirm the factory reset. Make sure to read the confirmation message, as it will inform you that all data on the tablet will be erased. If you’re ready to proceed, select the “Yes” option to confirm and initiate the reset process.
The factory reset process will now begin, and it may take a few minutes to complete. Once it’s finished, your Nabi tablet will reboot automatically, and you will be taken to the initial setup screen.
Follow the on-screen instructions to set up your tablet as you did when you first purchased it. You can choose to set up a new parental control PIN or skip the process if you don’t want to enable parental controls.
Using the Nabi Parental Controls app to perform a factory reset provides a convenient option, particularly for users who have enabled parental controls on their device. However, if you encounter any issues or are unable to access the app, there are alternative methods you can try, which we will discuss in the following sections.
Factory Reset Method 4: Using the Nabi Sync Utility
The Nabi Sync Utility is a software tool provided by Fuhu Inc., the manufacturer of Nabi tablets. It allows you to manage and sync data between your Nabi tablet and a computer. In addition to data syncing, the Nabi Sync Utility also provides a method to perform a factory reset on your Nabi tablet.
To begin, you will need to download and install the Nabi Sync Utility on your computer. The utility is available for both Windows and Mac operating systems and can be downloaded from the official Nabi website.
Once the Nabi Sync Utility is installed, connect your Nabi tablet to the computer using a compatible USB cable. Make sure the tablet is switched on and the USB debugging mode is enabled in the developer options. If you haven’t enabled USB debugging before, you can do so by going to the tablet’s settings, navigating to “About”, tapping on “Build Number” seven times to unlock developer options, and then enabling USB debugging from the developer options menu.
After connecting the Nabi tablet to the computer, open the Nabi Sync Utility on your computer. The utility should recognize your device and display it in the interface.
Locate the “Advanced” or “Device Options” section within the Nabi Sync Utility, and look for the “Factory Reset” option. Click on this option to initiate the factory reset process.
A confirmation message will appear, informing you that all data on the tablet will be erased. Read the message carefully and ensure you have backed up any important files or data before proceeding.
If you’re ready to proceed, click on the “Yes” or “Continue” button to confirm and initiate the factory reset on your Nabi tablet.
The Nabi Sync Utility will now start the factory reset process. This may take a few minutes to complete, and the progress will be displayed on the screen.
Once the reset process is finished, your Nabi tablet will reboot automatically. You can now disconnect the USB cable and set up your tablet as you did when you first purchased it.
The Nabi Sync Utility provides an alternative method to perform a factory reset on your Nabi tablet and can be useful if you prefer using a computer or if other methods are not accessible. However, if you encounter any issues or difficulties with this method, don’t worry. There are other methods available that we have discussed in earlier sections.
Important Considerations Before Resetting
Before proceeding with a factory reset on your Nabi tablet, there are a few important considerations to keep in mind. These considerations will help ensure a smooth and successful reset process, as well as protect your data and settings.
Backup your data: Performing a factory reset will erase all data on your Nabi tablet, including apps, accounts, and personal files. It’s crucial to back up any important data before initiating the reset. You can use cloud storage services, external storage devices, or your computer to create backups of photos, videos, documents, and other files you want to keep.
Update your software: Before resetting your tablet, it’s advisable to update your software to the latest version available. Software updates often include bug fixes and performance improvements that can help resolve common issues. Updating your software may also enhance the overall reset process.
Check your power source: Ensure your Nabi tablet is connected to a power source or has a fully charged battery. Performing a factory reset requires uninterrupted power to avoid any disruptions during the process. A sudden loss of power can result in incomplete or corrupted reset, causing further issues.
Read the instructions: It’s important to carefully read and understand the instructions provided for the specific method you choose to perform a factory reset on your Nabi tablet. Each method may have slight variations and specific steps that need to be followed for a successful reset. Familiarize yourself with the process before proceeding.
Take note of your accounts and passwords: Resetting your Nabi tablet will remove any accounts and passwords associated with the device. Make sure to make a note of your account credentials, especially for important apps or services that you may need to re-login after the reset.
Understand the consequences: Performing a factory reset should be considered a last resort when all other troubleshooting methods have failed. A reset will erase all data and settings on your Nabi tablet, and you will need to set it up again as if it were new. Ensure you understand the consequences of a factory reset and consider seeking additional support or guidance if needed.
By considering these important factors before resetting your Nabi tablet, you can ensure a smoother and more successful reset process. Taking the necessary precautions will help safeguard your data and settings, allowing you to start fresh with your device.
Tips for Troubleshooting Reset Issues
Performing a factory reset on a Nabi tablet is typically a straightforward process. However, there are instances where users may encounter issues or difficulties during the reset. In this section, we’ll provide some useful tips to troubleshoot common reset issues and ensure a successful reset.
Ensure a stable and fast internet connection: Some Nabi tablets may require an internet connection during the reset process, particularly when setting up the device after the reset. Make sure you have a stable and fast internet connection to prevent any interruptions or delays.
Perform a hard reset: If you’re experiencing issues with the standard factory reset methods, you can try performing a hard reset. This involves completely powering off the device, removing the battery (if possible), and holding the power button for a few seconds to discharge any residual power. Reinsert the battery (if applicable) and power the tablet back on. This can sometimes help resolve stubborn issues.
Clear cache and perform a soft reset: If you’re encountering software-related issues with your Nabi tablet, you can try clearing the cache and performing a soft reset. To do this, navigate to the “Settings” menu, select “Storage,” and then tap on “Cached Data.” Choose the option to clear the cache. Once cleared, perform a soft reset by powering off your tablet and turning it back on. This can sometimes help resolve minor software glitches.
Try a different factory reset method: If one factory reset method is not working for your Nabi tablet, try using another method. For example, if you’re encountering issues with the settings menu method, attempt using the volume and power buttons method or the Nabi Sync Utility method. Different methods may have varying levels of success depending on the specific circumstances.
Verify software compatibility: Make sure the software version on your Nabi tablet is compatible with the factory reset methods you’re attempting. If you’re using an outdated software version, consider updating to the latest version available before performing the reset. Updating the software can often resolve compatibility issues and improve the reset process.
Contact Nabi customer support: If you have tried multiple troubleshooting steps but are still unable to reset your Nabi tablet, it’s advisable to reach out to Nabi customer support for further assistance. They will be able to provide personalized guidance and help resolve any specific issues you may be facing.
By following these troubleshooting tips, you can overcome common reset issues and ensure a successful factory reset on your Nabi tablet. However, if you continue to experience difficulties, don’t hesitate to seek additional support or guidance from the manufacturer or authorized service centers.
Conclusion
Resetting a Nabi tablet can be a valuable solution when you encounter performance issues or need to restore the device to its original settings. In this article, we explored several methods to perform a factory reset on a Nabi tablet, including using the settings menu, the volume and power buttons, the Nabi Parental Controls app, and the Nabi Sync Utility.
Before proceeding with a reset, it’s important to back up your data, update your software, and ensure a stable power source. Additionally, understanding the process and considering the consequences of a reset are crucial steps to take to avoid any unwanted data loss or complications.
Troubleshooting tips were provided to address common issues that may arise during the reset process. These tips include verifying software compatibility, performing a hard or soft reset, and contacting Nabi customer support for further assistance.
By following the instructions and tips outlined in this article, you can successfully perform a factory reset on your Nabi tablet and resolve any persistent issues you may be facing. Remember to exercise caution and make sure to create backups of your important data before initiating the reset.
Resetting your Nabi tablet can provide a fresh start, allowing you to enjoy improved performance and functionality. Whether you choose to use the settings menu, the volume and power buttons, the Nabi Parental Controls app, or the Nabi Sync Utility, the process is relatively straightforward and can be done with ease.
We hope that this guide has provided you with the knowledge and confidence to perform a factory reset on your Nabi tablet. If you have any questions or concerns, don’t hesitate to reach out to Nabi customer support for further assistance.


