To reset a monitor, you'll typically use the On-Screen Display (OSD) menu to perform a factory reset, or you can do a power cycle (hard reset) by unplugging it. This process restores your display to its original default state and fixes common issues like flickering, incorrect colors, blurry text, or unresponsive buttons by clearing software glitches and reverting settings changes.
How to Reset a Monitor to Fix Display Problems
A monitor reset is a straightforward troubleshooting step that returns your display to its original factory state. It's not a physical repair; instead, it clears the monitor's internal settings and temporary memory. This is the first thing to try when you're seeing problems like a washed-out picture, a persistent flicker, or an OSD that won't respond to button presses. By performing a reset, you undo any problematic customizations and give the monitor a clean slate to operate from, which often resolves the issue without needing further intervention.
Method 1: Factory Reset Using the On-Screen Display (OSD) Menu
The most common and direct way to reset a monitor is through its own built-in menu system. This method works on nearly all modern displays and is the primary solution for fixing color issues, incorrect aspect ratios, or an OSD that’s stuck. Here’s how to do it, with specific guidance for popular brands.
Step 1: Locate the Physical Buttons
Look for the physical buttons or a joystick on your monitor. These are usually located on the bottom bezel, the right side, or the back of the device. They might be labeled with icons like a gear (Menu), arrows (Navigation), and a checkmark or "OK" (Select). If you can't find them, consult your monitor's manual to identify the button layout.
Step 2: Open the OSD Menu and Navigate
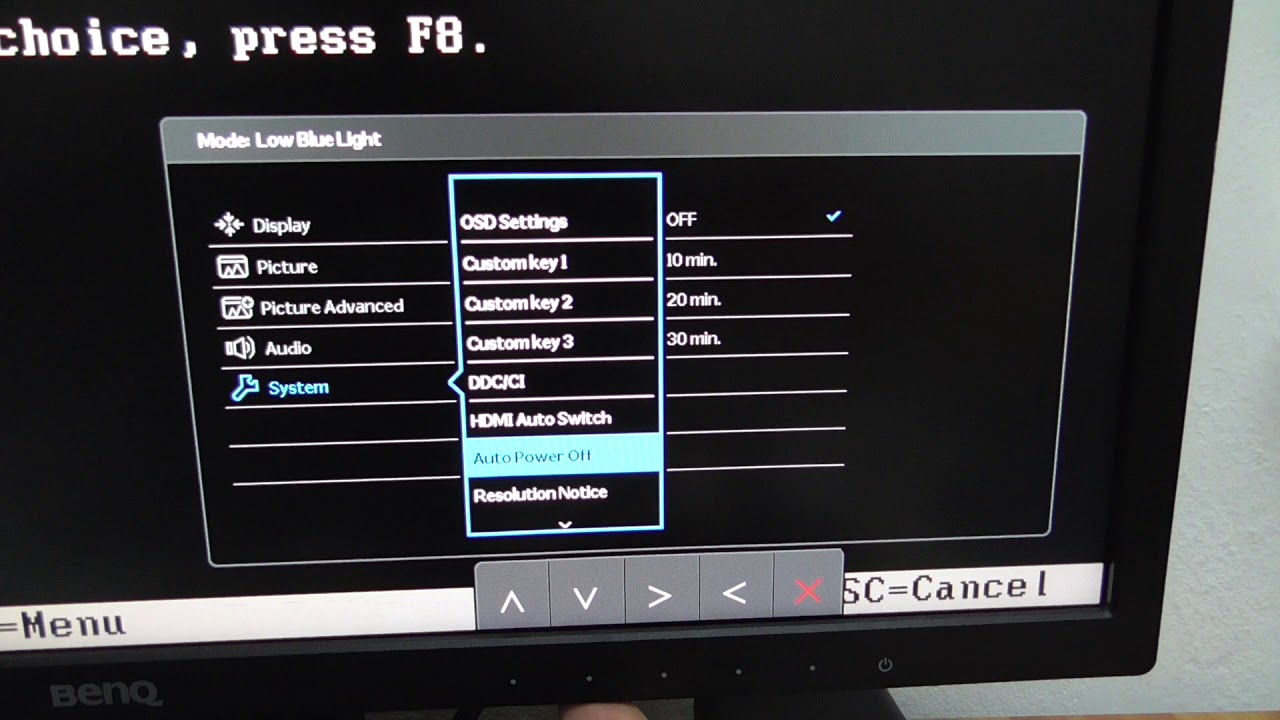
Press the "Menu" button to open the On-Screen Display. Use the arrow buttons or the joystick to navigate the menu. You are looking for a section typically labeled "System," "Management," "Other Settings," or "General." Inside that section, find an option named "Reset," "Factory Reset," "Reset All," or "Restore Defaults."
Step 3: Select and Confirm the Reset
Highlight the "Reset" option and press the "OK" or "Select" button. The monitor will usually ask you to confirm your choice. Select "Yes" or "Confirm" and press "OK" again. The monitor will then process the reset, which usually takes a few seconds, and may turn off and on automatically. Once it's back on, the OSD menu will close, and your monitor will be running on its default settings.
Specific Menu Paths for Common Brands
While the general steps are the same, here are the exact paths for some popular manufacturers:
- LG: Press the joystick button to open the menu. Go to Settings (the gear icon) → General → Reset (or Reset to Initial Settings). Confirm the action.
- Asus: Press the Menu button. Navigate to System Setup (often represented by a wrench icon). Then select Reset or All Reset and confirm.
- BenQ: Press the Menu button. Go to System or System Settings. From there, select Reset All and press the "OK" button to execute the reset.
If you have a different brand, the principle is the same: look for a "System" or "Settings" menu and then find the "Reset" option. Some Samsung displays, particularly for signage, might require a specific remote control sequence (MUTE → 1 → 8 → 2 → POWER ON) to access a service menu for a factory reset, but this is less common for standard PC monitors.
Method 2: Power Cycle (Hard Reset) Your Monitor
If your monitor is unresponsive to button presses, or if you're dealing with a complete black screen, a power cycle is the best approach. This method clears the monitor's internal memory and can fix minor software glitches that a standard OSD reset can't. It’s a more thorough way to reset a monitor that is stuck in a bad state.
Step 1: Turn Off and Unplug Everything
First, turn off your monitor using its power button. Then, unplug the power cable from the back of the monitor. It's also crucial to disconnect all video cables (HDMI, DisplayPort, VGA, etc.) from the monitor. This ensures that no residual power is being drawn from the computer or the wall outlet.
Step 2: Drain Residual Power
With the monitor unplugged, press and hold the power button on the monitor itself for 10 to 60 seconds. This step is critical because it discharges any remaining electrical charge stored in the monitor's capacitors. This helps to fully clear the internal memory and reset the hardware. You can hold it for the full 60 seconds to be thorough.
Step 3: Reconnect and Power On
After holding the power button, wait a minute or two. Then, reconnect the power cable and your video cables. Press the power button on the monitor to turn it back on. The monitor will power up as if it were new. This process doesn't just turn the monitor off and on; it ensures a complete power reset, which is often the only way to fix an unresponsive OSD or a monitor stuck in a deep sleep mode.
When a Monitor Reset Helps (and When It Doesn't)
Understanding what a reset can and cannot fix will save you time and frustration. A monitor reset is a powerful tool for resolving software and settings-related issues. This includes fixing incorrect color calibration, eliminating screen flicker caused by a driver conflict, clearing a blurry display from a bad resolution setting, and reviving an OSD menu that has become unresponsive. If you've adjusted your monitor's settings and now something looks wrong, a reset is the fastest way to revert to a known-good state.
However, it's crucial to know its limits. A reset will not fix physical hardware damage. If your screen is cracked, has dead pixels, or the display is physically broken, a reset won't help. Similarly, if the monitor doesn't power on at all (no LED light), the problem is likely a failed internal power supply or a damaged mainboard, which requires physical repair. For physical damage like a cracked screen, you'll need to look into a cracked screen repair guide or contact the manufacturer for service. In short, a reset fixes digital problems, but it cannot repair physical ones.
\nRelated reading: How To Change Resolution On Lg Monitor, How To Flip Screen On Windows, and How To Rotate Your Screen On Chromebook.