Introduction
Attaching a webcam to your monitor is a great way to enhance your video chatting, online meetings, gaming, and content creation experiences. Whether you want to connect with loved ones, collaborate with colleagues, or stream your gameplay, having a webcam attached to your monitor can provide you with better positioning, stability, and improved video quality.
In this guide, we will walk you through the steps of attaching a webcam to your monitor. We will discuss the materials you will need, the different types of attachments available, and provide helpful tips for positioning and adjusting the webcam. By following these steps, you can ensure that your webcam is securely attached and optimally positioned for your specific needs.
Before we delve into the step-by-step process, make sure you have the necessary materials at hand. You will need a compatible webcam, a monitor with a flat bezel or suitable attachment options, and a clean cloth for surface preparation. Additionally, refer to the instructions provided by the webcam manufacturer for any specific recommendations or attachment methods.
Now, let’s get started and discover how you can easily attach your webcam to your monitor!
Step 1: Gather the necessary materials
Before you begin the process of attaching a webcam to your monitor, it is important to gather all the necessary materials. Here is a list of items you will need:
- A compatible webcam: Ensure that the webcam you have is compatible with your computer system and has the necessary connectivity options (USB, HDMI, etc.).
- A suitable monitor: Look for a monitor that has a flat bezel or attachment options specifically designed for webcam integration.
- A clean cloth: This will be used to clean the surfaces of both the monitor and the webcam, ensuring a firm and secure attachment.
- Instructions from the webcam manufacturer: Check the user manual or online resources provided by the webcam manufacturer for any specific recommendations or attachment methods.
Having these materials ready will make the process smoother and help you avoid any delays or complications along the way. Ensure that you have double-checked the compatibility of the webcam with your computer system to avoid any potential compatibility issues.
It is also worth noting that some webcams come with additional accessories or mounting options, such as a clip or a stand. If your webcam includes these accessories, make sure you have them readily available during the attachment process.
Now that you have gathered all the necessary materials, you are ready to move on to the next step: determining the type of attachment for your webcam and monitor.
Step 2: Determine the type of attachment
When it comes to attaching a webcam to your monitor, there are different types of attachments you can choose from, depending on your monitor’s design and your personal preference. Here are a few common attachment options:
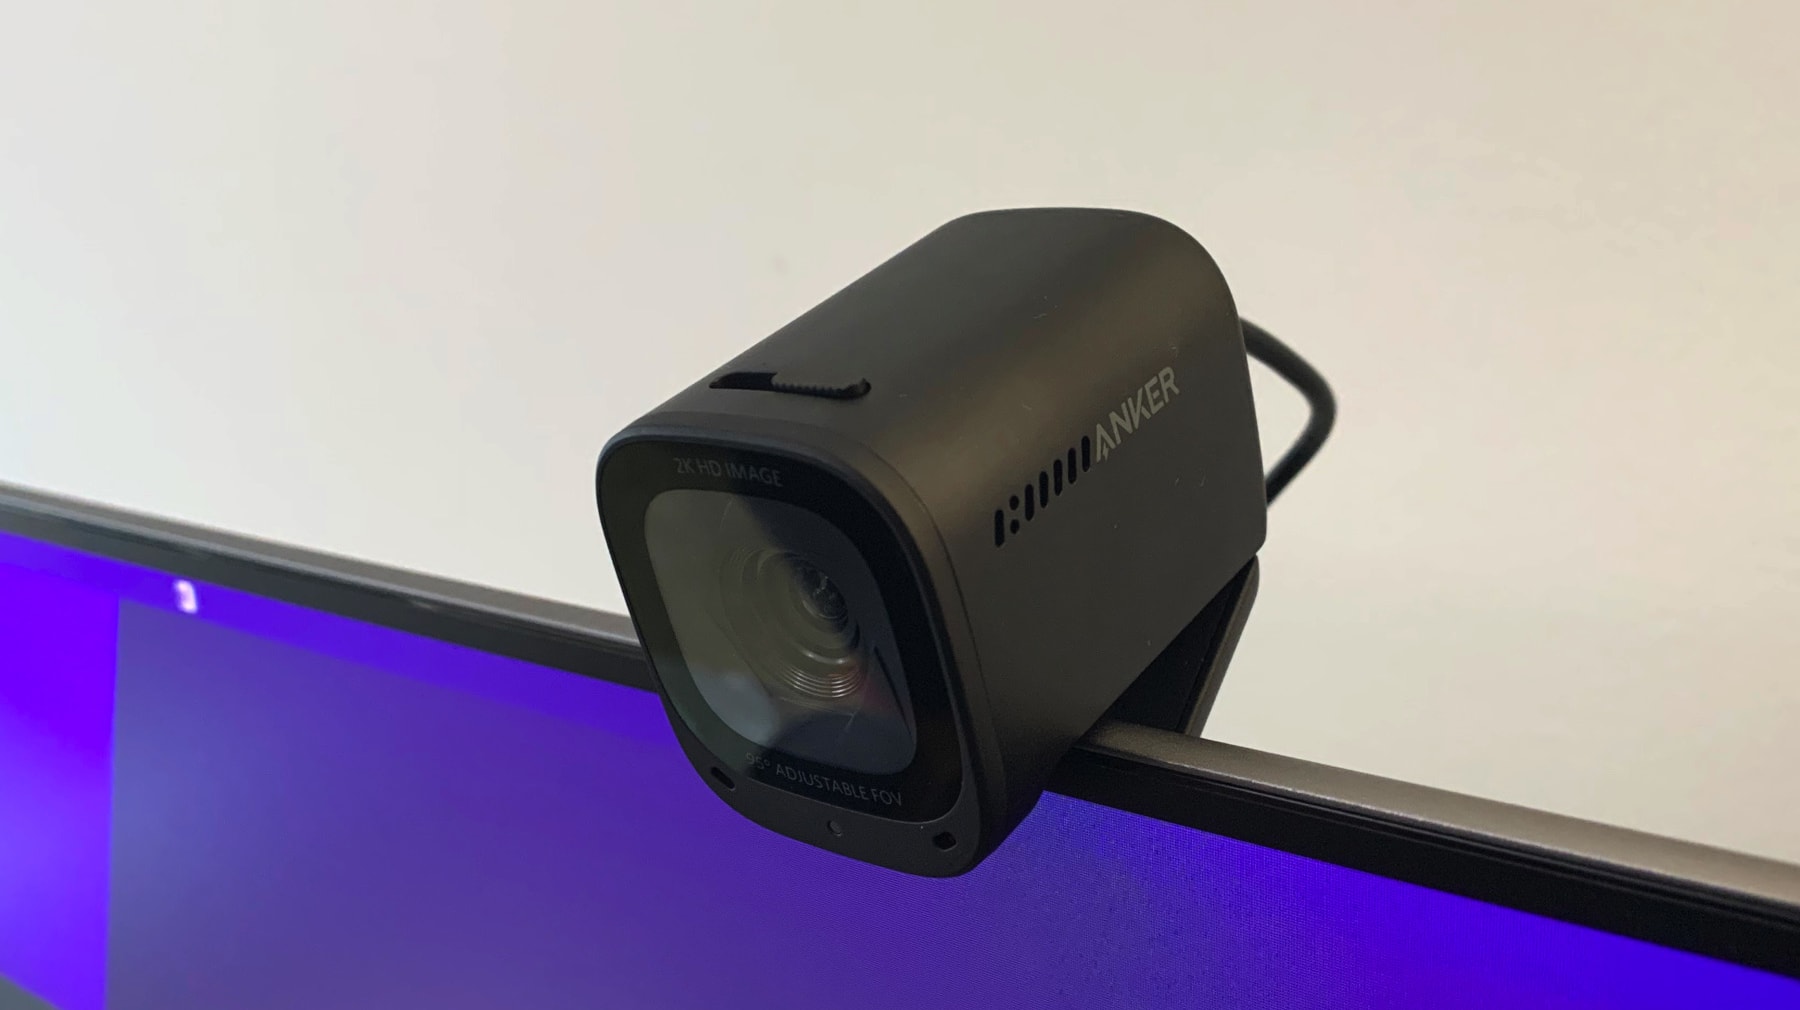
- Clip attachment: This is one of the most common attachment methods. It involves using a clip that securely holds the webcam onto the top edge of your monitor. The clip is typically adjustable, allowing you to change the angle and position of the webcam as needed.
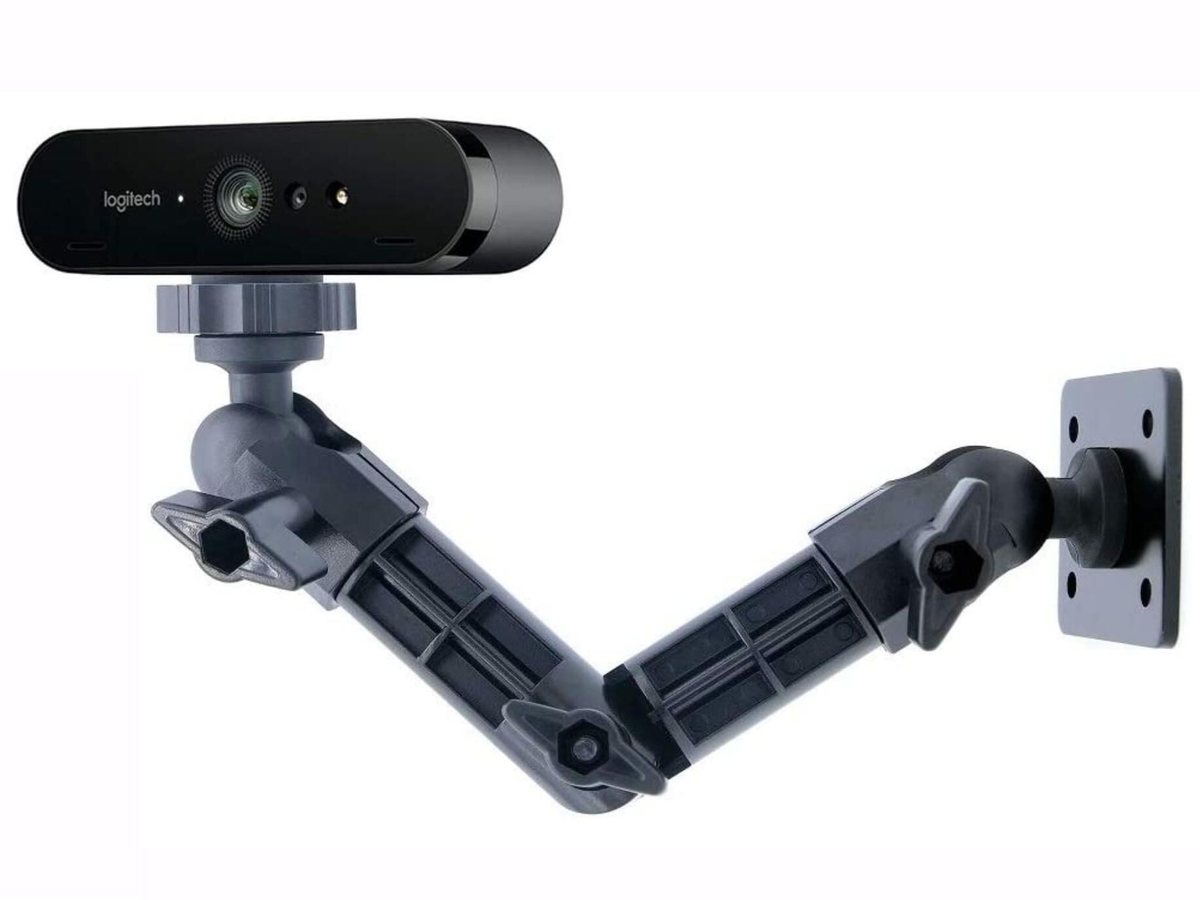
- Mount attachment: Some webcams come with a dedicated mounting mechanism that allows you to attach them directly to a specific mounting point on the back of your monitor. This type of attachment provides a more stable and permanent solution.
- Adhesive attachment: In certain cases, you may find webcams that come with adhesive pads or stickers. These attachments stick to the monitor’s surface, providing a secure hold without the need for clips or mounts. However, keep in mind that adhesive attachments may not be suitable for all monitor surfaces.
Take a moment to assess the design and features of your monitor to determine which attachment method would work best for you. Consider factors such as the monitor’s bezel thickness, the flexibility you desire in adjusting the webcam’s position, and the stability required for your specific use case.
It’s also a good idea to refer to the webcam manufacturer’s instructions or website for any specific attachment recommendations. They may provide insights on the best attachment method for your webcam and monitor combination.
Once you have determined the type of attachment that suits your needs, you can proceed to the next step: cleaning the surfaces of your monitor and webcam for a secure attachment.
Step 3: Clean the monitor and webcam surfaces
Before attaching the webcam to your monitor, it is crucial to ensure that both surfaces are clean and free from dust, dirt, or any other particles that could hinder the attachment. Here’s what you need to do:
- Power off your monitor: Start by turning off your monitor and disconnecting it from any power source. This will prevent any accidental damage or interference during the cleaning process.
- Prepare a clean cloth: Grab a soft, lint-free cloth, preferably microfiber, to clean the surfaces of your monitor and webcam. Avoid using abrasive materials or harsh chemicals that could potentially cause damage.
- Clean the monitor: Gently wipe the monitor’s surface to remove any dust or smudges. Begin from the top and work your way down, ensuring that you cover the entire surface. Pay extra attention to the area where you plan to attach the webcam.
- Clean the webcam: Use the cloth to wipe the surface of the webcam, removing any dirt or fingerprints. Be careful not to apply excessive pressure or get any liquid into the webcam’s openings or lenses.
- Dry the surfaces: Allow the monitor and webcam surfaces to air dry or use a clean, dry cloth to gently pat them dry. Make sure there is no moisture remaining before proceeding to the next step.
By cleaning both the monitor and webcam surfaces, you will ensure a solid and secure attachment. Any dust or particles left on the surfaces could affect the grip and stability of the attachment, potentially leading to a shaky or unstable webcam position.
Once you have thoroughly cleaned the surfaces, you are now ready for the next step: attaching the webcam using a clip or mount, depending on the type of attachment you have chosen.
Step 4: Attach the webcam using a clip or mount
Now that you have cleaned the surfaces of your monitor and webcam, it’s time to attach the webcam securely to your monitor. The method will depend on the type of attachment you have chosen. Follow these steps:
- Clip attachment:
- Mount attachment:
- Adhesive attachment:
If you are using a clip attachment, locate the appropriate area on your monitor where you want to attach the webcam. Ensure that the clip is wide enough to fit securely over the top edge of the monitor.
Gently position the webcam’s clip over the top edge of the monitor, ensuring a firm grip. Apply gentle pressure to close the clip and secure the webcam in place. Make any necessary adjustments to achieve the desired angle and position.
If your webcam has a dedicated mount attachment, locate the mounting point on the back of your monitor. Some mounts may require you to remove a plastic cover or panel to reveal the mounting area.
Align the mount with the mounting point and carefully attach the webcam to the monitor. Ensure that the mount is securely fastened and tightened if there are any components that allow adjustment.
If your webcam uses adhesive pads or stickers, carefully remove the protective covering to expose the adhesive side.
Align the webcam and attach it to the desired spot on your monitor’s surface. Apply even pressure for a few seconds to ensure a secure bond.
Whichever attachment method you choose, ensure that the webcam is firmly attached to the monitor. Wiggle it slightly to test its stability and make any necessary adjustments to the positioning and angle.
Keep in mind that not all monitors and webcams are designed to accommodate all attachment methods. Refer to the webcam manufacturer’s instructions or website for specific guidance on attaching the webcam to your monitor.
Now that your webcam is securely attached, it’s time to move on to the next step: adjusting the webcam position and angle to best suit your needs.
Step 5: Adjust the webcam position and angle
With the webcam securely attached to your monitor, it’s important to adjust its position and angle to ensure optimal framing and image quality. Follow these steps to get the best setup:
- Check your positioning:
- Adjust the tilt and swivel:
- Ensure proper lighting:
- Check for distracting backgrounds:
- Test the view:
Consider the purpose for which you are using the webcam. If you’re primarily using it for video conferencing or online meetings, position the webcam at eye level or slightly above to create a more natural perspective. This helps avoid unflattering angles or awkward framing.
If you’re using the webcam for gaming or content creation, experiment with different angles to find what works best for you. It may take some trial and error to achieve the desired setup.
Most webcams allow you to tilt and swivel them to adjust the view. Take advantage of this feature to fine-tune the angle and framing. Make adjustments based on your preference and the specific activity you are using the webcam for.
Consider the lighting conditions in your environment. Avoid bright backlighting or direct sunlight that may wash out the image. Position yourself and the webcam in a way that provides even and flattering lighting on your face.
If necessary, you can add additional lighting sources such as desk lamps or ring lights to improve the overall lighting quality and visibility.
Pay attention to the background visible through your webcam. Remove any clutter or distracting elements that may divert attention away from you during video calls or recordings.
You can also consider using virtual backgrounds or applying a shallow depth of field effect (if supported by your webcam software) to further enhance the visual appeal.
Before starting your video call or recording, test the view by opening your preferred webcam software or using an online video testing tool. Make any necessary adjustments to the position and angle to ensure that you are happy with the framing and image quality.
Remember, the optimal position and angle of the webcam may vary depending on your personal preferences and specific use case. Take your time to experiment and find the configuration that works best for you and enhances your video chatting, meetings, or content creation experience.
Now that you have adjusted the webcam position and angle to your liking, it’s time to move on to the next step: testing the webcam functionality.
Step 6: Test the webcam functionality
After attaching and adjusting your webcam, it’s important to test its functionality to ensure that it is working correctly. Follow these steps to perform a thorough test of your webcam:
- Open webcam software:
- Check the video feed:
- Ensure audio functionality:
- Test video quality:
- Verify additional functionalities:
Launch the webcam software or application that you typically use for video calls or recordings. If you do not have any specific software, you can use online webcam testing websites or applications.
Once the webcam software is open, check if the video feed from your webcam is displayed correctly. You should see yourself or the surroundings, depending on the view and setup.
If your webcam has a built-in microphone, make sure it is working by speaking into it or clapping your hands nearby. Check if the audio levels are registered and if the sound is clear.
Depending on the software or website you are using, there may be options to adjust video quality settings. Experiment with these settings to find the best balance between video resolution, frame rate, and bandwidth usage.
Perform simple movements in front of the webcam to see if the image appears smooth and without significant lag or distortion. Check if the colors are accurate and if the image is sharp and well-focused.
If your webcam has additional features such as autofocus, zoom, or special effects, test these functionalities and ensure they are working as expected. Familiarize yourself with the controls and explore any additional settings or options provided by the software or webcam.
During the testing process, be attentive to any error messages, glitches, or unusual behavior. If you encounter any issues, refer to the webcam’s user manual or the manufacturer’s support resources for troubleshooting steps.
By thoroughly testing your webcam’s functionality, you can ensure that it is ready for use in video calls, online meetings, gaming, or content creation.
Once you have verified that your webcam is functioning properly, you can move on to the final step: removing the webcam if needed.
Step 7: Remove the webcam if needed
There may be instances when you need to remove the webcam from your monitor. It could be due to a change in setup, relocation, or simply not needing the webcam at that time. Follow these steps to safely remove the webcam:
- Power off your monitor:
- Detach the clip or mount:
- Remove adhesive attachments:
- Store the webcam:
Before removing the webcam, turn off your monitor and disconnect it from any power source. This ensures your safety and prevents any accidental damage during the removal process.
If you attached the webcam using a clip, gently press on the release mechanism or slide it sideways to unlock the clip from the monitor’s edge. Carefully lift the webcam away from the monitor, ensuring no cables or attachments are caught.
If your webcam was mounted using a dedicated mount, locate the fastening mechanism and loosen it to remove the webcam. Be cautious not to force or damage any parts during the removal process.
If your webcam uses adhesive pads or stickers, start by detaching one side of the adhesive from the monitor’s surface. Slowly peel it off, applying even pressure to avoid leaving any residue or damaging the monitor.
Once the adhesive is removed, clean any remaining residue on the monitor using a mild cleaning solution and a soft cloth. Be careful not to use any abrasive materials that could scratch or damage the monitor’s surface.
If you plan to store the webcam for future use, ensure it is kept in a safe and dust-free location. Place it in a protective case or packaging provided by the manufacturer to prevent any potential damage.
Store any additional accessories, cables, or attachments with the webcam to keep everything organized and readily available when needed.
By safely removing the webcam from your monitor, you can preserve its functionality and prevent any damage to both the webcam and the monitor. If you need to reattach the webcam in the future, simply follow the steps mentioned earlier in this guide.
Congratulations! You have successfully learned how to attach, adjust, and remove a webcam from your monitor. Whether you’re using it for video conferencing, gaming, or content creation, having a well-positioned and stable webcam can greatly enhance your experiences. Enjoy using your webcam and make the most out of your online interactions and engagements.
Conclusion
Attaching a webcam to your monitor is a simple process that can greatly enhance your video chatting, online meetings, gaming, and content creation experiences. By following the steps outlined in this guide, you can securely attach your webcam and adjust its position to achieve the best framing and image quality.
Remember to gather all the necessary materials, including a compatible webcam, a suitable monitor, and a clean cloth for surface preparation. Determine the type of attachment that suits your needs, whether it’s a clip, mount, or adhesive option. Clean the surfaces of your monitor and webcam to ensure a secure attachment, and attach the webcam using the appropriate method.
Adjust the position and angle of the webcam to achieve optimal framing and lighting. Test the webcam functionality, including video feed, audio, and additional features, to ensure everything is working smoothly. If needed, safely remove the webcam from your monitor by following the recommended steps.
By attaching a webcam to your monitor, you open up a world of possibilities for online communication, collaboration, and entertainment. Whether you’re connecting with colleagues, family, or friends, or pursuing your passion for content creation or gaming, a well-placed and stable webcam can drastically improve the overall experience.
Now that you have completed the process of attaching and adjusting your webcam, you are ready to enjoy the benefits it brings. Have a great time using your webcam and make the most out of your online interactions!