Introduction
Welcome to this guide on how to replace a projector bulb. If you own a projector, you know that the bulb is a crucial component responsible for projecting the sharp and vibrant images onto the screen. Over time, projector bulbs experience wear and tear, and their brightness and performance start to degrade. When that happens, it’s necessary to replace the bulb to ensure optimal image quality and longevity of your projector.
Replacing a projector bulb may seem like a daunting task, especially if you have never done it before. However, with the right tools and instructions, it can be a straightforward process that anyone can accomplish.
In this article, we will walk you through the step-by-step process of replacing a projector bulb. We will cover everything from turning off the projector and allowing it to cool down to removing the old bulb and inserting a new one. We will also provide tips on resetting the projector lamp timer and testing the new bulb to ensure it is working correctly.
By following these instructions, you will be able to confidently replace a projector bulb without the need for professional assistance. So, let’s get started and ensure you have a bright and clear picture for your next movie night or presentation.
Tools and Materials Needed
Before you begin the process of replacing a projector bulb, it’s important to gather the necessary tools and materials. Having everything ready will streamline the process and ensure you have everything you need at your fingertips. Here are the tools and materials you will need:
- Safety gloves: It’s always a good idea to wear safety gloves to protect your hands during the bulb replacement process.
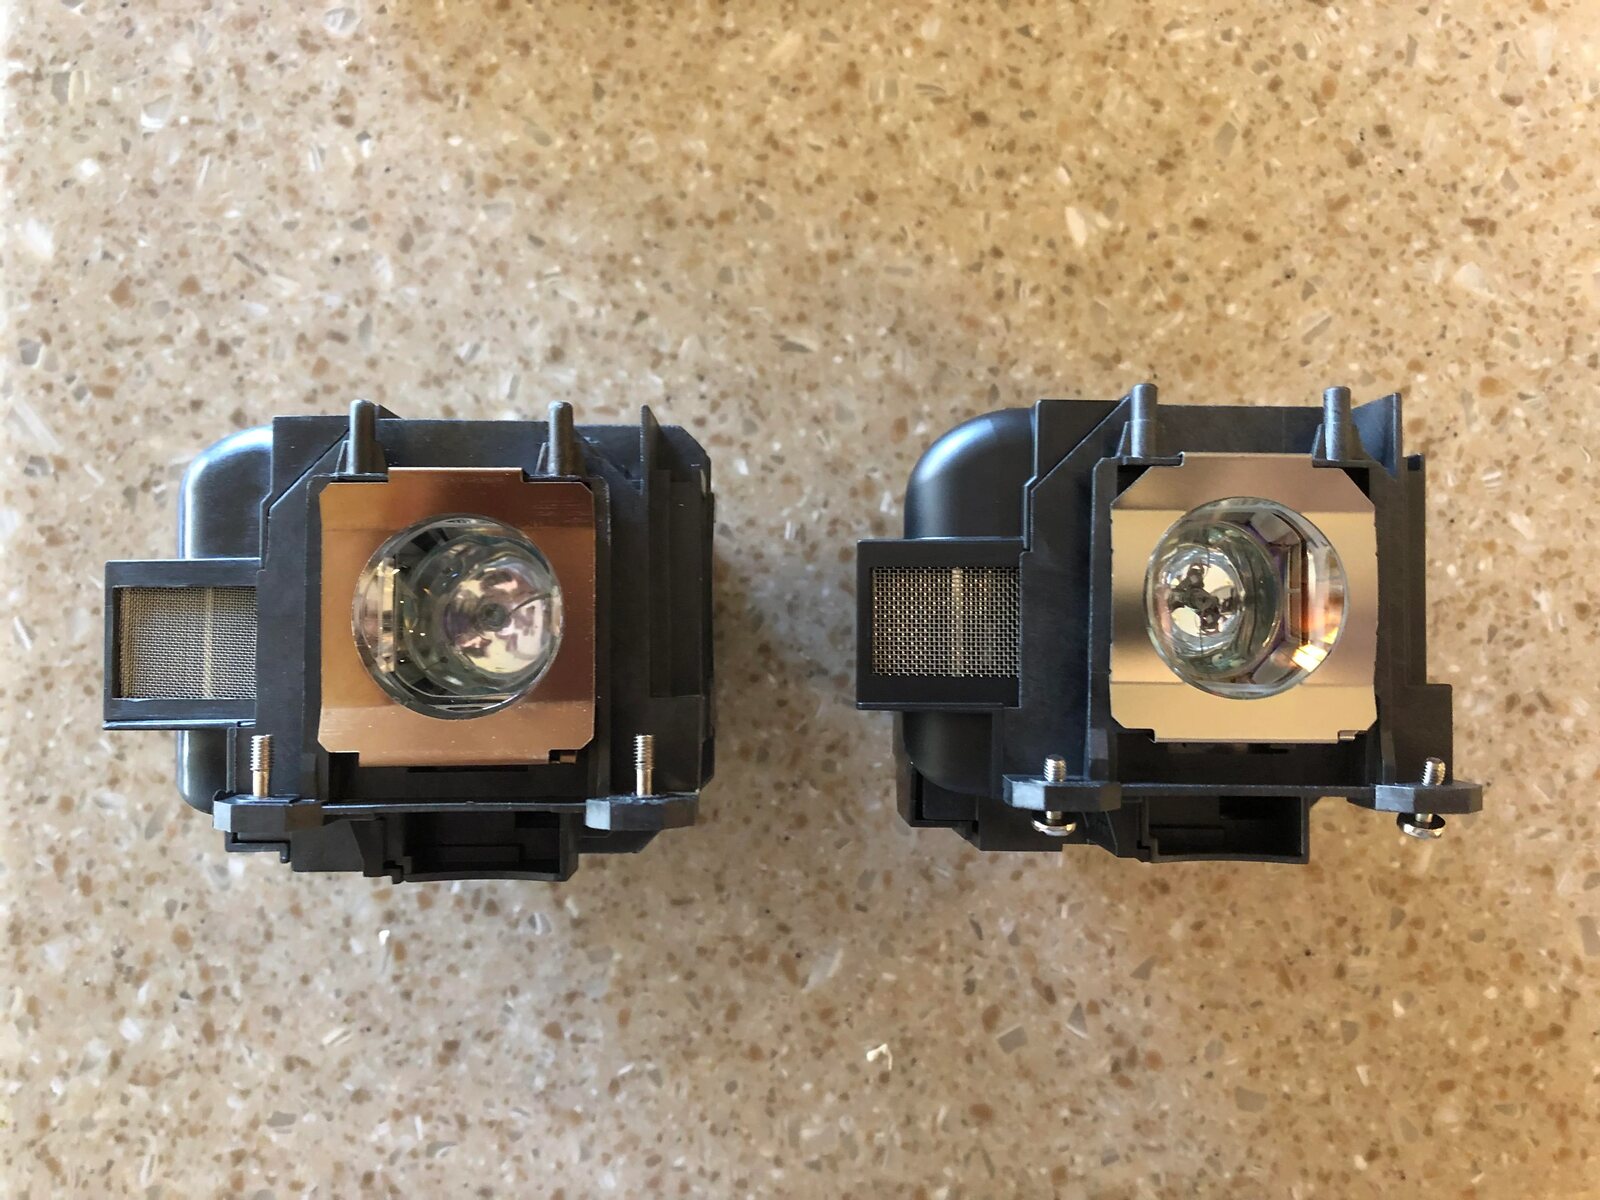
- Replacement projector bulb: Make sure you have a compatible replacement bulb for your specific projector model. Check the projector’s user manual or the manufacturer’s website to find the correct bulb.
- Screwdriver: Depending on the projector model, you might need a Phillips or flat-head screwdriver to remove the access panel or secure the bulb in place.
- Cleaning cloth: A lint-free cleaning cloth will come in handy for wiping away any dust or fingerprints that may have accumulated on the new bulb or inside the projector.
- Rubbing alcohol: Use a small amount of rubbing alcohol on the cleaning cloth to ensure a thorough and clean installation of the new bulb.
- Static-free cloth or gloves: Static electricity can damage sensitive components of the projector. Using a static-free cloth or wearing anti-static gloves will help prevent any potential damage during the bulb replacement.
Ensure that you have all these tools and materials before proceeding with the replacement process. Having them ready will make the process smoother and help you avoid any unnecessary delays or interruptions. Now that you have everything prepared, let’s move on to the step-by-step instructions on replacing the projector bulb.
Step 1: Turn off the projector and unplug it
Before you begin the process of replacing a projector bulb, it is crucial to ensure the safety of both yourself and the projector. To do so, follow these steps:
- Make sure the projector is turned off: Locate the power button on the projector or the remote control and press it to turn off the device.
- Unplug the projector: Locate the power cord at the back or side of the projector and gently unplug it from the power outlet. This will prevent any electrical shock or damage while handling the bulb.
- Allow the projector to cool down: Projector bulbs become extremely hot during operation, so it’s important to give them enough time to cool down. Check the user manual to determine how long the cooling period should be for your specific model.
By following these steps, you ensure a safe environment for bulb replacement and minimize the risk of burns or electrical hazards. Remember, safety should always be your top priority when handling any electronic device, including projectors.
Step 2: Allow the projector to cool down
Once you have turned off the projector and unplugged it, it’s crucial to allow the projector sufficient time to cool down before proceeding with the bulb replacement. This will help prevent any potential injuries or damage caused by touching a hot bulb.
The cooling time can vary depending on the projector model and how long it has been in use. It is recommended to consult the user manual or the manufacturer’s website for specific instructions regarding the cooling period for your projector.
During this cooling period, it’s essential to refrain from touching the projector or attempting to open any access panels. Doing so can result in burns or other injuries. It’s best to exercise patience and wait for the projector to reach a safe temperature for handling.
As the projector cools down, take this opportunity to gather the necessary tools and materials for the bulb replacement. This will ensure that you are fully prepared when the projector is ready for the next steps.
By allowing the projector to cool down adequately, you protect both yourself and the equipment from potential harm. It’s always better to be safe than sorry, so take the necessary time and precautions during this step.
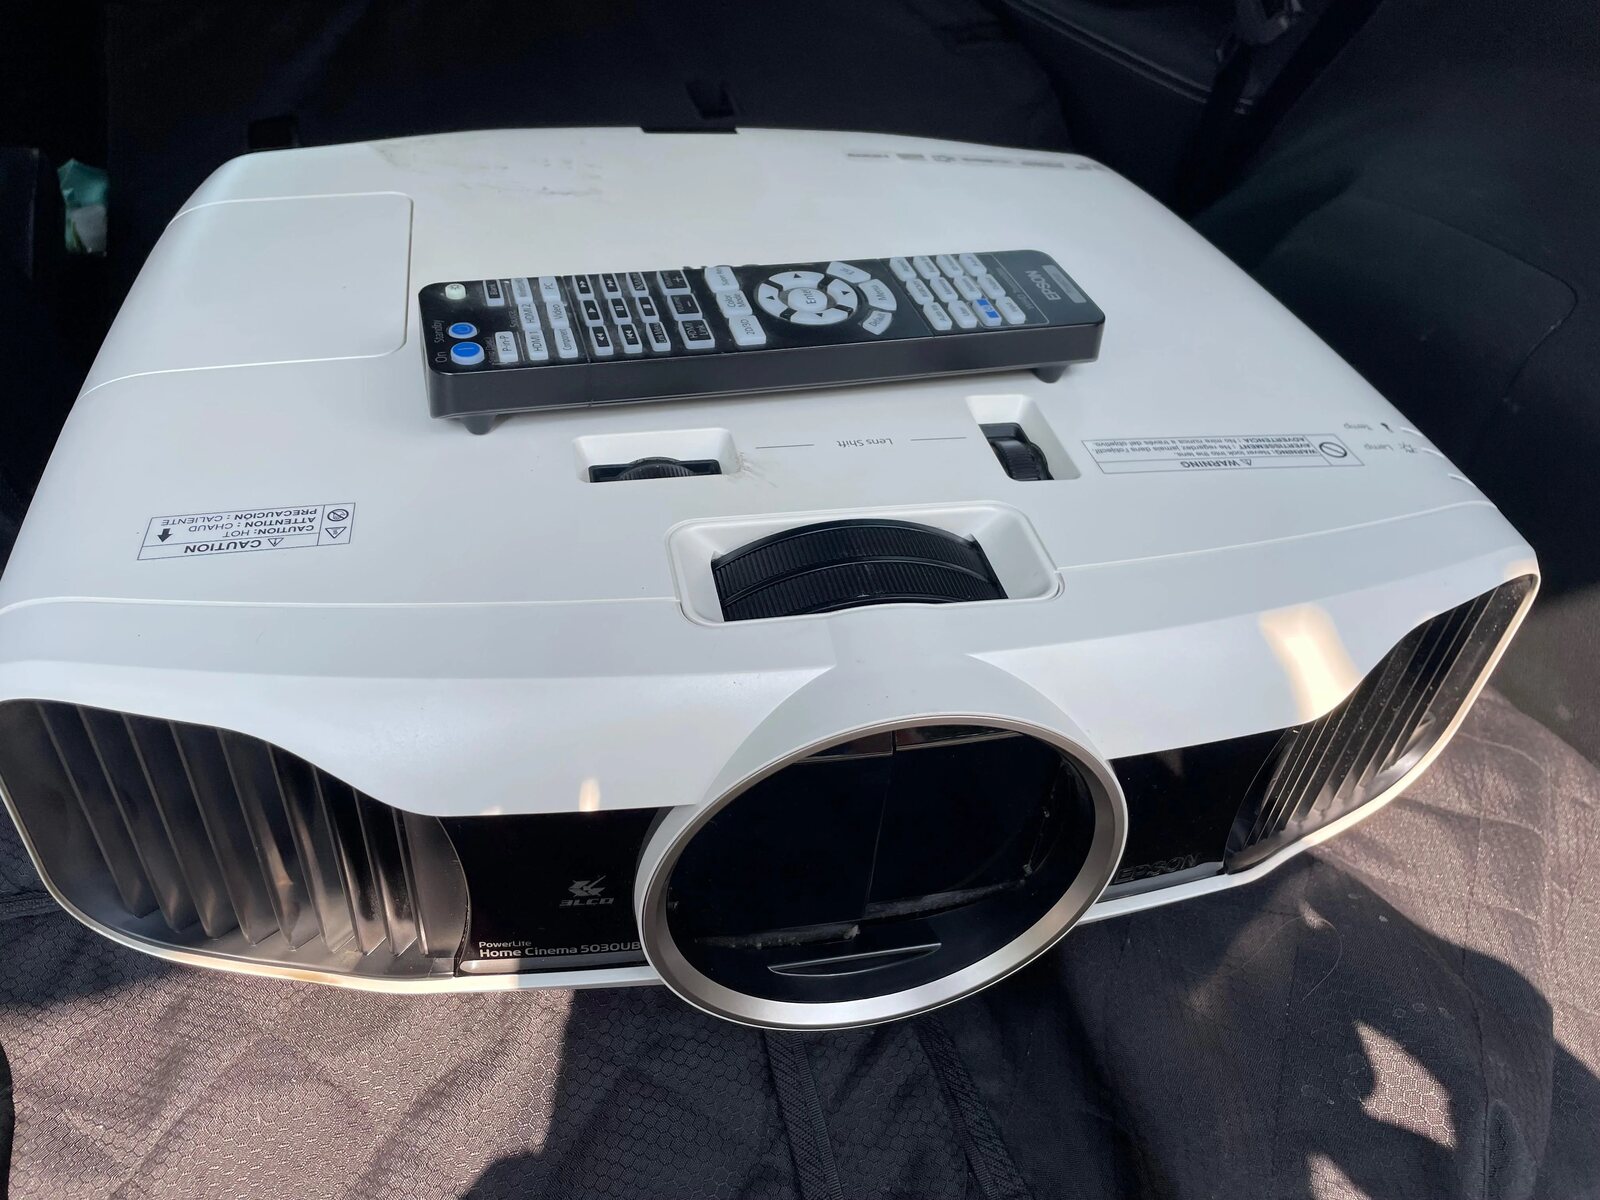
Step 3: Locate the projector bulb access panel
After the projector has cooled down and you are ready to proceed with the bulb replacement, the next step is to locate the projector bulb access panel. This panel provides you with access to the bulb compartment for replacement.
Here’s how to find the access panel:
- Consult the user manual: The user manual that came with your projector is an excellent resource for locating the access panel. It will typically provide detailed instructions, including diagrams or illustrations, to guide you to the right spot.
- Inspect the projector: Examine the exterior of the projector and look for any removable panels or compartments. The access panel is usually located on the side or rear of the projector, but the exact location can vary depending on the model.
- Check for labeling or markings: Some projectors have labeling or markings indicating the location of the access panel. Look for words like “lamp” or “bulb” or symbols that resemble a light bulb.
- Online research: If you are unable to find the access panel using the user manual or visual inspection, conducting a quick online search for your specific projector model can provide helpful tips or video tutorials.
Once you have located the access panel, take a moment to familiarize yourself with its opening mechanism. Some panels may require the use of a screwdriver to remove screws, while others may have a latch or slide mechanism.
Remember, it’s essential to handle the projector with care during this step. Avoid applying excessive force or pressure to prevent damaging the projector or its components.
By successfully locating the projector bulb access panel, you are one step closer to replacing the old bulb with a new one. Proceed to the next step for instructions on removing the access panel safely.
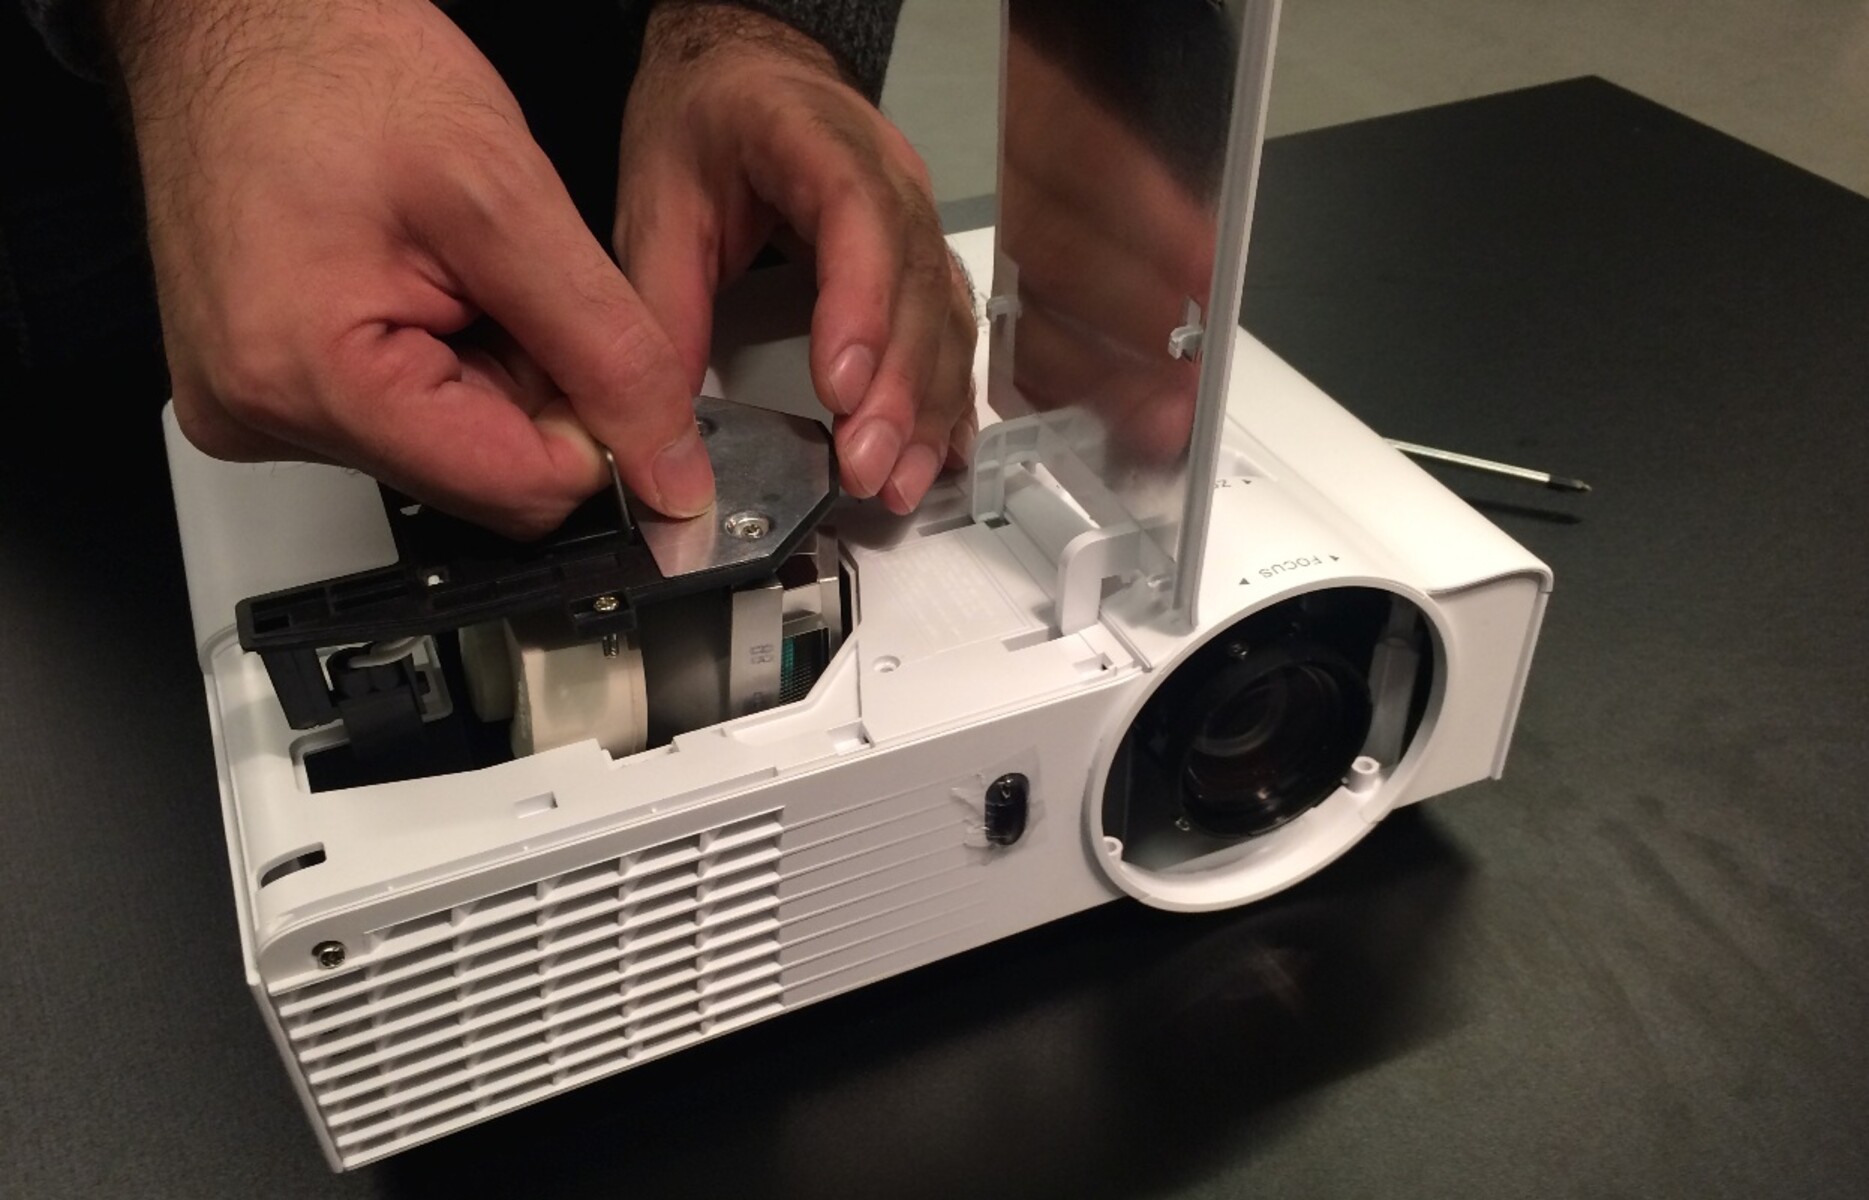
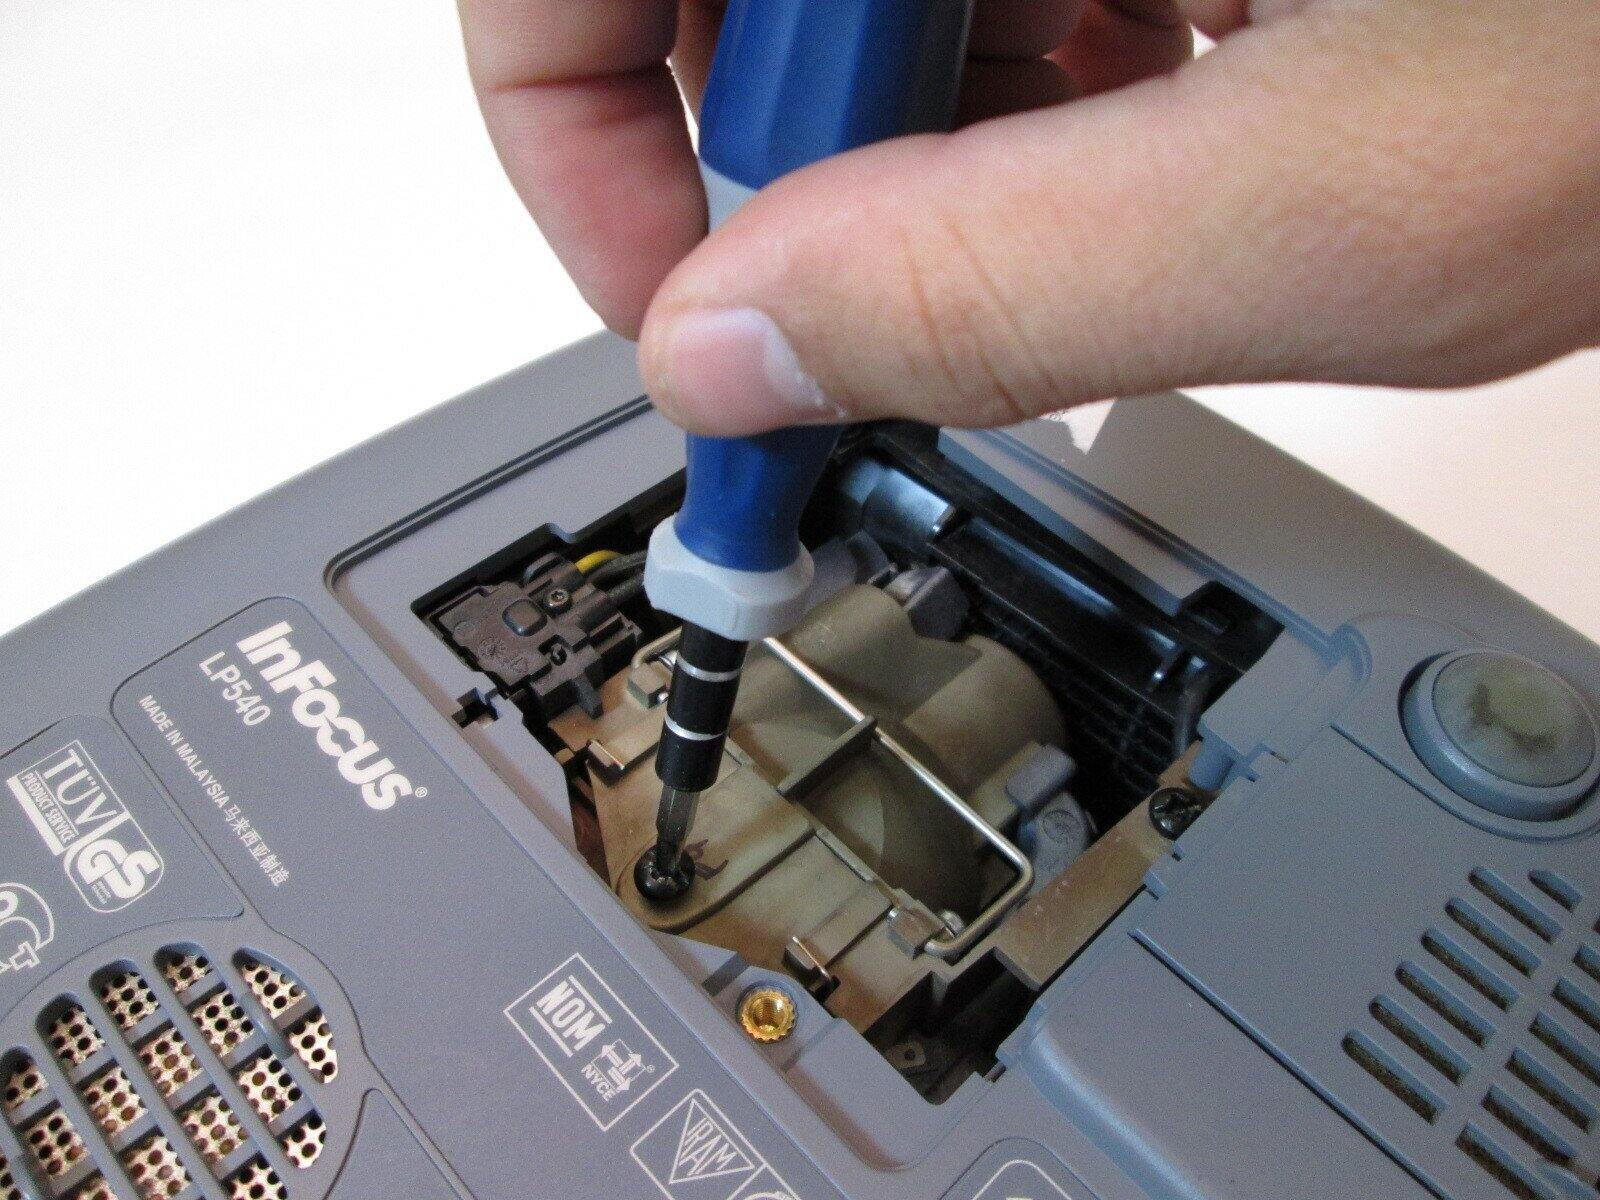
Step 4: Remove the access panel
Now that you have located the projector bulb access panel, it’s time to remove it to gain access to the old bulb. Follow these steps to safely remove the access panel:
- Switch off the projector: Ensure that the projector is turned off and unplugged from the power source before proceeding. This is crucial for your safety.
- Refer to the user manual: If you are unsure about how the access panel is designed or how to remove it, consult the user manual specific to your projector model. The manual should provide detailed instructions and illustrations.
- Use the correct tools: Depending on the projector, you may require a screwdriver to remove any screws securing the access panel. If screws are present, carefully unscrew them and keep them in a safe place for reassembly.
- Or, slide the latch or panel: Some projectors have a latch mechanism or a slide-out panel for easy access. In such cases, locate the latch or panel and gently slide or lift it open. Be careful not to force it, as it may be delicate.
- Set aside the access panel: Once the panel is free, set it aside in a safe and clean location. This ensures that it doesn’t get damaged or obstruct your work area while replacing the bulb.
Remember, every projector model is unique, so the method of removing the access panel may vary. It’s crucial to follow the specific instructions provided in the user manual to avoid any damage to your projector or the panel itself.
By successfully removing the access panel, you have now gained access to the old projector bulb. The next step will guide you through the process of safely removing the old bulb from the projector.
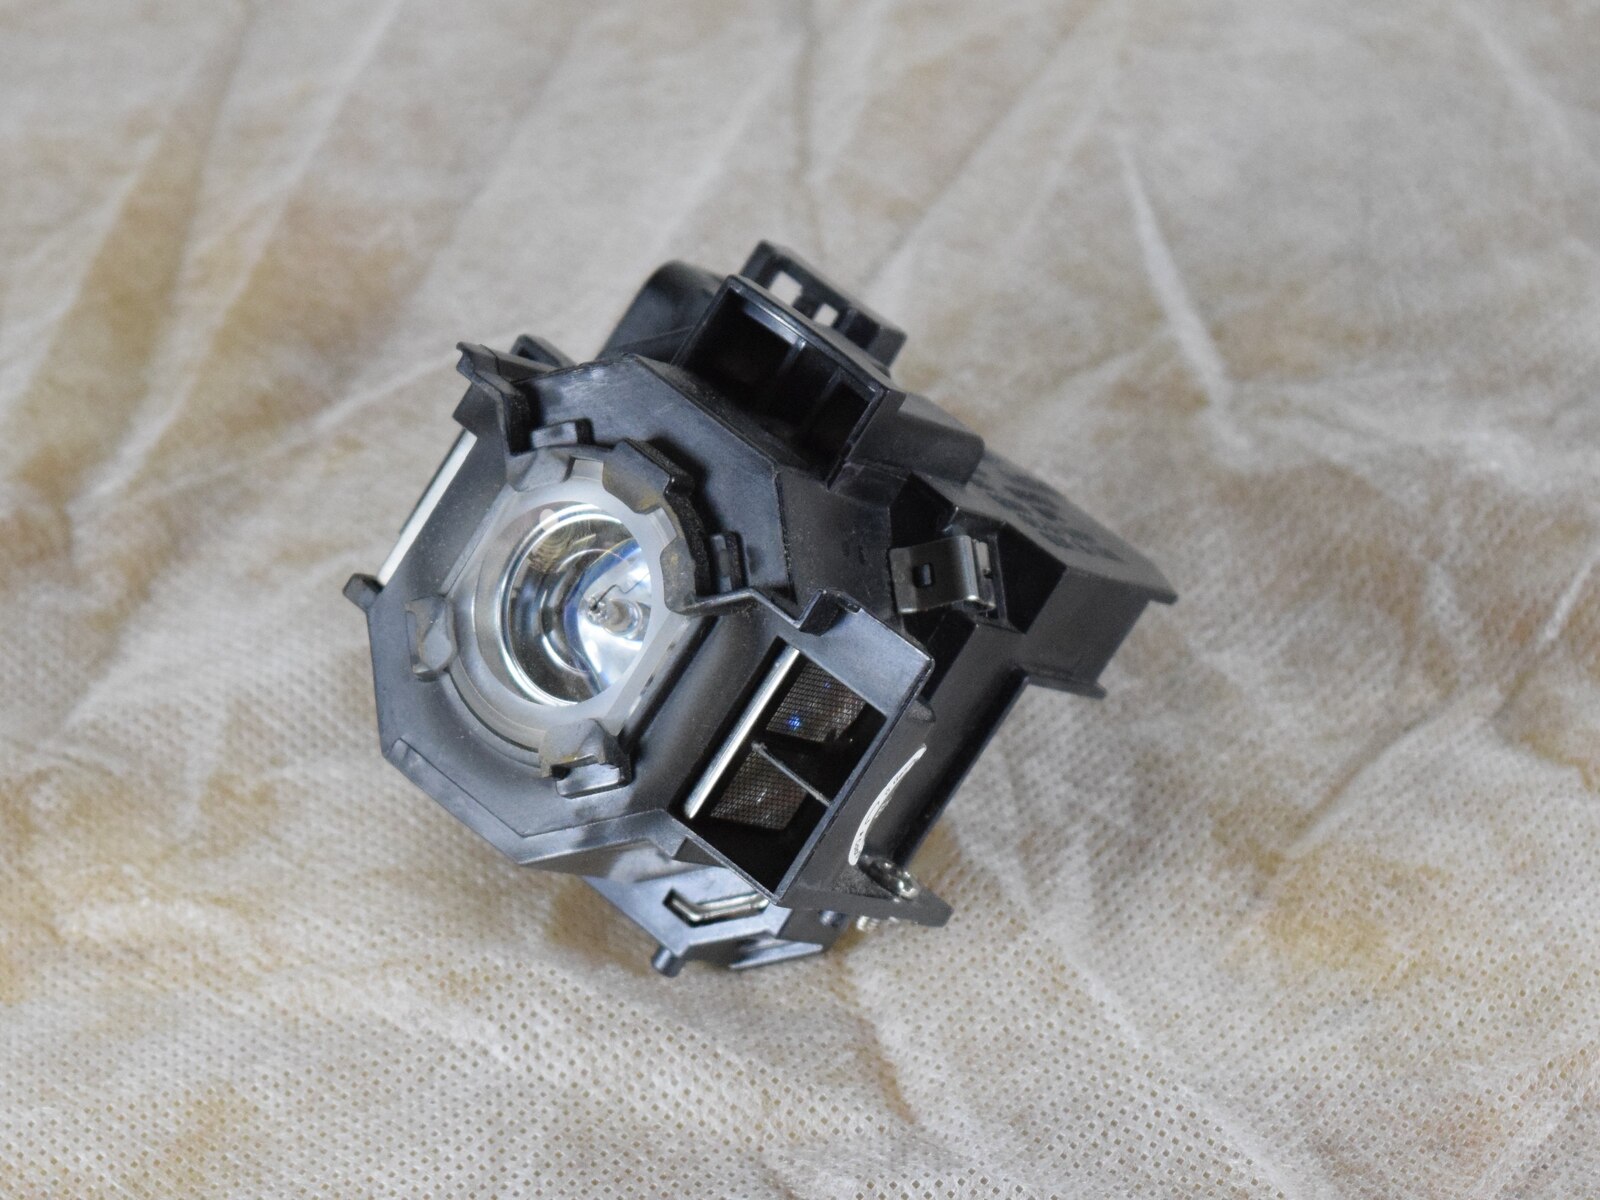
Step 5: Remove the old projector bulb
With the access panel removed, it’s time to carefully remove the old projector bulb. Follow these steps to ensure a safe and successful removal:
- Identify the bulb housing: Locate the old bulb inside the projector. It is typically housed in a small compartment or socket that will be clearly visible once the access panel is removed.
- Check for any retaining screws or clips: Some projectors may have retaining screws or clips holding the bulb in place. If present, carefully unscrew or release these to free the old bulb.
- Gently disconnect any electrical connectors: The old bulb may be connected to the projector by electrical connectors. Take note of how these connectors are attached and gently disconnect them, being careful not to damage the connectors or the bulb.
- Remove the old bulb from its socket: Once the electrical connectors are disconnected, you can safely remove the old bulb from its socket. Be cautious and handle the bulb with care to avoid accidental breakage or damage.
It is important to note that projector bulbs are fragile and can be sensitive to static electricity. To avoid any potential damage, it is recommended to wear static-free gloves or use a static-free cloth when handling the bulb.
In case the old bulb is stuck or difficult to remove, refer to the user manual or contact the manufacturer for specific instructions or troubleshooting advice.
Once you have successfully removed the old projector bulb, it’s time to proceed to the next step and insert the new bulb.
Step 6: Insert the new projector bulb
Now that you have removed the old projector bulb, it’s time to insert the new bulb. Follow these steps carefully to ensure a proper and successful installation:
- Prepare the new bulb: Take the new projector bulb out of its packaging and ensure you handle it with clean hands or wear clean gloves to avoid any fingerprints or smudges.
- Align the new bulb correctly: Look for alignment indicators or notches on the new bulb and the socket inside the projector. Align these indicators to ensure the bulb is inserted in the correct orientation.
- Insert the bulb into the socket: Gently insert the new bulb into the socket, taking care not to apply excessive force. Ensure a secure fit, but avoid any rough handling or twisting of the bulb.
- Reconnect the electrical connectors: Carefully reconnect any electrical connectors that were disconnected in the previous step. Ensure they are securely attached without causing strain or bending to the connectors.
- Check for retaining screws or clips: If there were retaining screws or clips holding the old bulb, make sure to reattach them to secure the new bulb in place. Follow the manufacturer’s instructions on tightening the screws or clips.
It’s important to note that projector bulbs are delicate, and mishandling them can cause damage or reduce their lifespan. Avoid touching the glass part of the bulb as much as possible to prevent any oil or residue from affecting its performance.
Once the new bulb is securely inserted and all connections are reestablished, you’re ready to move on to the next step and replace the access panel.
Step 7: Replace the access panel
After successfully inserting the new projector bulb, it’s time to replace the access panel that was removed earlier. Follow these steps to securely put the panel back in its place:
- Align the access panel: Hold the access panel in the correct position, ensuring that it aligns perfectly with the projector. Pay attention to any notches, guides, or holes that indicate the correct alignment.
- Slide or secure the panel: Depending on the design of your projector, you may need to slide the panel back into place or secure it with screws. Use gentle yet firm pressure to ensure a proper fit without forcing it.
- Tighten screws, if applicable: If the access panel is secured with screws, carefully tighten them using a screwdriver. Be cautious not to overtighten, as it may cause damage to the panel or the projector enclosure.
- Double-check for proper closure: Ensure that the access panel is fully closed and properly seated. Give it a gentle push to make sure it is secure and flush with the rest of the projector’s housing.
It’s crucial to handle the access panel with care, making sure it aligns accurately and is securely fastened. This ensures that the new bulb remains protected inside the projector and allows for proper functioning.
By properly replacing the access panel, you have completed an essential step in the projector bulb replacement process. Proceed to the next step to learn about resetting the projector lamp timer.
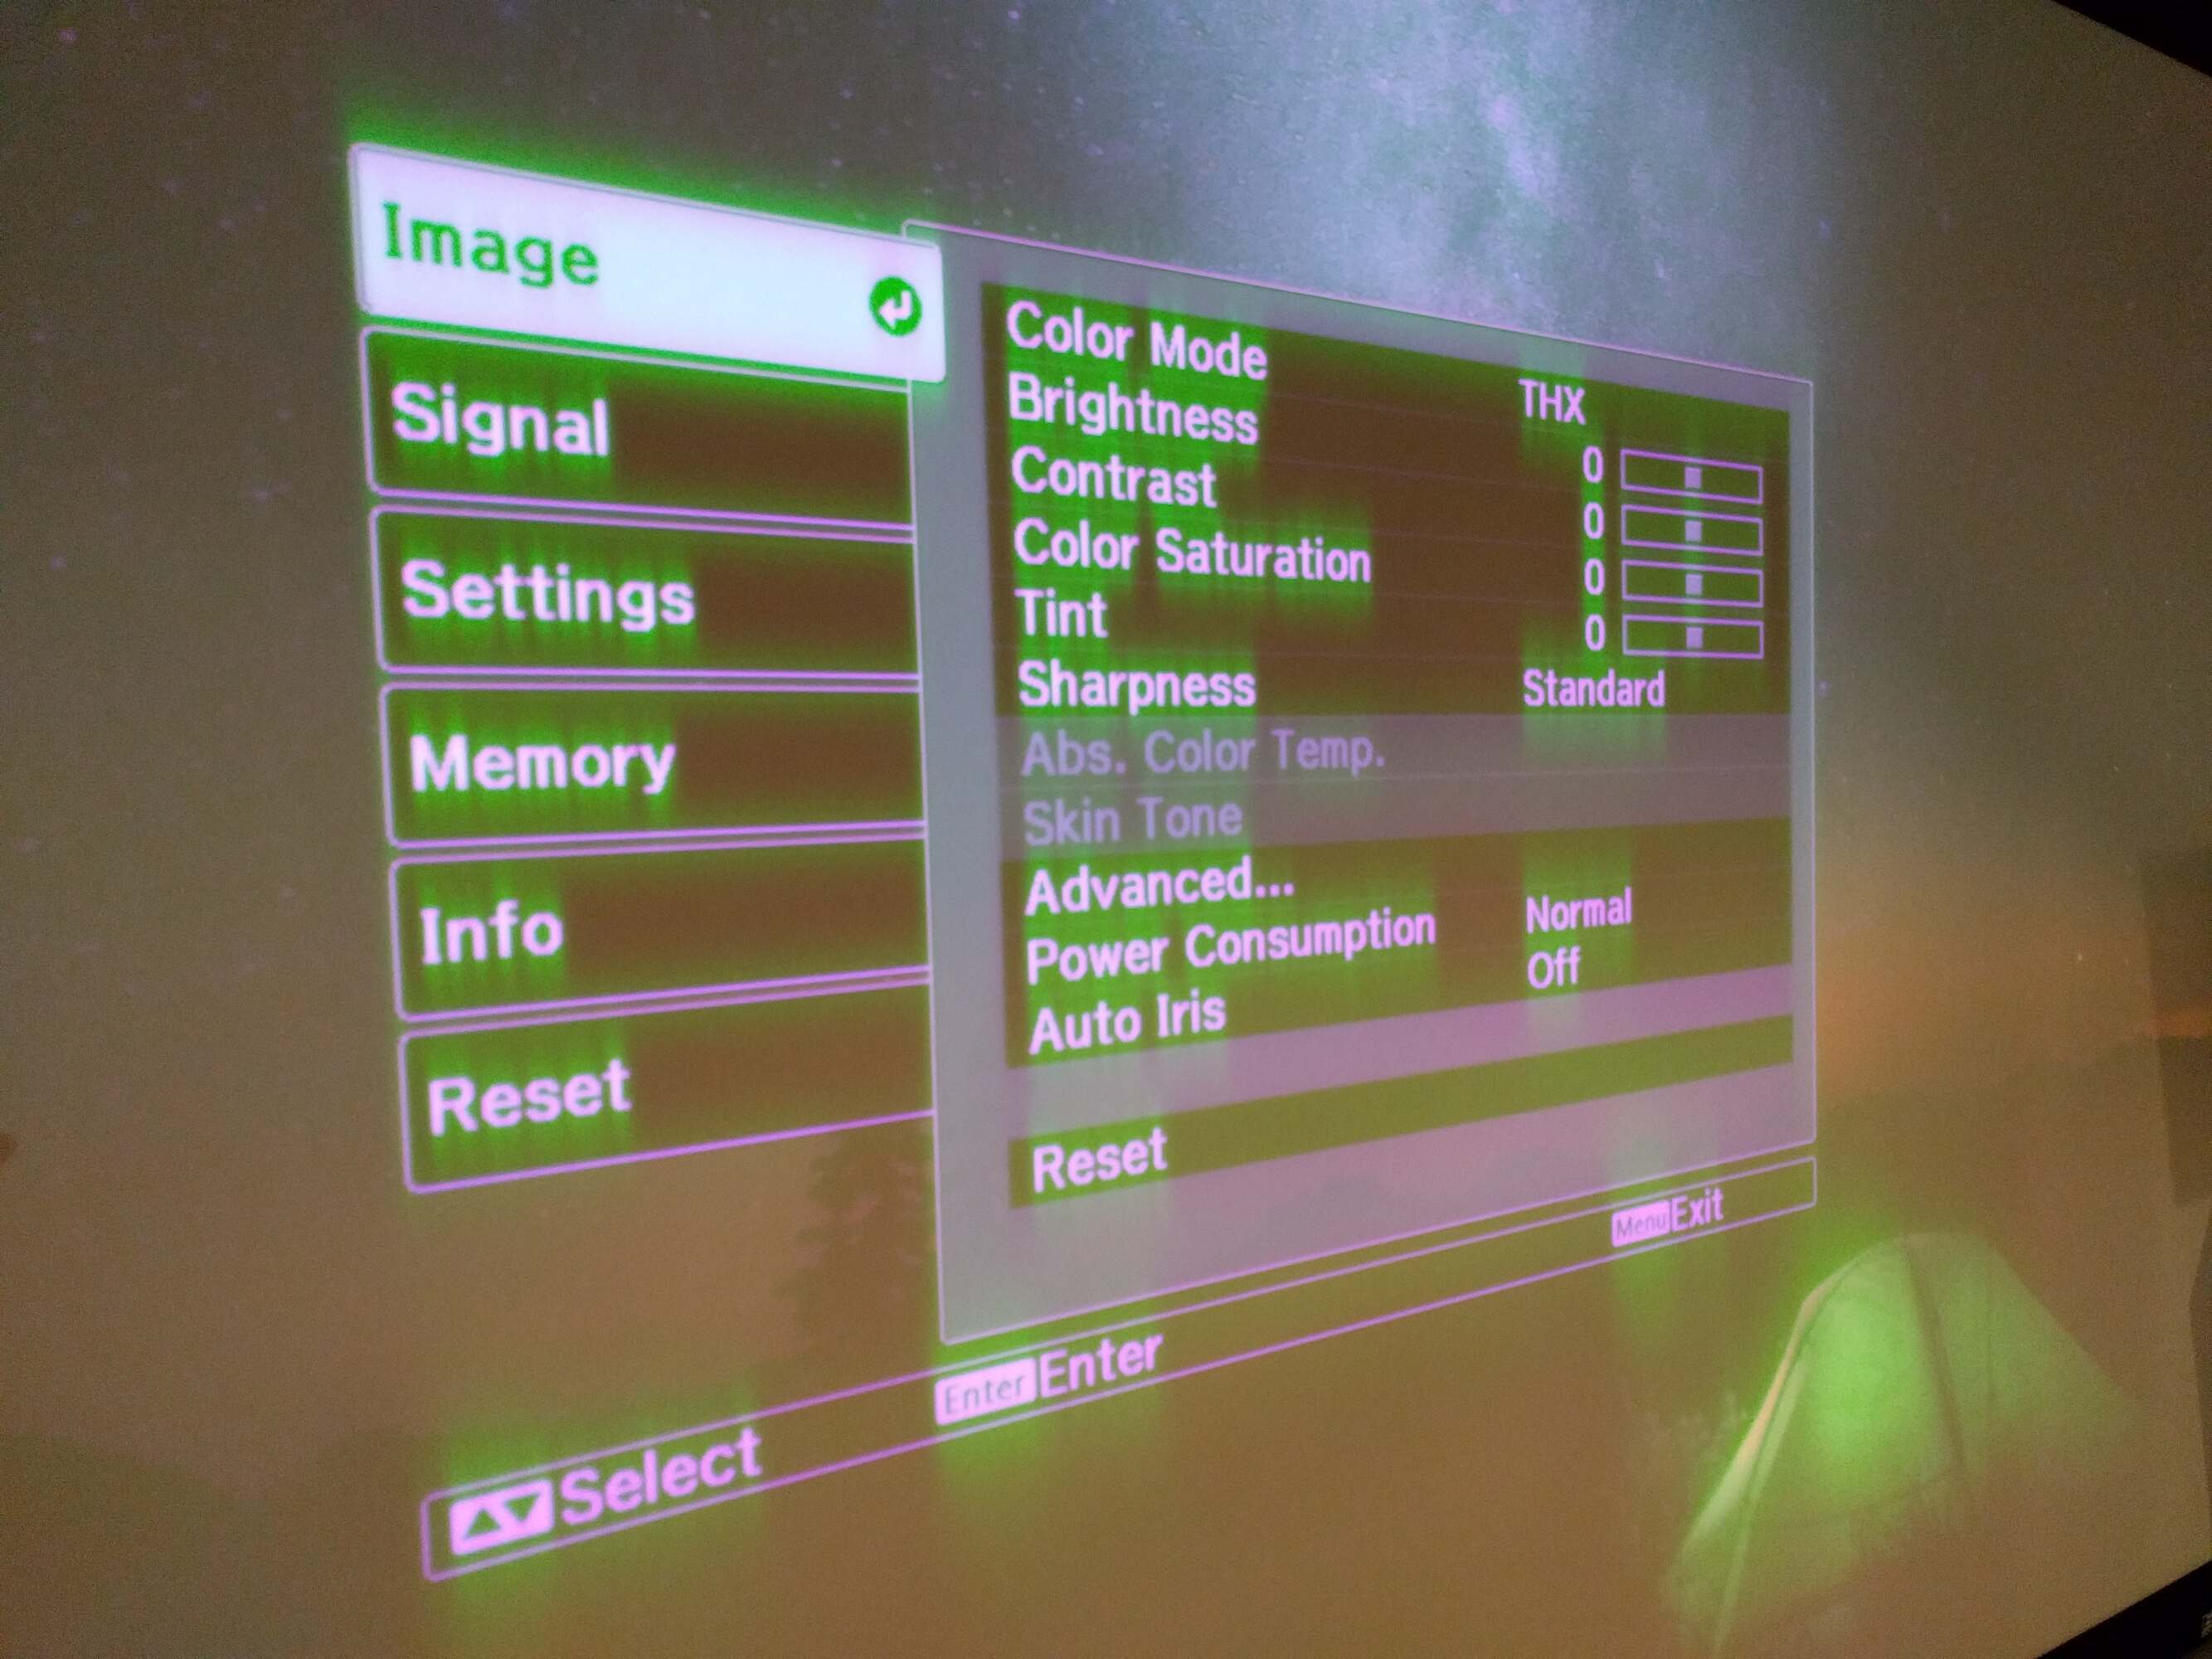
Step 8: Reset the projector lamp timer
After replacing the projector bulb, it’s important to reset the lamp timer in order to accurately monitor the usage and lifespan of the new bulb. Here’s how to reset the projector lamp timer:
- Access the projector menu: Power on the projector and navigate to the menu settings. The exact navigation method can vary depending on the projector model, so refer to the user manual for specific instructions.
- Find the lamp or lamp timer option: Once in the menu settings, locate the option related to the lamp or lamp timer. It may be listed under “Lamp Settings” or a similar category.
- Select the lamp timer reset option: Within the lamp or lamp timer settings, you should find an option to reset or clear the lamp timer. Choose this option to reset the timer to zero.
- Confirm the lamp timer reset: Some projectors may require a confirmation or verification step after selecting the lamp timer reset option. Follow the on-screen instructions or press the appropriate button to confirm the reset.
- Exit the menu settings: Once the lamp timer has been successfully reset, exit the menu settings and return to the projector’s main display or standby mode.
Resetting the lamp timer ensures that you have accurate information about the usage and remaining lifespan of the new bulb. It helps you keep track of when it may be time for a replacement in the future, based on recommended usage hours or manufacturer guidelines.
Remember, the specific steps to reset the lamp timer may vary depending on the projector model and manufacturer. If you’re unsure or unable to find the correct option, refer to the user manual or contact the manufacturer for assistance.
By resetting the projector lamp timer, you’ve completed an important post-replacement task that will help you manage the lifespan and performance of the new bulb.
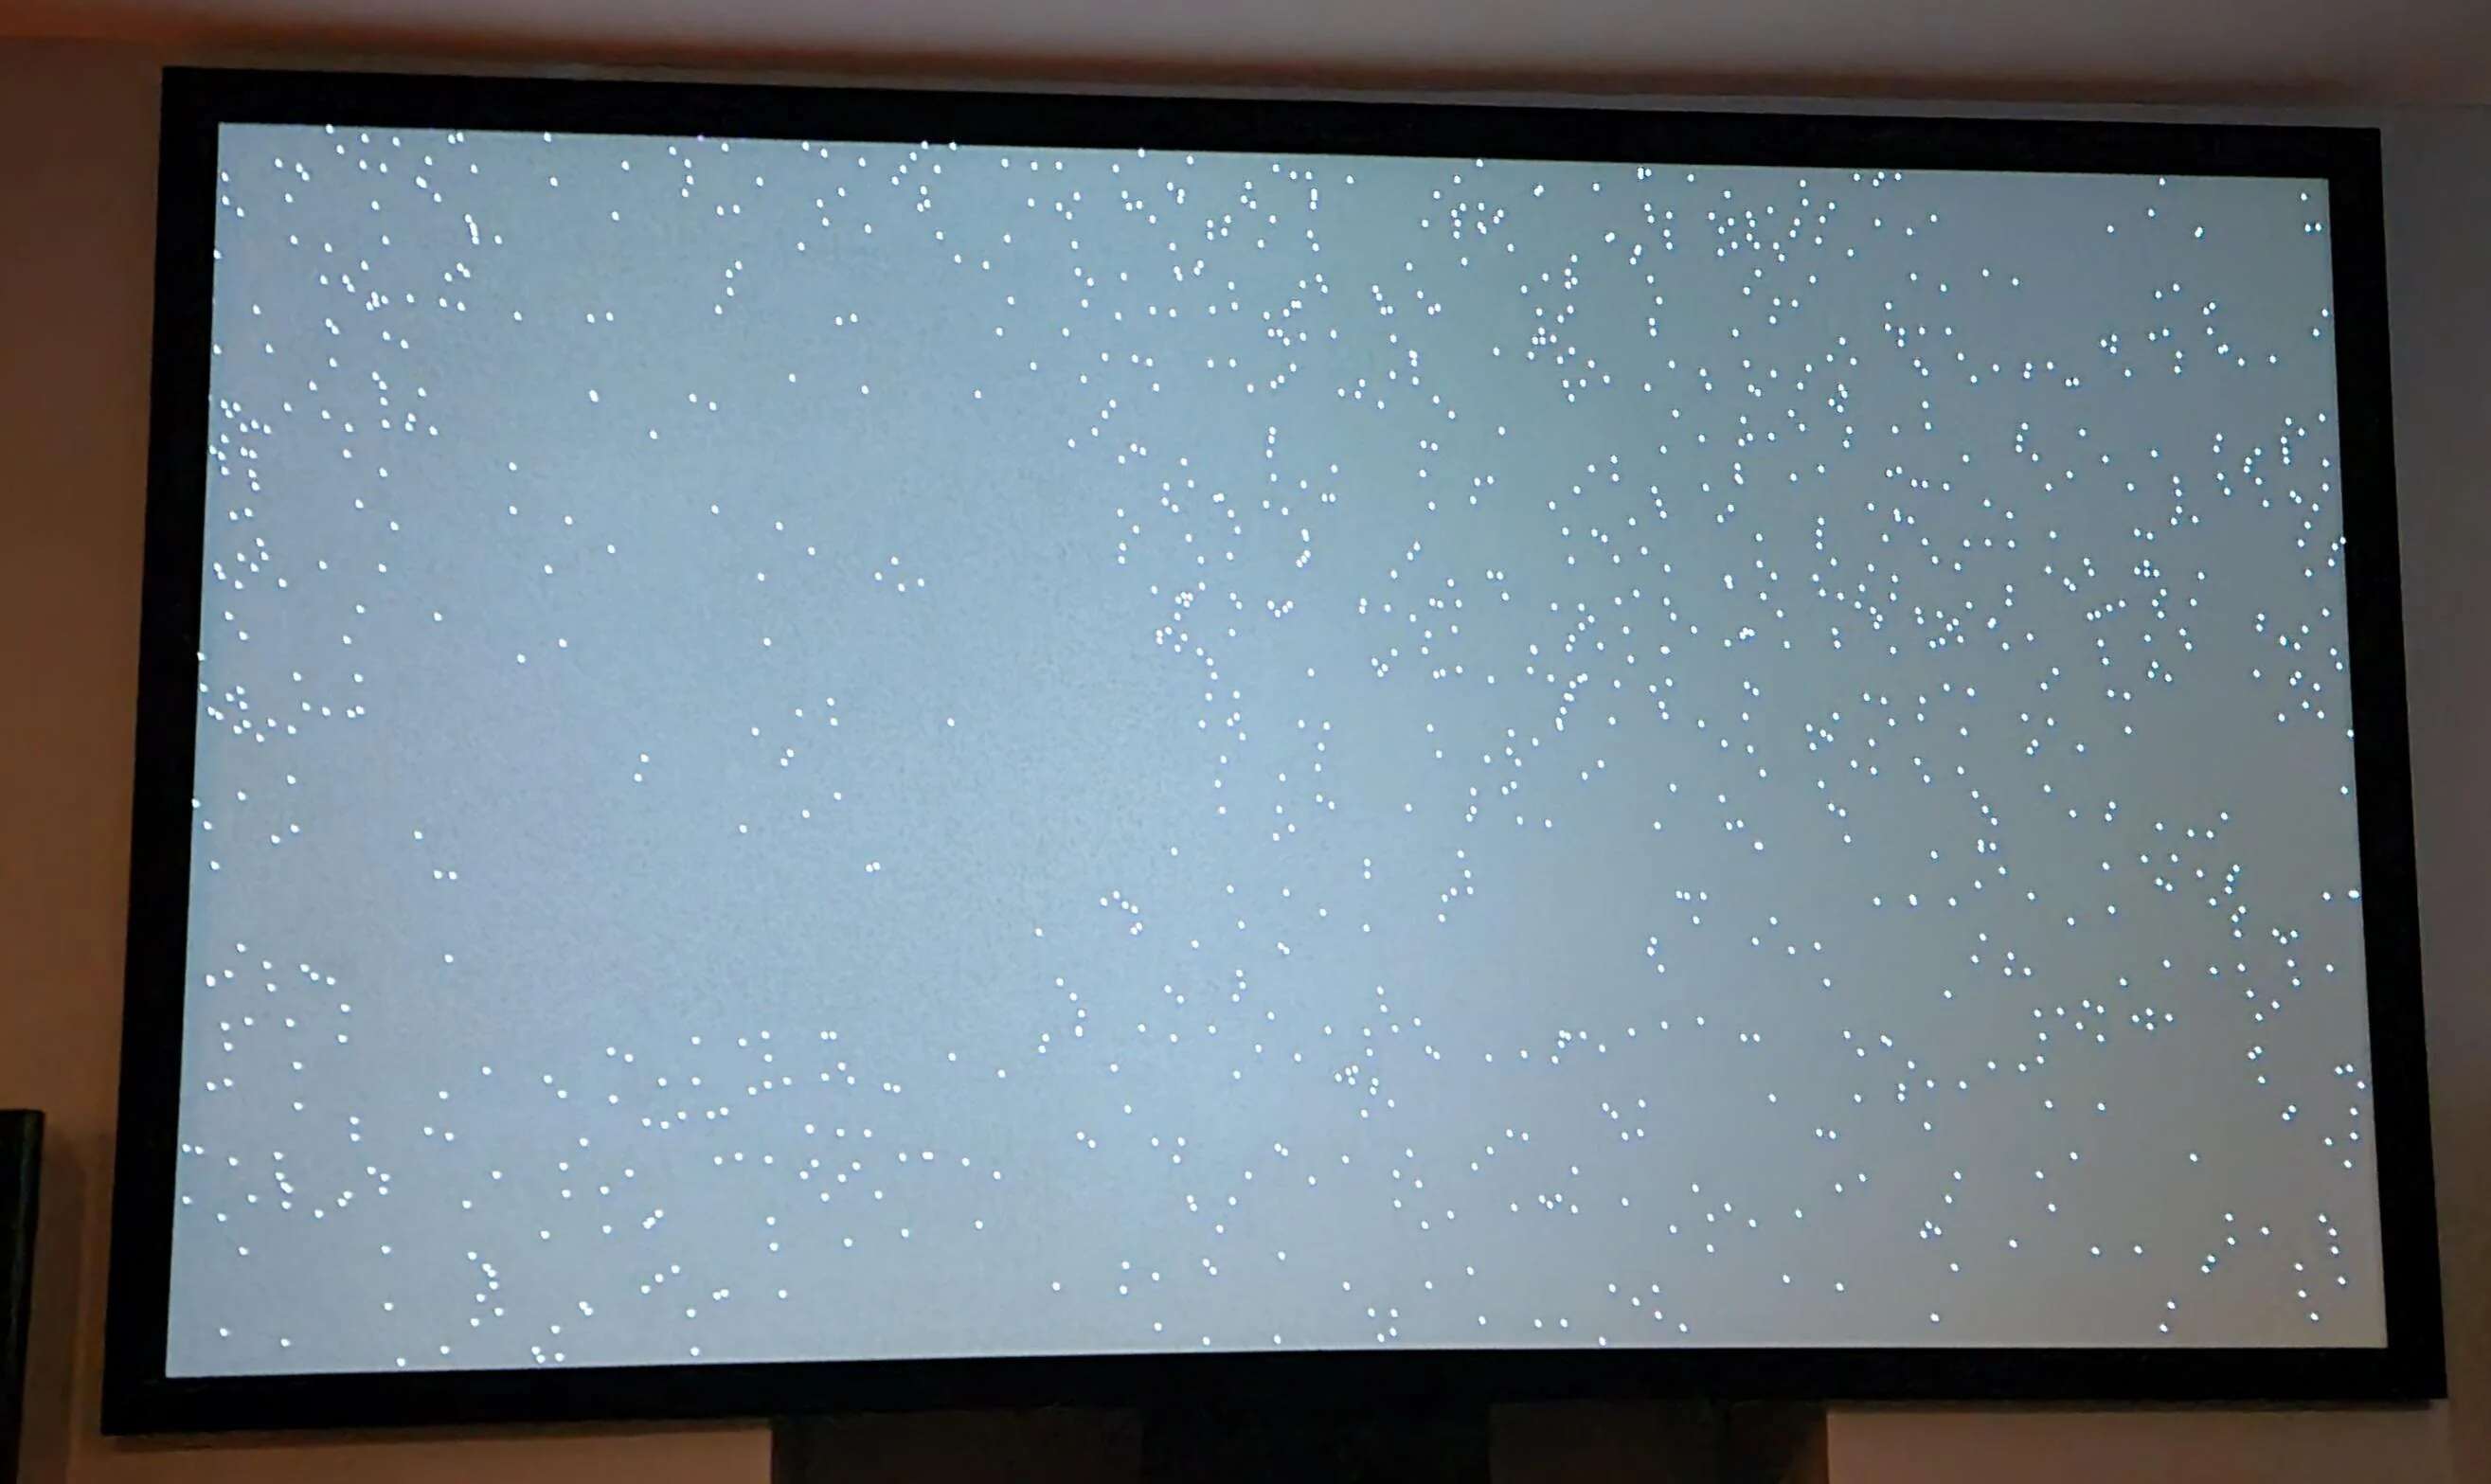
Step 9: Turn on the projector and test the new bulb
With the projector bulb replaced and the lamp timer reset, it’s time to turn on the projector and test the new bulb. Follow these steps to ensure that the replacement has been successful:
- Plug in the projector: Connect the power cord back to the projector and plug it into a power outlet.
- Switch on the projector: Press the power button on the projector or use the remote control to turn it on.
- Observe the startup process: Watch as the projector goes through its startup procedure. You should see the projector’s indicator lights or display come to life.
- Check for proper bulb functionality: Look for any error messages or warnings related to the bulb. If the new bulb is functioning correctly, it should illuminate and display a clear, bright image or projection.
- Ensure proper brightness and color: Verify that the image projected by the projector is sharp, bright, and displays accurate colors. If you notice any abnormalities or issues, refer to the troubleshooting section of the user manual or contact the manufacturer for assistance.
- Test the projector for a sufficient duration: Allow the projector to run for at least 15-30 minutes to ensure that the new bulb remains stable and performs consistently. During this time, check for any signs of flickering, dimming, or unusual behavior.
By testing the new bulb, you can confirm that the replacement was successful and that the projector is functioning optimally. It’s important to thoroughly test the new bulb to detect any potential issues early on and address them if necessary.
If the new bulb is displaying a clear and bright image without any problems, congratulations! You’ve successfully replaced the projector bulb and can now enjoy your projector’s enhanced visual performance for various presentations, movies, or other media.
Conclusion
Replacing a projector bulb might seem like a complicated task, but with the right tools and instructions, it can be done successfully by anyone. In this guide, we’ve walked you through the step-by-step process of replacing a projector bulb:
- Turn off the projector and unplug it.
- Allow the projector to cool down.
- Locate the projector bulb access panel.
- Remove the access panel.
- Remove the old projector bulb.
- Insert the new projector bulb.
- Replace the access panel.
- Reset the projector lamp timer.
- Turn on the projector and test the new bulb.
By following these steps and paying attention to safety precautions, you can successfully replace a projector bulb and enjoy clear and vibrant images once again. Remember to consult the user manual provided with your projector for specific instructions, as the exact process may vary depending on the model.
Remember, it’s important to handle projector bulbs with care and take your time during the replacement process. Ensure that you have all the necessary tools and materials ready before you start, and always follow the manufacturer’s guidelines for bulb replacement.
Lastly, proper maintenance and regular inspections of your projector’s bulb will help prolong its lifespan and ensure optimal performance. Keep track of the lamp timer and be alert to any signs of diminished brightness or image quality, as these may indicate the need for a replacement.
With this guide, you now have the knowledge and confidence to replace a projector bulb on your own. So go ahead and enjoy your projector’s captivating visuals once again!