Introduction
Have you ever experienced the frustration of a malfunctioning keyboard key? Whether it’s a stuck key, a key that doesn’t register when pressed, or a completely broken key, it can greatly hinder your productivity and make typing a real challenge. But fear not! In this article, we will guide you through the process of repairing keyboard keys and getting your keyboard functioning like new again.
Keyboard key issues can arise from a variety of reasons, such as dust and debris accumulation, liquid spills, or mechanical failure. Thankfully, many keyboard key problems can be resolved with some simple troubleshooting and basic repairs. By following the steps outlined in this guide, you can save yourself the hassle and expense of replacing your entire keyboard.
Before we dive into the repair process, it’s important to note that not all keyboard models are the same. The specific steps and methods may vary depending on the manufacturer and design of your keyboard. However, the general principles and techniques discussed here should be applicable to most standard keyboards.
So, if you’re ready to learn how to repair keyboard keys and regain the smooth and efficient typing experience you deserve, let’s get started with step one: assessing the issue.
Step 1: Assess the Issue
Before diving into the repair process, it’s important to assess the issue with your keyboard key. This step will help you understand the nature of the problem and determine the appropriate course of action. Here’s how to assess the issue:
- Observe and identify the problem: Take a close look at the key that is causing trouble. Is it stuck in a pressed position? Does it fail to register when pressed? Is it unresponsive altogether? By observing and identifying the problem, you can better understand the underlying issue.
- Test the key: Press the problematic key multiple times to see if the issue persists consistently. Note down any irregularities in its behavior, such as unexpected key repeats or delays.
- Check for external factors: Sometimes, the issue can be caused by external factors like dirt, debris, or spilled liquids. Inspect the key and the surrounding area for any visible signs of contamination or damage.
- Consider software-related issues: In some cases, keyboard problems can be software-related. Ensure that your operating system and keyboard drivers are up to date. Also, test the key on different applications to determine if the problem is specific to certain software.
By assessing the issue, you will have a clearer understanding of the problem at hand. This will guide you in proceeding with the appropriate solution. Next, we’ll move on to step 2: removing the keycap.
Step 2: Remove the Keycap
Once you have assessed the issue with your keyboard key, the next step is to remove the keycap. Removing the keycap allows you to gain access to the underlying mechanisms of the key and clean or replace any damaged components. Here’s how you can easily remove the keycap:
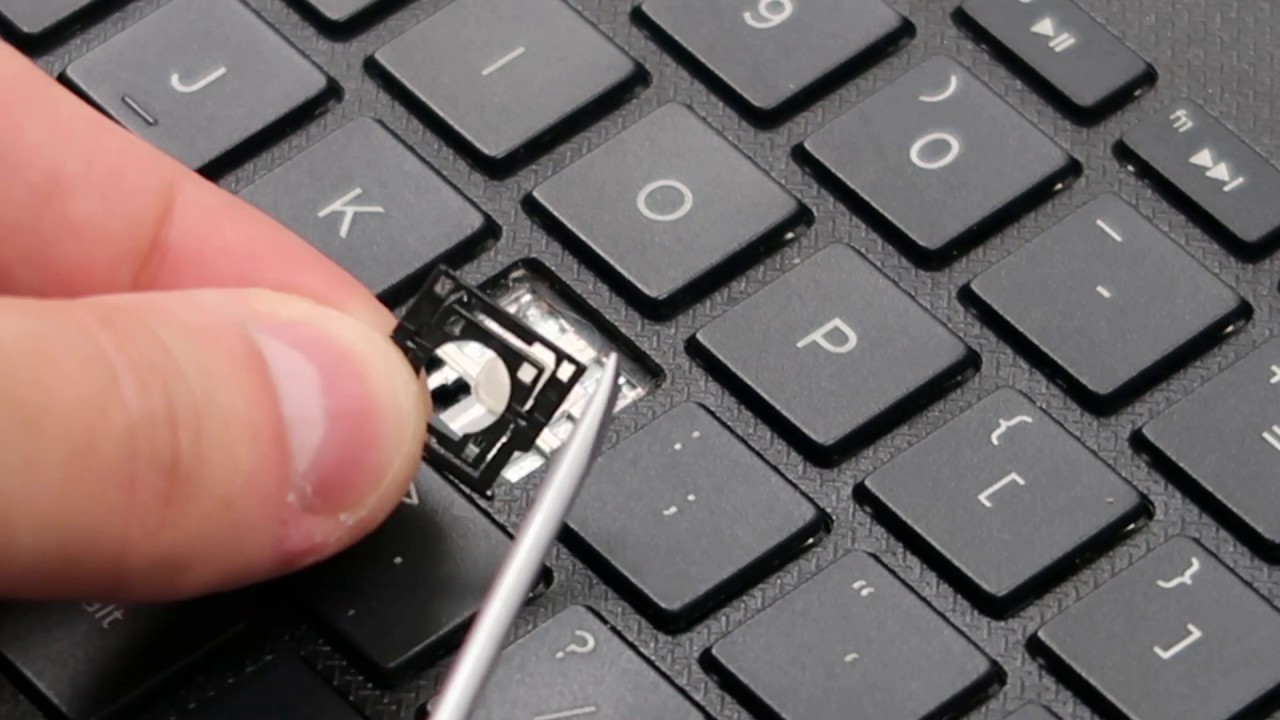
- Prepare the necessary tools: You will need a small flathead screwdriver or a keycap puller tool. These tools will help you safely remove the keycap without causing any damage to the key or keyboard.
- Position yourself properly: Find a comfortable and well-lit area to work on. This will ensure that you have a clear view of the key and its surrounding components. It’s also a good idea to rest your keyboard on a clean and stable surface.
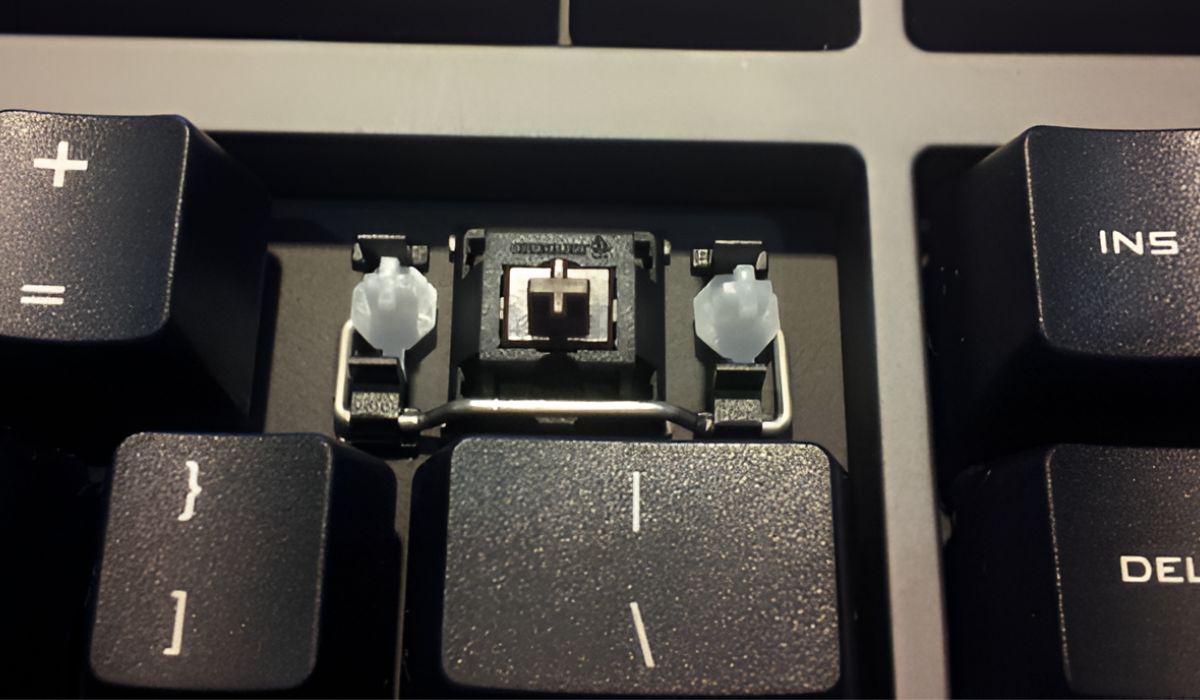
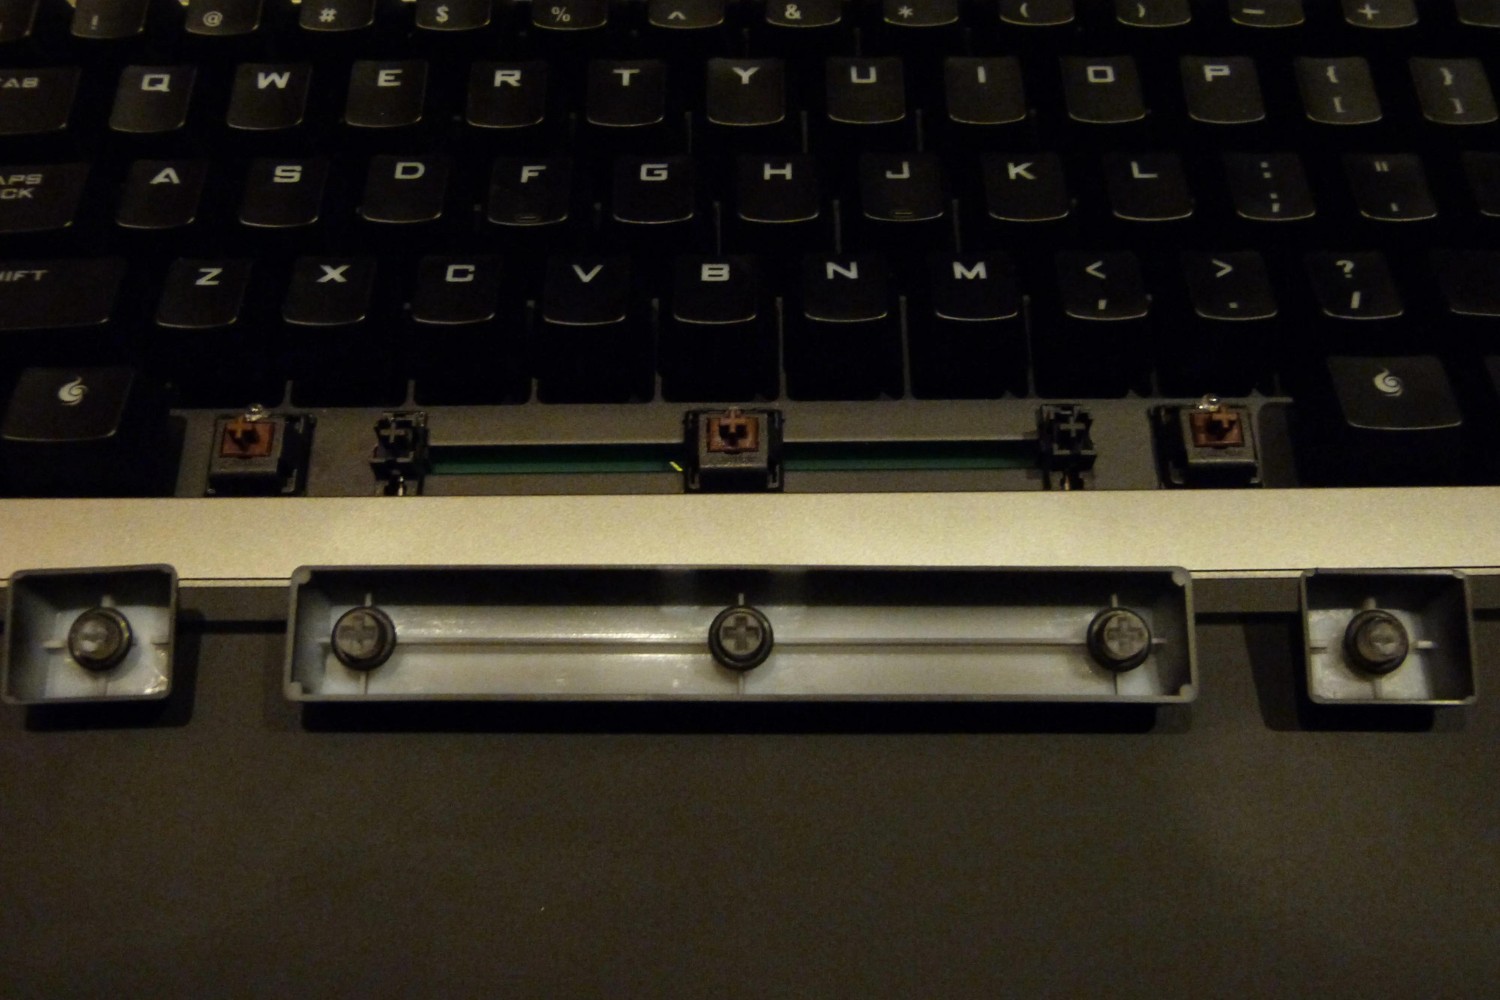
- Identify the attachment mechanism: Take a closer look at the keycap and determine the type of attachment mechanism used. Most keycaps are either attached with retention clips or are snapped onto a scissor or membrane switch.
- Detach the keycap: Use your screwdriver or keycap puller tool to gently pry the keycap from the keyboard. If the keycap is attached with retention clips, apply equal pressure on both sides and lift it up. If the keycap is snapped onto a switch, use the tool to carefully lift one edge of the keycap and then slide it off.
- Handle the keycap with care: To avoid damaging the keycap or the underlying switches, be gentle when removing the keycap. Use even pressure and avoid excessive force.
- Set aside the keycap: Once you have successfully removed the keycap, set it aside in a safe place. This will prevent it from getting lost or damaged.
By following these steps, you can easily remove the keycap and gain access to the inner workings of the key. In the next step, we will discuss how to clean the key and the keyboard to resolve any issues caused by dirt or debris.
Step 3: Clean the Key and Keyboard
After removing the keycap, it’s time to clean both the key and the keyboard itself. Dust, debris, and even spilled liquids can cause keyboard issues, so thorough cleaning can often solve the problem. Here’s how you can effectively clean the key and keyboard:
- Prepare cleaning materials: Gather some compressed air, cotton swabs, a soft brush, and a mild cleaning solution. You can create your own cleaning solution by diluting a small amount of dish soap with water.
- Clean the keycap: Begin by gently brushing the keycap to remove any loose debris. Then, moisten a cotton swab with the cleaning solution and carefully wipe down the keycap. Ensure that the keycap is completely dry before reattaching it.
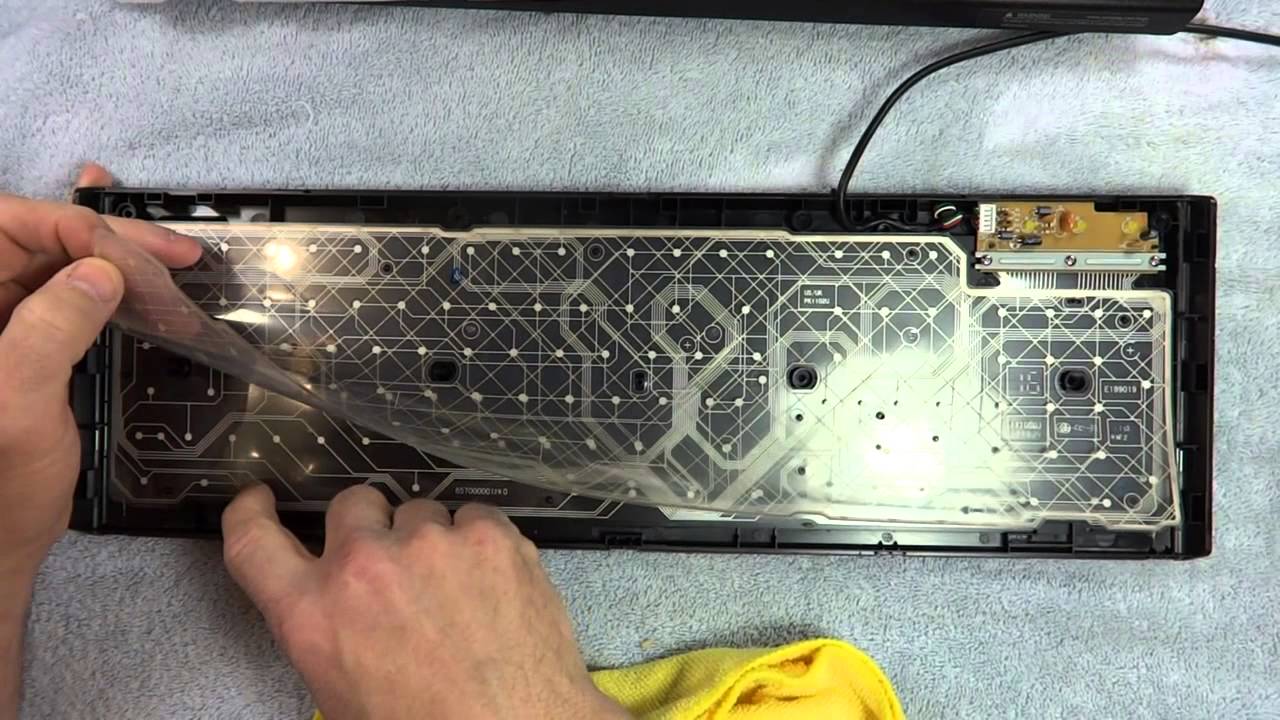
- Clean the keyboard surface: Use compressed air to blow away dust and dirt from the keyboard surface. Pay close attention to the area where the keycap was removed, as well as the surrounding keys. Use a soft brush to sweep away any remaining debris. Avoid using excessive force or liquid when cleaning the keyboard surface.
- Address sticky keys or spills: If you encountered a sticky key or a liquid spill, use a cotton swab slightly moistened with the cleaning solution to gently clean the affected area. Be cautious not to saturate the keyboard with excessive liquid.
- Dry thoroughly: After cleaning, ensure that both the keycap and keyboard surface are completely dry before reassembling. You can use a dry cotton swab or allow it to air dry naturally.
By thoroughly cleaning the key and keyboard, you can remove dirt, debris, and residue that may be causing issues with the key’s functionality. In the next step, we will discuss how to either replace or repair the key to resolve more severe problems.
Step 4: Replace or Repair the Key
After assessing and cleaning the key and keyboard, it’s time to determine whether you need to replace or repair the key. Depending on the severity of the issue and the availability of replacement parts, you may choose one of the following options:
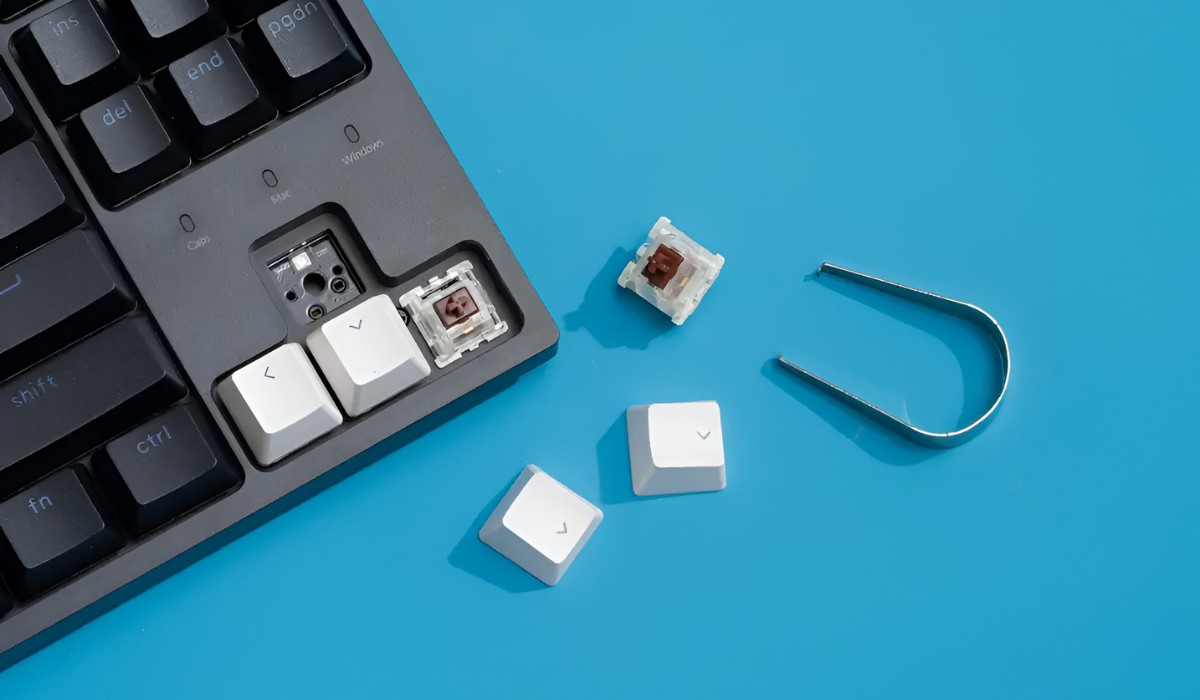
- Replace the key with a spare: If you have a spare key from the same keyboard model or a compatible one, you can simply replace the faulty key. Ensure that the replacement key is clean and in good working condition. Align the key properly and press it evenly until it snaps into place. Test its functionality to ensure it registers properly when pressed.
- Repair the existing key mechanism: If a spare key is not available, or if the issue lies with the key mechanism itself, you can attempt to repair it. Carefully examine the key mechanism for any signs of damage, such as broken or bent parts. If possible, attempt to realign the key mechanism or gently bend any protruding parts back into place. Exercise caution to avoid causing further damage.
- Seek professional repair or replacement: If you’re unable to resolve the issue on your own, or if the key is severely damaged, it may be best to seek professional assistance. Contact the manufacturer or a computer repair specialist to inquire about replacement parts or repair services. They will have the necessary expertise and resources to properly address the issue.
Keep in mind that not all keyboard keys are designed for easy replacement or individual repairs. Some keyboards have integrated key mechanisms that cannot be easily fixed or replaced. In such cases, your best option may be to replace the entire keyboard.
Once you replace or repair the key, proceed to the next step to learn how to reattach the keycap.
Step 5: Reattach the Keycap
After replacing or repairing the key, it’s time to reattach the keycap to the keyboard. Properly aligning and attaching the keycap ensures its stability and allows for smooth and accurate typing. Follow these steps to reattach the keycap:
- Position the keycap correctly: Take a close look at the keycap and locate the alignment markers or tabs on the bottom. These markers should correspond to the switches on the keyboard. Align the keycap with the switch, ensuring that it sits evenly and firmly on top.
- Apply even pressure: Press down on the keycap gently but firmly until you hear a satisfying click. This indicates that the keycap is properly seated on the switch and securely attached. Avoid applying excessive force, as it may damage the key or switch.
- Test the keycap: Press the reattached keycap multiple times to verify its functionality. Ensure that it registers properly when pressed and returns to its original position without any sticking or wobbling.
By following these steps, you can successfully reattach the keycap and complete the repair process. Now it’s time for the final step: testing the key to ensure everything is working correctly.
Step 6: Test the Key
After reattaching the keycap, it’s important to test the key to ensure that the repair has been successful. Testing the key will help you verify its functionality and ensure that it registers properly when pressed. Here’s how you can test the key:
- Type a document: Open a word processing application or any program that allows you to type. Start typing a document, paying close attention to the key you repaired. Test its responsiveness, accuracy, and whether it registers each keystroke without any issues.
- Try different combinations: Test the repaired key in combination with other keys. Try pressing it simultaneously with other keys to ensure that it doesn’t cause any unwanted key combinations or conflicts.
- Test in different applications: Open various applications, such as web browsers or text editors, and test the key’s functionality in each of them. Ensure that it works consistently across different software.
- Repeat the testing process: Test the key multiple times to ensure that the repair has provided a lasting solution. Press it with different degrees of pressure and at various angles to simulate real-world typing conditions.
By thoroughly testing the repaired key, you can confirm that it is functioning properly and that your keyboard is back to its optimal state. If any issues persist, it may be necessary to revisit the previous steps or seek additional assistance.
Congratulations! You have successfully repaired your keyboard key and restored its functionality. Remember to keep your keyboard clean and free from debris to prevent future issues. Now you can enjoy uninterrupted typing and improved productivity.
Conclusion
Repairing keyboard keys is a practical and cost-effective solution for resolving common issues that can hinder your typing experience. By following the steps outlined in this guide, you can assess the problem, remove the keycap, clean the key and keyboard, and either replace or repair the key. Finally, you can reattach the keycap and test the key to ensure its proper functionality.
Remember that keyboard designs may vary, so the specific repair process may differ slightly depending on your keyboard model. It’s always a good idea to consult the manufacturer’s documentation or seek professional assistance if needed. Additionally, exercise caution when handling delicate components and avoid using excessive force to prevent further damage.
By taking the time to repair your keyboard keys, you can save yourself the expense and inconvenience of purchasing a new keyboard. Troubleshooting and performing basic repairs on your own is not only satisfying but also an excellent way to extend the lifespan of your keyboard and maintain its optimal performance.
So, the next time you encounter a problematic keyboard key, don’t panic. Follow this guide and put these steps into action. With a little patience and effort, you’ll be able to repair the key and get your keyboard back to its functional and efficient state. Happy typing!