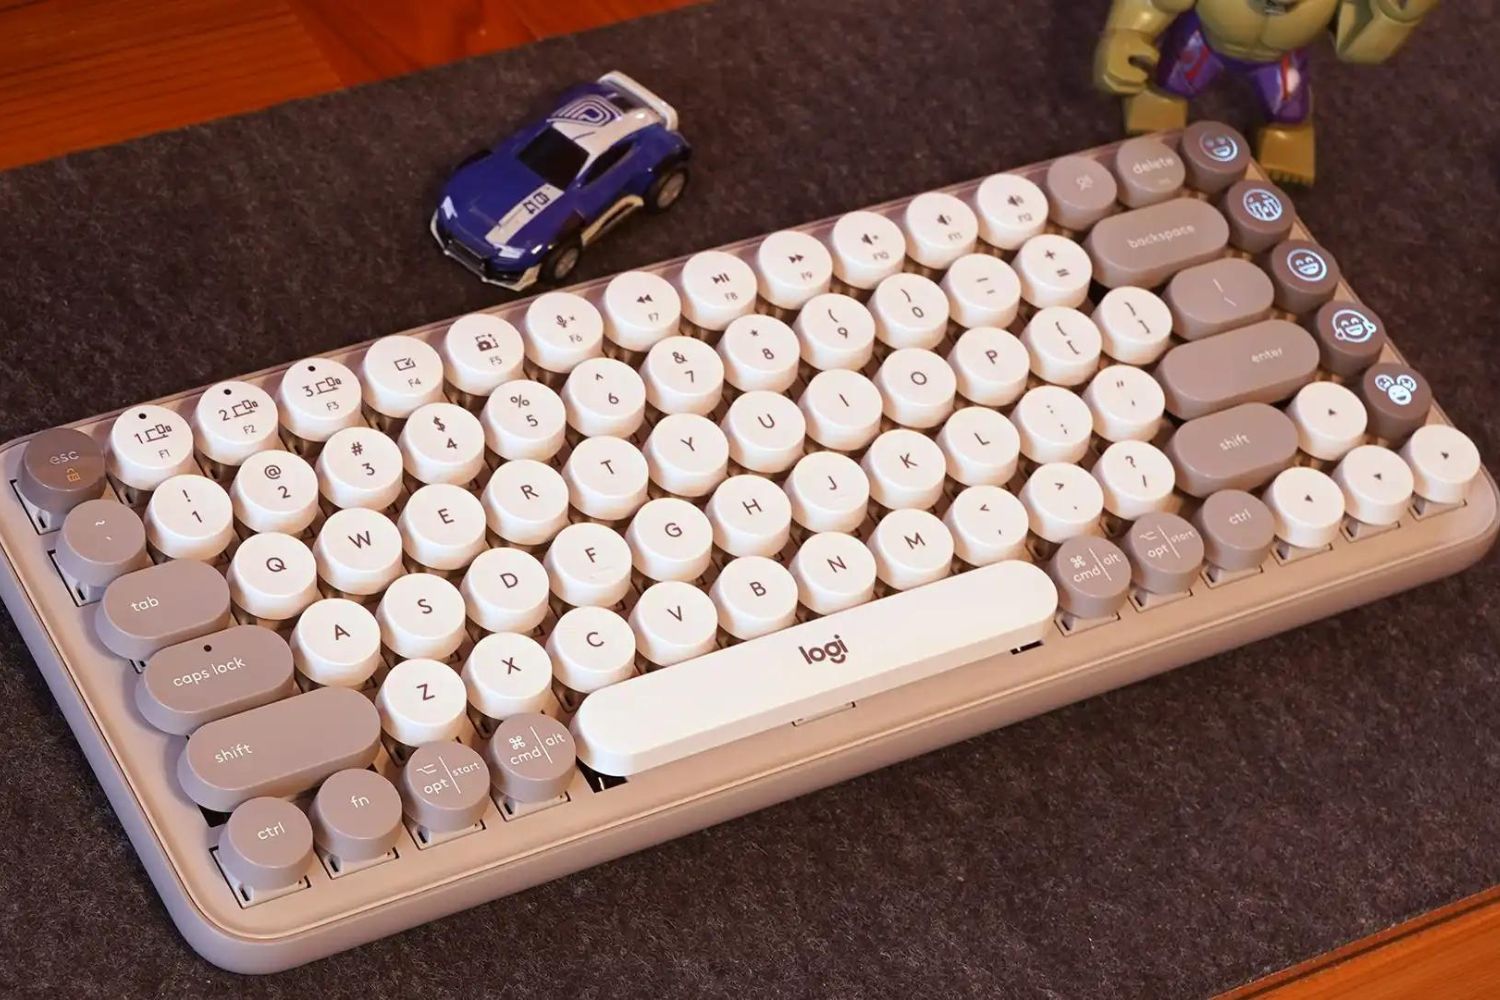
Introduction
Have you ever encountered the frustrating situation of one of your keyboard keys coming loose or popping off? It’s a common occurrence that can happen due to regular wear and tear or accidental mishaps. While it may seem daunting at first, putting a keyboard key back on is actually a relatively simple process that you can do yourself.
In this article, we will provide you with a step-by-step guide on how to put a keyboard key back on. Whether you’re dealing with a missing key on your laptop or a desktop keyboard, we’ve got you covered. By following our instructions and using the right tools, you’ll have your keyboard back in working order in no time.
We understand the frustration that comes with not being able to type properly or the annoyance of having to use an external keyboard as a workaround. That’s why we’re here to help you restore your keyboard to its full functionality.
Before we dive into the process, it’s important to gather the necessary tools and materials. You’ll need a few simple items that are readily available, so let’s make sure we have everything before we start.
Gathering the necessary tools and materials
Before you begin the process of putting a keyboard key back on, it’s important to gather the necessary tools and materials. Here’s a list of items you’ll need:
- A small, flat-headed screwdriver or a plastic spudger: This will help you pry off the key without damaging the keyboard or the key itself.
- A pair of tweezers: Tweezers come in handy when handling the key and aligning it properly on the keyboard.
- A clean and dry cloth: It’s always a good idea to have a cloth nearby to wipe any dust or debris off the key or the keyboard.
- A small container: This is useful for keeping any small parts or screws secure and in one place.
These tools are generally readily available and can be found in most households. If you don’t have a small screwdriver or plastic spudger, you might be able to use a toothpick or a similar small, flat object to pry off the key.
Once you’ve gathered all the necessary tools, make sure you have a clear and well-lit working space. This will help you see the key and the keyboard more clearly and reduce the chances of losing any small parts.
Now that you have everything ready, it’s time to move on to the next step: removing the missing key.
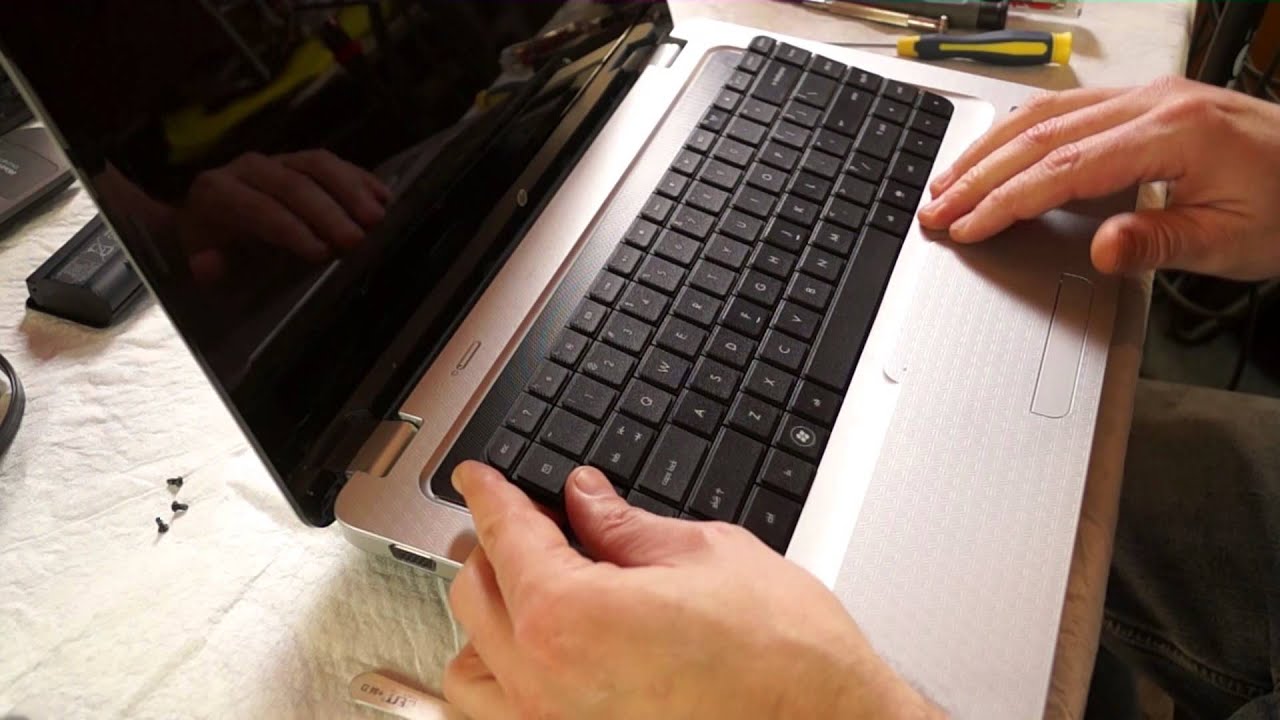
Removing the missing key
Before you can put the keyboard key back on, you need to remove the missing key from the keyboard. Here’s how you can do it:
- First, make sure your computer is turned off or the keyboard is disconnected to avoid any accidental inputs.
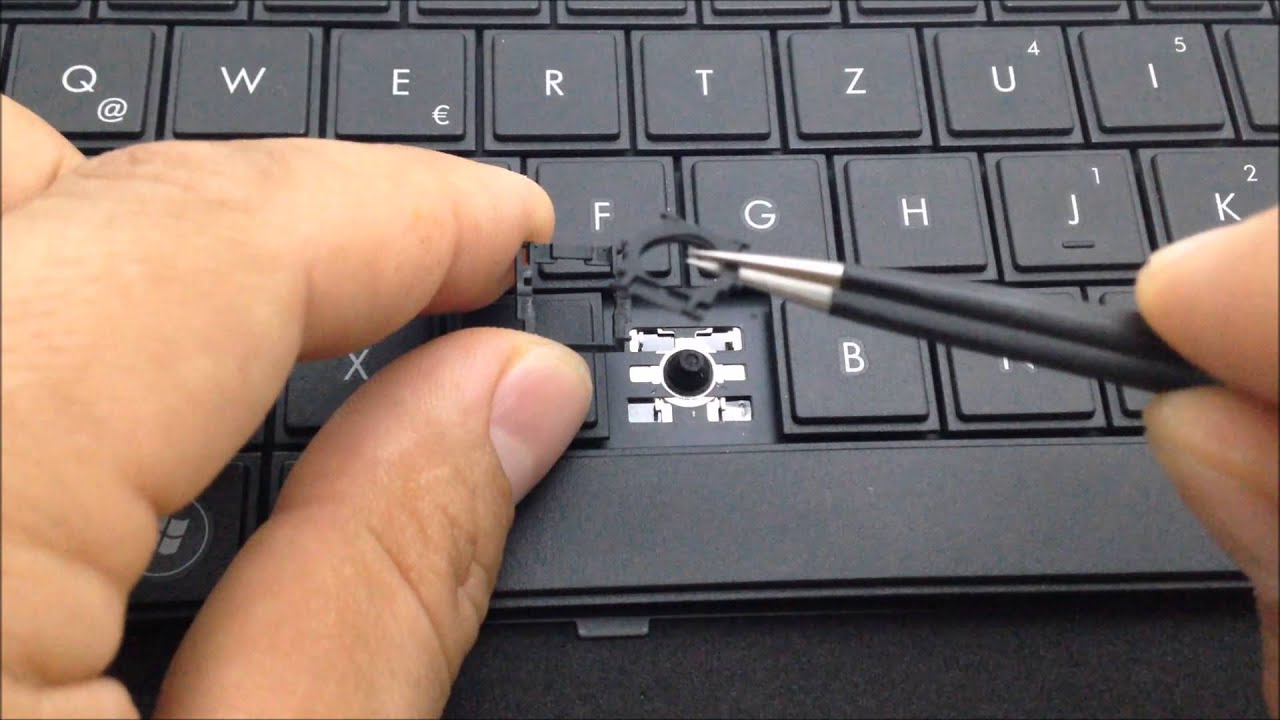
- Take your small, flat-headed screwdriver or plastic spudger and gently insert it under the edge of the key that is missing.
- Gently apply pressure and lift the key slowly. Be careful not to use excessive force as this can damage the key or the keyboard. If the key doesn’t come off easily, stop and reassess to avoid any potential damage.
- Once the key is lifted slightly, use your fingers or tweezers to carefully pull it off the keyboard. Be sure to keep the key and any attached components, such as the keycap or the key retainer, together and in a safe place.
- If the key has any debris or dirt attached to it, use a clean, dry cloth to gently wipe it off. Similarly, clean any visible dirt or debris from the keyboard itself, taking care not to apply excessive pressure.
With the missing key removed, you can now move on to the next step: examining the key and the keyboard to understand their mechanism.
Examining the key and the keyboard
Now that you have successfully removed the missing key, it’s time to examine both the key and the keyboard to get a better understanding of their mechanism. This step is essential in ensuring that you put the key back on correctly.
Start by inspecting the key itself. Look for any damage or signs of wear that may have caused it to come loose. Check if the keycap is still intact and if the key retainer is securely attached to it. If any of these components are damaged or missing, you may need to replace them before proceeding.
Next, examine the keyboard. Pay close attention to the area where the missing key was located. Look for any visible signs of damage or debris that may have caused the key to come off. It’s essential to clean the keyboard thoroughly in this area to ensure a proper fit when reattaching the key.
Take note of any unique features or mechanisms on the keyboard that might affect how the key is reattached. Look for any hooks, clips, or small tabs that the key needs to align with. Understanding these details will make the reassembly process smoother.
If you have the replacement components for the key, compare them to the key and the keyboard to ensure they match in size and design. This is especially crucial if you’re using a third-party replacement key or if the key comes from a different keyboard model.
By examining both the key and the keyboard, you’ll have a clear idea of what to expect during the reattachment process. You’re now ready to move on to the next step: understanding the key mechanism.
Understanding the key mechanism
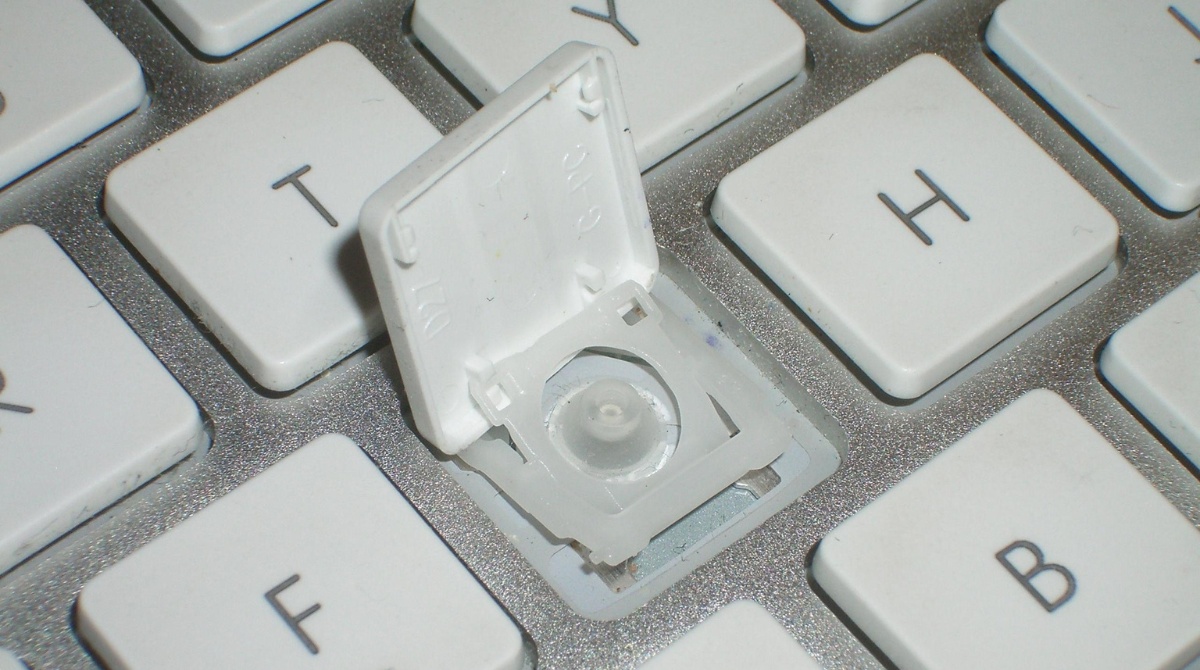
Before putting the keyboard key back on, it’s important to have a solid understanding of the key mechanism. Each key on a keyboard is made up of several components that work together to ensure proper functionality. Familiarizing yourself with these components will help you reattach the key correctly. Here’s a breakdown of the key mechanism:
1. Keycap: The keycap is the visible part of the key that you press with your finger. It is typically made of plastic and carries the symbol or letter corresponding to the key’s function.
2. Key retainer: The key retainer is a small plastic piece that holds the keycap in place. It helps stabilize the key and ensures it remains attached to the keyboard. The shape and design of the key retainer vary depending on the keyboard model.
3. Scissor or rubber dome mechanism: Underneath the keycap and key retainer, you’ll find the scissor or rubber dome mechanism. This mechanism provides the spring-like resistance and tactile feedback when you press a key.
4. Membrane sheet: The membrane sheet is a thin layer of conductive material that lies between the key mechanism and the keyboard circuit. It allows the electrical signal to pass through when a key is pressed.
Understanding how these components fit together is crucial for a successful reattachment. Take note of any hooks or tabs on the key retainer or the keyboard that need to align properly. Pay attention to the orientation of the keycap to ensure it sits correctly on top of the key retainer.
By comprehending the key mechanism, you’ll have a clearer idea of how to proceed with placing the key back onto the keyboard. Now, let’s move on to the next step: actually attaching the key.
Placing the key back onto the keyboard
Now comes the moment of reassembling your keyboard by placing the key back onto the keyboard. Follow these steps to ensure a successful reattachment:
- Take a close look at the key retainer and the keyboard to identify the corresponding alignment points. There may be small tabs, hooks, or clips that need to align correctly for the key to fit back in place.
- Position the key retainer in its designated spot on the keyboard. Ensure it is seated properly and aligned with the surrounding keys.
- Hold the keycap at a slight angle and position it over the key retainer. Align the keycap with its original position and firmly press it down.
- Use your fingers or tweezers to apply gentle pressure around the edges of the keycap. This will help snap the keycap securely into place.
- Once the keycap is in position, give it a light press to check if it moves freely and feels stable. If it feels loose or wobbly, you may need to remove it and reattach it more securely.
It’s important to note that different keyboard models may have slight variations in the reattachment process. Some keys may require a specific angle or technique to ensure a proper fit. If you have access to the keyboard’s user manual, consult it for any specific instructions that may apply.
Take your time during this step and ensure that the keycap is securely attached and aligned with the surrounding keys. A properly placed key will not only look normal but also function as it should.
With the key installed, it’s time to move on to the next step: ensuring the key is securely attached to the keyboard.
Ensuring the key is securely attached
Once you have placed the key back onto the keyboard, it’s important to ensure that it is securely attached. This will prevent any further issues and ensure the key functions properly. Follow these steps to verify the key’s attachment:
- Gently press the key multiple times to test its movement. It should feel firm and stable, without any excessive wobbling or looseness.
- Pay attention to the key’s response as you press it. It should register your keystrokes accurately without any delay or inconsistency.
- Observe the keycap closely to ensure it sits flush with the surrounding keys. There should be no noticeable height difference or misalignment.
- Try typing with the reattached key to test its functionality. Check if it responds as expected and if there are any issues with key strokes or sticking.
If the key feels loose or wobbly, try removing it and reattaching it again, ensuring a more secure fit. You may need to apply slightly more force when snapping the key into place.
If the key still doesn’t feel secure after reattaching it several times, there may be an issue with the key retainer or a damaged component. In such cases, it may be necessary to consult a professional or consider replacing the keyboard if the problem persists.
By ensuring that the key is securely attached, you can enjoy uninterrupted typing and prevent the key from coming loose again in the future. Now, let’s move on to the next step: testing the key functionality.
Testing the key functionality
After reattaching the key, it’s crucial to test its functionality to ensure that it is working correctly. Follow these steps to assess the key’s responsiveness:
- Open a text editor or any application where you can input text.
- Type the key repeatedly and observe the text input. The characters corresponding to the key should appear consistently and without any issues.
- Test different combinations with the key, such as holding down the Shift key and pressing the key for uppercase letters or using the key in combination with other modifier keys like Ctrl or Alt.
- Check for any unusual behavior while using the key. Pay attention to any sticking, double typing, or unresponsiveness that may indicate a problem with the key.
If the key does not function properly or exhibits erratic behavior, it may be necessary to repeat the process of removing and reattaching the key. Make sure to carefully examine the key mechanism and ensure a proper fit. If the issue persists, there might be an underlying hardware problem, and seeking professional assistance may be necessary.
By thoroughly testing the key’s functionality, you can be confident that it is working as intended and restore the full typing capability of your keyboard.
Next, we will provide additional tips and troubleshooting techniques that can help resolve common issues that may arise during the key reattachment process.
Additional tips and troubleshooting
While reattaching a keyboard key is a relatively straightforward process, it’s important to be aware of some additional tips and troubleshooting techniques to address any potential issues that may arise. Here are some helpful tips:
- Take your time: Patience is key when working with small components and delicate mechanisms. Rushing the process may lead to mistakes or complications.
- Refer to online resources: If you’re unsure about the specific steps for your keyboard model, consult online tutorials, videos, or manufacturer support materials for guidance.
- Consider using a key puller: If you regularly remove and reattach keys, investing in a key puller tool can make the process easier and reduce the risk of damage.
- Use compressed air: Before reattaching the key, use a can of compressed air to clean any dust or debris from the keyboard. This can improve key performance and prevent future issues.
- Replace damaged components: If you notice any damaged or worn-out components during the reattachment process, such as a broken keycap or a damaged key retainer, consider replacing them with compatible replacements.
In case you encounter any difficulties, here are a few troubleshooting techniques that might help:
- Ensure proper alignment: Double-check that the key is aligned correctly with the key retainer and surrounding keys. Misalignment can lead to issues with key functionality.
- Check for debris or obstruction: Inspect the key mechanism and keyboard area to see if there are any obstructions or debris that may be affecting the key’s performance. Remove any foreign objects if found.
- Test with different keycaps: If you have multiple keys with a similar design, try swapping their keycaps to check if the issue is specific to the key or the keycap itself.
- Restart your computer: Sometimes, a simple computer restart can resolve minor software issues that may be affecting key functionality.
By following these additional tips and utilizing troubleshooting techniques, you can effectively address common challenges and ensure a successful keyboard key reattachment process.
Now, let’s conclude the article with a summary of the key points covered.
Conclusion
Putting a keyboard key back on may initially seem like a daunting task, but with the right tools and guidance, it becomes a manageable and rewarding process. In this article, we have covered the step-by-step procedure for reattaching a keyboard key, including gathering the necessary tools, removing the missing key, examining the key and the keyboard, understanding the key mechanism, placing the key back onto the keyboard, ensuring its secure attachment, and testing its functionality.
Remember to take your time and be meticulous throughout the process to achieve the best results. Familiarizing yourself with the key mechanism and identifying any unique features of your keyboard will contribute to a successful reattachment. Additionally, testing the key’s functionality and troubleshooting any issues that may arise further ensure a proper functioning key.
While our guide provides a comprehensive overview, it’s important to consult the user manual or online resources specific to your keyboard model for any model-specific instructions or troubleshooting tips.
By following these steps and incorporating the additional tips and troubleshooting techniques, you can confidently restore your keyboard’s functionality and enjoy smooth and accurate typing once again.
So, next time you encounter a loose or missing key on your keyboard, don’t panic. Armed with the knowledge and tools from this article, you’ll be able to fix the issue and get back to typing in no time.