Introduction
Replacing a laptop keyboard may seem daunting at first, but with the right tools and a little know-how, it can be a straightforward process. Whether your keyboard is damaged, unresponsive, or simply outdated, replacing it can breathe new life into your laptop and enhance your typing experience.
In this guide, we will walk you through the step-by-step process of replacing a laptop keyboard. From gathering the necessary tools to installing the new keyboard, we will cover everything you need to know to successfully complete the task.
Before we delve into the details, it is essential to note that while the process may vary slightly depending on your laptop’s make and model, the general steps remain the same. It is always a good idea to consult your laptop’s user manual or search for specific instructions online for your particular model.
Additionally, if you are not confident in your technical skills or feel uncomfortable working with delicate electronic components, it is recommended to seek professional assistance. However, with some patience and careful handling, replacing a laptop keyboard can be a rewarding DIY project.
Now, let’s dive into the first step of the process: gathering the necessary tools.
Step 1: Gather the necessary tools
Before you begin the process of replacing your laptop keyboard, you will need to gather the necessary tools. Having the right tools on hand will ensure a smooth and efficient replacement process. Here are the essential tools you will need:
- Screwdriver set: A small precision screwdriver set with various head types, such as Phillips and flathead, is essential for removing the screws that hold the keyboard in place.
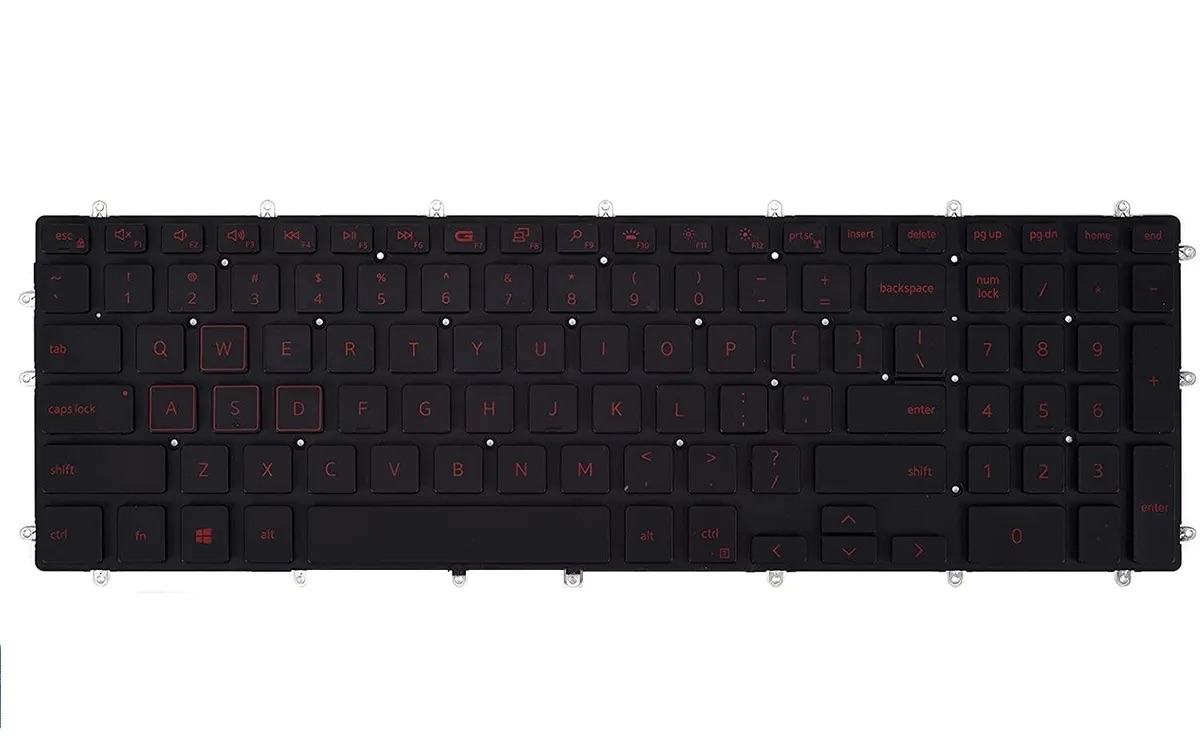
- Replacement keyboard: Make sure to purchase a compatible replacement keyboard for your specific laptop model. You can find these online or at computer hardware stores.
- Tweezers: Tweezers will come in handy when delicately handling small connectors and cables during the replacement process.
- Antistatic wrist strap: While not necessary, an antistatic wrist strap can help protect the sensitive electronic components of your laptop from static electricity damage.
- Cleaning supplies: It’s a good idea to have some lint-free cloths and isopropyl alcohol on hand to clean the laptop’s surface and remove any dirt or debris.
Once you have gathered these tools, you will be ready to move on to the next step: preparing the workspace.
Step 2: Prepare the workspace
Before you start replacing your laptop keyboard, it’s important to prepare your workspace properly. This will create a clean and organized environment for you to work in, minimizing the risk of damaging any components or losing small screws. Follow these steps to prepare your workspace:
- Choose a clean and well-lit area: Find a spacious and well-lit workspace where you can comfortably spread out your tools and work on your laptop. A clutter-free surface will help you stay organized and focused.
- Power off and unplug your laptop: It’s crucial to turn off your laptop completely and unplug it from the power source before starting any repairs. This will prevent any electrical shocks or accidental damage.
- Remove any accessories and external devices: Take off any external devices or accessories connected to your laptop, such as USB drives or headphones. Clearing the area around your laptop will give you more room to work.
- Ground yourself: To avoid static electricity damage to your laptop’s internal components, ground yourself by touching a grounded metal object or wearing an antistatic wrist strap. This will discharge any static build-up in your body.
- Organize your tools: Lay out your tools and components in an organized manner, making them easily accessible during the replacement process. This will save time searching for tools and prevent misplacing any small screws.
Once your workspace is set up and your laptop is properly prepared, you’re ready to move on to the next step: removing the old keyboard.
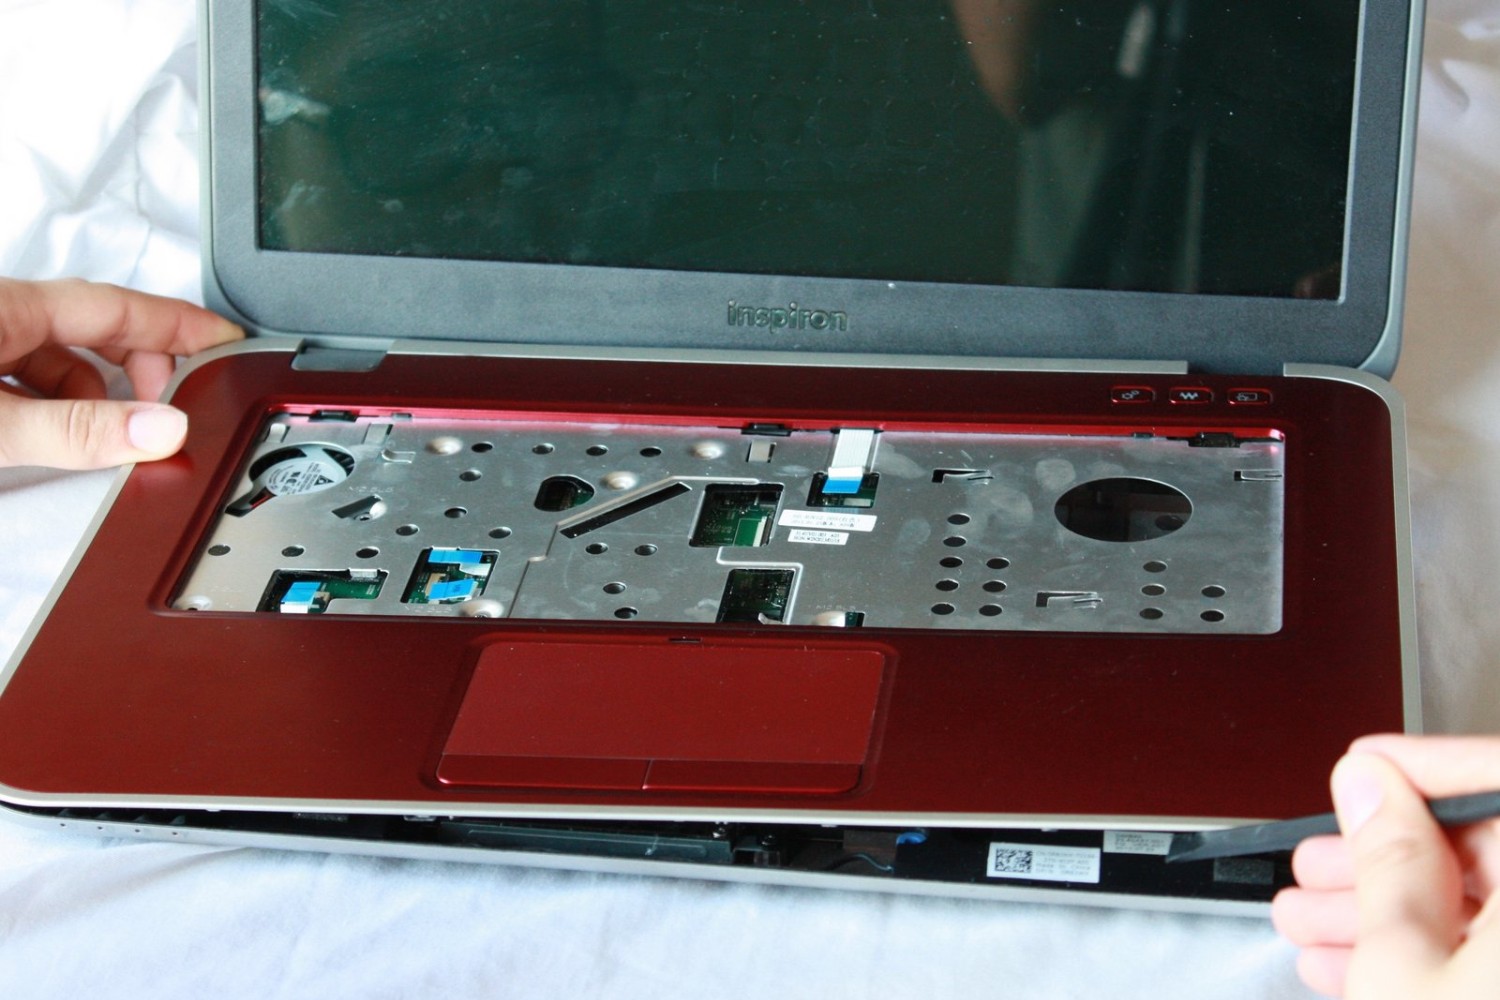
Step 3: Remove the old keyboard
Now that you have gathered the necessary tools and prepared your workspace, it’s time to remove the old keyboard from your laptop. Follow these steps carefully to ensure a successful removal:
- Disconnect the power source: Make sure your laptop is turned off and unplugged from the power source before you begin. This step is crucial to avoid any electrical hazards.
- Remove the battery: In some laptops, you may need to remove the battery before accessing the keyboard. Check your laptop’s user manual or search online for specific instructions on how to remove the battery.
- Locate the keyboard screws: Carefully flip your laptop over and look for the screws that secure the keyboard. These screws are usually labeled with a keyboard symbol or indicated by small arrows pointing towards them.
- Remove the keyboard screws: Using the appropriate screwdriver from your set, unscrew the keyboard screws and keep them in a safe place. Be gentle and avoid applying excessive force to prevent damaging the delicate components underneath.
- Disconnect the keyboard ribbon cable: Once the screws have been removed, locate the ribbon cable that connects the keyboard to the motherboard. Gently lift the locking tab holding the ribbon cable in place and carefully unplug it from the connector.
- Remove the old keyboard: With the ribbon cable disconnected, you can now lift the old keyboard out of its housing. Take your time and handle it with care.
Once you have successfully removed the old keyboard, set it aside and proceed to the next step: installing the new keyboard.
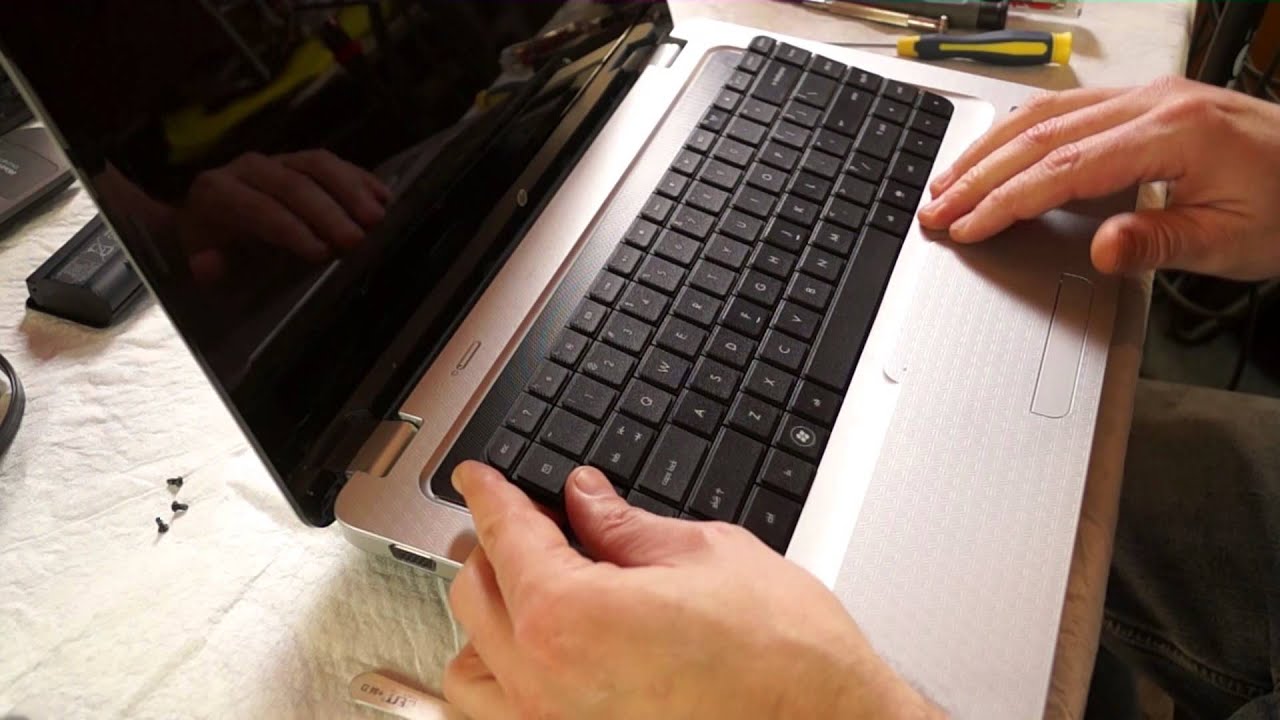
Step 4: Install the new keyboard
With the old keyboard removed, it’s time to install the new keyboard onto your laptop. Follow these steps to ensure a proper installation:
- Align the new keyboard: Take the new keyboard and align it with the slots and screw holes on your laptop. Make sure it sits flat and matches the placement of the previous keyboard.
- Connect the keyboard ribbon cable: Locate the ribbon cable connector on the motherboard and carefully plug the ribbon cable from the new keyboard into it. Ensure that it is securely inserted and the locking tab is engaged.
- Secure the keyboard screws: Using the screws you removed earlier, secure the new keyboard in place. Start with one screw and tighten it slightly, then move on to the next screw. Repeat this process until all the screws are securely fastened.
- Perform a visual check: Take a moment to visually inspect the keyboard installation, ensuring that it is properly aligned and securely attached. Check that all the keys are in the correct position and that nothing is obstructing them.
Once the new keyboard is installed and everything looks good, proceed to the next step: testing the new keyboard.
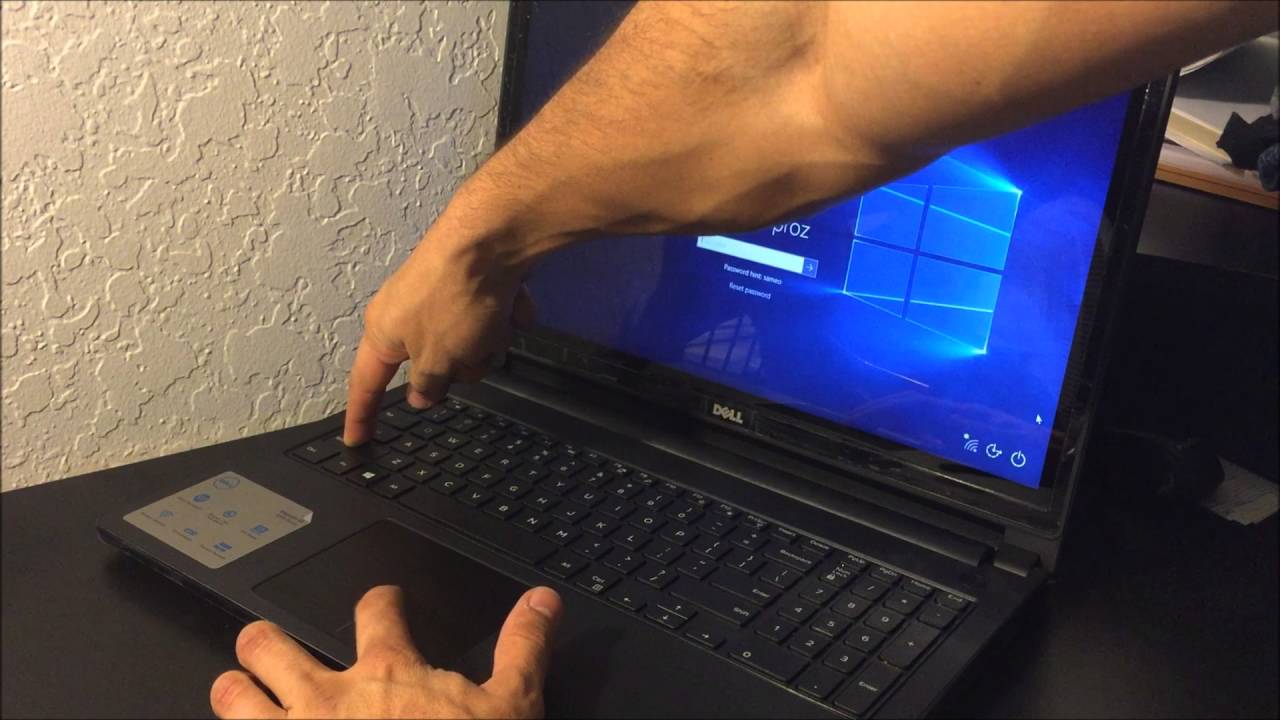
Step 5: Test the new keyboard
Now that the new keyboard is installed, it’s important to test its functionality before putting everything back together. Follow these steps to ensure that the new keyboard is working properly:
- Power on your laptop: Turn on your laptop and wait for it to boot up completely. Once it’s on, you can proceed with the testing process.
- Type a test message: Open a word processing application or any program that allows you to type. Start typing a test message to check if all the keys on the new keyboard are working correctly. Pay close attention to any keys that were previously malfunctioning or unresponsive.
- Test special function keys: Some laptop keyboards have special function keys that perform specific actions, such as adjusting the volume or brightness. Test these keys to ensure that they are functioning as intended.
- Check for any errors: While typing, keep an eye out for any errors or inconsistencies. Verify that each key registers correctly and that there are no issues with key spacing or sensitivity.
If you encounter any issues during the testing process, double-check the connections and ensure that the keyboard is properly installed. If the problems persist, you may need to consult a professional technician or contact the keyboard manufacturer for further assistance.
Once you have confirmed that the new keyboard is functioning correctly, you can proceed to the final step: cleaning up and putting everything back together.
Step 6: Clean up and put everything back together
After successfully testing the new keyboard, it’s time to clean up your workspace and put everything back together. Follow these steps to complete the process:
- Turn off your laptop: Before proceeding, make sure to power off your laptop completely.
- Clean the laptop surface: Take a lint-free cloth and lightly dampen it with isopropyl alcohol. Gently wipe the surface of your laptop to remove any dirt, smudges, or fingerprints.
- Reassemble any removed components: If you had removed the laptop battery or any other accessories, now is the time to reattach them properly. Follow the instructions from your laptop’s user manual if needed.
- Secure the back cover: Carefully align the back cover of your laptop and secure it in place using the appropriate screws. Make sure all the screws are tightened, but be cautious not to overtighten and risk damaging the threads.
- Power on your laptop: Once everything is put back together, power on your laptop to ensure that it boots up without any issues. Allow it to fully start up and run a quick test to ensure that all components, including the new keyboard, function properly.
With the laptop now reassembled and fully operational, you have successfully completed the process of replacing the keyboard. Enjoy your improved typing experience!
Remember to keep your old keyboard or dispose of it responsibly according to your local guidelines. Additionally, it’s a good practice to retain the warranty or warranty information for the new keyboard in case any issues arise in the future.
Conclusion
Congratulations! You have successfully replaced the keyboard on your laptop. By following the step-by-step process outlined in this guide, you were able to gather the necessary tools, prepare your workspace, remove the old keyboard, install the new one, test its functionality, and clean up and put everything back together.
Replacing the keyboard can breathe new life into your laptop and enhance your overall typing experience. Whether you were dealing with a damaged keyboard, unresponsiveness, or simply wanted to upgrade to a better one, this DIY project can save you time and money compared to seeking professional assistance.
Remember to consult your laptop’s user manual or search for specific instructions online for your particular make and model. Each laptop may have slight variations in the replacement process, so it’s crucial to follow the appropriate guidelines.
If at any point you feel unsure or uncomfortable with the process, it’s always a good idea to seek professional help. Damaging any internal components or making incorrect connections can result in further issues or additional repair costs.
Now that your laptop has a brand new keyboard, take some time to adjust to the new layout and enjoy the improved typing experience. Keep your workspace clean and maintain good hygiene by regularly cleaning the keyboard to ensure its longevity.
Thank you for following this guide. We hope it has been helpful in assisting you through the process of replacing your laptop keyboard. Happy typing!