Introduction
Having a clean and functional keyboard is essential for a smooth and efficient typing experience. Over time, keyboard keys can accumulate dirt, dust, and debris, which can affect their performance and make typing more difficult. That’s why it’s important to know how to take off keyboard keys and clean them properly.
In this article, we will walk you through the step-by-step process of removing keyboard keys, cleaning them, and reassembling the keyboard. Whether you spilled a drink on your keyboard, have sticky or unresponsive keys, or simply want to give your keyboard a thorough cleaning, this guide will provide you with the knowledge and tools you need to get the job done.
Before we dive into the details, it’s important to note that taking off keyboard keys may vary slightly depending on the specific keyboard model or brand. However, the general principles and techniques discussed here can be applied to most keyboards with removable keys.
Now, let’s gather the necessary tools and get ready to take off those keyboard keys!
Tools you will need
Before you start removing keys from your keyboard, it’s important to gather the necessary tools to ensure a smooth and successful disassembly process. Here are the essential tools you will need:
- Keycap puller: This tool is specifically designed to safely and easily remove keycaps without damaging the surrounding keys or keyboard housing. It typically has a set of prongs or hooks that securely grab onto the keycap for effortless removal.
- Cotton swabs or soft cloth: These will be used to clean the keycaps and the surrounding area. They should be gentle enough to avoid scratching or damaging the keys.
- Isopropyl alcohol: Isopropyl alcohol is an effective cleaning agent that helps remove dirt, grime, and grease from the keycaps. Make sure to use a high concentration alcohol (70% or higher) for best results.
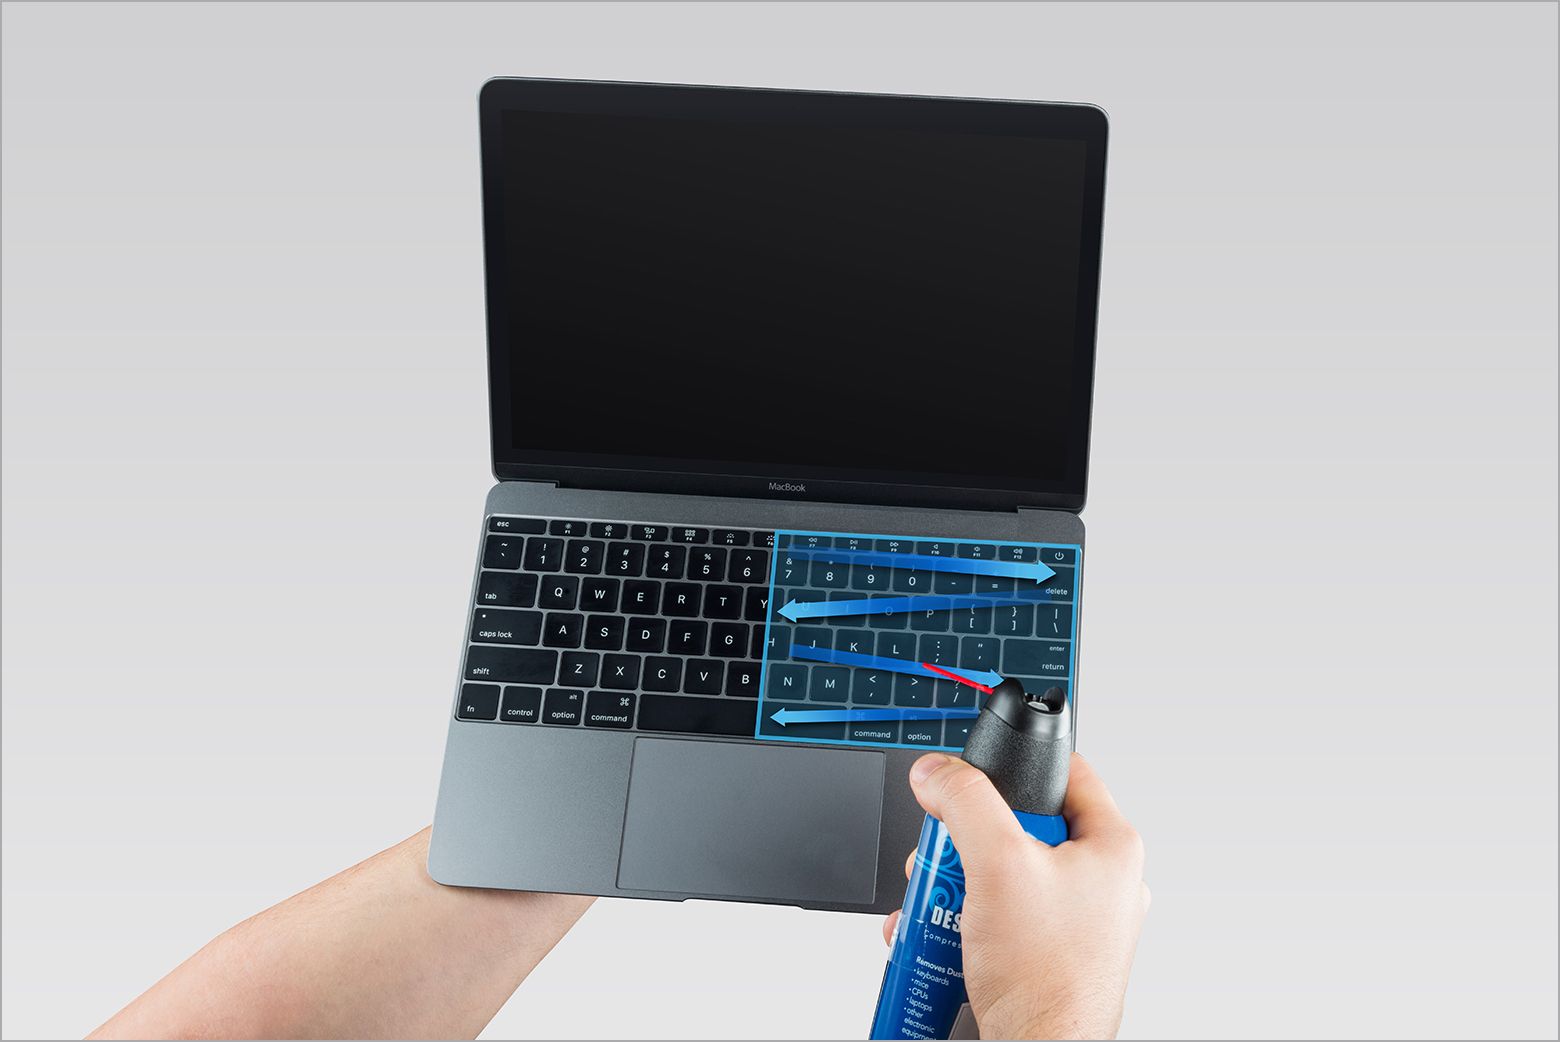
- Compressed air: This handy tool is perfect for blowing away dust, crumbs, and other debris that may be stuck under the keys. It helps ensure a thorough cleaning before reassembling the keyboard.
- Small container: Having a small container nearby will make it easy to soak the keycaps in cleaning solution if necessary. It should be large enough to hold several keycaps at once.
- Flathead screwdriver or spudger: In some cases, you may need a flathead screwdriver or a plastic spudger to assist in removing the keyboard housing or accessing hard-to-reach areas.
Having these tools readily available will save you time and frustration during the disassembly and cleaning process. Now that you have everything you need, let’s move on to preparing for disassembly!
Preparing for Disassembly
Before you start taking off keyboard keys, it’s important to prepare your workspace and take certain precautions to ensure a smooth disassembly process. Here’s what you need to do:
- Power off your computer: Before you do anything, make sure to power off your computer or laptop. This is an important safety measure to avoid any accidental keystrokes or interference while working on the keyboard.
- Find a clean and well-lit area: Choose a clean and well-lit workspace with enough room to spread out the keycaps and tools. This will make it easier to keep track of the disassembled keys and ensure you don’t lose any small components.
- Take a photo or make a diagram: It’s helpful to take a photo or make a diagram of your keyboard layout before removing any keys. This will serve as a reference point later on when you are reassembling the keyboard and fitting the keys back into their correct positions.
- Remove any obstacles: Clear away any obstructions or debris from your keyboard’s surface. This includes any paper clips, pens, or other items that may be resting on the keys. It’s also a good idea to wipe down the keyboard with a soft cloth to remove any loose dirt or dust.
- Ground yourself: Static electricity can damage sensitive electronic components, so it’s important to ground yourself before handling the keyboard. You can do this by touching a metal object or wearing an anti-static wristband.
By taking these preparatory steps, you’ll create an organized and controlled environment for disassembling your keyboard. With your workspace ready, you’re now ready to move on to the next step: removing the keycaps!
Removing the Keycap
Now that you’re ready to start the disassembly process, it’s time to remove the keycaps from your keyboard. Follow these steps to safely remove the keycaps:
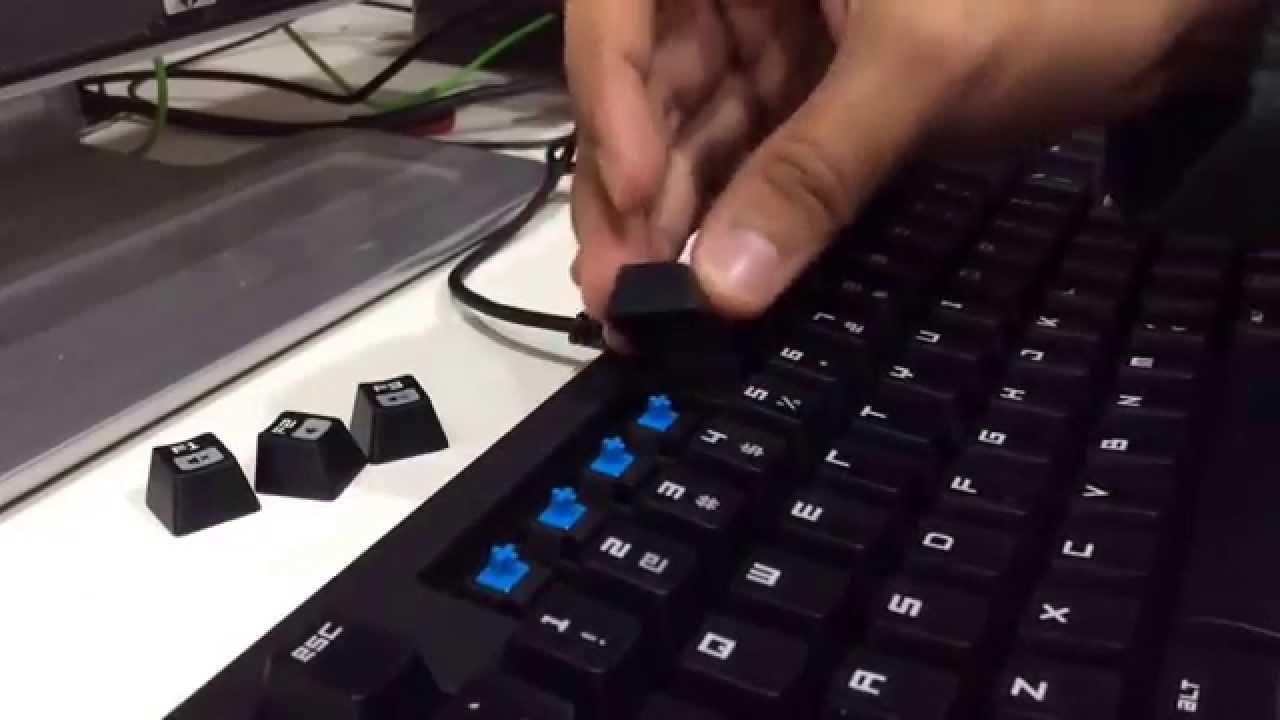
- Locate the keycap: Identify the keycap you want to remove. It’s advisable to start with one of the corner keys, such as the Shift, Control, or Enter key, as they are usually easier to remove.
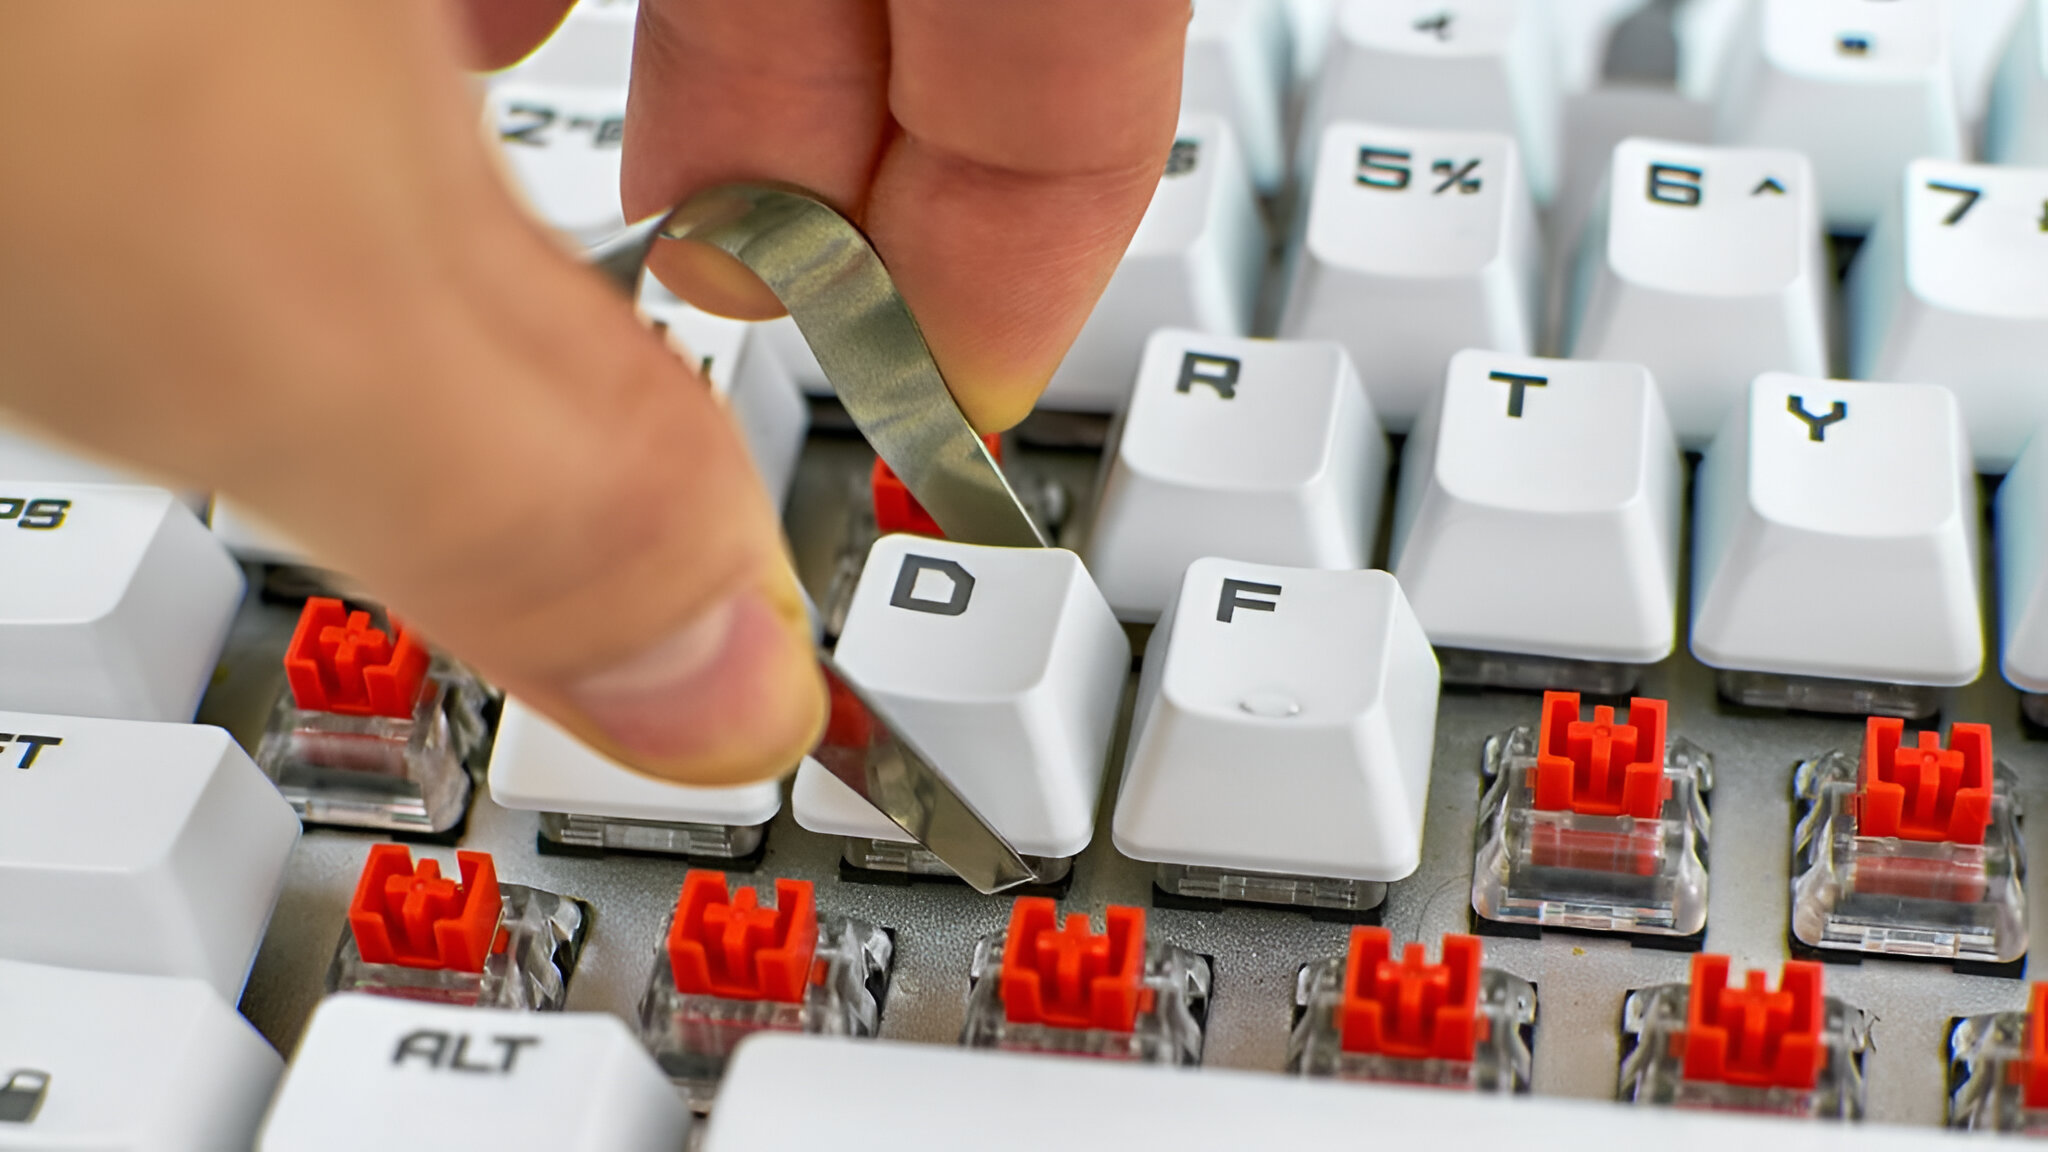
- Use a keycap puller: Take your keycap puller and place the prongs or hooks underneath the bottom edge of the keycap. Ensure that the puller is centered and securely gripping the keycap.
- Gently pull upward: Apply even pressure and gently pull upward on the keycap. Avoid any sudden or forceful movements to prevent damaging the key or the keyboard housing.
- Repeat for other keycaps: Continue removing the remaining keycaps using the same method. Take your time and be cautious, especially when dealing with larger or more fragile keys like the spacebar or function keys.
During the keycap removal process, it’s crucial to work carefully and avoid using excessive force. If a keycap feels stubborn or resistant to removal, double-check that the keycap puller is securely attached and try gently wiggling the keycap back and forth while pulling upward.
As you remove each keycap, place them in a safe spot or in a small container so that they don’t get lost or mixed up. It’s important to keep track of the location and order of the keycaps to make reassembly easier later on.
Now that you’ve successfully removed the keycaps, you’re ready to move on to the next step: removing the housing of the keyboard.
Removing the Housing
After removing the keycaps, the next step in the disassembly process is removing the housing of the keyboard. Follow these steps to safely remove the housing:
- Turn the keyboard upside down: Flip the keyboard upside down to access the underside of the housing.
- Inspect for screws or clips: Look for any screws or clips that may be securing the housing in place. These can vary depending on the keyboard model, so carefully examine the underside of the keyboard to identify them.
- Remove screws: If you see screws, use a small screwdriver to unscrew them. Keep track of the screws as you remove them. Place them in a separate container to avoid misplacing them.
- Release clips: If there are clips securing the housing, gently press or release them to disengage the housing from the keyboard base. Be mindful of any plastic tabs or fragile components to prevent damage.
- Lift off the housing: Once the screws are removed or the clips are released, carefully lift off the housing from the keyboard base. Take your time to ensure that you don’t force it and risk breaking any delicate parts.
As you remove the housing, you may encounter cables or ribbon connectors that connect the keyboard to the computer. If you do, be cautious when handling them to avoid damaging the connections.
During the housing removal process, it’s important to pay attention to any specific instructions or guidelines provided by the keyboard manufacturer. Every keyboard may have slightly different methods for housing removal, so be prepared to adapt your approach based on the specific design and construction of your keyboard.
With the housing removed, you now have access to the inner components and can proceed to clean the keycaps and keyboard thoroughly.
Cleaning the Key
Now that you have successfully removed the keycap and housing of your keyboard, it’s time to clean the keycaps to ensure they are free from dirt, dust, and debris. Follow these steps to effectively clean the keycaps:
- Prepare a cleaning solution: In a small container, mix isopropyl alcohol with water in a 1:1 ratio. This solution will help to break down and remove any grime or grease from the keycaps.
- Soak the keycaps: Place the keycaps into the cleaning solution and let them soak for a few minutes. This will loosen any dirt or residue on the surface of the keycaps.
- Scrub the keycaps: Use a soft cloth or a cotton swab dipped in the cleaning solution to scrub the keycaps gently. Pay attention to any stubborn stains or marks and apply a bit more pressure if necessary. Avoid using excessive force to prevent damaging the keycaps.
- Rinse the keycaps: After scrubbing, rinse the keycaps under running water to remove any remaining cleaning solution. Ensure that the water is not too hot to avoid warping or damaging the keycaps.
- Dry the keycaps: Pat the keycaps dry with a clean cloth or let them air dry completely before reassembling the keyboard. Make sure they are completely dry to prevent any liquid from seeping into the keyboard.
In addition to cleaning the keycaps, you should also take the opportunity to clean the keyboard housing and the exposed area underneath the keycaps. Use compressed air to blow away any dust, crumbs, or debris that may have accumulated. You can also use a soft cloth or cotton swab dampened with the cleaning solution to wipe down the surface.
Once all the components are thoroughly cleaned and dried, you’re ready to proceed with reassembling the keyboard, which we’ll discuss in the next section.
Reassembling the Keyboard
After successfully cleaning the keycaps and the keyboard components, it’s time to reassemble your keyboard. Follow these steps to ensure a proper reassembly:
- Retrieve the keycaps: Gather all the clean and dry keycaps that you removed earlier. Make sure they are arranged in the correct order according to the photo or diagram you took before disassembly.
- Align the keycap: Take each keycap and align it with the stem on the keyboard base. Ensure that the keycap is positioned correctly and in line with the surrounding keycaps.
- Press down firmly: Apply firm and even pressure to the top of the keycap, pressing it down until you hear a satisfying click or feel it securely snap into place.
- Repeat for all keycaps: Repeat the process for all the keycaps, working your way across the keyboard until every keycap is reattached. Take your time and be patient to ensure that each keycap is properly aligned and installed.
- Reattach the housing: Once all the keycaps are back in place, carefully align the housing with the keyboard base. Ensure that any cables or ribbon connectors are properly reinserted if necessary.
- Screw in or clip the housing: If you removed any screws during disassembly, screw them back into place to secure the housing. If there were clips, press or snap them back into position to secure the housing.
As you reassemble the keyboard, refer to the photo or diagram you took earlier to ensure the correct placement of the keycaps. Double-check that all keys are fitted properly and aligned evenly. If any key feels loose or wobbly, remove it and reattach it to ensure a secure fit.
Once the keyboard housing is back in place and all the keycaps are securely reattached, you can now connect your keyboard to your computer, power it on, and test the keys to make sure they are functioning as expected.
Congratulations! You have successfully cleaned and reassembled your keyboard. Enjoy your fresh and fully functional keyboard for a pleasant typing experience!
Conclusion
Cleaning and maintaining your keyboard is an important part of ensuring its longevity and optimal performance. By learning how to take off keyboard keys and clean them properly, you can keep your keyboard looking and functioning like new.
In this guide, we have covered the step-by-step process of removing keyboard keys, cleaning them, and reassembling the keyboard. Remember to gather the necessary tools, prepare your workspace, and take precautions like powering off your computer and grounding yourself.
Removing the keycaps and housing carefully is crucial to avoid any damage to the keyboard. Take your time, use a keycap puller, and follow the manufacturer’s instructions if available.
When cleaning the keycaps, use a gentle cleaning solution, such as a mixture of isopropyl alcohol and water. Scrub the keycaps gently with a soft cloth or cotton swab, rinse them thoroughly, and allow them to dry completely before reassembling.
During the reassembling process, align the keycaps correctly and ensure a secure fit. Pay attention to the correct order and position of the keycaps to maintain the keyboard layout.
By following these steps, you can enjoy a clean and fully functional keyboard that provides a pleasant typing experience. Remember to perform regular maintenance and cleaning to keep your keyboard in top shape.
Now that you have the knowledge and skills to take off keyboard keys and clean them, don’t hesitate to give your keyboard the attention it deserves. Happy typing!