Introduction
Removing the front panel of a PC case is a common task that may be necessary for various reasons. Whether you need to clean the dust filters, install new fans, or access the front I/O ports, understanding how to properly remove the front panel is essential for any PC enthusiast or technician.
The front panel of a PC case is typically held in place by screws or fasteners and can vary in design depending on the make and model of the case. It usually covers the front I/O ports, which include USB ports, audio jacks, and power buttons.
In this guide, we will take you through the step-by-step process of removing the front panel of a PC case. We will cover the tools you will need, the necessary precautions to take, and the proper techniques to ensure a successful removal without damaging any components.
By following this guide, you will gain the knowledge and confidence to safely remove the front panel of your PC case and perform any maintenance or upgrades that require access to it.
Tools Required
Before you begin removing the front panel of your PC case, it’s important to gather the necessary tools to make the process easier and ensure that you avoid any potential damage. Here are the tools you will need:
- Screwdriver: Depending on your PC case, you may need a Phillips or flathead screwdriver to remove the screws holding the front panel in place.
- Anti-static wrist strap: To protect your PC components from static electricity, it is recommended to use an anti-static wrist strap throughout the process.
- Compressed air or a soft brush: If you plan on cleaning the front panel or any dust filters, having compressed air or a soft brush will help you remove dust and debris effectively.
- Optional: Cleaning solution and microfiber cloth: If you want to give your front panel a thorough cleaning, you can use a cleaning solution and a microfiber cloth to wipe away any smudges or fingerprints.
Having these tools ready and within reach before you start will save you time and ensure that you have everything you need to safely remove the front panel of your PC case.
Step 1: Power down and unplug your computer
Before you begin removing the front panel of your PC case, it is crucial to power down your computer and unplug it from the electrical outlet. This is an essential safety precaution that should never be overlooked. Here’s how to do it:
- Shut down your computer: Save any open files and close all applications. Click on the Start menu, select “Shut Down,” and wait for your computer to turn off completely.
- Unplug your computer: Once your computer is shut down, gently unplug the power cord from the electrical outlet. This will ensure that there is no power running through your computer while you work on removing the front panel.
- Ground yourself: To avoid damaging sensitive components in your PC due to static electricity, it is recommended to ground yourself. You can do this by touching a grounded metal object, such as a doorknob or the metal portion of your PC case.
Powering down your computer and unplugging it from the electrical outlet not only protects your safety but also prevents any accidental damage to your PC components. Make sure to follow this step before proceeding to the next one.
Step 2: Remove any cables or accessories connected to the front panel
Before you can remove the front panel of your PC case, you need to disconnect any cables or accessories that are connected to it. This ensures a smooth and hassle-free removal process. Follow these steps:
- Identify the cables: Take a close look at the front panel and identify any cables or accessories that are connected to it. Common connections include the power button, reset button, USB ports, audio jacks, and LED indicators.
- Unplug the cables: Carefully unplug each cable from its corresponding connector on the motherboard. Gently tug on the connector, not the cable, to avoid damaging any components. If necessary, use a small amount of force, but do not yank or twist the cable.
- Remove accessories: If there are any accessories attached to the front panel, such as fan filters or LED strips, remove them by unscrewing or unclipping them according to the manufacturer’s instructions.
- Set aside the cables and accessories: Once all cables and accessories are disconnected, set them aside in a safe place to avoid misplacing them or causing damage.
By following these steps, you will ensure that there are no obstructions or potential damage to the cables or accessories connected to the front panel of your PC case. This will make the removal process easier and more efficient.
Step 3: Locate the screws or fasteners holding the front panel in place
Once you have disconnected all cables and accessories from the front panel, the next step is to locate the screws or fasteners that are holding it securely to the PC case. The exact location and number of screws may vary depending on the case manufacturer and model. Follow these guidelines:
- Inspect the front panel: Take a close look at the front panel and examine its edges and corners for any visible screws or fasteners. These are typically located on the sides or bottom of the front panel.
- Refer to the PC case manual: If you are having trouble locating the screws or fasteners, refer to the PC case manual. It will provide detailed instructions on how to remove the front panel specific to your case model.
- Check for hidden screws: Some PC cases have hidden screws or fasteners that may not be immediately visible. These are often concealed behind removable panels or part of a tool-less design. Carefully inspect the case for any hidden screws and remove them if necessary.
- Document the screw locations: If you anticipate having difficulty remembering the exact screw locations, take a photo or sketch the front panel and mark the screw positions. This will help you reassemble the panel correctly later on.
By carefully inspecting the front panel and referring to the PC case manual, you will be able to locate the screws or fasteners that are holding the panel in place. This will allow you to proceed to the next step of removing the front panel successfully.
Step 4: Unscrew or unfasten the front panel
With the screws or fasteners located, it’s time to unscrew or unfasten them to remove the front panel from the PC case. Follow these steps to safely detach the front panel:
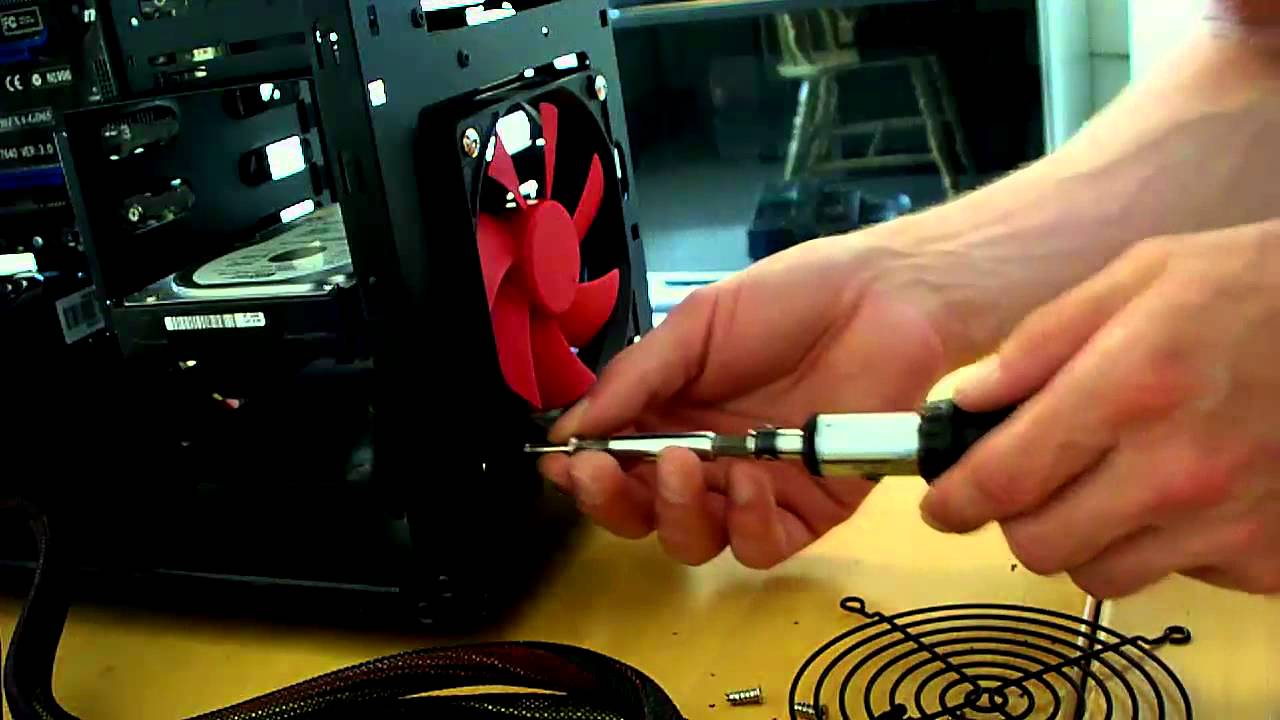
- Use the appropriate tool: Depending on the type of screws or fasteners used, use the appropriate tool, such as a Phillips or flathead screwdriver, to loosen and remove them. Be sure to apply consistent pressure and turn the screws counterclockwise.
- Keep screws in a safe place: As you remove the screws, place them in a small container or bag and keep them in a safe place. This will prevent them from getting lost and ensure that you have all the necessary screws for reassembly later.
- Exercise caution when unfastening: If your PC case features a tool-less design, be mindful of the mechanisms used to secure the front panel. Follow the manufacturer’s instructions to disengage the fasteners without applying excessive force that could damage the case or panel.
- Be mindful of attached cables: While unscrewing or unfastening the front panel, be aware of any cables or connectors that are still attached. Gently guide these cables through the openings in the case as you remove the panel to prevent any strain or damage.
By carefully unscrewing or unfastening the screws, keeping them in a safe place, and being mindful of attached cables, you can safely detach the front panel from your PC case. Remember to handle the panel with care to minimize the risk of scratches or other damage.
Step 5: Gently remove the front panel from the case
Now that you have unscrewed or unfastened the front panel, it’s time to gently remove it from the PC case. Follow these steps to safely extract the front panel:
- Apply even pressure: Place your hands on both sides of the front panel and apply even pressure. Slowly and steadily pull the panel directly towards you.
- Check for any resistance: If you encounter resistance while removing the front panel, pause and inspect the area. Ensure that all screws or fasteners have been removed and that no cables are still attached.
- Verify clearances: As you lift the front panel away from the case, ensure that there is enough clearance to avoid any cables or components getting caught or damaged.
- Set the panel aside: Once the front panel is completely free from the case, set it down on a soft, flat surface. This will prevent any accidental scratches or damage to the panel.
By applying even pressure, checking for resistance, and verifying clearances, you can safely remove the front panel from your PC case. Remember to handle the panel with care and avoid unnecessary force to protect the panel and prevent any damage to the components inside the case.
Step 6: Clean or perform maintenance on the front panel (optional)
Once you have removed the front panel from your PC case, you have the option to clean or perform maintenance on it. This step is optional, but it is a great opportunity to keep your front panel looking fresh and functioning optimally. Here are a few suggestions:
- Dust off the panel: If you notice any dust or debris on the front panel, use compressed air or a soft brush to gently remove it. Be careful not to apply too much force or use abrasive materials to avoid scratching or damaging the panel.
- Clean the dust filters: If your front panel has dust filters, this is an excellent time to clean them. Remove the filters and rinse them gently with water or use a vacuum cleaner to remove the trapped dust. Allow them to dry completely before reattaching them to the front panel.
- Inspect and clean ports: Take a moment to inspect the USB ports, audio jacks, and other connectors on the front panel. If they appear dirty or have any debris, use a small brush or compressed air to clean them.
- Perform maintenance or upgrades: If you have any accessories or components attached to the front panel, such as fan filters or LED strips, you can use this opportunity to clean or replace them as needed. Ensure that you follow the manufacturer’s instructions for maintenance or upgrades.
By cleaning or performing maintenance on the front panel, you can improve its appearance and functionality. This optional step allows you to keep your PC case well-maintained and ensures that the front panel continues to serve its purpose effectively.
Step 7: Reassemble the front panel onto the case
After cleaning or performing maintenance on the front panel, it’s time to reassemble it back onto the PC case. Follow these steps to ensure a proper and secure reassembly:
- Align the front panel: Position the front panel in front of the PC case, aligning the screw holes or fastener slots with the corresponding openings on the case. Make sure the panel is seated flush against the case.
- Reattach the screws: Insert the screws or fasteners into their respective holes or slots. Use your fingers to tighten them initially, ensuring they are threaded properly. Then, use the appropriate tool, such as a screwdriver, to securely tighten the screws without over-tightening.
- Recall any hidden screws: If you previously removed any hidden screws during the disassembly, make sure to reinsert and secure them now.
- Reconnect cables and accessories: Carefully reconnect any cables that were detached earlier. Ensure each cable is securely plugged into its corresponding connector on the motherboard or other devices. Reattach any accessories, such as fan filters or LED strips, if applicable.
- Double-check the connections: Take a moment to double-check all connections to ensure they are properly seated and secure. Verify that no cables are pinched or obstructed by the front panel.
By following these steps, you can successfully reassemble the front panel onto your PC case. Take your time and pay attention to detail to ensure a secure and accurate reassembly.
Conclusion
Removing the front panel of a PC case is a straightforward process that allows you to access the front I/O ports, clean dust filters, and perform maintenance or upgrades. By following the steps outlined in this guide, you can safely and efficiently remove the front panel without causing any damage to your PC components.
Starting with powering down and unplugging your computer, you ensure your safety and protect your PC from any electrical mishaps. Disconnecting cables and accessories from the front panel eliminates any obstructions and allows for a smooth removal process.
Locating and unscrewing or unfastening the panel enables you to detach it from the case, while gentle handling helps prevent scratches or other damage. Optionally, you can clean the front panel and perform maintenance to keep it in optimal condition.
Finally, reassembling the front panel onto the case ensures a secure fit and proper connection of cables and accessories. Double-checking all connections guarantees a successful reassembly without any issues.
With this guide, you now have the knowledge and confidence to remove and reassemble the front panel of your PC case. Remember to take your time, be mindful of the components, and follow any manufacturer instructions specific to your case model.


