Introduction
Reinstalling Windows 10 on your SSD can be a practical solution in various situations. It can help improve overall system performance, fix software issues, or prepare for a fresh start. Whether you have a new SSD or simply want to reinstall the operating system on your current one, this step-by-step guide will walk you through the process.
By following these instructions, you’ll be able to reinstall Windows 10 on your SSD without losing your important files and settings. However, it’s crucial to note that this process will erase all the data on your SSD, so be sure to back up your files beforehand. Additionally, make sure to have your Windows 10 installation media ready, such as a bootable USB drive or DVD.
With the necessary preparations in place, you’ll be ready to dive into the reinstallation process. In the next steps, you’ll learn how to properly install your new SSD, boot from the installation media, customize your settings, and restore your backed-up data.
Reinstalling Windows 10 on your SSD can give your computer a fresh start and eliminate any performance issues caused by outdated software or conflicts. It’s also an opportunity to start with a clean slate, removing unnecessary programs and clutter that may have accumulated over time.
So, let’s get started and reinstall Windows 10 on your SSD. Follow each step carefully, and soon you’ll have a fully functional operating system with improved performance and stability.
Step 1: Back Up Your Data
Before reinstalling Windows 10 on your SSD, it’s important to back up your data to ensure that you don’t lose any important files or documents. This step is crucial as the reinstallation process will erase all the data on your SSD.
There are several ways to back up your data. One option is to manually copy and paste your files to an external hard drive, USB flash drive, or cloud storage service. Simply select the files and folders you want to back up, right-click, and choose “Copy.” Then, navigate to the external storage device, right-click, and select “Paste.” This method works well for small amounts of data or specific files.
If you have a large amount of data or want a more automated approach, you can use a backup software tool. There are many free and paid options available that allow you to schedule automatic backups and easily restore your files. Some popular backup software includes EaseUS Todo Backup, Acronis True Image, and Macrium Reflect.
In addition to backing up your files, it’s also a good idea to make note of any software licenses or product keys for programs you may need to reinstall later. This will save you time and ensure that you can reactivate your software without any issues.
Remember to double-check that you’ve backed up all the necessary data before proceeding with the Windows 10 reinstallation. Once you’re confident that everything is safely backed up, you can move on to the next step.
Step 2: Create a Windows 10 Installation Media
Creating a Windows 10 installation media is essential for reinstalling the operating system on your SSD. It allows you to boot from the installation media and initiate the reinstallation process.
To create a Windows 10 installation media, you’ll need a blank USB flash drive or a DVD with at least 8GB of storage space. Follow these steps:
- Visit the official Microsoft website and download the Windows 10 Media Creation Tool. This tool will help you create the installation media seamlessly.
- Open the Media Creation Tool and accept the license terms.
- Select the option “Create installation media (USB flash drive, DVD, or ISO file)” and click Next.
- Choose the desired language, edition, and architecture for Windows 10.
- Select the USB flash drive or DVD as the media to use.
- Click Next and wait for the tool to download and create the installation media.
- Once the process is complete, you’ll have a bootable USB flash drive or a Windows 10 installation DVD ready to be used for reinstalling the operating system.
Having a bootable USB flash drive or DVD is crucial as it allows you to boot your computer from the installation media. This step is necessary to begin the Windows 10 reinstallation process on your SSD.
Make sure to keep the installation media in a safe place as you’ll need it in the subsequent steps. With the installation media prepared, you’re one step closer to reinstalling Windows 10 on your SSD and enjoying its improved performance and features.
Step 3: Shut Down Your Computer
Before proceeding with the installation process, it’s essential to shut down your computer properly. This step ensures that your computer is in a stable state and ready for the reinstallation of Windows 10 on your SSD.
Follow these simple steps to shut down your computer:
- Save any open documents or files you’re working on. It’s important to close all applications to avoid data loss during the shutdown process.
- Click on the Start button located at the bottom left corner of your screen.
- From the Start menu, select the Power option. A dropdown menu will appear with several power options.
- Choose the “Shut down” option. This will initiate the shutdown process.
- Wait for your computer to completely shut down. You may see a screen that says “Shutting Down” or a black screen indicating that the computer is turning off.
- Ensure that all the fans and lights on your computer have stopped running before proceeding to the next step. This step is crucial to prevent any damage to the hardware during the installation process.
Once your computer is completely shut down, you’re ready to move on to the next step of reinstalling Windows 10 on your SSD. By shutting down your computer properly, you’re ensuring that the installation process starts on a clean slate and reduces the risk of potential errors or complications during the process.
Take a moment to double-check that your computer is fully powered off before continuing to the next step. This will help you avoid any potential issues that may arise if the computer is not properly shut down.
Step 4: Open Your Computer’s Case
In order to install the new SSD, you’ll need to open your computer’s case. Before proceeding, ensure that you have a clear workspace and gather the necessary tools, such as a screwdriver, that may be required for this step.
Follow these steps to open your computer’s case:
- Turn off your computer completely by following the steps outlined in the previous section.
- Unplug the power cable from the back of your computer to ensure your safety.
- Place your computer on a stable surface, making sure it is easily accessible.
- Locate the screws or latches on the exterior of your computer case that hold the side panel in place.
- Use a screwdriver or other appropriate tool to remove the screws or unlatch the panel and carefully slide it off.
- Set aside the side panel in a safe and easily retrievable location as you will need it later to reassemble your computer.
Once you have successfully opened your computer’s case, you will have direct access to the internal components, including the storage drives. Be cautious when handling the internal components to avoid any damage.
It’s important to note that the process of opening the computer’s case may vary depending on the make and model of your computer. If you’re unsure about how to open your specific computer case, consult the manufacturer’s documentation or seek assistance from a professional.
With your computer’s case now open, you’re ready to proceed to the next step of the reinstallation process, which involves disconnecting the old SSD. Take care to follow the instructions closely to ensure a smooth and successful installation of your new SSD.
Step 5: Disconnect the Old SSD
In order to proceed with the installation of the new SSD, you will first need to disconnect the old SSD from your computer. This step ensures that you can safely remove the old SSD and replace it with the new one.
Follow these steps to disconnect the old SSD:
- Locate the existing SSD inside your computer. It is typically a small rectangular-shaped device connected to the motherboard or a dedicated SSD slot.
- Identify the cables connected to the old SSD. These cables include the SATA data cable and the power cable.
- Gently detach the SATA data cable by pressing down on the small clip or latch and pulling it away from the SSD.
- Next, disconnect the power cable by gently pulling it away from the power connector on the SSD.
- Once both cables are disconnected, carefully remove the old SSD from its mounting bracket or slot. Depending on your computer’s design, you may need to unscrew it or release any additional securing mechanisms.
- Set aside the old SSD in a safe place as you may need it later to retrieve any data or files.
It’s essential to handle both the old SSD and the cables with care to avoid any damage. Be mindful of any fragile components and connectors while disconnecting the old SSD.
Remember to keep the old SSD in a safe place until you’ve completed the installation of the new SSD. This will ensure that your data remains accessible and allows you to transfer any necessary files or settings to the new SSD, if needed.
With the old SSD now disconnected from your computer, you’re ready to move on to the next step of installing the new SSD and reassembling your computer.
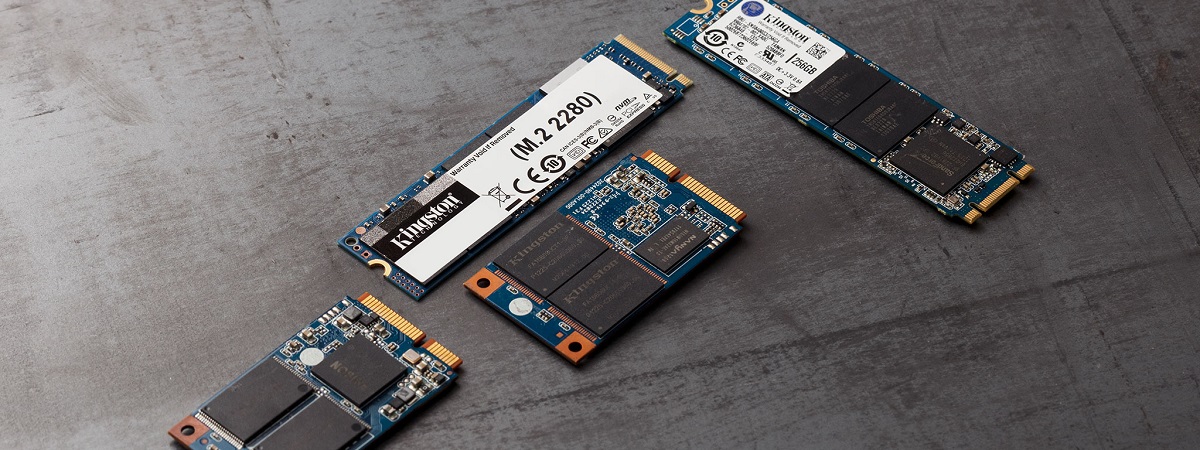
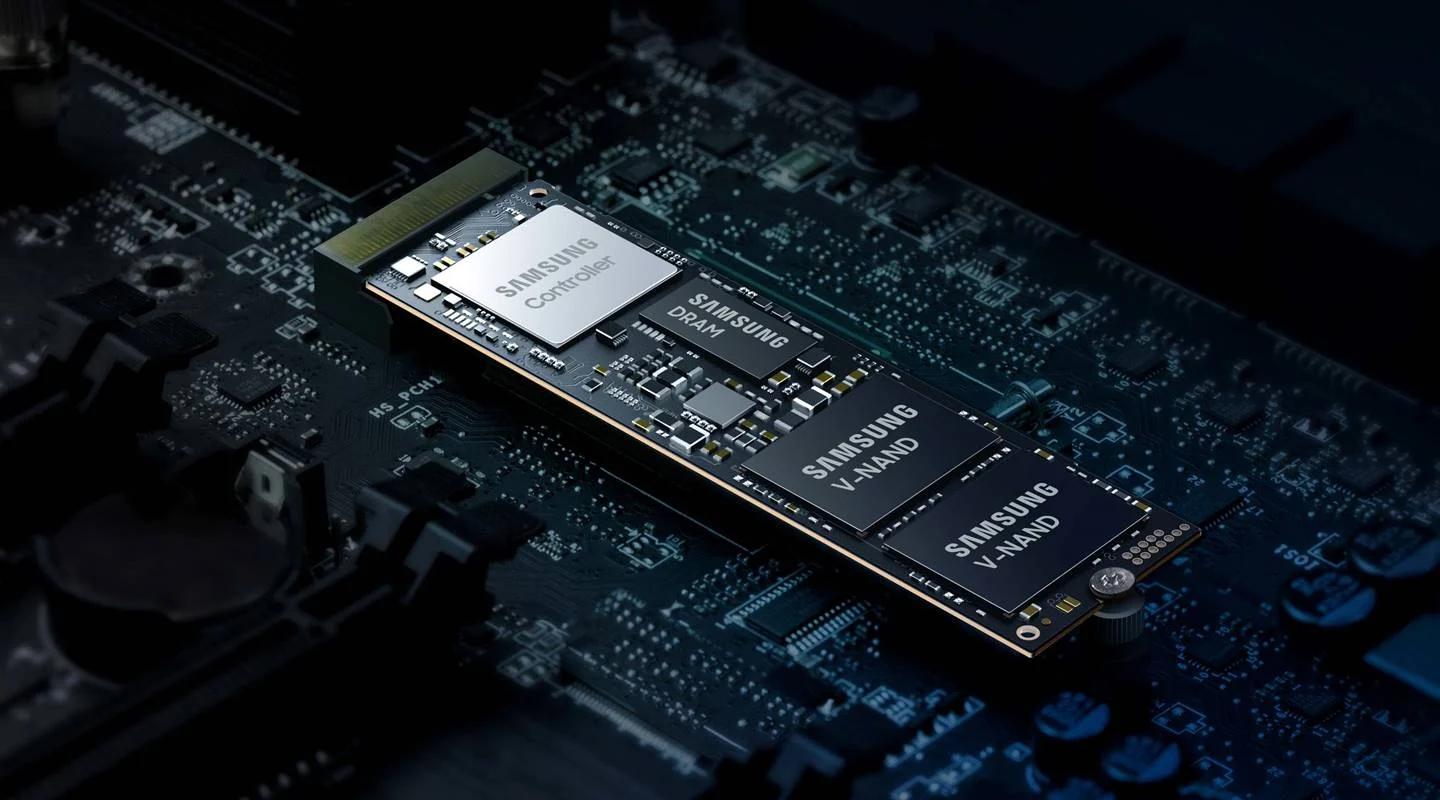
Step 6: Install the New SSD
With the old SSD disconnected, it’s time to install the new SSD into your computer. This step will allow you to take advantage of the improved performance and storage capacity that the new SSD offers.
Follow these steps to install the new SSD:
- Take the new SSD and locate the appropriate slot or mounting bracket inside your computer case. This is usually a small rectangular area specifically designed to accommodate the SSD.
- Carefully align the connectors on the new SSD with the corresponding ports on the motherboard. There are typically multiple SATA ports available, so ensure that you choose an available one.
- Once aligned, gently slide the new SSD into the slot or bracket until it sits securely and is flush with the motherboard.
- If necessary, use screws or other securing mechanisms provided with the SSD or your computer case to secure the new SSD in place. Refer to the manufacturer’s instructions or your computer’s documentation for specific guidance.
- Double-check all the connections to ensure that the new SSD is properly seated and secure. The SATA data cable should be connected to the corresponding port on the SSD, and the power cable should be connected to the power connector.
It’s important to handle the new SSD with care, avoiding excessive force or bending when inserting it into the slot or bracket. Ensure that the connectors are fully inserted and aligned correctly to prevent any potential issues during the installation process.
By installing the new SSD, you’re now ready to benefit from improved storage performance. In the next step, you’ll reassemble your computer, allowing you to proceed with the Windows 10 reinstallation process.
Take a moment to ensure that the new SSD is securely installed and all connections are properly seated before proceeding to the next step. This will ensure a successful installation and reduce the risk of encountering any complications during the process.
Step 7: Reassemble Your Computer
Now that you have installed the new SSD, it’s time to reassemble your computer. This step involves putting back the side panel, reconnecting any cables, and securing everything in place.
Follow these steps to reassemble your computer:
- Locate the side panel that you set aside earlier and carefully align it with the case.
- Slide the panel back into place, ensuring that it fits snugly and aligns with the screw holes or latches.
- If applicable, use a screwdriver to secure the screws that hold the side panel in place. Make sure not to overtighten the screws.
- Next, reconnect any cables that you previously disconnected, such as the power cable, keyboard, mouse, and any other peripherals.
- Verify that all cables are connected securely and are in their proper ports.
- Once all connections are in place, double-check that everything is properly aligned and that there are no loose cables.
After completing these steps, your computer should be fully reassembled and ready to proceed with the Windows 10 reinstallation process. This includes booting from the installation media you created earlier and following the on-screen prompts.
It’s important to note that the reassembly process may differ depending on your specific computer model or case design. If you encounter any difficulties or uncertainties during reassembly, refer to your computer’s documentation or seek assistance from a professional.
With your computer reassembled, you’re ready to move on to the next step—booting from the installation media and initiating the Windows 10 reinstallation. By following these steps carefully, you’ll soon have an updated and optimized operating system running on your new SSD.
Step 8: Boot from the Installation Media
With your computer reassembled, it’s time to boot from the installation media that you created in Step 2. This step is essential to initiate the Windows 10 reinstallation process on your new SSD.
Follow these steps to boot from the installation media:
- Ensure that the Windows 10 installation media, whether it’s a bootable USB flash drive or a DVD, is inserted or connected to your computer.
- Power on your computer and wait for the manufacturer’s logo to appear on the screen.
- As soon as the logo appears, press the key on your keyboard that will bring up the boot menu. This key varies depending on your computer’s manufacturer but is often the F12, F11, or ESC key.
- In the boot menu, use the arrow keys to highlight the option that corresponds to the Windows 10 installation media. It may be labeled as “USB:
” or “DVD: “. - Press Enter to select the boot device and initiate the boot process from the installation media.
After selecting the installation media, your computer will start the Windows 10 installation process. This may take a few moments to load, so be patient and wait for the installation screen to appear.
If you’re unable to access the boot menu or encounter any issues when trying to boot from the installation media, refer to your computer’s documentation or consult the manufacturer’s website for specific guidance on how to change the boot order or enable the appropriate boot options.
Once you have successfully booted from the installation media, you’re ready to move on to the next step—choosing the language and region settings for your Windows 10 reinstallation.
It’s important to note that during the boot process, your computer will temporarily run the Windows 10 setup from the installation media. The next steps will guide you through the setup process and allow you to customize various settings for your new installation of Windows 10.
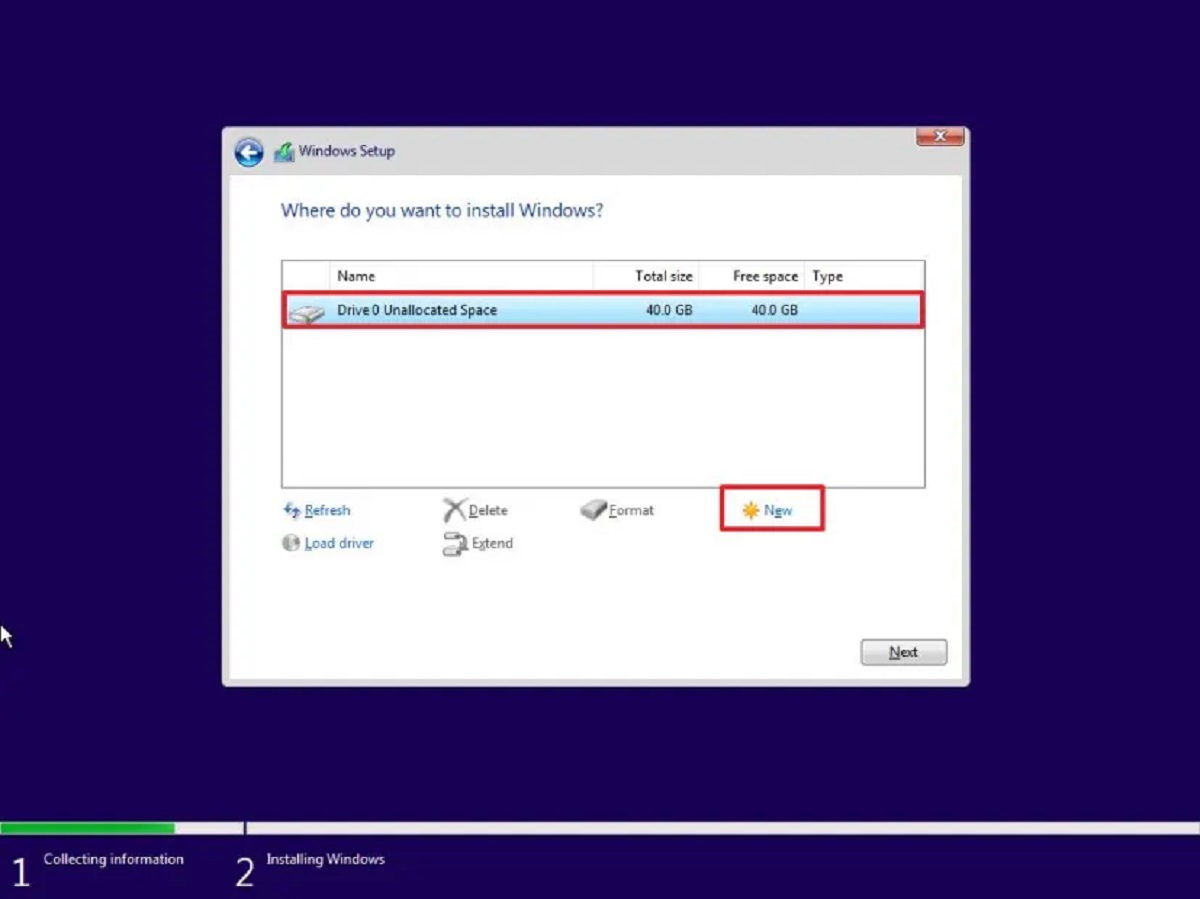
Step 9: Choose the Language and Region Settings
After successfully booting from the Windows 10 installation media, you will be prompted to choose the language and region settings for your reinstallation. This step ensures that your operating system is configured to your preferred language and regional settings.
Follow these steps to select the language and region settings:
- On the Windows Setup screen, select your preferred language from the list. This will determine the language used for the installation process and the default language for your Windows 10 system.
- Next, choose the region or country where you are located. This selection sets the regional settings, such as date and time format, currency, and keyboard layout, to match your location.
- Click “Next” to proceed to the next step.
After making your language and region selections, Windows 10 will start to apply the settings and prepare for the installation process. This may take a few moments, so be patient and wait for the progress to complete.
It’s important to choose the correct language and region settings as they will affect various aspects of your Windows 10 experience, such as system messages, date and time formats, and keyboard layouts. Selecting your preferred language and region settings ensures that your operating system is personalized to suit your needs.
Once the language and region settings are applied, you’ll be ready to proceed to the next step of the reinstallation process, which involves activating your Windows 10 license. This step ensures that your operating system is properly licensed and authorized for use.
Continue following the prompts on the screen to complete the installation and customization of your Windows 10 system.
Step 10: Activate Windows 10
After completing the installation and customization of Windows 10, it’s important to activate your operating system. Activating Windows 10 ensures that your copy is genuine, registered, and authorized for use. Without activation, your operating system may be limited in certain features and functionality.
Follow these steps to activate Windows 10:
- Go to the Start menu and click on the Settings (gear) icon. Alternatively, you can press the Windows key + I on your keyboard to open the Settings directly.
- In the Settings window, select the “Update & Security” option.
- Click on the “Activation” tab in the left-hand menu.
- If your Windows 10 copy is not activated, you will see an option to activate it now. Click on the “Activate” button.
- Follow the prompts to complete the activation process. You may be asked to enter a product key or sign in with a Microsoft account if necessary.
- If you have a valid product key, enter it in the designated field. Otherwise, select the option to activate Windows using a digital license tied to your hardware or sign in with a Microsoft account that has an associated Windows 10 license.
- Click on “Activate” to initiate the activation process.
- Wait for Windows 10 to validate your product key or digital license. If successful, your operating system will be activated, and you will have access to all features and functionality.
It’s important to note that activation may require an internet connection and may vary depending on how you obtained your Windows 10 license. If you encounter any issues during the activation process, ensure that you have a stable internet connection and double-check the product key or digital license information.
Once Windows 10 is activated, you can proceed to the next step to customize your settings further and install any necessary drivers and software for optimal performance.
Continue following the prompts in the Settings window to further personalize your Windows 10 experience and ensure that your operating system is fully functional.
Step 11: Customize Your Settings
Now that your Windows 10 operating system is activated, it’s time to customize your settings to suit your preferences and needs. Customizing your settings allows you to optimize your Windows 10 experience and tailor it to your specific requirements.
Follow these steps to customize your settings:
- Go to the Start menu and click on the Settings (gear) icon. Alternatively, you can press the Windows key + I on your keyboard to open the Settings directly.
- In the Settings window, you’ll see various categories such as System, Devices, Personalization, and more.
- Click on each category to explore and adjust the settings according to your preferences. For example:
- In the System category, you can configure display, notifications, power, and storage settings.
- In the Devices category, you can manage printers, Bluetooth devices, and other hardware settings.
- In the Personalization category, you can customize your desktop background, themes, and colors.
- In the Privacy category, you can choose which apps have access to your location, microphone, camera, and other personal data.
- In the Accounts category, you can manage your user accounts, sync settings, and sign-in options.
- In the Update & Security category, you can check for updates, manage security settings, and configure backup options.
- Review each setting within the category and make changes according to your preferences. Take your time to explore and adjust the settings that are relevant to you.
- Once you have customized your desired settings, close the Settings window, and your changes will be saved automatically.
Customizing your settings allows you to optimize your Windows 10 experience to your liking. It enables you to personalize your desktop appearance, control how your devices interact with the operating system, manage privacy settings, and more.
Take the time to review the various categories and settings available in the Settings app and configure them to best suit your needs. This step ensures that your Windows 10 operating system is tailored to your preferences and provides an enhanced user experience.
Once you have personalized your settings, you can move on to the next step, which involves installing any necessary drivers and software for optimal performance.
Step 12: Install Necessary Drivers and Software
After customizing your settings in the previous step, it’s important to install any necessary drivers and software to ensure optimal performance of your Windows 10 system. Drivers allow your hardware components to communicate with the operating system, while software provides additional functionality and enhances your overall computing experience.
Follow these steps to install necessary drivers and software:
- Identify the hardware components in your computer that may require specific drivers. Common hardware components include the graphics card, sound card, network adapter, and chipset.
- Visit the websites of the respective hardware manufacturers to locate the latest drivers for your specific components.
- Download the appropriate drivers for your hardware, making sure to select the Windows 10 version and architecture (32-bit or 64-bit) that matches your system.
- Once the drivers are downloaded, double-click on the installation file and follow the on-screen instructions to install them. This usually involves accepting the license agreement, selecting a destination folder, and completing the installation process.
- After installing the necessary drivers, you may want to install additional software to enhance your computing experience. This can include productivity tools, media players, internet browsers, or other software applications based on your specific needs.
- Visit trusted software websites or app stores to search for and download the software you require. Ensure that you download from reputable sources to avoid any security risks.
- Once the software is downloaded, double-click on the installation file and follow the installation wizard to install it. This typically involves accepting the license agreement, choosing the installation folder, and selecting any additional options or preferences.
- After the installation is complete, launch the software and configure it according to your preferences.
Installing the necessary drivers and software ensures that your hardware components are functioning correctly and that you have the required tools and applications to meet your computing needs.
Regularly updating your drivers and software is also essential to maintain system stability, security, and performance. Be sure to periodically check for updates on the hardware manufacturer’s websites and update your software to the latest versions when available.
Once you have successfully installed the necessary drivers and software, you’re ready to move on to the final step, which involves restoring your backed-up data to your Windows 10 system.
Step 13: Restore Your Backed-up Data
Now that you have customized your settings, installed necessary drivers and software, it’s time to restore your backed-up data to your newly reinstalled Windows 10 system. Restoring your data ensures that you can continue working with your files, documents, and other important information.
Follow these steps to restore your backed-up data:
- Connect any external storage devices or access your cloud storage service where you saved your backup.
- Navigate to the location of your backup files, whether it’s on an external hard drive, USB flash drive, or in your cloud storage account.
- Copy the files and folders that you want to restore from the backup location.
- Paste the files and folders to the corresponding locations on your Windows 10 system. For example, restore your documents to the Documents folder, pictures to the Pictures folder, and so on.
- If you are restoring application-specific files or settings, follow the instructions provided by the application’s documentation or support resources.
- Take your time to carefully organize and manage your restored files and folders as needed. Consider creating new folders or organizing files into existing folders for easy access and retrieval.
When restoring your data, it’s important to ensure that you do not overwrite any existing files or folders on your Windows 10 system unintentionally. Take caution to review and verify the locations where you are pasting your backed-up data.
Once your data has been restored, you can open your files and access your important information, bringing back the familiarity and convenience of your previous setup.
It’s also a good time to consider implementing a regular backup strategy to ensure that your data is protected in case of future issues or failures. There are many backup options available, such as external hard drives, cloud storage services, or automated backup software.
With your data successfully restored, you have completed the final step in the process of reinstalling Windows 10 on your SSD. You can now enjoy a fresh and updated operating system with all your important files and settings intact.
Conclusion
Reinstalling Windows 10 on your SSD can breathe new life into your computer and provide a fresh start for improved performance and stability. By following the step-by-step guide outlined in this article, you have successfully navigated through the process of reinstalling Windows 10 on your SSD.
Throughout the steps, you learned about the importance of backing up your data, creating a Windows 10 installation media, shutting down your computer properly, opening the computer’s case, disconnecting the old SSD, installing the new SSD, reassembling your computer, booting from the installation media, choosing language and region settings, activating Windows 10, customizing your settings, installing necessary drivers and software, and finally, restoring your backed-up data.
Each step plays a crucial role in ensuring that the reinstallation process is smooth and successful. From backing up your data to customizing your settings and restoring your files, you have taken the necessary precautions and actions to protect your data and tailor your Windows 10 system to your specific needs.
Remember, before embarking on the process, ensure that you have all the necessary tools, such as an external storage device for backups and the Windows 10 installation media. Additionally, take your time and follow each step carefully to avoid any potential issues or errors.
Reinstalling Windows 10 on your SSD is an opportunity to start fresh and optimize your computer’s performance. It allows you to utilize the full potential of your new SSD, take advantage of new features and improvements in Windows 10, and ensure that your computer is running smoothly.
Now that you have reinstalled Windows 10 on your SSD, take a moment to enjoy the benefits of a fresh and updated operating system. Remember to regularly update your drivers and software to maintain the stability and security of your system.
We hope this guide has provided you with the necessary information and guidance to successfully reinstall Windows 10 on your SSD. Enjoy the enhanced performance and productivity that your newly installed operating system brings!