Introduction
Welcome to the step-by-step guide on how to reinstall Windows onto an SSD. If you’ve recently upgraded your computer or want to give it a speed boost, reinstalling Windows onto an SSD is one of the best things you can do. Solid State Drives (SSDs) are faster and more reliable than traditional hard drives, providing you with snappy performance and quicker boot times. However, the reinstallation process can be a bit daunting if you’re not familiar with it.
In this guide, we will walk you through the necessary steps to prepare for the reinstallation, back up your data, create a bootable USB drive, install the SSD, change the boot order, format the SSD, install Windows, complete the installation, and restore your data. We’ll ensure that you are equipped with all the information you need to successfully reinstall Windows onto your SSD.
Before starting, it’s important to note that reinstalling Windows will erase all the data on your computer, so make sure to back up any important files or documents beforehand. Additionally, this guide assumes you have a basic understanding of computer hardware and software installation. If you’re unsure about any steps, it’s always a good idea to consult your computer’s documentation or seek assistance from a professional.
Are you ready to give your computer a performance boost? Let’s get started with the preparation process and ensure a smooth reinstallation of Windows onto your SSD.
Preparing for the Reinstallation
Before you dive into reinstalling Windows onto your SSD, there are a few crucial steps you need to take to ensure a successful process. These preparatory steps will help you safeguard your data, gather necessary tools, and make the transition as smooth as possible.
1. Backing up your data: As mentioned earlier, reinstalling Windows will erase all the data on your computer. Therefore, it’s essential to back up your files, documents, photos, and any other important data before proceeding. You can use an external hard drive, cloud storage, or even a USB flash drive to create a backup. Make sure to double-check that all your data is securely saved before moving forward.
2. Creating a list of essential programs and licenses: Take note of any programs or applications that you regularly use and ensure you have the necessary installation files or licenses. This will save you time by allowing you to easily reinstall your preferred software after the Windows reinstallation.
3. Gathering drivers: Make a list of the hardware components in your computer, such as the graphics card, sound card, and network adapter. Visit the manufacturers’ websites and download the latest drivers for each component. Having these drivers readily available will help ensure that all your hardware works smoothly after the reinstallation.
4. Collecting installation media: Obtain a copy of the Windows installation media. You can either use an installation DVD or create a bootable USB drive containing the Windows installation files. The latter option is typically more convenient and faster. You will need a USB flash drive with sufficient storage space (at least 8GB).
By completing these preparations, you will be in a prime position to proceed with the reinstallation process smoothly. With your data backed up, essential programs and licenses accounted for, and necessary drivers and installation media on hand, you are ready to reinstall Windows onto your SSD. Let’s move on to the next steps.
Backing up your Data
Before embarking on the process of reinstalling Windows onto your SSD, it is essential to back up your data to ensure that none of your important files are lost during the installation. Creating a backup will provide you with peace of mind and the ability to restore your files once the reinstallation is complete.
1. Identify critical data: Take some time to identify the files and folders that hold the most value to you. This includes documents, photos, videos, music, and any other files that you cannot afford to lose. Remember to consider files stored in directories that are not part of the default system folders. Make a list to make sure you don’t miss anything.
2. Choose a backup method: There are several methods you can choose from to back up your data. Here are a few popular options:
- External Hard Drive: Connect an external hard drive with sufficient storage capacity to your computer. You can then manually copy and paste your important files and folders onto the external hard drive. This method is straightforward and provides a physical backup that you can easily access.
- Cloud Storage: Utilize a cloud storage service like Google Drive, Dropbox, or OneDrive. These services allow you to upload your files to the cloud, providing secure storage and the ability to access your data from anywhere. Keep in mind that free cloud storage plans typically have limited space, so consider upgrading if needed.
- Network Backup: If you have a local network with multiple computers, you can back up your files to another computer on the network. This method requires setting up a shared folder and configuring network backup software.
- Third-Party Backup Software: Consider using third-party backup software, such as Acronis True Image or Macrium Reflect. These applications offer more robust features and can create full system backups or incremental backups that only include changes since the last backup.
3. Execute the backup: Once you have chosen a backup method, proceed to back up your important files and folders. Follow the specific instructions for your chosen method to ensure a successful backup process. It is advisable to verify the backup files after the process is complete to ensure their integrity.
4. Verify your backup: After completing the backup process, take a moment to verify that your important files and folders have been successfully copied or uploaded. Check a few random files to ensure they can be opened and have not been corrupted during the backup process.
By diligently backing up your data using one of the methods mentioned above, you can proceed with the reinstallation of Windows onto your SSD with confidence. Having a backup ensures that even if something goes wrong, your files will remain safe and can easily be restored once the reinstallation is complete.
Creating a Bootable USB Drive
Creating a bootable USB drive is a crucial step in reinstalling Windows onto your SSD. This bootable USB drive will allow you to start the installation process and ensure a smooth transition to your new operating system. Follow the steps below to create a bootable USB drive:
1. Obtain the Windows installation files: If you don’t already have them, download the Windows installation ISO file from the official Microsoft website. Make sure to select the correct version and edition of Windows that you want to install on your SSD.
2. Prepare the USB drive: Insert a USB flash drive with at least 8GB of storage capacity into your computer. Keep in mind that all the data on the USB drive will be erased during the process, so make sure you have any important files backed up.
3. Format the USB drive: Open the Disk Management tool on your computer. Locate the USB drive and right-click on it. Select “Format” and choose the “FAT32” file system. Leave the allocation unit size as “Default” and give the USB drive a name for easy identification.
4. Create a bootable USB drive: Open the Command Prompt as an administrator. Type “diskpart” and hit enter to open the DiskPart utility. In DiskPart, type “list disk” to view a list of available disks on your computer. Identify the disk number associated with your USB drive, usually labeled “Disk 1”.
5. Select the USB drive: Type “select disk X” (replace X with the disk number of your USB drive). This will select the USB drive as the focus for DiskPart commands.
6. Clean the USB drive: Type “clean” and hit enter. This command will remove any existing partitions or data on the USB drive.
7. Create a primary partition: Type “create partition primary” and hit enter. This command will create a primary partition on the USB drive.
8. Format the partition: Type “format fs=fat32 quick” and hit enter. This command will quickly format the partition using the FAT32 file system.
9. Assign a drive letter: Type “assign letter=X” (replace X with the desired drive letter) and hit enter. This command will assign a drive letter to the newly created partition on the USB drive.
10. Copy the installation files: Open File Explorer and navigate to the location where you have stored the Windows installation files. Select all the files and folders, then copy and paste them into the root directory of the USB drive.
Now you have a bootable USB drive ready for the Windows installation. This USB drive will allow you to boot your computer into the installation environment and proceed with the reinstallation process. Keep the USB drive in a safe place and ensure easy access when needed.
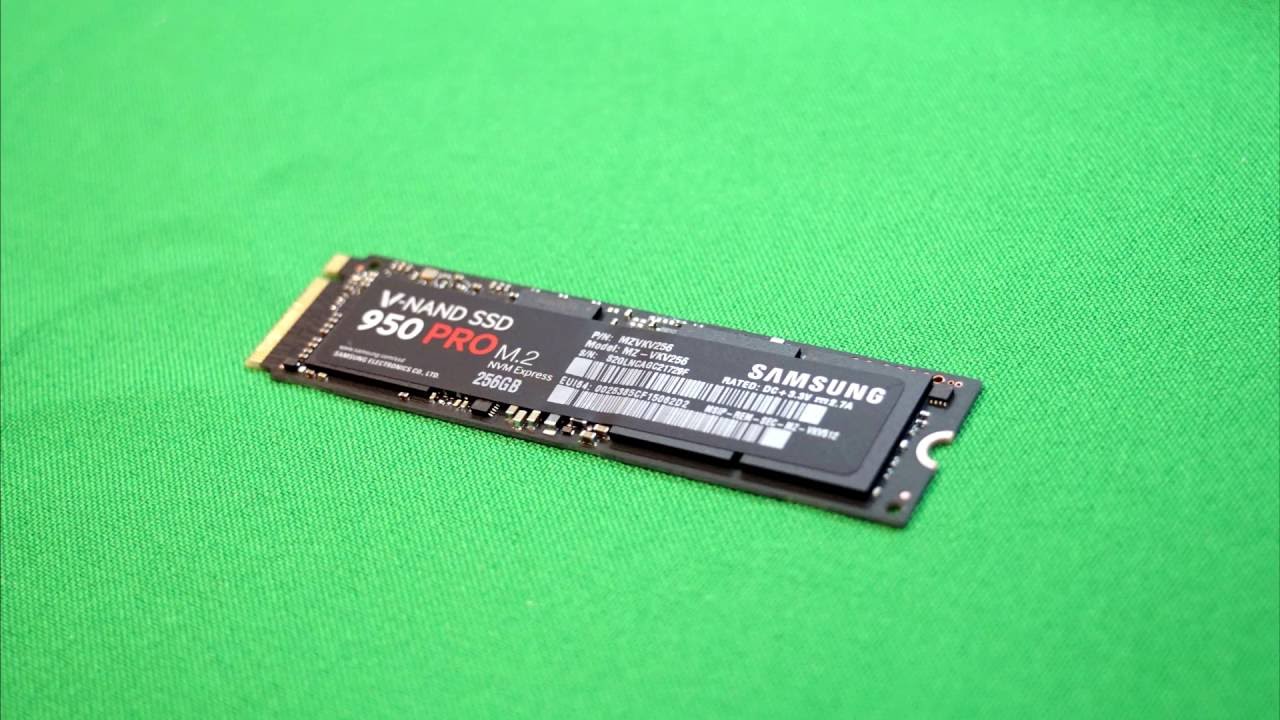
Installing the SSD
Now that you have prepared a bootable USB drive, it’s time to physically install the SSD into your computer. Follow the steps below to ensure a proper installation:
1. Power off your computer: Before working on your computer’s internal components, make sure to shut it down completely and unplug the power cord from the wall outlet. This ensures your safety and prevents any accidental damage to the hardware.
2. Open your computer case: Depending on the type of computer you have, you may need to remove screws or gently slide off the side panel to access the internal components. Consult your computer’s manual or manufacturer’s website for specific instructions on how to open the case.
3. Locate an available drive bay: Find an available drive bay in your computer where you can install the SSD. Depending on your computer’s configuration, you may have dedicated bays for 2.5-inch or 3.5-inch drives, or you may need to use an adapter to secure the SSD.
4. Connect power and data cables: Connect the appropriate power cable from your power supply to the SSD. Next, connect a SATA cable from the SSD to an available SATA port on your motherboard. Make sure the connections are secure.
5. Secure the SSD: Depending on the drive bay, you may need to use screws or mounting brackets to secure the SSD in place. If using an adapter, follow the specific instructions provided with the adapter to properly secure the SSD.
6. Close your computer case: Once the SSD is securely installed, carefully put the side panel back onto your computer case and screw it back into place. Ensure that all cables are neatly organized and not obstructing any fans or other components.
7. Reconnect peripherals and power on: Reconnect any peripherals or cables you had previously disconnected and plug your computer back into the power source. Power on your computer and enter the BIOS (usually by pressing a certain key during the startup process) to verify that the SSD is recognized by your system.
At this point, you have successfully installed the SSD into your computer. Now it’s time to configure the boot order and proceed with booting from the USB drive to begin the Windows reinstallation process.
Changing the Boot Order
Before you can proceed with the Windows reinstallation, you need to change the boot order in your computer’s BIOS settings to prioritize the bootable USB drive that contains the Windows installation files. Follow the steps below to change the boot order:
1. Restart your computer: Save any open files and restart your computer. As it starts up, pay attention to the initial screen that appears, which usually displays the manufacturer’s logo and a key or combination of keys to access the BIOS settings. Common keys include F2, F10, or Del, but it can vary depending on the computer manufacturer.
2. Access the BIOS settings: Press the key or combination of keys displayed on the initial screen to enter the BIOS settings. If you miss the opportunity or your computer proceeds to the operating system, restart it again and try pressing the corresponding key(s) promptly during startup.
3. Navigate to the Boot menu: Once you’re in the BIOS settings, look for a menu labeled “Boot” or “Boot Order”. The exact location and name of this menu can vary depending on the BIOS version and computer manufacturer.
4. Change the boot order: In the Boot menu, you will see a list of devices in the boot order sequence. Use the arrow keys to select the bootable USB drive that you created and move it to the top of the list. This ensures that the computer will attempt to boot from the USB drive first before accessing any other devices.
5. Save and exit: Once you have changed the boot order and placed the USB drive at the top, look for an option to “Save and Exit” or “Exit and Save Changes”. Press the corresponding key or select the option to save the changes and exit the BIOS settings.
6. Restart your computer: Let your computer restart again. It should now boot from the USB drive and enter the Windows installation environment, initiating the reinstall process.
Note: If your computer still does not boot from the USB drive, it’s possible that the BIOS settings were not saved correctly. Repeat the steps above and ensure that you properly save the changes before exiting the BIOS settings.
By changing the boot order to prioritize the bootable USB drive, you have set the stage for the Windows reinstallation process. Next, you will proceed with actually booting from the USB drive and formatting the SSD to prepare for the Windows installation.
Booting from the USB Drive
Now that you’ve changed the boot order in the BIOS settings, it’s time to boot your computer from the USB drive that contains the Windows installation files. This step is essential to initiate the reinstallation process. Follow the steps outlined below to successfully boot from the USB drive:
1. Restart your computer: Save any open files and restart your computer. As it starts up, pay attention to the initial screen that appears, which usually displays the manufacturer’s logo.
2. Access the boot menu: Depending on your computer manufacturer, you will need to press a specific key or combination of keys to access the boot menu. The key is usually displayed on the initial screen. Common keys include F10, F11, or F12. Press the corresponding key repeatedly until the boot menu appears.
3. Select the USB drive: In the boot menu, you will see a list of devices from which you can boot. Use the arrow keys to highlight the USB drive that contains the Windows installation files. Press Enter to select it.
4. Begin the Windows installation: Once you’ve selected the USB drive, your computer will begin to boot from it. This process may take a few moments, and you may see a Windows logo or loading screen. Soon, you will be presented with the Windows installation environment.
Note: If your computer does not have an easily accessible boot menu, you can try accessing the BIOS settings again and double-check that the boot order is correctly set. Additionally, you can try pressing the key to access the BIOS settings during startup and manually selecting the USB drive as the primary boot device in the BIOS settings.
By successfully booting from the USB drive, you have entered the Windows installation environment and are now ready to proceed with formatting the SSD and installing Windows onto it. The following steps will guide you through the formatting and installation process.
Formatting the SSD
Once you have successfully booted from the USB drive and entered the Windows installation environment, the next step is to format the SSD. Formatting the SSD will erase all existing data on it and prepare it for the installation of Windows. Follow the steps below to format the SSD:
1. Select the language, time, and currency format: In the Windows installation environment, select your preferred language, time format, and currency format. Click “Next” to proceed.
2. Click on “Install Now”: On the next screen, click on the “Install Now” button to begin the installation process.
3. Accept the license terms: Read and accept the license terms by checking the box and clicking “Next”.
4. Choose the installation type: Choose the “Custom: Install Windows only (advanced)” option.
5. Select the SSD: You should see a list of available drives. Identify the SSD where you want to install Windows and select it. Make sure to double-check the drive size to ensure you are selecting the correct one.
6. Click on “Format”: With the SSD selected, click on the “Format” option. This will erase all the data on the SSD and prepare it for the Windows installation. Confirm the action when prompted.
7. Wait for the format process: The format process may take a few minutes, depending on the size of the SSD. Once the format is complete, the SSD will be empty and ready for the Windows installation.
8. Click on “Next”: After formatting the SSD, click on the “Next” button to continue with the installation process.
Formatting the SSD ensures a clean slate for the installation of Windows. Once the format is complete, you can proceed with the installation of Windows onto the SSD. The next section will guide you through the process of installing Windows and completing the installation.
Installing Windows
With the SSD formatted and ready, you can now proceed with the installation of Windows onto the drive. Follow the steps below to install Windows:
1. Choose the SSD for installation: In the Windows installation environment, select the formatted SSD as the destination for the installation. Click on the SSD and click “Next” to continue.
2. Wait for the installation: The installation process will begin, and Windows will be copied onto the SSD. This may take some time, so be patient and avoid interrupting the process.
3. Set up Windows: Once the installation is complete, you will be prompted to set up Windows. Follow the on-screen instructions to select your region, keyboard layout, and input preferences.
4. Activate Windows and enter the product key: If prompted, enter the product key to activate Windows. You can usually find the product key on the installation media or in the confirmation email if you purchased a digital copy.
5. Customize your settings: Choose your personal preferences for privacy settings, time zone, and network settings. You can customize these settings according to your preferences.
6. Create your user account: Set up a user account by entering your name and creating a password. This account will be used to log in to Windows.
7. Complete the installation: Windows will finalize the installation and configure the operating system. Wait for this process to complete, and your computer will restart.
8. Log in and personalize Windows: Once your computer restarts, log in with the user account you created. Take some time to personalize Windows by customizing the desktop background, theme, and other settings according to your preference.
After completing these steps, you have successfully installed Windows onto your SSD. The newly installed operating system will provide you with a fresh start and improved performance on your computer.
Completing the Installation
Once you have successfully installed Windows onto your SSD, there are a few final steps to complete the installation and ensure your system is fully set up. Follow the steps below to finish the installation process:
1. Install device drivers: After installing Windows, it’s essential to install the necessary device drivers to ensure optimal performance and functionality. Use the driver installation files you gathered earlier or download the latest drivers from the manufacturers’ websites. Install the drivers one by one, following the provided instructions.
2. Windows updates: It is crucial to keep your operating system up to date with the latest security patches and improvements. Open the Windows Update settings and check for available updates. Install any updates and restart your computer if necessary.
3. Install essential programs and applications: Reinstall any essential programs and applications that you use regularly. Use the installation files or licenses you gathered before the reinstallation process. This step ensures that you have all the tools necessary for your day-to-day tasks.
4. Configure Windows settings: Take the time to configure Windows settings according to your preferences. Customize options such as power settings, display settings, notification preferences, and privacy settings. This step allows you to personalize your Windows experience to suit your needs.
5. Restore your data: If you backed up your data before reinstalling Windows, restore your files from the backup you created. Copy and paste the files back into their original locations or designated folders. Double-check that all your important files and documents are present and accessible.
6. Set up additional accounts: If you need to create additional user accounts or configure user permissions, navigate to the user account settings in the Control Panel. Create the necessary accounts and customize the settings accordingly.
7. Install and update security software: Install a reliable antivirus program and any other security software you prefer. Update the antivirus definitions and run a full system scan to ensure your computer is protected from malware and other threats.
8. Test functionality: Take some time to test the functionality of your computer and ensure that all the hardware components are working correctly. Check the audio, network connectivity, graphics, and any other peripherals you have connected.
By completing these final steps, you will have successfully completed the installation process and have a fully functioning system with a fresh copy of Windows installed on your SSD. Enjoy the improved performance and reliability that comes with reinstalling Windows onto an SSD.
Restoring your Data
After reinstalling Windows and completing the necessary configurations, it’s time to restore your data to your computer. Whether you backed up your files onto an external hard drive, cloud storage, or another device, follow the steps below to restore your data:
1. Connect your backup device: If you backed up your data onto an external hard drive, connect it to your computer. For cloud storage, sign in to your account and ensure you have access to your backed-up files.
2. Copy files back to your computer: Use File Explorer to navigate to the location where you stored your backed-up files. Select the files and folders you want to restore and copy them to the appropriate locations on your computer. This may include documents, photos, videos, music, and any other important files.
3. Organize your restored files: Take the time to organize your restored files into the appropriate folders. Create new folders if necessary and ensure that files are stored in a structured manner that makes sense to you.
4. Reinstall applications: If you backed up any installed applications, locate the installation files or setup executables and reinstall them onto your computer. Use the license keys or login information you have saved to reactivate the applications.
5. Configure application settings: After reinstalling applications, take a moment to configure their settings according to your preferences. This may include customizing preferences, importing previous configurations, or connecting to cloud-based accounts if applicable.
6. Verify the integrity of your restored data: Double-check that all your restored files can be opened and accessed without any issues. Verify that your documents, photos, videos, and other files have been retrieved successfully without any corruption.
7. Delete temporary backup files: Once you have confirmed the successful restoration of your data, you can safely delete the temporary backup files from your external hard drive or other backup devices. This will help free up storage space and keep your backup organized for future use.
By following these steps, you will have successfully restored your important files and data to your computer. Take the time to review your restored data, ensuring everything is in order. Enjoy using your computer with all your personalized files, applications, and settings once again.
Final Thoughts
Congratulations! You have successfully reinstalled Windows onto your SSD, giving your computer a performance boost and a fresh start. Reinstalling Windows onto an SSD can significantly improve your system’s speed, boot times, and overall responsiveness. Now that you have completed the installation and restoration process, here are a few final thoughts to keep in mind:
1. Regularly back up your data: After going through the process of reinstalling Windows, it’s crucial to establish a backup routine. Regularly back up your data to protect against unexpected incidents or system failures. Consider using automatic backup solutions or cloud storage to ensure your files are always protected.
2. Keep your system updated: Windows updates and driver updates are vital for maintaining the security and stability of your system. Stay up to date with the latest updates provided by Microsoft and regularly check for updated drivers for your hardware components.
3. Optimize your SSD: SSDs require different maintenance compared to traditional hard drives. Learn about the specific features and optimizations available for SSDs and consider implementing them to maximize the performance and lifespan of your SSD.
4. Install essential software and antivirus: As you reinstall your applications, make sure to install essential software such as productivity tools, media players, and utilities that suit your needs. Additionally, don’t forget to install an antivirus program and keep it up to date to protect your system from potential threats.
5. Maintain a clean and organized system: Take the opportunity of a fresh installation to keep your system clean and organized. Uninstall any unnecessary applications, regularly clean up temporary files and unused data, and keep your desktop and file system neatly organized to ensure smooth operation and easy access to your files.
6. Seek professional help if needed: If you encounter any difficulties during the reinstallation process or run into technical issues afterward, don’t hesitate to seek professional assistance. Computer repair shops or IT professionals can provide expertise and guidance to resolve any intricate problems.
By following these suggestions and maintaining a proactive approach to system maintenance, you can make the most of your reinstalled Windows and SSD combination. Enjoy the improved performance and responsiveness of your computer as you embark on new computing adventures.