Introduction
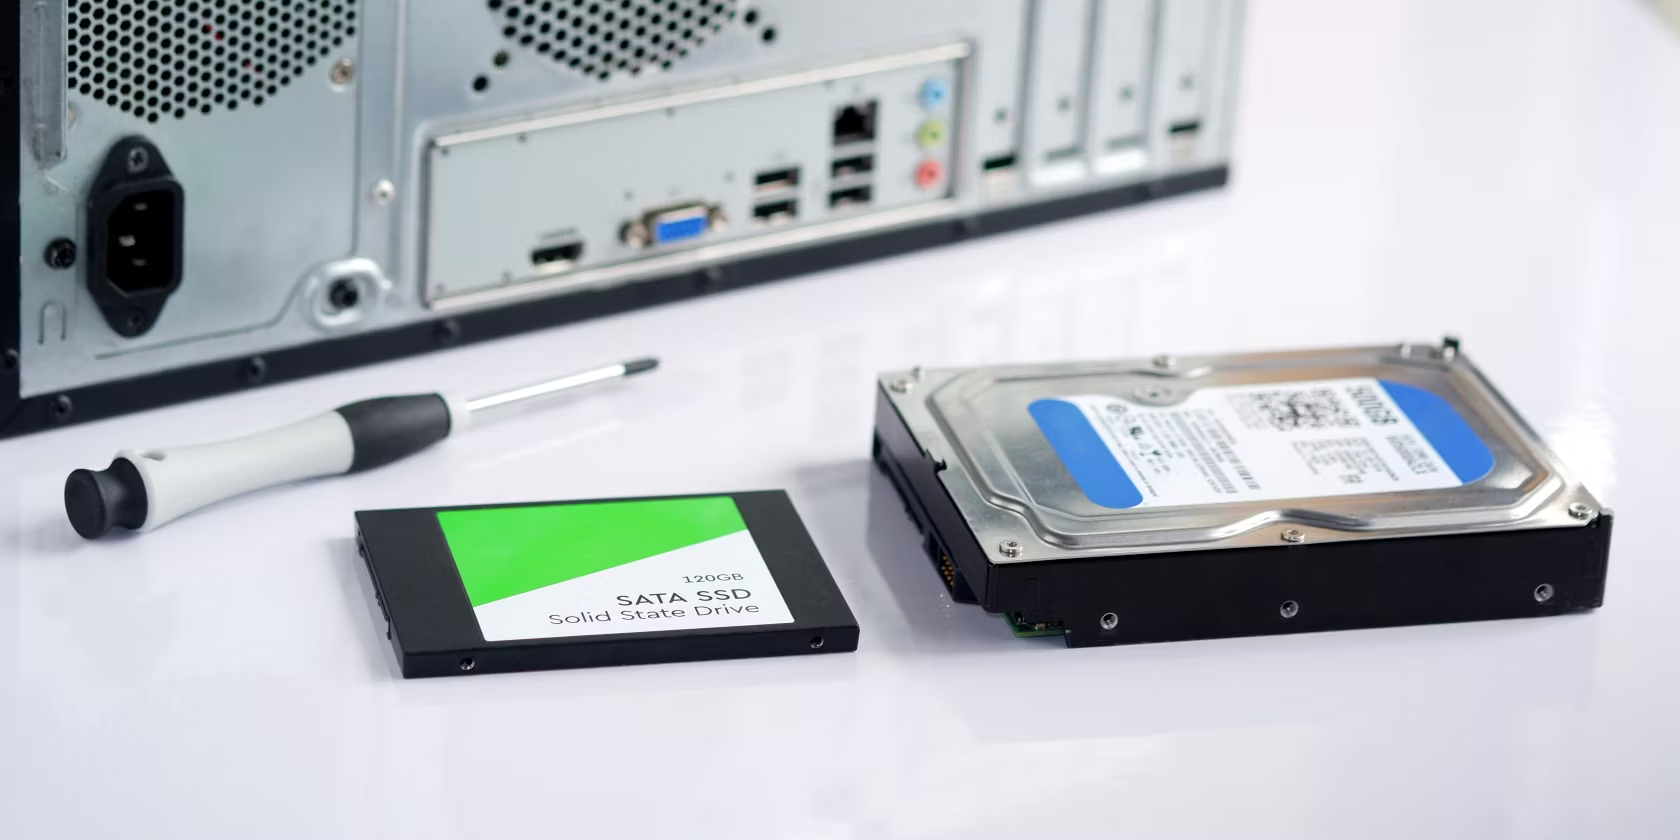
Having a Solid State Drive (SSD) in your computer can greatly enhance its performance and speed. However, like any other electronic device, SSDs can encounter issues over time. Whether it’s due to firmware problems, connection errors, or other technical glitches, knowing how to repair a SSD can help you save time and money.
In this guide, we will walk you through the step-by-step process of repairing a SSD. From gathering the necessary tools and materials to troubleshooting and identifying the issue, we will provide you with valuable insights and tips to get your SSD back up and running smoothly.
It’s important to note that attempting to repair a SSD requires a certain level of technical knowledge and expertise. If you are not comfortable working with computer hardware or if your SSD is still covered under warranty, it is recommended to contact the manufacturer for assistance. However, if you are up for the challenge, let’s dive into the world of SSD repair!
Step 1: Gathering the necessary tools and materials
Before you begin repairing your SSD, it’s important to have the right tools and materials at your disposal. Here’s a list of what you’ll need:
- Screwdriver set: Depending on the type of SSD and its enclosure, you may need a Phillips or Torx screwdriver.
- Antistatic wrist strap: This will help protect your SSD from damage caused by static electricity.
- USB adapter or enclosure: This will allow you to connect your SSD to another computer for troubleshooting.
- Data backup drive: It’s crucial to have a backup drive to save your important files and data before attempting any repairs.
- Diagnostic software: Some SSD manufacturers provide specialized software to diagnose and repair their drives. Check the manufacturer’s website for downloadable software.
Once you have gathered all the necessary tools and materials, you can proceed to the next step in the repair process. It’s essential to work in a clean and static-free environment to minimize the risk of further damage to your SSD. If possible, use an antistatic mat or work on a non-static surface such as a wooden table.
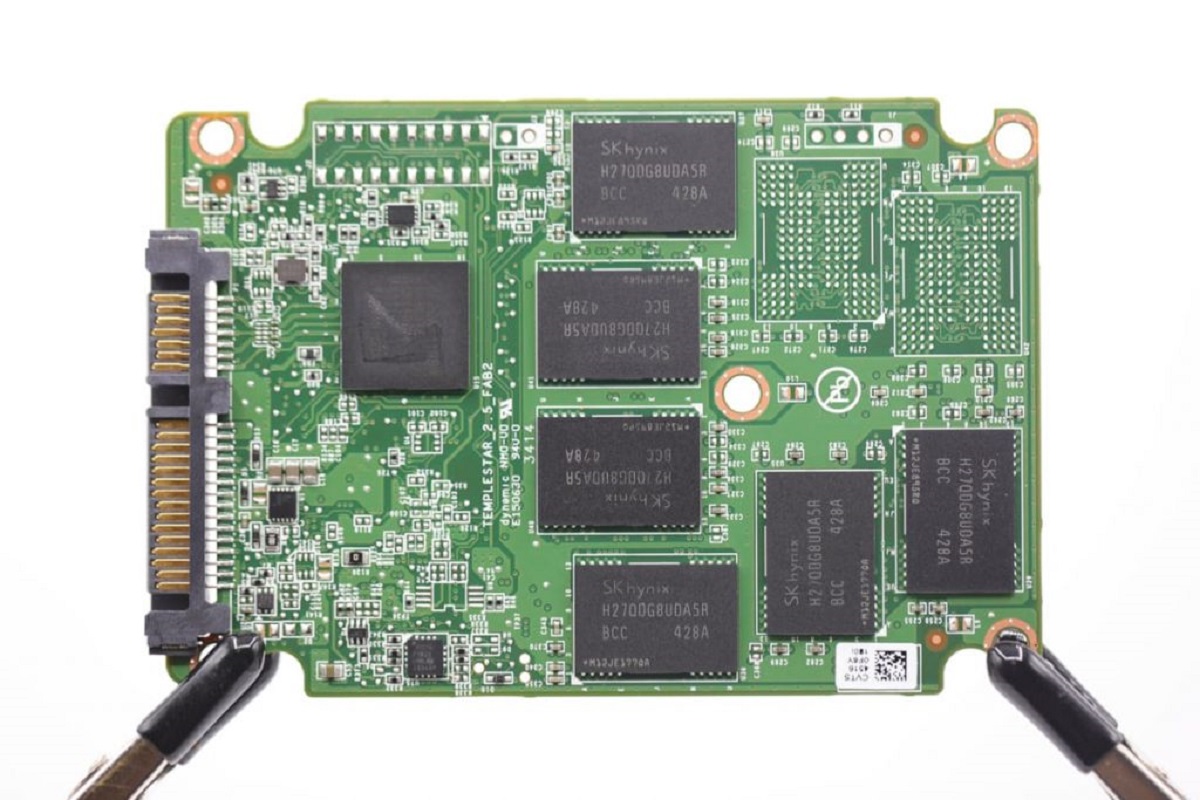
Remember to handle your SSD with care and avoid touching the gold connectors or any sensitive components. These delicate parts can be easily damaged by static electricity or physical impact. By taking the time to gather the right tools and materials, you’ll be well-prepared for the repair process ahead.
Step 2: Backing up your data
Before proceeding with any repairs or troubleshooting, it’s essential to back up your data to prevent any potential loss. Repairing a SSD can be a delicate process, and there’s always a chance that your data could be compromised. By backing up your data beforehand, you’ll have peace of mind knowing that your important files are safe.
To back up your data, follow these steps:
- Assess your data storage needs: Determine the amount of data that needs to be backed up and ensure you have enough storage space available on your backup device.
- Choose a backup method: There are several ways to back up your data, including external hard drives, cloud storage services, or network-attached storage (NAS). Select the method that works best for you in terms of convenience, security, and storage capacity.
- Organize and prioritize your files: Sort through your files and prioritize what needs to be backed up. Focus on important documents, photos, videos, and any other irreplaceable data.
- Initiate the backup process: Use your chosen backup method or software to start the backup process. Follow the instructions provided by the backup solution to ensure a smooth and successful backup.
- Verify your backup: Once the backup is complete, double-check to ensure that all your important data has been successfully backed up. Verify that the files can be accessed and restored if needed.
By backing up your data, you can mitigate the risk of losing important files during the SSD repair process. This precautionary step will give you the freedom to address any problems with your SSD without the added worry of data loss. Remember, it’s always better to be safe than sorry when it comes to safeguarding your valuable data.
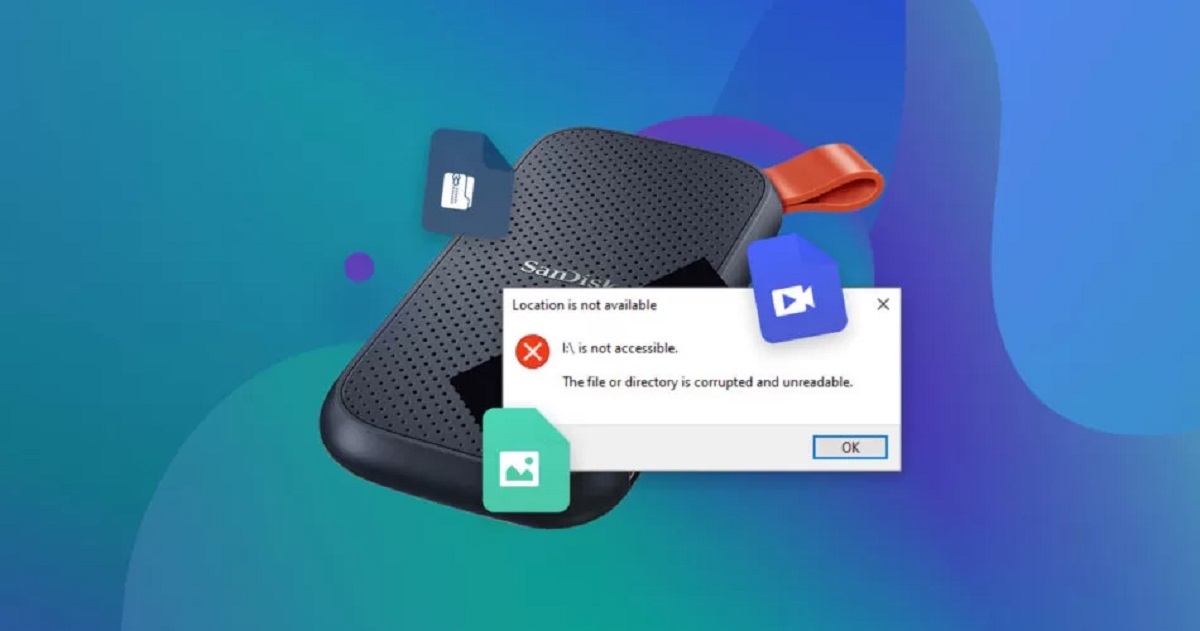
Step 3: Troubleshooting and identifying the issue
Once you have backed up your data, it’s time to troubleshoot and identify the specific issue with your SSD. Understanding the root cause of the problem will help you determine the appropriate course of action for repair. Here are some common troubleshooting steps you can take:
- Check the connections: Ensure that all cables connecting your SSD to the computer’s motherboard or external enclosure are securely plugged in. Sometimes, loose connections can cause detection or performance issues.
- Use a different SATA or USB port: If you are using an internal SSD, try connecting it to a different SATA port on the motherboard. For external SSDs, switch to a different USB port. This can help rule out potential issues with the current port.
- Update firmware: Visit the manufacturer’s website and check for any available firmware updates for your SSD. Outdated firmware can cause performance problems or compatibility issues, so it’s important to keep it up to date.
- Run diagnostic software: Many SSD manufacturers provide diagnostic software that can help identify specific issues with your drive. Download and run the software according to the manufacturer’s instructions to perform a thorough analysis of your SSD.
- Test on another computer: Connect your SSD to another computer to see if the issue persists. This can help determine whether the problem lies with the SSD itself or with your computer’s hardware or software.
By troubleshooting and identifying the specific issue with your SSD, you will have a clearer understanding of what needs to be done next. This step is crucial in determining whether the issue can be resolved through software updates, driver installations, or if physical repairs are required. Remember to document any error messages or symptoms you encounter during the troubleshooting process, as this information can be helpful when seeking further assistance or contacting the manufacturer for support.
Step 4: Performing a firmware update
Firmware is the software embedded in your SSD that governs its operation and functionality. Outdated firmware can sometimes cause performance issues or compatibility problems. Performing a firmware update can help address these issues and improve the overall performance of your SSD. Here’s how you can update the firmware on your SSD:
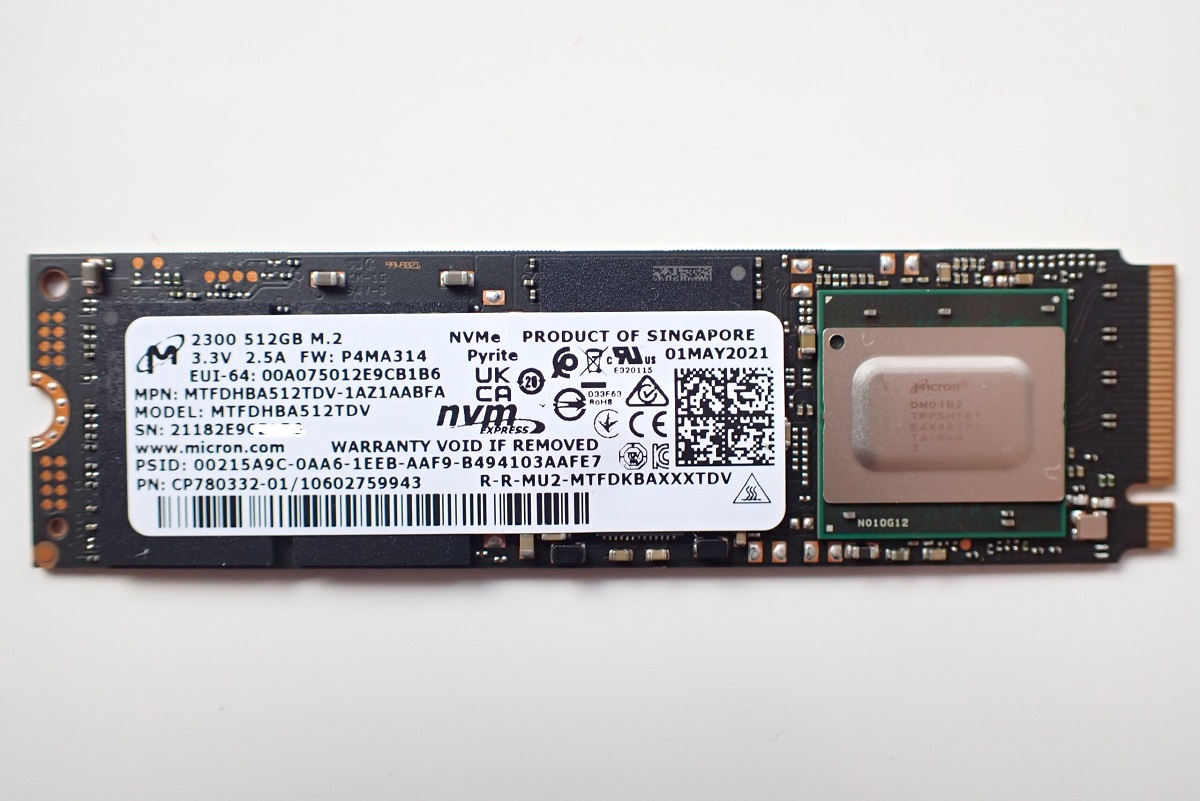
- Identify your SSD model: Check the label on your SSD or refer to the manufacturer’s documentation to identify the specific model and firmware version of your SSD.
- Visit the manufacturer’s website: Go to the official website of your SSD manufacturer and navigate to the support or downloads section. Look for firmware updates specific to your SSD model.
- Download the firmware update: Locate the appropriate firmware update for your SSD model and download it to your computer. Be sure to choose the correct firmware version compatible with your specific SSD.
- Read the instructions: Before proceeding with the firmware update, carefully read the instructions provided by the manufacturer. Some firmware updates may require specific steps or precautions to ensure a successful update.
- Back up your data: It’s always advisable to back up your data before performing a firmware update. Although rare, there is a slight chance that the firmware update process could cause data loss or data corruption.
- Execute the firmware update: Follow the manufacturer’s instructions to execute the firmware update. This may involve running an executable file or using specialized software provided by the manufacturer.
- Wait for the update to complete: Allow the firmware update process to complete without interruption. It may take several minutes for the update to finish, during which time you should not power off your computer or disconnect the SSD.
- Verify the firmware update: After the firmware update is complete, restart your computer and confirm that the new firmware version is installed. Check your SSD’s documentation or the manufacturer’s website for steps to verify the updated firmware.
Performing a firmware update is an important step in maintaining the optimal performance and stability of your SSD. By keeping the firmware up to date, you can ensure that your SSD is operating with the latest features and bug fixes. However, it’s worth mentioning that firmware updates should be approached with caution, as improper execution or interruption during the process can lead to permanent damage to your SSD. If you’re unsure about performing a firmware update, it’s recommended to seek assistance from the manufacturer or a professional technician to avoid any potential risks.
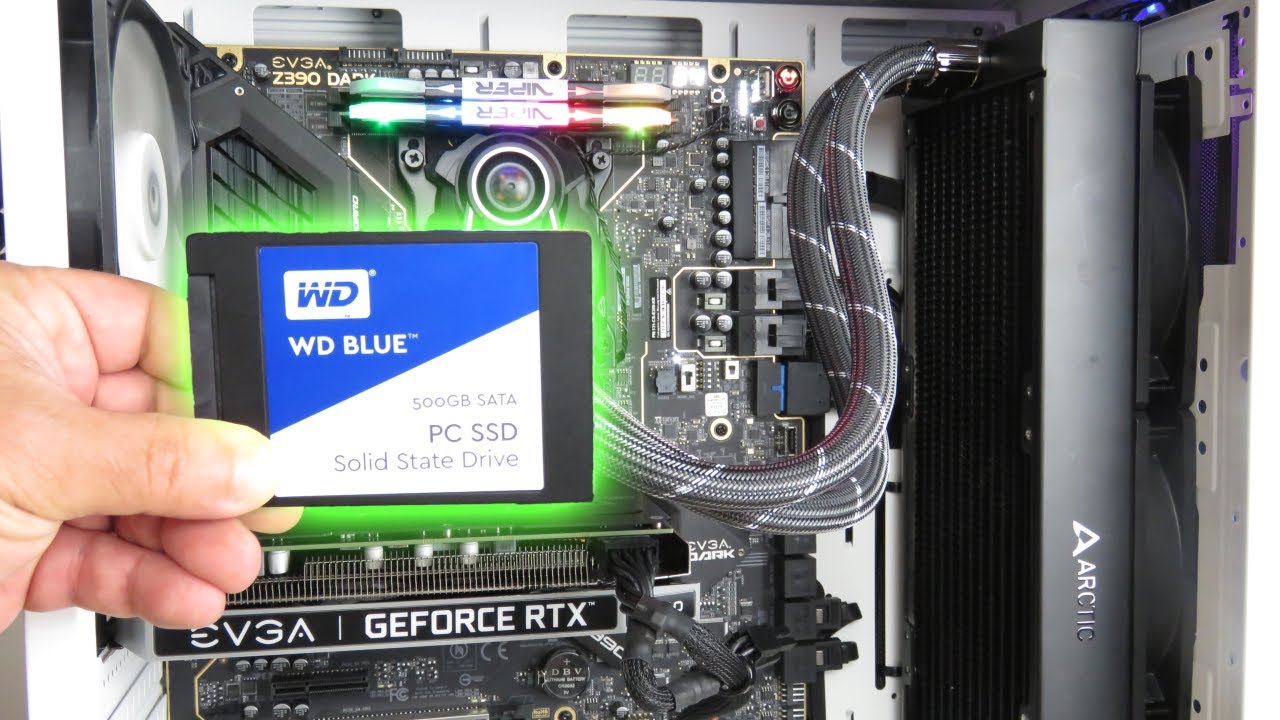
Step 5: Checking the connections
Loose or faulty connections can often be the cause of SSD issues. Checking the connections between your SSD and your computer is a crucial step in the troubleshooting process. Here’s what you should do to ensure the connections are secure and functioning properly:
- Power off your computer: Before checking the connections, make sure your computer is completely powered off. This will help prevent any accidental damage to the SSD or other components.
- Open your computer case: If your SSD is installed internally, you’ll need to open your computer case to access it. Refer to your computer’s manual or online resources for instructions specific to your model.
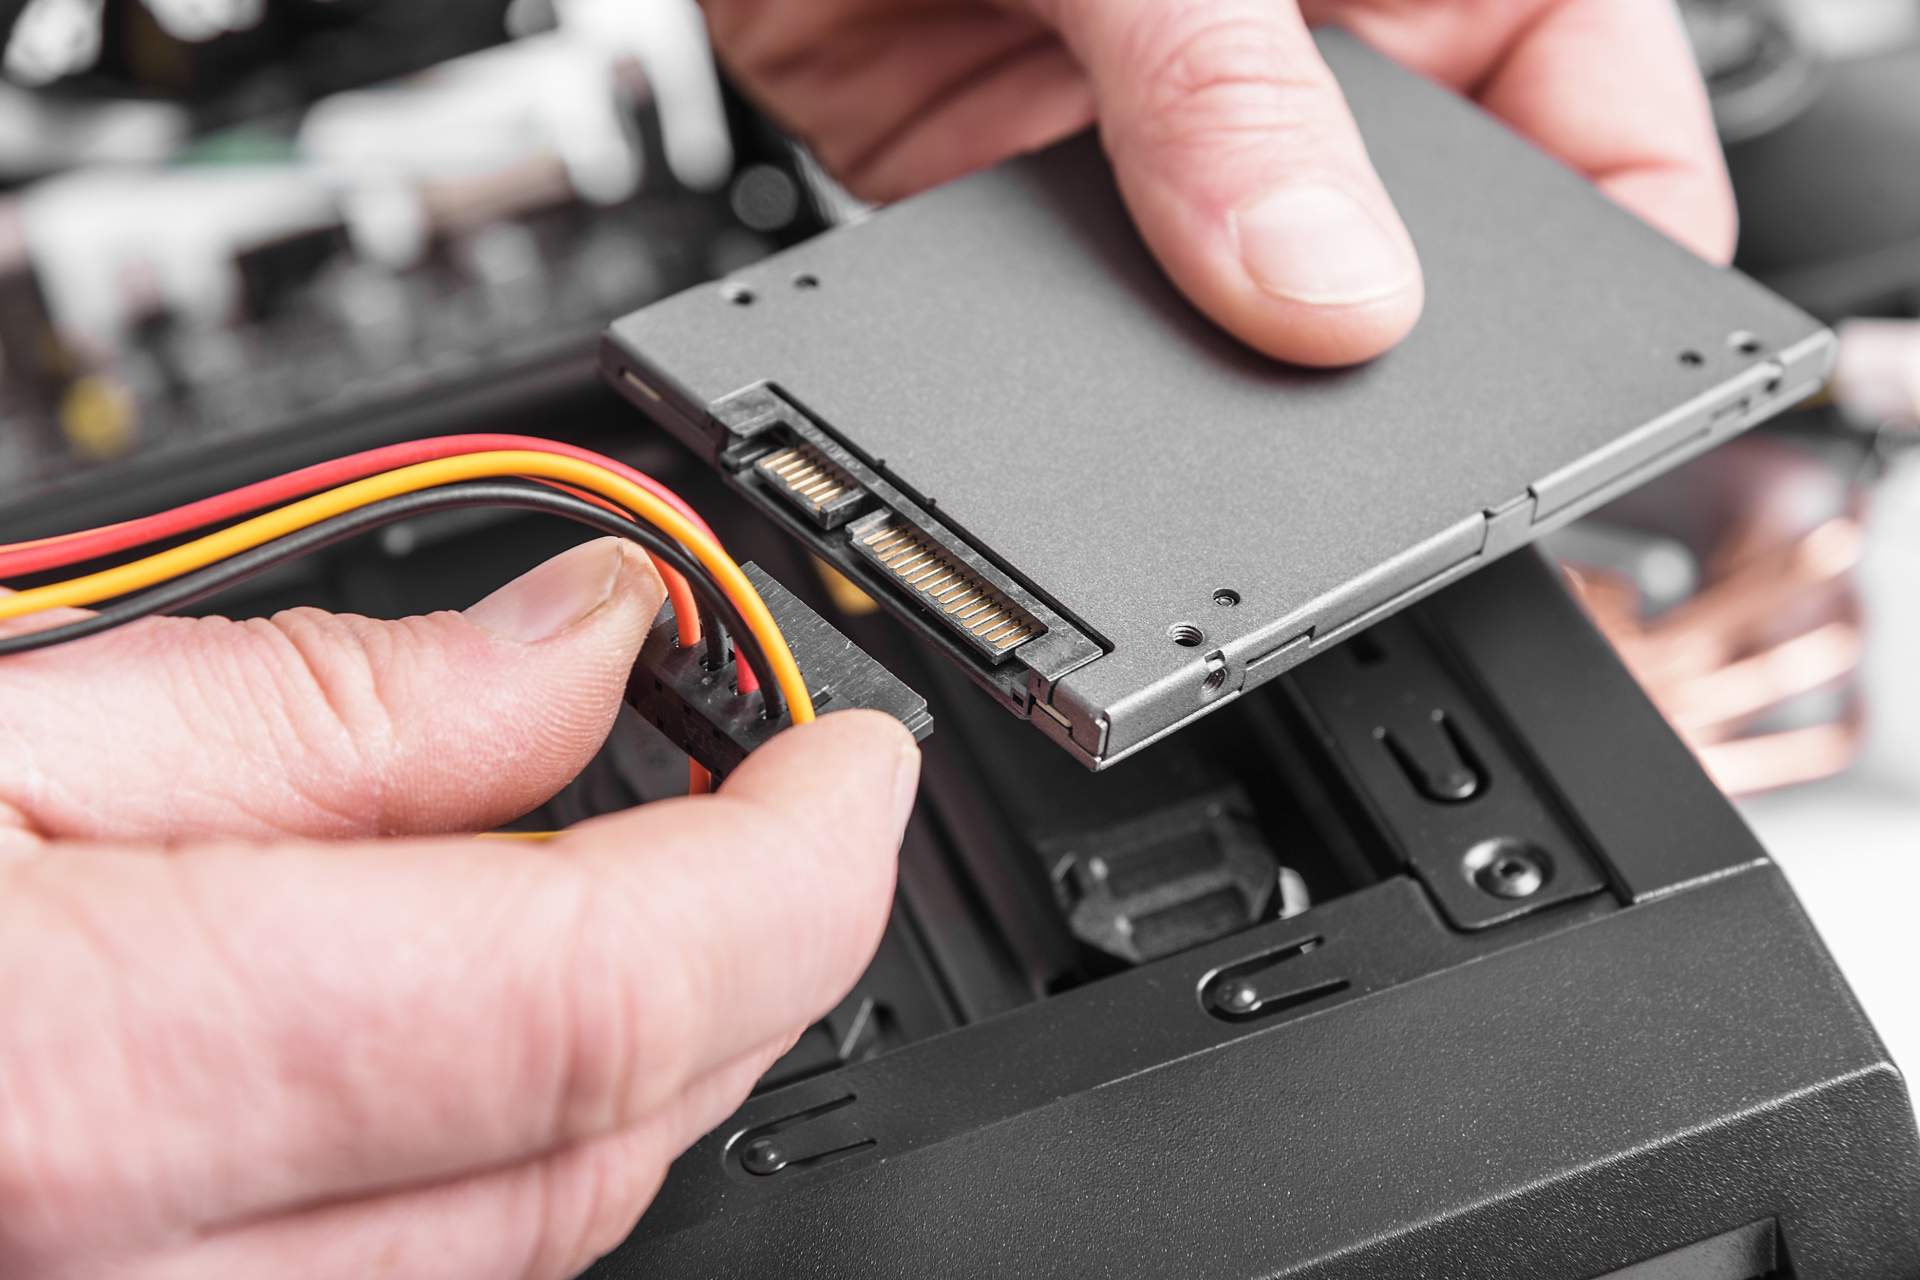
- Inspect the SATA or power cables: Examine the SATA data cable and power cable that connect your SSD to the motherboard. Ensure that they are securely plugged into the appropriate ports on both the SSD and the motherboard.
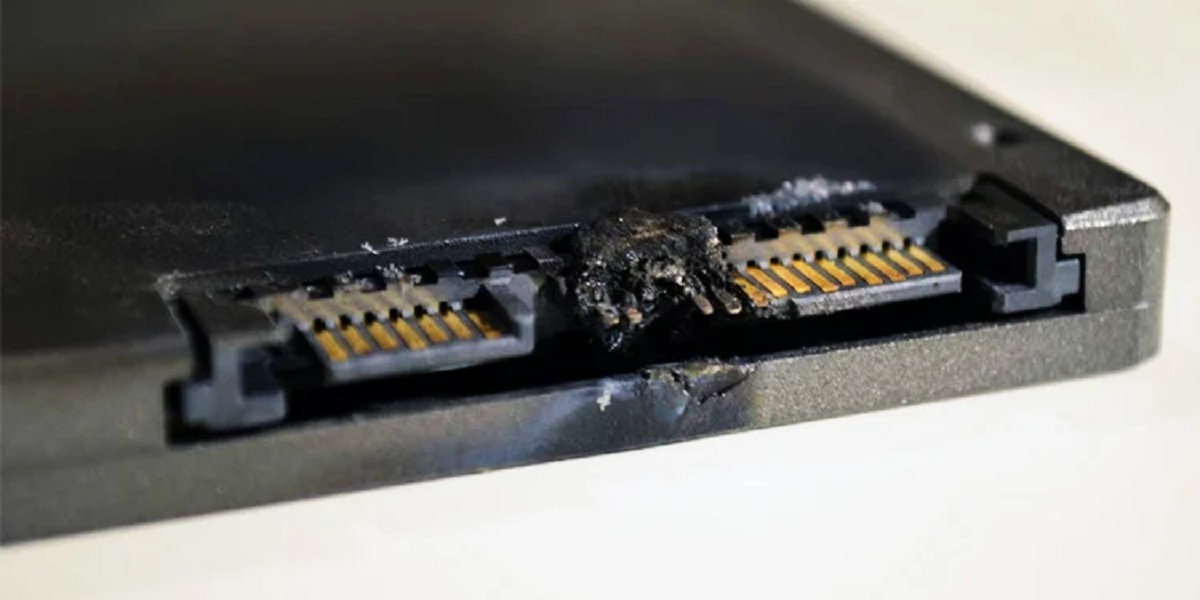
- Check for physical damage: Look for any signs of physical damage on the cables, connectors, or the SSD itself. Bent pins, frayed cables, or physical impact can all cause connection problems. If you notice any damage, consider replacing the affected component.
- Re-seat the connections: Disconnect the SATA data cable and power cable from the SSD and then reconnect them firmly. This will help ensure a tight and reliable connection.
- Test with a different cable: If possible, try using a different SATA data cable or power cable to rule out the possibility of a faulty cable causing the issue. Sometimes, cables can become damaged over time or may not make proper contact.
- Secure the SSD: Double-check that the SSD is securely mounted in its slot or drive bay. Loose screws or improper installation can result in poor or intermittent connections.
- Close the computer case: Once you have checked and secured all the connections, close your computer case. Ensure that all screws are tightened properly to prevent any movement or disconnection of the SSD.
Checking the connections between your SSD and your computer may seem like a simple step, but it can often solve many SSD-related issues. Loose or faulty connections can lead to poor performance, intermittent connectivity, or even SSD not being detected by the system. By ensuring all connections are secure and properly seated, you increase the chances of resolving any connection-related problems and restoring your SSD’s functionality.
Step 6: Running diagnostic software
Running diagnostic software specifically designed for SSDs can help identify and pinpoint any underlying issues with your drive. These diagnostic tools can provide valuable insights into the health, performance, and overall condition of your SSD. Here’s how you can run diagnostic software on your SSD:
- Research and select a diagnostic tool: Look for diagnostic software provided by your SSD’s manufacturer. Visit their official website and navigate to the support or downloads section to find the appropriate diagnostic tool for your SSD model.
- Download and install the diagnostic software: Once you’ve identified the suitable diagnostic tool, download it to your computer and follow the installation instructions provided by the manufacturer. Make sure to download the latest version of the software.
- Launch the diagnostic software: Open the diagnostic software and familiarize yourself with its interface and features. Each manufacturer’s diagnostic tool may have a different layout and set of options, but they generally offer functions such as SMART data monitoring, error scanning, and performance testing.
- Perform a thorough scan: Use the diagnostic software to run a thorough scan on your SSD. This scan will analyze the drive’s internals, check for any bad sectors, and detect any potential issues or errors.
- Review the scan results: After the scan is complete, carefully review the results provided by the diagnostic software. Look for any warnings, errors, or abnormalities reported regarding the health or performance of your SSD.
- Follow the recommended actions: Based on the scan results, the diagnostic software may provide recommendations or steps to address the detected issues. Follow the instructions provided by the software to resolve any problems identified.
- Document the scan results: Take note of any error codes, error messages, or other relevant information from the scan results. It will be helpful if you need to seek further assistance from the manufacturer’s support team or perform advanced troubleshooting.
- Regularly monitor your SSD: It’s a good practice to periodically run the diagnostic software to monitor the health and performance of your SSD. This can help you identify any potential issues early on and take necessary actions to maintain the optimal functioning of your SSD.
Running diagnostic software is an effective way to gain insights into the health and performance of your SSD. By identifying any underlying issues, you can take appropriate action to rectify the problems and ensure the long-term reliability and functionality of your SSD.
Step 7: Reformatting the drive
If you have exhausted all other troubleshooting measures and are still experiencing issues with your SSD, reformatting the drive may be the next step. Reformatting involves erasing all existing data on the SSD and restoring it to its original factory settings. Here’s how you can reformat your SSD:
- Back up your data: Before proceeding with the reformatting process, ensure that you have backed up all important data from the SSD. This step is crucial as reformatting will erase all the data on the drive.
- Open Disk Management on Windows: If you’re using Windows, press the Windows key + X and select “Disk Management” from the menu. This will open the Disk Management utility, which allows you to manage your drives and partitions.
- Select the SSD: In the Disk Management window, locate your SSD based on its storage capacity and drive letter. Right-click on it and select “Format” from the context menu.
- Configure the format settings: In the Format window, you can assign a new name to the volume, select the file system (e.g., NTFS or FAT32), and choose the allocation unit size. It’s recommended to leave the default settings unless you have specific requirements.
- Start the formatting process: Click on the “OK” or “Format” button to initiate the formatting process. A warning message will appear, reminding you that all data on the drive will be erased. Double-check that you have backed up your data and then proceed.
- Wait for the formatting to complete: The formatting process may take some time, depending on the size and speed of your SSD. During the process, do not interrupt the operation or turn off your computer. Once the formatting is complete, you will receive a confirmation message.
- Create new partitions: After the reformatting process, you can choose to create new partitions on your SSD if desired. This step is optional and depends on your specific needs.
- Restore your data: Once the SSD is reformatted, you can restore your previously backed-up data to the drive. Copy your files back onto the SSD from your backup source.
Reformatting the SSD can be a drastic step, as it erases all the data stored on the drive. Therefore, it’s important to proceed with caution and ensure that you have a backup of your important files before initiating the process. Reformatting can help resolve certain software-related issues or remove any potential file system errors. However, if the problems persist after reformatting, it may be necessary to seek further assistance from the manufacturer or consult with a professional technician for advanced troubleshooting.
Step 8: Resetting the SSD to factory settings
If you have exhausted all other troubleshooting steps and your SSD is still not functioning properly, resetting it to factory settings may be necessary. Resetting the SSD will erase all data, settings, and configurations, restoring it to its original state as it was when you first purchased it. Here’s how you can reset your SSD to factory settings:
- Back up your data: Before proceeding with the reset process, ensure you have backed up all important data from the SSD. Resetting the SSD will erase all data stored on the drive, so it’s crucial to have a backup.
- Identify the reset method: The process of resetting an SSD to factory settings can vary depending on the manufacturer. Refer to the manufacturer’s documentation or website to find the specific instructions for your SSD model.
- Perform a secure erase: Some SSDs support a “secure erase” function, which ensures that all data on the SSD is permanently erased. This helps to maintain the privacy and security of your information. Follow the instructions provided by the manufacturer to initiate a secure erase if available.
- Perform a system restore: If a secure erase is not available or not feasible for your SSD, you can perform a system restore. This will reinstall the operating system and restore the SSD to its original factory settings.
- Access the system restore options: Depending on your operating system, accessing the system restore options may vary. On Windows, you can access it through the “Recovery” section in the Control Panel or by pressing the F11 key during startup. Consult your system’s documentation or online resources for specific instructions.
- Follow the system restore process: Once you have accessed the system restore options, follow the on-screen instructions to initiate a system restore. This process may take some time, as it involves reinstalling the operating system and resetting the SSD to its factory settings.
- Reinstall your data and applications: After the system restore is complete, you can reinstall your backed-up data and applications onto the SSD. Copy your files back onto the SSD from your backup source, reinstall any desired applications, and reconfigure your settings.
Resetting your SSD to factory settings can help resolve persistent issues that could not be resolved through other troubleshooting methods. However, it’s important to note that resetting the SSD will result in the loss of all data stored on the drive. So, be sure to backup your important files before initiating the reset process. If the problems persist after resetting the SSD, it may be necessary to contact the manufacturer for further assistance or consult with a professional technician.
Step 9: Contacting the manufacturer for support
If you have followed all the previous steps and are still experiencing issues with your SSD, it may be time to reach out to the manufacturer for additional support. SSD manufacturers usually provide technical support services to assist customers with troubleshooting and resolving issues. Here’s how you can contact the manufacturer for support:
- Gather necessary information: Before contacting the manufacturer, make sure you have the necessary information readily available. This includes the model number, serial number, and any error codes or messages you have encountered during the troubleshooting process.
- Visit the manufacturer’s website: Start by visiting the manufacturer’s official website. Look for the support or contact section, which typically provides information on how to reach out for technical support or customer service.
- Submit a support ticket or email: Many manufacturers have online support forms or email addresses where you can submit your inquiry or problem description. Provide as much detail as possible, including the troubleshooting steps you have already taken.
- Call the manufacturer’s support hotline: If you prefer personalized assistance or have urgent concerns, look for the manufacturer’s support hotline. Call the provided phone number and be prepared to provide the necessary information and describe your issue to the support representative.
- Follow the instructions provided: Once you have submitted your support request or contacted the manufacturer’s support team, follow any instructions or recommendations they provide. They may ask for additional information, request diagnostic logs, or suggest further troubleshooting steps.
- Be patient: Depending on the manufacturer’s support resources and workload, it may take some time for them to respond or provide a solution. Be patient and allow them the necessary time to address your inquiry. In the meantime, continue to use any temporary workaround you may have implemented.
- Document communication: Keep a record of your interactions with the manufacturer’s support team. This includes any support ticket numbers, names of support representatives, and details of the troubleshooting steps or recommendations provided. This documentation will be useful for future reference or if you need to escalate your issue.
Contacting the manufacturer for support is a valuable step when all else fails. Their technical expertise and knowledge of their products can often provide insight and guidance in resolving complex SSD issues. Be sure to describe your issue thoroughly and provide any relevant information you have gathered during the troubleshooting process. Remember that the manufacturer’s support team is there to assist you, so don’t hesitate to reach out and ask for their help to get your SSD back to working condition.
Conclusion
Repairing a Solid State Drive (SSD) can be a daunting task, but with the right knowledge and resources, it is possible to troubleshoot and resolve common issues. In this guide, we walked through the step-by-step process of repairing a SSD, from gathering the necessary tools and materials to contacting the manufacturer for support. Let’s recap what we covered:
We first discussed the importance of gathering the necessary tools and materials before starting the repair process. Having the right equipment and a clean work environment is essential to ensure the safety and success of the repair.
Next, we emphasized the significance of backing up your data. This precautionary measure prevents any potential loss of important files during the repair process. Always make sure to have a reliable backup system in place before proceeding with any repairs.
We then explored troubleshooting techniques to help identify the issues with your SSD. Checking connections, updating firmware, running diagnostic software, and other troubleshooting steps can provide valuable insights into the root cause of the problem.
In situations where software-related solutions are not effective, we discussed reformatting the drive as an option. Reformatting erases all data on the SSD and restores it to its factory settings, resolving potential software-related issues.
If reformatting fails to solve the problem, resetting the SSD to its factory settings may be necessary. This step involves removing all data, settings, and configurations, returning the SSD to its original state when you first purchased it.
Lastly, we highlighted the importance of contacting the manufacturer for support. SSD manufacturers provide technical support services to assist customers with troubleshooting and resolving complex issues. Their expertise and guidance can be invaluable in getting your SSD back up and running smoothly.
Remember that repairing a SSD requires technical knowledge and expertise. If you are not comfortable working with computer hardware or if your SSD is still covered under warranty, it is recommended to contact the manufacturer or a professional technician for assistance.
By following the steps outlined in this guide, you have equipped yourself with the necessary information and tools to repair and troubleshoot common SSD issues. We hope this guide has been helpful to you in your SSD repair journey. Good luck and may your SSD be back to its optimal performance soon!