Introduction
Zoom has become one of the most popular video conferencing platforms, widely used by individuals and businesses alike. With its seamless interface and powerful features, it has made remote communication and collaboration easier than ever before. One of the key functionalities that make Zoom a valuable tool is its ability to record meetings.
In this article, we will explore the process of recording a Zoom meeting as a participant. Whether you’re attending a business meeting, educational webinar, or a virtual social gathering, being able to capture the content and discussions can be invaluable for future reference or sharing with others.
Recording a Zoom meeting as a participant may not be as straightforward as it is for the host, but there are methods that you can employ to capture the session effectively. In the following sections, we will discuss the reasons why you may want to record a Zoom meeting, whether it’s allowed, and the different methods you can use to record meetings as a participant.
Before we delve into the details, it’s important to note that recording a Zoom meeting is subject to legal and ethical considerations. Always obtain the necessary permissions and adhere to any applicable laws or regulations when recording any kind of audio or video content.
Why would you want to record a Zoom meeting?
Recording a Zoom meeting can serve several purposes and offer numerous benefits, making it a desirable feature for participants. Here are some common reasons why you might want to record a Zoom meeting:
- Review and reference: Recording a Zoom meeting allows you to revisit the content discussed during the session. This is particularly useful for educational webinars, training sessions, or important business meetings where there is a lot of information to absorb.
- Collaboration and sharing: Having a recording of a Zoom meeting enables you to easily share the session with others who may not have been able to attend. This can be beneficial for colleagues, team members, or clients who may need to catch up on the discussion or refer to specific details.
- Documentation and record-keeping: Recording a Zoom meeting can serve as an official record, especially for legal or compliance purposes. It can be used as evidence of decisions made, agreements reached, or discussions held during the meeting.
- Training and learning: If the Zoom meeting includes valuable training material or educational content, recording it allows participants to use it as a resource for self-paced learning. This can be particularly helpful in situations where participants may need to refer back to the material at a later time.
- Performance evaluation: Recording presentations or demonstrations during a Zoom meeting can provide valuable insights for performance evaluation purposes. It allows participants to analyze their own performance or receive constructive feedback from others.
These are just a few examples of why recording a Zoom meeting can be beneficial. Depending on your specific circumstances and needs, you may have additional reasons for wanting to capture and preserve the contents of a Zoom meeting.
Can you record a Zoom meeting as a participant?
Yes, as a participant in a Zoom meeting, you have the ability to record the session. However, it’s important to note that the recording feature availability may vary depending on the settings the host has enabled for the meeting.
By default, Zoom allows hosts to enable or disable the recording feature for participants. If the host has not allowed participants to record the meeting, you may not have the option to do so. In such cases, you will need to seek permission from the host if you wish to record the meeting as a participant.
Additionally, keep in mind that some organizations or educational institutions may have specific policies or guidelines regarding meeting recordings. It’s crucial to respect those rules and obtain the necessary permissions before recording any Zoom meeting.
When a host allows participants to record a Zoom meeting, you will have access to the recording controls during the session. These controls can vary depending on the device and Zoom application you are using. Usually, participants can start or stop their recording, pause/resume the recording, or access recording options from the meeting controls menu.
It’s worth noting that while you can record as a participant, the recording will be saved locally on your device. It will not be automatically shared with other participants. If you wish to share the recording, you will need to manually distribute it to the intended recipients.
Now that we know it is possible to record a Zoom meeting as a participant, let’s explore the different methods you can use to accomplish this task in the next section.
How to record a Zoom meeting as a participant
Recording a Zoom meeting as a participant can be achieved using different methods. In this section, we will discuss two common approaches: using Zoom’s built-in recording feature and utilizing third-party screen recording software.
Method 1: Using Zoom’s built-in recording feature
Zoom provides a built-in recording feature that allows participants to capture the meeting. Here’s how you can use this method:
- Join the Zoom meeting as a participant.
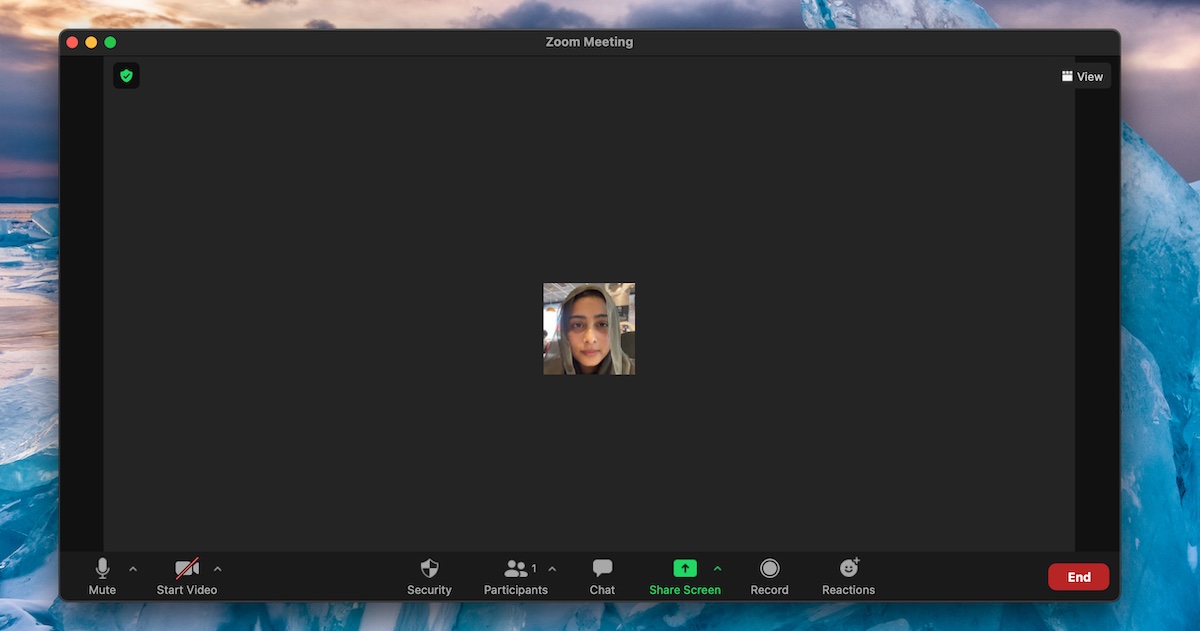
- Once the meeting has started, locate the meeting controls at the bottom of the Zoom window.
- In the meeting controls, you will find a “Record” button. Click on it to start recording the meeting.
- When the meeting is over, click on the “Stop Recording” button to end the recording.
- After you end the meeting, Zoom will process the recording and save it locally on your device (the default location is usually in the Zoom folder).
Method 2: Using third-party screen recording software
If the host has not allowed participants to record the meeting or if you prefer more advanced recording options, you can utilize third-party screen recording software. Here’s how:
- Install a reliable screen recording software on your device. There are various options available, such as OBS Studio, Camtasia, or QuickTime Player (for Mac users).
- Launch the screen recording software and set it up to capture the Zoom meeting window or the entire screen (depending on your preferences).
- Join the Zoom meeting as a participant and start the screen recording software to begin capturing the meeting.
- When the meeting concludes, stop the screen recording software to end the recording.
- Review and save the recorded video from the screen recording software to a location of your choice.
By following these methods, you can successfully record a Zoom meeting as a participant. However, always remember to comply with any legal and ethical requirements and seek permission from the host before recording any meetings.
Method 1: Using Zoom’s built-in recording feature
Zoom offers a convenient built-in recording feature, making it easy for participants to capture a Zoom meeting. Here’s a step-by-step guide on how to use Zoom’s built-in recording feature:
- Join the Zoom meeting: Start by joining the Zoom meeting as a participant. You can enter the meeting by clicking on the meeting link provided or entering the Meeting ID and password if required.
- Locate the meeting controls: Once you’re in the meeting, you will see the meeting controls at the bottom of the Zoom window. These controls contain various options for managing the meeting, including the recording feature.
- Start the recording: In the meeting controls, look for the “Record” button. Click on it to start recording the meeting. A small recording indicator will appear on your screen to confirm that the recording has started.
- Manage the recording: While the meeting is being recorded, you have several options to manage the recording. You can pause and resume the recording if needed, mute and unmute your microphone, and turn your camera on or off during the meeting.
- Stop the recording: When the meeting concludes or when you want to stop the recording, click on the “Stop Recording” button in the meeting controls. Once stopped, the recording will be processed and saved locally on your device.
- Access the saved recording: After the recording is processed, you can access the saved video file on your device. By default, Zoom saves the recording in the location specified in your Zoom settings. However, you can also choose a different location if desired.
Using Zoom’s built-in recording feature is a straightforward and reliable method for recording a Zoom meeting as a participant. It provides a convenient way to capture the content and discussions during the meeting, ensuring that you have a reliable reference for future use.
It’s important to note that the recording feature availability may depend on the settings enabled by the host. If the host has restricted recording for participants, you may not see the recording button in the meeting controls. In such cases, you can either request permission from the host to record or explore alternative methods, such as third-party screen recording software, which we will discuss in the next section.
Method 2: Using third-party screen recording software
If the host has not allowed participants to record the Zoom meeting, or if you prefer more advanced recording options, you can utilize third-party screen recording software. Here’s a step-by-step guide on how to record a Zoom meeting using third-party screen recording software:
- Choose a screen recording software: Start by selecting a reliable third-party screen recording software that suits your needs. There are various options available, such as OBS Studio, Camtasia, or QuickTime Player (for Mac users).
- Install and set up the software: Download and install the selected screen recording software on your computer. Follow the software’s instructions to complete the installation process. Once installed, launch the software and familiarize yourself with its settings and features.
- Select the recording area: Configure the screen recording software to capture the Zoom meeting window or the entire screen, depending on your preferences. Some software allows you to select specific areas of the screen to record, which can be useful if you only want to focus on certain parts of the Zoom meeting.
- Join the Zoom meeting: Join the Zoom meeting as a participant using the provided meeting link or Meeting ID and password. Make sure the meeting window is visible on your screen.
- Start recording: Begin the screen recording in the third-party software. This typically involves clicking on the record button or using the designated hotkey to initiate the recording process. The software will start capturing everything displayed on your screen, including the Zoom meeting.
- Manage the recording: While the meeting is being recorded, you can perform additional actions, such as adjusting audio settings, adding annotations, or highlighting important parts of the screen, depending on the features offered by the screen recording software.
- Stop the recording: When the Zoom meeting concludes or when you’re ready to stop the recording, click on the stop button or use the assigned hotkey in the third-party software. The software will finalize the recording and save it to your chosen destination on your computer.
- Access the saved recording: Once the recording is complete, you can access the saved video file on your computer. The location of the saved file will depend on the settings you specified in the third-party screen recording software.
Using third-party screen recording software provides you with more flexibility and customization options for capturing a Zoom meeting as a participant. However, remember to consult the terms and conditions of the software you choose to ensure compliance with any relevant regulations or licensing requirements.
By following these steps, you can effectively record a Zoom meeting as a participant using third-party screen recording software. It’s a great alternative when the host hasn’t enabled the recording feature or when you require additional functionality for your recordings.
Step-by-step guide for recording a Zoom meeting as a participant
Recording a Zoom meeting as a participant can be done by following a few simple steps. Here’s a step-by-step guide to help you navigate the process:
- Join the Zoom meeting: Start by joining the Zoom meeting as a participant. Click on the meeting link provided by the host or enter the Meeting ID and password (if applicable).
- Check recording permissions: Verify if the host has allowed participants to record the meeting. If the recording feature is disabled, reach out to the host and request permission to record the session.
- Assess recording options: Once in the meeting, familiarize yourself with the available recording options. If the host has enabled participant recording, you should see a “Record” button in the meeting controls. If not, consider using third-party screen recording software.
- Start the recording: If the recording feature is available, click on the “Record” button in the meeting controls to start recording. A small recording indicator will appear, indicating that the meeting is being recorded.
- Engage in the meeting: Fully participate in the Zoom meeting as you normally would. Feel free to engage in discussions, ask questions, or contribute your thoughts, knowing that the session is being captured for future reference.
- Manage your recording: During the meeting, you have control over your own recording. You can pause or resume the recording if needed, depending on the content being discussed or any breaks in the meeting. Utilize the meeting controls to manage the recording functionalities.
- End the recording: Once the meeting has concluded, click on the “Stop Recording” button in the meeting controls to end the recording process. Zoom will process the recording, and it will be saved locally on your device.
- Access the saved recording: After the recording has been processed, you can access the saved video file on your device. By default, Zoom saves the recording in a designated folder, but you can choose a different location if desired.
Following these steps will enable you to record a Zoom meeting as a participant, whether through Zoom’s built-in recording feature or third-party screen recording software. Remember to seek permission from the host and comply with any legal or ethical obligations related to recording meetings.
By capturing the meeting content, you create a valuable resource for future reference, collaboration, and knowledge sharing. Ensure that you use the recorded material responsibly and in alignment with the purpose of the meeting.
Tips for ensuring a successful recording
Recording a Zoom meeting as a participant can greatly benefit you in terms of reviewing content, sharing information, and having a record of important discussions. To ensure a successful recording, consider the following tips:
- Check recording permissions: Confirm with the host whether participants are allowed to record the meeting. Respect the host’s decision and seek permission if necessary.
- Test your equipment: Before the meeting starts, ensure that your microphone and camera are functioning properly. Conduct a quick test to check for any technical issues that may affect the recording.
- Choose a quiet environment: Find a quiet and distraction-free location for participating in the Zoom meeting. Background noise can interfere with the recording quality and make it challenging to understand the discussions.
- Use a stable internet connection: A stable and reliable internet connection is crucial for a smooth Zoom meeting experience and recording. Connect to a strong Wi-Fi or wired network to minimize disruptions.
- Optimize your video settings: Adjust your video settings to optimize recording quality. Ensure that the camera is positioned properly, and the lighting conditions are suitable for clear video capture.
- Position yourself properly: Sit in a well-lit area and position yourself in the frame of the camera properly. Make sure your face is clearly visible and avoid excessive movements that may affect the quality of the recording.
- Consider using an external microphone: If possible, use an external microphone for better audio quality. It can reduce background noise and ensure that your voice comes across clearly in the recording.
- Participate actively: Engage in the meeting actively, contributing to discussions and asking questions. Ensure that your audio is unmuted when you want to speak and follow any guidelines or meeting protocols set by the host.
- Monitor the recording: Keep an eye on the recording indicator to ensure that it is still active. If the recording stops unexpectedly, check your connectivity or reach out to the host for assistance.
- Review the recording: After the meeting, take the time to review the recorded session to ensure that everything was captured as expected. Check for any technical issues or areas where the recording quality may have been compromised.
By following these tips, you can increase the chances of having a successful and high-quality recording of your Zoom meeting. Remember to always ensure compliance with any legal and ethical requirements related to recording meetings, and obtain the necessary permissions when needed.
Conclusion
Recording a Zoom meeting as a participant can be a valuable tool for reviewing content, sharing information, and preserving important discussions. Whether you’re attending a business meeting, educational webinar, or social gathering, being able to capture the session provides a convenient reference for future use.
In this article, we explored two methods to record a Zoom meeting as a participant. Using Zoom’s built-in recording feature allows for a straightforward and hassle-free recording experience, provided that the host has enabled participant recording. Alternatively, utilizing third-party screen recording software offers more advanced options and flexibility.
To ensure a successful recording, it’s crucial to check recording permissions, test your equipment, choose a quiet environment, and optimize your video and audio settings. Active participation, a stable internet connection, and monitoring the recording indicator help maintain the quality of the recorded session.
Remember, recording a Zoom meeting should be done in compliance with any legal and ethical obligations. Always seek permission from the host before recording and respect any guidelines or policies in place. Additionally, use the recorded material responsibly and for its intended purpose.
Whether it’s for future reference, collaboration, or training purposes, recording a Zoom meeting as a participant allows you to capture valuable content and create a lasting record of these virtual interactions. By following the steps and tips outlined in this article, you can confidently record Zoom meetings and make the most of the platform’s features.