Introduction
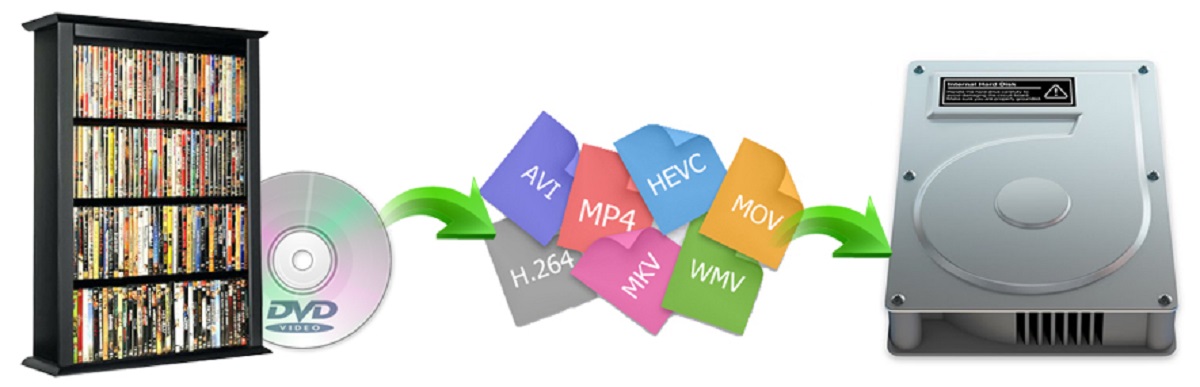
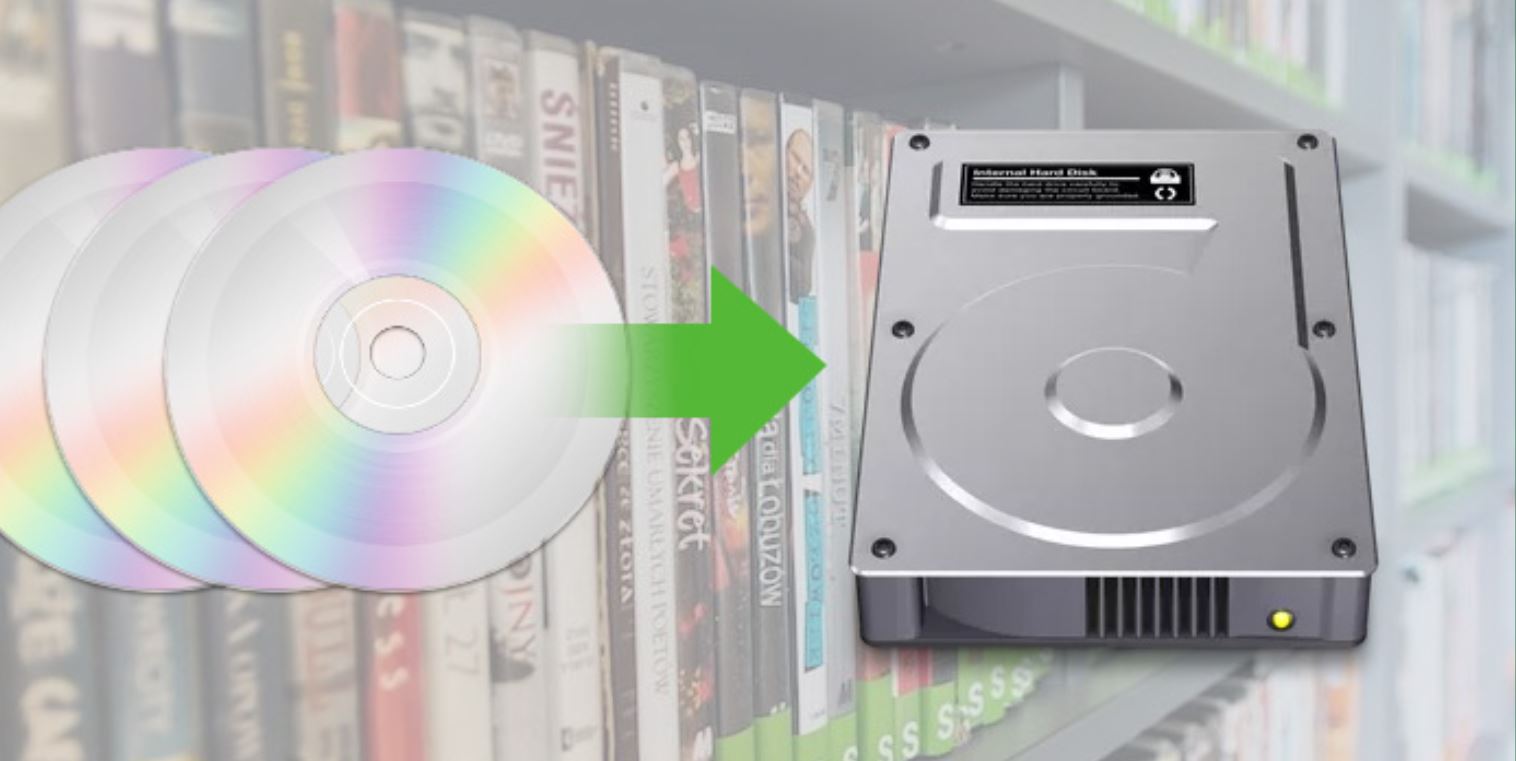
Technology has made it incredibly easy to access and enjoy media content. From movies and TV shows to music and documentaries, we have a plethora of options at our fingertips. However, sometimes we may want to have a physical backup of our favorite DVDs or simply transfer them to a more convenient storage device. This is where an external hard drive can come in handy.
In this article, we will guide you through the steps to put DVDs onto an external hard drive, allowing you to access your movie collection without the need for the physical discs. Whether you want to free up space on your shelves or create a portable media library, this process will enable you to have your DVDs readily available in digital format.
By ripping the DVD and saving it on an external hard drive, you can watch your favorite movies on any device that supports the file format. This means you can bring your entire collection on the go, whether it’s on your laptop, tablet, or even a smart TV. Additionally, it provides a convenient way to organize your movies, create playlists, and enjoy them without the hassle of swapping discs.
Before we dive into the details, it’s important to note that the process of putting DVDs onto an external hard drive may involve the use of software specifically designed for ripping DVDs. Make sure to do some research and choose a reliable and reputable program that suits your needs. Additionally, ensure that you are legally allowed to make copies of the DVDs you own, as there may be copyright restrictions in some cases.
Now that we have covered the basics, let’s move on to the step-by-step guide on how to put DVDs onto an external hard drive. By following these instructions, you will have your movie collection in a digital format that’s accessible anytime, anywhere.
Step 1: Gather the necessary equipment
Before you begin the process of putting DVDs onto an external hard drive, it’s essential to gather the necessary equipment. Here’s what you’ll need:
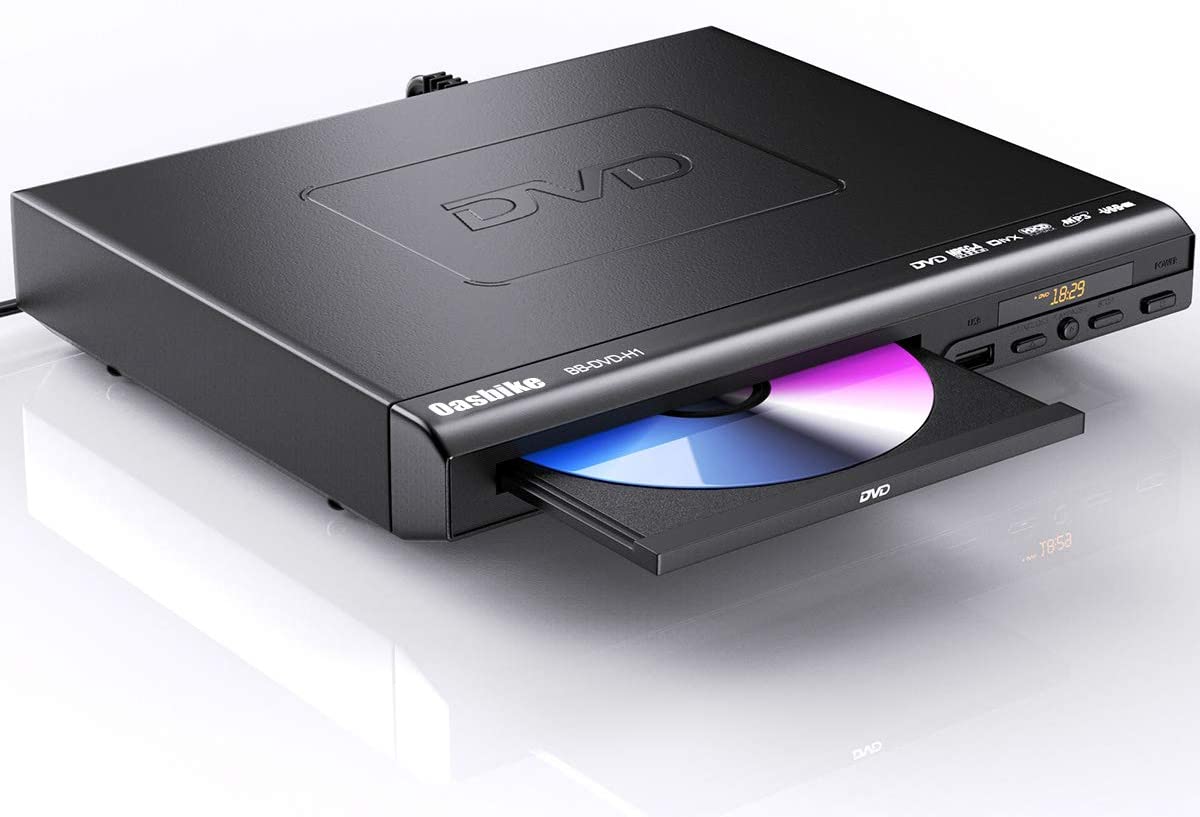
- A computer or laptop: You’ll need a computer or laptop with a DVD drive to read the DVD discs.
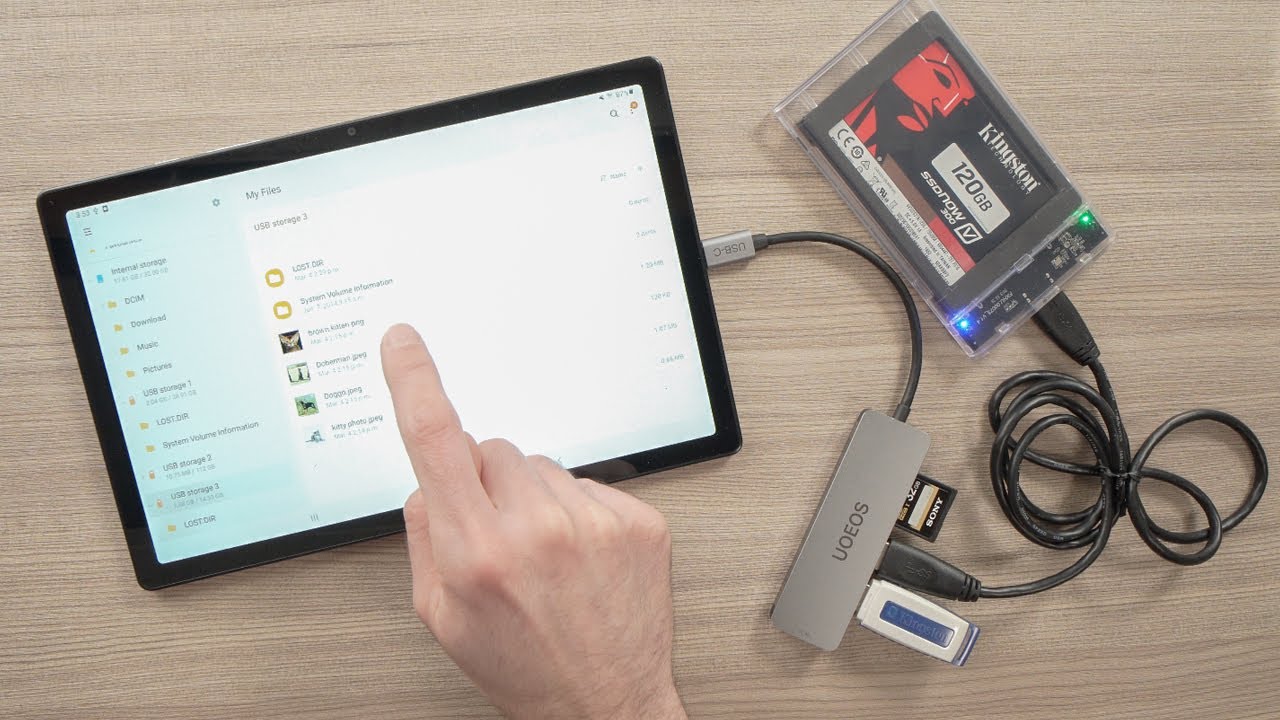
- An external hard drive: Ensure you have a reliable external hard drive with sufficient storage capacity to hold your DVD collection. It’s recommended to have a drive with USB 3.0 or higher for faster data transfer.
- DVD ripping software: Look for reputable DVD ripping software that supports the file format you want to save the DVDs in. There are both free and paid options available, so choose one that suits your needs and budget.
- Blank DVDs (optional): If you want to create backup copies of your DVDs, you may need blank DVDs to burn the ripped files onto. However, this step is not necessary if you only want to store the DVDs on the external hard drive.
Make sure all the necessary equipment is properly connected and ready to use. Ensure your computer is powered on and the external hard drive is connected via a USB port. If you haven’t already installed the DVD ripping software, follow the manufacturer’s instructions to download and install it on your computer.
By having these essential items at hand, you’re ready to move on to the next step of putting your DVDs onto the external hard drive. This simple preparation will ensure a smooth and hassle-free process as you transfer your collection from physical discs to digital files. Remember to choose high-quality equipment and software to ensure the best results and a reliable storage solution for your movies.
Step 2: Install DVD ripping software
After gathering the necessary equipment, the next step is to install DVD ripping software on your computer. This software allows you to extract the content from the DVD and save it in a digital format that can be transferred to the external hard drive. Here’s how to do it:
- Research and choose a reputable DVD ripping software: There are numerous options available online, both free and paid. Look for software that has positive reviews, offers the features you require, and is compatible with your operating system.
- Download and install the software: Once you have chosen the software, visit the official website and download the installation file. Follow the prompts to install the software on your computer.
- Configure the software settings (optional): Some DVD ripping software allows you to customize settings such as video quality, audio preferences, subtitles, and more. Take some time to explore and adjust the settings based on your preferences.
It’s important to note that while there are numerous free DVD ripping software available, some may come with limitations or potential risks. If you opt for a free option, ensure you download it from a trusted source to avoid any malware or spyware. If you prefer a more comprehensive and feature-rich solution, consider investing in a paid DVD ripping software that offers additional benefits and customer support.
Once you have successfully installed the DVD ripping software, you’re ready to move on to the next step of the process. Having the right software installed will allow you to seamlessly rip and save your DVDs onto the external hard drive, ensuring you can access them in digital format whenever you want.
Step 3: Connect the external hard drive
Now that you have the DVD ripping software installed on your computer, it’s time to connect the external hard drive. Follow these steps to ensure a proper connection:
- Locate an available USB port: Check your computer or laptop for an available USB port. The USB port is usually located on the sides or back of the computer.
- Connect the external hard drive: Take the USB cable that came with the external hard drive and plug one end into the USB port on your computer. Then, plug the other end into the appropriate port on the external hard drive.
- Ensure a secure connection: Make sure the USB cable is securely plugged into both the computer and the external hard drive. You should feel a slight click when the connection is properly made.
Once you have connected the external hard drive, your computer should recognize it and assign it a drive letter. This allows you to access the external hard drive as a storage device on your computer. If you encounter any issues with the connection, try using a different USB port or cable to troubleshoot the problem.
It’s worth noting that if your external hard drive requires external power, make sure it is properly plugged in and turned on. Some external hard drives draw power solely from the USB connection, while others may require an additional power source. Consult the manufacturer’s instructions to ensure your external hard drive is powered correctly.
By connecting the external hard drive to your computer, you are now ready to proceed to the next step. This ensures that the DVD ripping software has a destination to save the ripped files, allowing you to transfer your DVDs onto the external hard drive smoothly.
Step 4: Launch the DVD ripping software
With the external hard drive connected to your computer, it’s time to launch the DVD ripping software that you installed in the previous step. Here’s what you need to do:
- Locate the DVD ripping software icon on your computer: Depending on the software you installed, the icon may be on your desktop or in the programs folder. Look for the software’s name or icon, typically representing a DVD or film reel.
- Double-click on the icon to open the DVD ripping software: This action will launch the software and bring up the main interface on your computer screen. It may take a few seconds for the software to load, so be patient.
Once the DVD ripping software is open, you will have access to its various functions and features. The software should provide a user-friendly interface with clear options for ripping DVDs. Take some time to familiarize yourself with the layout and navigation of the software to ensure a smoother overall experience.
Depending on the DVD ripping software you selected, you may have additional customization options available to you at this stage. For example, you might be able to choose specific chapters, audio tracks, or subtitles to include in the ripped files. Explore these options and adjust the settings according to your preferences.
It’s also worth mentioning that different DVD ripping software may have slightly different interfaces and menus. However, most reliable software will guide you through the process step by step, making it easier for you to navigate and use the software effectively.
By launching the DVD ripping software and familiarizing yourself with its interface, you are now ready to proceed to the next steps. This software will serve as the tool that allows you to extract and save the content from your DVDs onto the external hard drive, bringing your movie collection into a digital format.
Step 5: Select the DVD source
Now that you have launched the DVD ripping software, it’s time to choose the DVD source that you want to rip and transfer to the external hard drive. Follow these steps:
- Ensure the DVD is in the DVD drive: Make sure the DVD you want to rip is inserted into the DVD drive of your computer or laptop.
- In the DVD ripping software, select the DVD source: Look for an option within the software that allows you to select the DVD source. It may be labeled as “Source” or “DVD Drive”. This option will give you access to the DVD content so that you can proceed with the ripping process.
- Choose the DVD from the list: If you have multiple DVD drives connected to your computer, the DVD ripping software may show a list of available drives. Select the appropriate drive that contains the DVD you wish to rip.
Once you have selected the DVD source in the software, you should be able to see the DVD name or other identifying information on the screen. This confirms that the DVD ripping software has detected the DVD and is ready to extract its content.
If the DVD ripping software doesn’t automatically detect the DVD source, try refreshing the source list or restart the software. In some cases, you may need to troubleshoot any compatibility issues or check if the DVD drive is functioning properly.
It’s important to choose the correct DVD source before proceeding to the next steps. Selecting the wrong source could result in the ripping process failing or extracting the wrong content. Double-check the DVD drive selection in the software to ensure that you’re ripping the desired DVD onto the external hard drive.
With the DVD source selected, you are now ready to move on to the next step. The DVD ripping software is now connected to the correct source, allowing you to extract and transfer the DVD content to the external hard drive effectively.
Step 6: Choose the external hard drive as the destination
Now that you have selected the DVD source, the next step is to choose the external hard drive as the destination for the ripped files. Follow these steps to ensure the files are saved onto the external hard drive:
- In the DVD ripping software, locate the destination settings: Look for an option within the software that allows you to choose the destination for the ripped files. This option may be labeled as “Destination” or “Output Folder”.
- Click on the destination option and select the external hard drive: When prompted to choose the destination for the ripped files, navigate to the external hard drive connected to your computer. Select it as the location where the ripped files will be saved.
- Specify a folder or directory on the external hard drive: If desired, you can create a specific folder or directory on the external hard drive to organize the ripped files. This will make it easier to locate and access the movies later on.
Once you have chosen the external hard drive as the destination and specified a folder or directory, the DVD ripping software will now save the ripped movie files directly onto the external hard drive. Depending on the size of the DVD and the ripping settings, this process may take some time.
It’s important to ensure that the external hard drive has enough available storage space to accommodate the ripped files. Check the capacity of the external hard drive and monitor the progress of the ripping process to ensure there is no risk of running out of space.
If the external hard drive does not appear as an option in the destination settings, make sure it is properly connected to your computer. Additionally, check if the external hard drive is recognized by your computer’s operating system. If necessary, try restarting the DVD ripping software or your computer to refresh the connection.
With the destination set to the external hard drive, you can proceed to the next steps confidently. The DVD ripping software is now configured to save the ripped files directly onto the external hard drive, providing a convenient and accessible storage location for your movie collection.
Step 7: Customize settings (optional)
In this step, you have the option to customize the settings of the DVD ripping software according to your preferences. While this step is optional, it allows you to have more control over the ripping process and the resulting ripped files. Here’s how you can customize the settings:
- Explore the software’s options and settings: Take a look at the various customization options provided by the DVD ripping software. These options may include video quality, audio preferences, subtitle selection, and more.
- Adjust the settings based on your requirements: Depending on your needs, adjust the settings to your desired specifications. For example, you can choose the desired video format, resolution, or even apply filters or effects to enhance the quality of the ripped files.
The available settings will depend on the DVD ripping software you are using. Some software may offer a wide range of options for advanced users, while others may have a more simplified and user-friendly interface geared toward beginners. Take some time to familiarize yourself with the settings and make adjustments accordingly.
It’s important to note that adjusting the settings may have an impact on the overall file size and quality of the ripped files. Keep this in mind, as higher quality settings may result in larger file sizes, requiring more storage space on the external hard drive. Find the balance between file size and quality that suits your needs and the capacity of your storage device.
Additionally, some DVD ripping software allows you to select specific chapters or segments of the DVD to rip. This can be useful if you only want to save certain parts of the DVD or create custom playlists. Explore these options within the software to customize the ripping process further.
Remember that customizing the settings is optional, and you can proceed with the default settings if you prefer. The important aspect is to ensure that the customized settings are suitable for your requirements and that they result in a satisfactory outcome for the ripped files.
Once you have adjusted the settings to your liking, you are ready to move forward to the next step. The DVD ripping software is now configured with your preferred customizations, ensuring a personalized ripping process and achieving the desired output for your ripped files.
Step 8: Start the ripping process
Now that everything is set up and customized according to your preferences, it’s time to initiate the DVD ripping process. Follow these steps to start ripping your DVDs onto the external hard drive:
- Double-check the settings: Before proceeding, ensure that all the settings in the DVD ripping software are correctly configured. Verify the destination folder on the external hard drive, the file format, and any other customized options you have selected.
- Click on the “Start” or “Rip” button: Look for a button in the DVD ripping software that initiates the ripping process. This button may be labeled as “Start”, “Rip”, or something similar. Click on it to begin the process.
- Monitor the ripping progress: Once the ripping process starts, a progress bar or indicator will appear in the software. Monitor the progress to see the percentage completed or the estimated time remaining.
During the ripping process, it’s important to avoid interrupting or closing the DVD ripping software to ensure a successful and complete transfer of the DVD content. Depending on the size of the DVD and the settings you have chosen, the process may take some time. It’s important to be patient and allow the software to complete its task.
While the software is ripping the DVD, it may display additional information such as the elapsed time, the current chapter being ripped, or the overall progress. This will help you keep track of the ripping process and estimate how much time is remaining.
You can also leave the computer running during the ripping process, but ensure that it does not go into sleep mode or turn off automatically to prevent any interruptions. Adjust your computer’s power settings accordingly to keep it operational until the ripping is complete.
Once the DVD ripping software has finished ripping the DVD, it may provide a notification or display a message indicating that the process is complete. At this point, you can move on to the next step to verify the ripped files on the external hard drive.
By starting the ripping process, you have initiated the extraction of the DVD content and the transfer of the files onto the external hard drive. Now it’s time to let the software do its work and complete the process, bringing your movie collection into digital format on the external hard drive.
Step 9: Monitor the progress
As the DVD ripping process is underway, it’s important to monitor the progress to ensure a smooth and successful transfer of the content. Follow these steps to effectively monitor the progress of the ripping process:
- Keep an eye on the DVD ripping software: Watch the DVD ripping software interface to monitor the progress. Most software will display a progress bar, indicating the percentage of the DVD that has been ripped.
- Check the estimated time remaining: Some DVD ripping software provides an estimated time remaining for the ripping process. Pay attention to this estimate to have an idea of how much time is left for the process to complete.
- Avoid interruptions or closing the software: It’s crucial not to interrupt or close the DVD ripping software while the process is ongoing. Doing so may result in an incomplete transfer or corrupted ripped files.
During the ripping process, you may also notice that the DVD drive on your computer is active and spinning as it reads the DVD. This is normal and indicates that the software is extracting the content from the DVD. However, avoid any unnecessary physical movements or bumps that could cause the DVD drive to become unstable or skip. This could potentially lead to errors during the ripping process.
Depending on the size of the DVD and the settings you have chosen, the ripping process may take some time. It’s essential to be patient and allow the software to complete its task. You can use this time to engage in other activities or take a break, but be sure to remain near the computer to monitor the progress and address any issues that may arise.
Keep in mind that the ripping process may require a significant amount of system resources such as CPU and memory. Depending on your computer’s specifications, you may experience a slight slowdown during the process. This is temporary and should return to normal once the ripping is complete.
By actively monitoring the progress of the ripping process, you can ensure that everything is running smoothly and intervene promptly if any problems occur. This step will help you stay informed and be prepared for the next action to take once the ripping process is complete.
Step 10: Verify the ripped files on the external hard drive
After the DVD ripping process is complete, it’s important to verify the ripped files on the external hard drive to ensure their integrity and completeness. Follow these steps to verify the ripped files:
- Open the file explorer on your computer: Use the file explorer or file manager on your computer to access the external hard drive.
- Navigate to the destination folder: Locate the folder or directory on the external hard drive where the ripped files were saved. This is the destination you specified earlier in the DVD ripping software.
- Review the files: Look through the folder and view the ripped files to ensure they are present and correctly named. Check that the file sizes are consistent with the original DVD’s content.
- Play a sample file: Select one of the ripped files and play it using a media player on your computer. Verify that the video and audio are synchronized, and the playback quality is satisfactory.
By reviewing and playing a sample ripped file, you can ensure that the DVD ripping process was successful and that the files were correctly saved onto the external hard drive. This step is crucial because it allows you to identify any potential issues or errors that may have occurred during the ripping process.
If you encounter any problems, such as missing files, corrupted files, or unsatisfactory quality, you may need to re-rip the DVD and repeat the process. Make sure to double-check the settings and ensure a stable and reliable DVD source for the best results.
Additionally, it’s a good practice to compare the ripped files with the original DVD to ensure that the content and quality are consistent. This will help you confirm that nothing was missed or altered during the ripping process.
Once you have verified the ripped files and are satisfied with the results, you can proceed to the next step to safely eject the external hard drive.
By verifying the ripped files on the external hard drive, you can be confident that the DVD content has been successfully transferred and preserved in digital format. This step ensures that you have a reliable and accessible copy of your DVD collection for future enjoyment.
Step 11: Safely eject the external hard drive
Once you have confirmed that the ripped files on the external hard drive are complete and satisfactory, it’s essential to follow the proper procedure to safely eject the external hard drive from your computer. This ensures that no data is lost or corrupted during the disconnection process. Follow these steps to safely eject the external hard drive:
- Close any open files or folders on the external hard drive: Make sure you are not accessing any files or folders on the external hard drive.
- Save any pending work: If you have any unsaved work or important files open on your computer, save them before proceeding.
- Locate the “Safely Remove Hardware” or “Eject” icon: Look for an icon in the system tray or taskbar on your computer, usually represented by a USB plug or an arrow pointing upwards.
- Click on the “Safely Remove Hardware” or “Eject” icon: Click on the icon to open a menu that shows the connected devices.
- Select the external hard drive from the menu: Identify the external hard drive in the menu and select it to initiate the eject process.
- Wait for the confirmation message: After selecting the external hard drive, wait for a confirmation message indicating that it is safe to remove the device.
- Physically remove the external hard drive: Once you receive the confirmation message, gently unplug the external hard drive from the USB port on your computer.
It’s important to follow the proper ejection process to ensure that all data is written and saved before disconnecting the external hard drive. Abruptly removing the external hard drive without safely ejecting it can potentially result in data corruption or loss.
Do not disconnect the external hard drive while files are being transferred or accessed, as this can lead to file corruption or damage. Always wait for confirmation that it is safe to remove the device before physically unplugging it from your computer.
By safely ejecting the external hard drive, you are taking the necessary precautions to preserve and protect the ripped files on the external storage device. Once safely ejected, you can store the external hard drive in a safe place or connect it to another device to enjoy your digital DVD collection conveniently.
Conclusion
Congratulations! You have successfully learned how to put DVDs onto an external hard drive. By following the step-by-step guide outlined in this article, you can now enjoy your movie collection in a digital format, accessible anytime and anywhere.
Throughout this process, you gathered the necessary equipment, installed DVD ripping software, connected the external hard drive, and configured the settings according to your preferences. You selected the DVD source, chose the external hard drive as the destination, and customized the settings if desired. After starting the ripping process, you monitored the progress and verified the ripped files on the external hard drive. Finally, you safely ejected the external hard drive from your computer.
It is important to note that the process of ripping DVDs onto an external hard drive should only be done with DVDs that you legally own and are permitted to make copies of. Ensure that you comply with copyright laws and respect the intellectual property rights of content creators.
Having your DVDs stored on an external hard drive offers a convenient way to access your favorite movies without the need for physical discs. You can now enjoy your movie collection on various devices, such as laptops, tablets, and smart TVs, by simply connecting the external hard drive. Additionally, you have the option to create backup copies of your DVDs or organize them into custom playlists.
Remember to regularly back up your external hard drive to ensure that your digital movie collection is protected. Consider making duplicate copies of important files and storing them in separate locations to prevent loss in case of hardware failure or damage.
Now that you are familiar with the process, you can confidently transfer your DVDs onto an external hard drive, freeing up space and enjoying the convenience of digital media. Explore the possibilities of creating your own digital library, easy access to your movie collection, and the ability to take it with you wherever you go.
We hope that this guide has been helpful in assisting you with putting your DVDs onto an external hard drive. Enjoy the convenience and accessibility of your digitized movie collection, and happy movie watching!