Introduction
Welcome to this comprehensive guide on how to use your Lacie External Hard Drive effectively. Whether you are a student, a professional, or an avid media consumer, having a reliable external hard drive can help you store and backup your important files, photos, videos, and documents. In this article, we will walk you through the essential steps and provide helpful tips to maximize the benefits of your Lacie External Hard Drive.
With its sleek design, high storage capacity, and easy-to-use features, the Lacie External Hard Drive is a popular choice for individuals who need additional storage space for their digital files. Plus, its compatibility with both Windows and Mac operating systems makes it a versatile option for users across different platforms.
Whether you have just purchased your Lacie External Hard Drive or want to make the most of the one you already have, this guide is here to assist you. We will cover the initial setup process, transferring files, organizing data, as well as troubleshooting common issues that you may encounter along the way. So, without further ado, let’s dive in and learn how to harness the power of your Lacie External Hard Drive!
Step 1: Connecting Your Lacie External Hard Drive
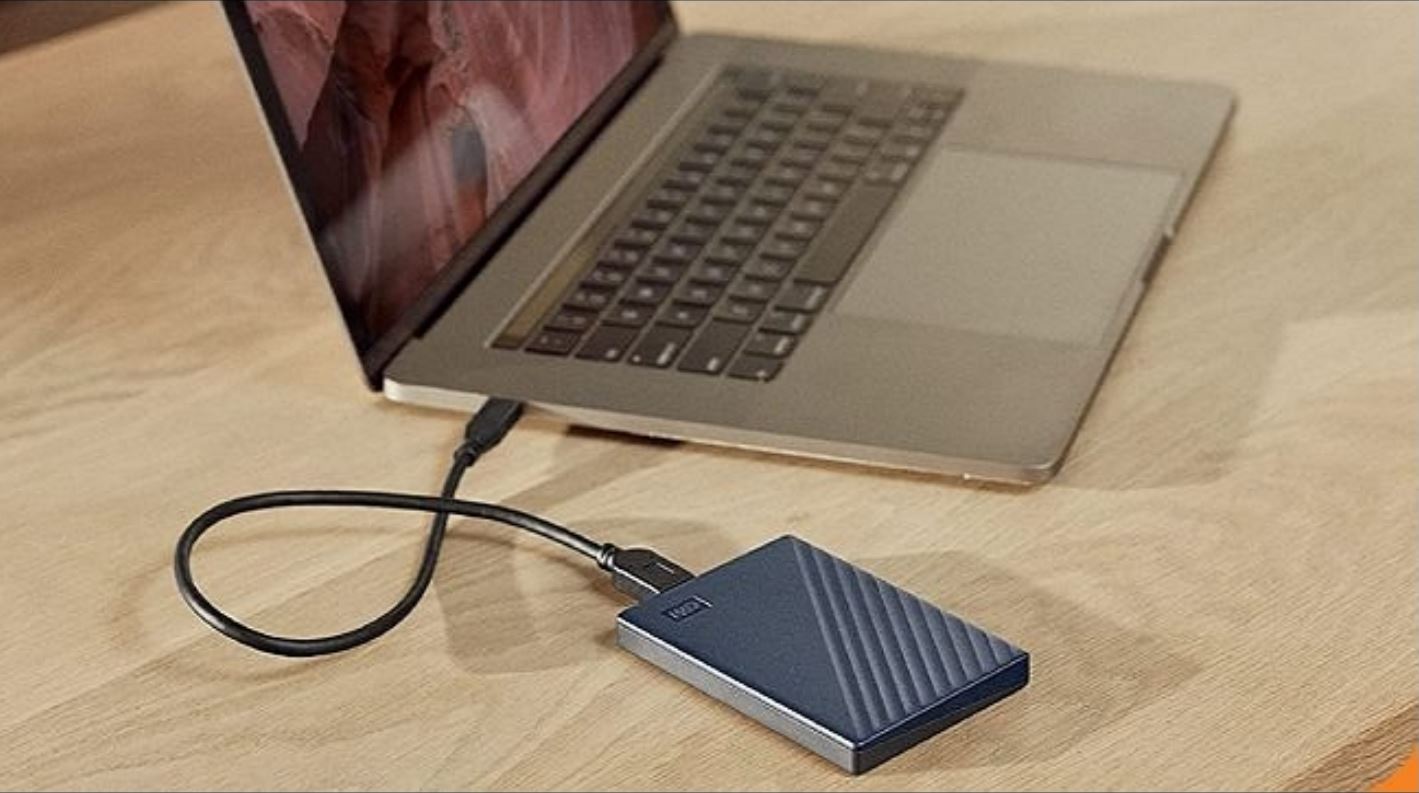
The first step in effectively using your Lacie External Hard Drive is to connect it to your computer or laptop. Follow these simple instructions to ensure a successful connection:
- Locate an available USB port on your computer. Most Lacie External Hard Drives come with a USB 3.0 connector, which provides faster data transfer speeds. However, if your computer only has a USB 2.0 port, don’t worry. The Lacie External Hard Drive is backward compatible with USB 2.0.
- Take the USB cable that came with your Lacie External Hard Drive and plug one end into the USB port on your computer and the other end into the USB port on your external hard drive. You should hear a click sound when the cable is securely connected.
- Once connected, your computer should automatically detect the Lacie External Hard Drive. In some cases, you may need to wait a few moments for the necessary drivers to be installed.
- Now, you can navigate to “My Computer” (Windows) or “Finder” (Mac) to verify that the Lacie External Hard Drive appears as a new drive on your system. It should be listed as a separate device with its own drive letter or name.
- Double-click on the drive icon to open the Lacie External Hard Drive. You are now ready to start using it for storing and accessing your files.
It’s important to note that some Lacie External Hard Drives may require an external power source, especially if you have an older model or if you are connecting multiple devices to your computer simultaneously. In such cases, follow the manufacturer’s instructions to connect the power adapter to the external hard drive and plug it into a power outlet.
Now that you have successfully connected your Lacie External Hard Drive to your computer, you are ready to move on to the next step: installing the necessary software to ensure optimal performance and functionality.
Step 2: Installing the Lacie External Hard Drive Software
To fully utilize the features and benefits of your Lacie External Hard Drive, it is recommended to install the accompanying software provided by Lacie. Here’s how you can install the software:
- Insert the CD or DVD that came with your Lacie External Hard Drive into your computer’s disk drive. If your computer does not have a disk drive, you can download the software from the official Lacie website.
- If the installation process does not start automatically, navigate to the disk drive on your computer and locate the setup file. Double-click on it to initiate the installation process.
- Follow the on-screen instructions to install the Lacie software. You may be required to accept a license agreement and choose the destination folder where the software will be installed.
- Once the software installation is complete, restart your computer to ensure that all changes are properly applied.
- After your computer restarts, you can open the Lacie software program. This program will provide you with additional tools and utilities to enhance the functionality of your external hard drive, such as data backup, synchronization, and encryption.
- Depending on the model of your Lacie External Hard Drive, you may also have access to features like power-saving mode, drive diagnostics, and firmware updates through the software interface.
- It’s important to keep the Lacie software up to date by periodically checking for updates on the Lacie website or using the built-in update feature within the software itself.
By installing the Lacie External Hard Drive software, you can take advantage of the full range of features and optimizations offered by Lacie. It will also ensure compatibility and stability between the hardware and software components, resulting in a seamless user experience.
Once you have successfully installed the software, you are now ready to move on to the next step: setting up your Lacie External Hard Drive for first-time use.
Step 3: Setting up Your Lacie External Hard Drive for First-Time Use
After connecting your Lacie External Hard Drive and installing the necessary software, it’s time to set up the device for its first use. Follow these steps to ensure a smooth setup process:
- Open the Lacie software program on your computer (if it’s not already open).
- In the software interface, you will find various options and settings to customize your Lacie External Hard Drive. Take some time to explore the different tabs and features to familiarize yourself with the available options.
- You may be prompted to format the external hard drive if it hasn’t been formatted yet. Formatting is necessary to ensure compatibility and optimize the storage capacity. Before formatting, make sure to back up any data you already have on the drive, as formatting will erase all the existing files.
- Follow the on-screen instructions to format the Lacie External Hard Drive. Make sure to choose the appropriate file system (such as NTFS for Windows or HFS+ for Mac) depending on the operating system you are using.
- Once the formatting is complete, you can choose to configure additional settings, such as encryption or password protection, depending on the features available with your Lacie External Hard Drive.
- After the initial setup is complete, you can begin transferring files to your Lacie External Hard Drive. Simply drag and drop the files from your computer’s internal storage to the external hard drive’s folder in the Lacie software interface.
- You can also create separate folders to organize your files and make it easier to locate them in the future. This can be particularly useful if you plan to store different types of files, such as photos, videos, or documents.
- Remember to regularly back up your important files to the Lacie External Hard Drive to ensure their safety and prevent data loss. This can be done manually or by setting up an automatic backup schedule using the backup features provided by the Lacie software.
By following these steps, you can set up your Lacie External Hard Drive for first-time use and start taking advantage of its storage capabilities and features. With proper organization and regular backups, you can ensure the safety and accessibility of your valuable data.
Next, we will discuss how to transfer data to your Lacie External Hard Drive, so keep reading to learn more!
Step 4: Transferring Data to Your Lacie External Hard Drive
Now that you have successfully set up your Lacie External Hard Drive, it’s time to transfer your data to the drive. Whether you want to back up important files, store large media libraries, or free up space on your computer, transferring data to your Lacie External Hard Drive is a simple process. Follow these steps to get started:
- Open the Lacie software program on your computer and ensure that your external hard drive is connected and recognized.
- In the software interface, navigate to the location on your computer where the files you want to transfer are located. This could be your desktop, documents folder, or any other location.
- Select the files or folders you want to transfer to the Lacie External Hard Drive. You can hold the Ctrl key (or Command key on Mac) to select multiple files or folders.
- Once you have selected the desired files, right-click on them and choose the option to “Copy” or “Cut”. Alternatively, you can use the keyboard shortcuts Ctrl+C or Ctrl+X (Command+C or Command+X on Mac).
- Navigate to the Lacie software interface and open the external hard drive’s folder where you want to transfer the files.
- Right-click inside the folder and choose the option to “Paste”. Alternatively, you can use the keyboard shortcut Ctrl+V (Command+V on Mac).
- The selected files will be copied or moved to the Lacie External Hard Drive, depending on whether you chose “Copy” or “Cut” in the previous step.
- Depending on the size of the files and the transfer speed of your computer and external hard drive, the process may take some time. Be patient and avoid interrupting the transfer process to prevent any data corruption or loss.
- Once the transfer is complete, you can verify that the files have been successfully transferred by navigating to the external hard drive’s folder and checking for the presence of the transferred files.
It is important to note that you can transfer a wide range of file types to your Lacie External Hard Drive, including photos, videos, documents, music, and more. This allows you to create backups of your important data, store multimedia collections, and free up space on your computer’s internal storage.
By following these simple steps, you can easily transfer your data to the Lacie External Hard Drive, ensuring its safety and accessibility at all times. In the next section, we will discuss how to safely eject your external hard drive to prevent data loss or corruption.
Step 5: Safely Ejecting Your Lacie External Hard Drive
Before disconnecting your Lacie External Hard Drive from your computer, it is crucial to safely eject it to prevent any data corruption or loss. Safely ejecting the external hard drive ensures that any pending read or write operations are completed, and all cached data is written to the drive. Follow these steps to safely eject your Lacie External Hard Drive:
- Make sure your external hard drive is not in use. Close any open files or applications that may be accessing or using the drive.
- Save any changes to the files you are working on and close any open documents.
- On your computer’s taskbar or system tray, locate the “safely remove hardware” icon. It is usually represented by a small USB plug or an icon with an arrow pointing upwards and downwards.
- Click on the “safely remove hardware” icon to open the list of connected devices.
- Locate your Lacie External Hard Drive in the list of devices and click on it to select it.
- A confirmation window will appear, indicating that it is safe to remove the device. Click on the “Eject” or “Safely Remove” option.
- Wait until you see a notification or message confirming that it is safe to disconnect the external hard drive.
- Once you receive the confirmation, you can safely unplug the USB cable from your computer and the Lacie External Hard Drive.
It is crucial to follow these steps to prevent any data corruption or loss when disconnecting your Lacie External Hard Drive. Abruptly removing the drive without safely ejecting it can result in file system errors or data fragmentation, which may render the drive inaccessible or cause data loss.
Remember to always wait for the confirmation message before disconnecting the USB cable. This ensures that all data transfer processes have completed and that the external hard drive is ready to be safely removed from your computer.
In the next section, we will discuss how to effectively manage your files on the Lacie External Hard Drive to keep your data organized and easily accessible.
Step 6: Managing Your Files on the Lacie External Hard Drive
Properly managing your files on the Lacie External Hard Drive is essential for easy access, organization, and efficient data retrieval. By following these steps, you can effectively manage your files:
- Use descriptive and meaningful file names: When saving files to your Lacie External Hard Drive, give them names that accurately describe their content. This will make it easier to locate specific files later on.
- Create folders to organize your files: Organizing your files into folders based on categories, such as “Work,” “Photos,” “Music,” or any other relevant classification, will help you navigate and find specific files quickly.
- Use sub-folders for further organization: If you have a large number of files within a specific category, consider creating sub-folders to further sort and categorize them. For example, within the “Photos” folder, you can have sub-folders for different events or locations.
- Regularly clean up and declutter: Periodically review and delete files that are no longer needed. This will help free up space on your external hard drive and keep it organized.
- Back up your Lacie External Hard Drive: To ensure the safety of your data, it’s a good practice to create another backup of your Lacie External Hard Drive. You can use cloud storage, another external hard drive, or any other backup method to keep your data secure.
- Keep track of file versions: If you frequently update files, it’s a good idea to keep track of different versions by using a file naming convention or enabling versioning within the Lacie software program. This way, you can easily access or recover previous versions if needed.
By implementing these file management practices, you can keep your Lacie External Hard Drive organized and ensure that you can find and retrieve files quickly whenever you need them. Efficient file management leads to increased productivity and a more enjoyable user experience.
Now that you know how to manage your files effectively, let’s move on to the next section, where we will discuss troubleshooting common issues that you may encounter with your Lacie External Hard Drive.
Step 7: Troubleshooting Common Issues with Lacie External Hard Drive
Although the Lacie External Hard Drive is a reliable and high-quality storage solution, you may encounter a few common issues during its usage. Here are some troubleshooting steps to help you resolve these issues:
- Ensure proper connection: Confirm that the USB cable is securely connected to both the external hard drive and your computer. Try using a different USB port or a different cable to see if the issue persists.
- Check power source: If your external hard drive requires an external power source, make sure it is properly connected and receiving power. Try plugging it into a different power outlet or using a different power adapter if available.
- Update device drivers: Verify that you have the latest device drivers installed for your Lacie External Hard Drive, as outdated drivers can cause compatibility issues. Visit the Lacie website or use the software program to check for and install any available driver updates.
- Scan for malware or viruses: Perform a malware and virus scan on your computer to ensure that your system is free from any malicious software that could be affecting the performance of your external hard drive.
- Restart your computer: Sometimes, a simple restart can resolve minor software glitches or conflicts that may be hindering the proper functioning of your external hard drive.
- Reformat the external hard drive: If you are experiencing persistent issues, you can try reformatting the Lacie External Hard Drive. However, keep in mind that reformatting will erase all the data on the drive, so make sure to back up your files before proceeding.
- Reach out to technical support: If all else fails and you are still experiencing issues with your Lacie External Hard Drive, don’t hesitate to contact Lacie’s technical support team. They can provide you with further assistance, diagnose any hardware or software problems, and offer solutions specific to your situation.
By following these troubleshooting steps, you should be able to identify and resolve common issues that may arise while using your Lacie External Hard Drive. Remember to stay patient and thorough in your troubleshooting process, and reach out to Lacie’s support team if needed for specialized assistance.
Once you have successfully resolved any issues, you can continue enjoying the convenience and reliability of your Lacie External Hard Drive for storing and accessing your important files and data.
Conclusion
Congratulations! You have now learned how to effectively use your Lacie External Hard Drive to store, backup, and manage your valuable files. With the ability to connect your external hard drive, install the necessary software, and set it up for first-time use, you are well-equipped to make the most of this powerful storage solution.
Transferring data to your Lacie External Hard Drive is a breeze, and with proper file management techniques, you can keep your files organized and easily accessible whenever you need them. Remember to always safely eject the external hard drive before disconnecting it to prevent any data corruption or loss.
In the event that you encounter any issues, the troubleshooting steps provided can help you identify and resolve common problems. And if you need additional support, don’t hesitate to reach out to Lacie’s technical support team for further assistance.
Your Lacie External Hard Drive offers a reliable and secure storage solution, whether you are a student, a professional, or a digital content creator. It provides peace of mind by allowing you to have backups of your important files and the flexibility to store large media libraries or free up space on your computer’s internal storage.
Remember to regularly back up your Lacie External Hard Drive and keep it updated with the latest software and firmware releases. By doing so, you ensure the safety and longevity of your data and the optimal performance of your external hard drive.
Thank you for following this guide on how to use your Lacie External Hard Drive. We hope that the information provided has been valuable, and that you can now make the most of your storage solution for all your file management needs.