Introduction
Welcome to the world of Gmail, where communication is made easy through emails. Whether you need to print an important document, a boarding pass, or just want to keep a hardcopy of a memorable conversation, Gmail provides a simple yet efficient way to print your emails. In this article, we will guide you through the step-by-step process of printing an email on Gmail.
Emails have become an integral part of our personal and professional lives, and being able to print them can be incredibly useful. Printing an email allows you to have a physical copy that you can refer to whenever you need, without having to rely on digital devices or an internet connection. It’s a convenient way to have important information at your fingertips, even when you’re offline.
By following the steps outlined in this guide, you’ll be able to print your Gmail emails in no time. Whether you’re using Gmail on your computer or mobile device, the process is straightforward and user-friendly. So, let’s dive into the steps and learn how to print an email on Gmail.
Please note that the exact steps may vary slightly depending on the device and browser you’re using, but the overall process remains the same. So, let’s get started!
Step 1: Open Gmail and Sign In
The first step in printing an email on Gmail is to open the Gmail website and sign in to your account. If you don’t have a Gmail account yet, you can easily create one by visiting the Gmail website and following the instructions to sign up. Once you have your account set up, you’re ready to proceed with printing your email.
To open Gmail, open your preferred web browser and type in “www.gmail.com” in the address bar. Press Enter, and the Gmail login page will appear. Enter your Gmail email address and password in the respective fields, then click on the “Sign In” button to access your account.
If you’re using a public computer or a device that is shared with others, it’s important to tick the “Stay signed in” checkbox to ensure that you remain signed in during your printing process. However, if you’re using your own personal device, it’s recommended to leave this option unchecked for security reasons.
Once you’re signed in to your Gmail account, you’ll be directed to your inbox, where you can see all your incoming and outgoing emails. Now that you’ve successfully opened Gmail and signed in to your account, let’s move on to the next step of printing your email.
Step 2: Open the Email
After signing in to your Gmail account, the next step is to locate and open the email that you want to print. This could be an email from a friend, a colleague, or an important confirmation email that you received. Gmail organizes your emails in chronological order, with the most recent ones appearing at the top.
To open the email, simply scan through your inbox and click on the subject line or the sender’s name of the email you wish to print. This will open the email in a new tab or window, depending on your browser settings. Alternatively, if you have already read the email, you can search for it using the search bar at the top of the Gmail interface.
Once you have opened the email, you’ll be able to view its contents, including the message content, attachments, and any embedded images or links. Take a moment to review the email and ensure that it is the correct one you want to print. If the email has multiple threads or replies, make sure to expand and view the entire conversation to include all the relevant information in your printout.
It’s worth mentioning that Gmail allows you to open and print multiple emails at once. To do this, you can press the Ctrl key (or Command key on Mac) and click on the individual emails you want to print, or you can use the Shift key to select a range of emails. Once selected, click on the “Open” button at the top to open all the selected emails in separate tabs or windows.
Now that you’ve successfully opened the email you want to print, let’s move on to the next step, where we will explore how to click on the print icon and customize the print settings.
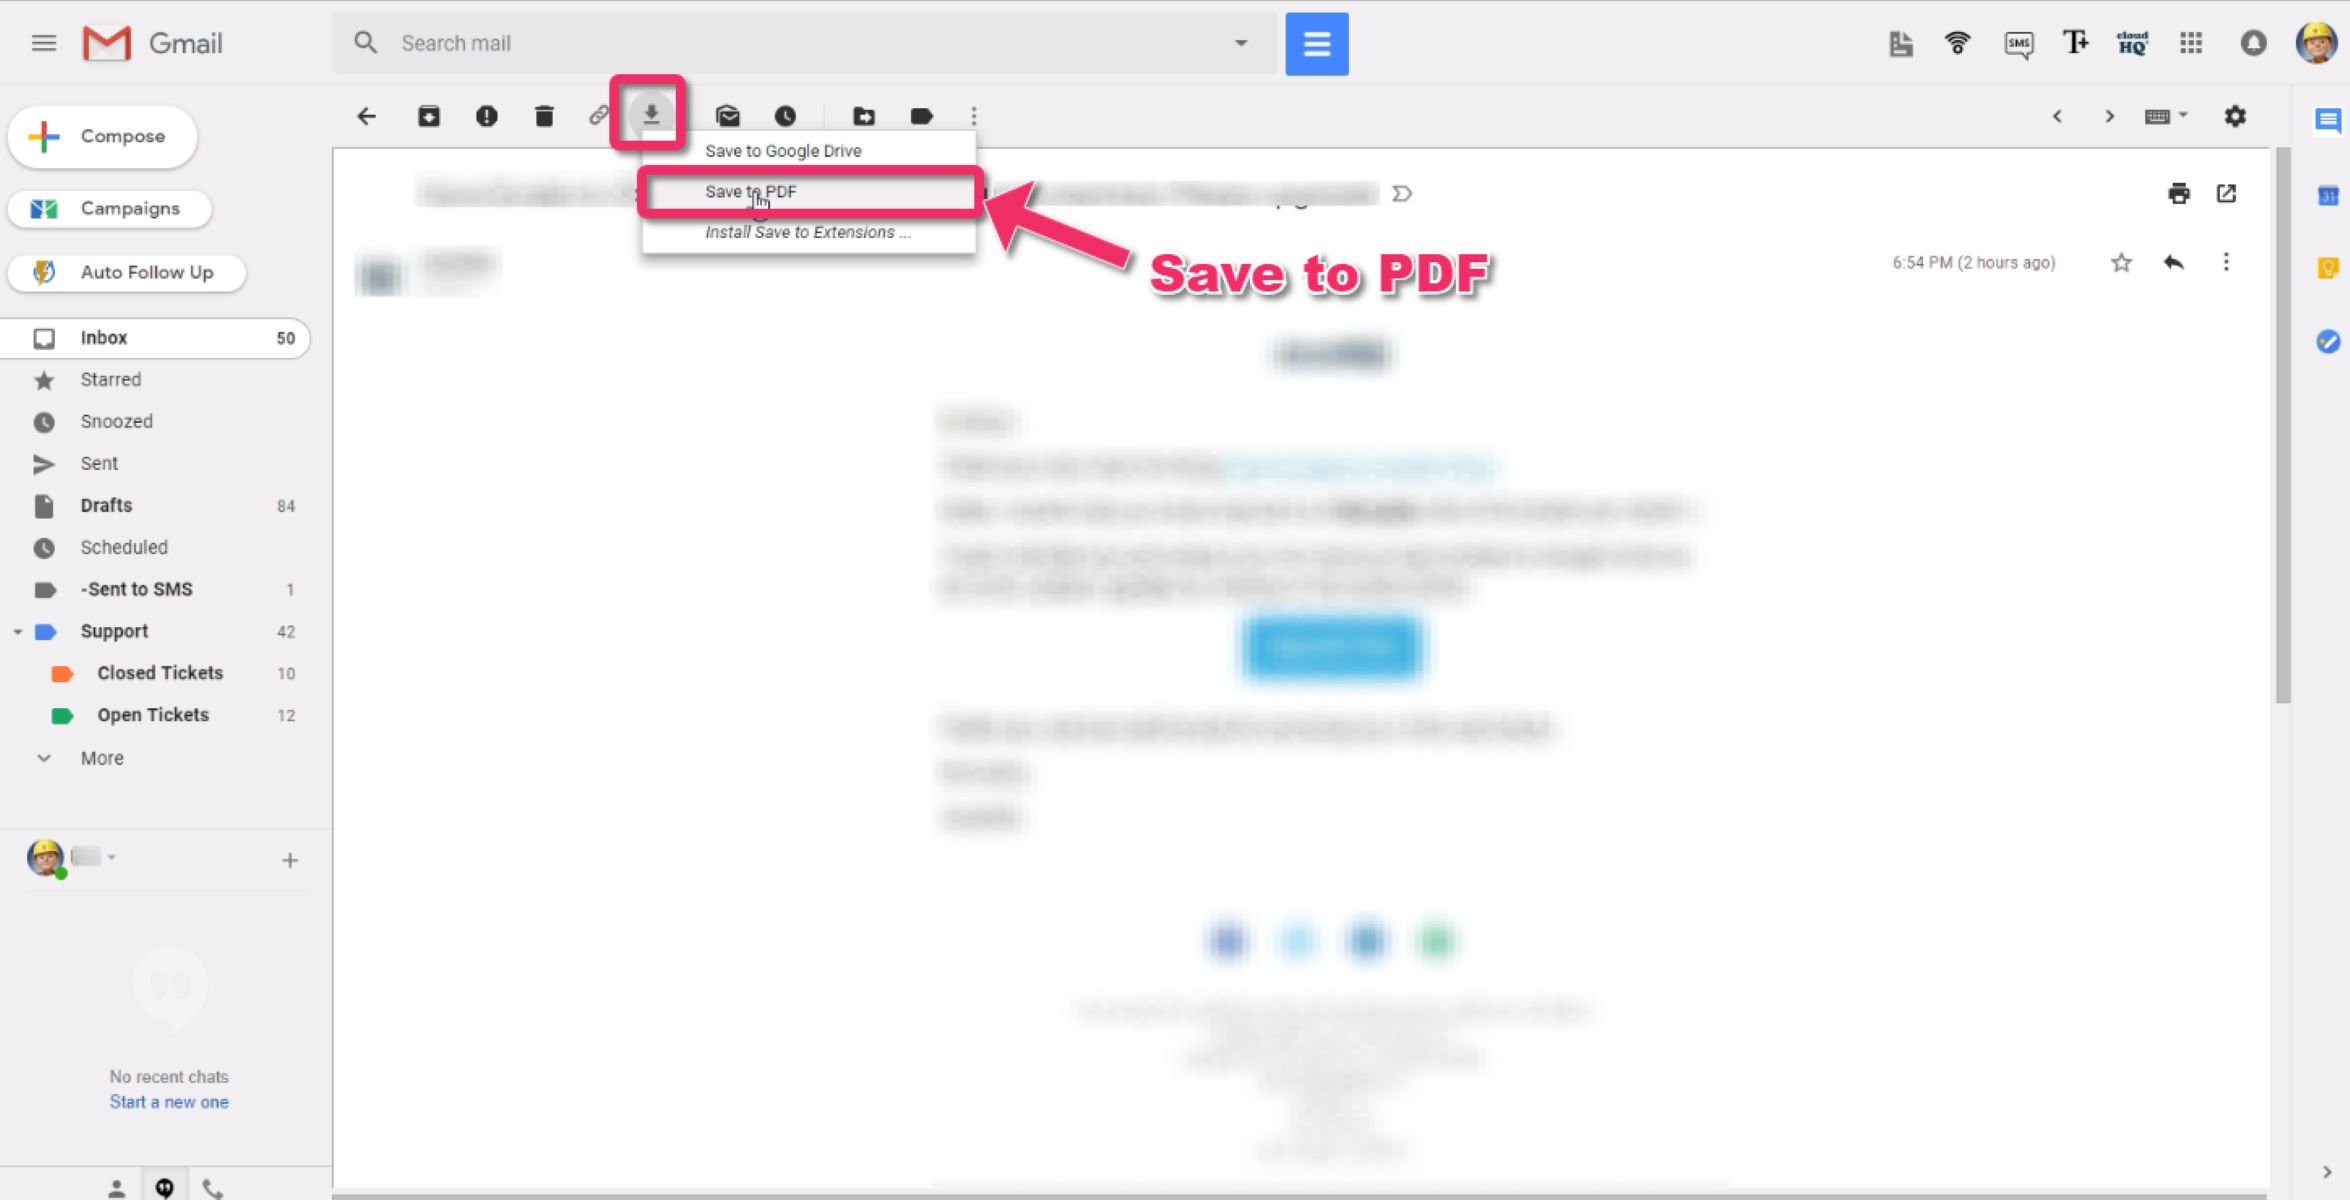
Step 3: Click on the Print Icon
Once you have opened the email you wish to print, it’s time to click on the print icon to start the printing process. The print icon is a commonly recognizable symbol that resembles a printer, and it is usually located in the top-right corner of the Gmail interface.
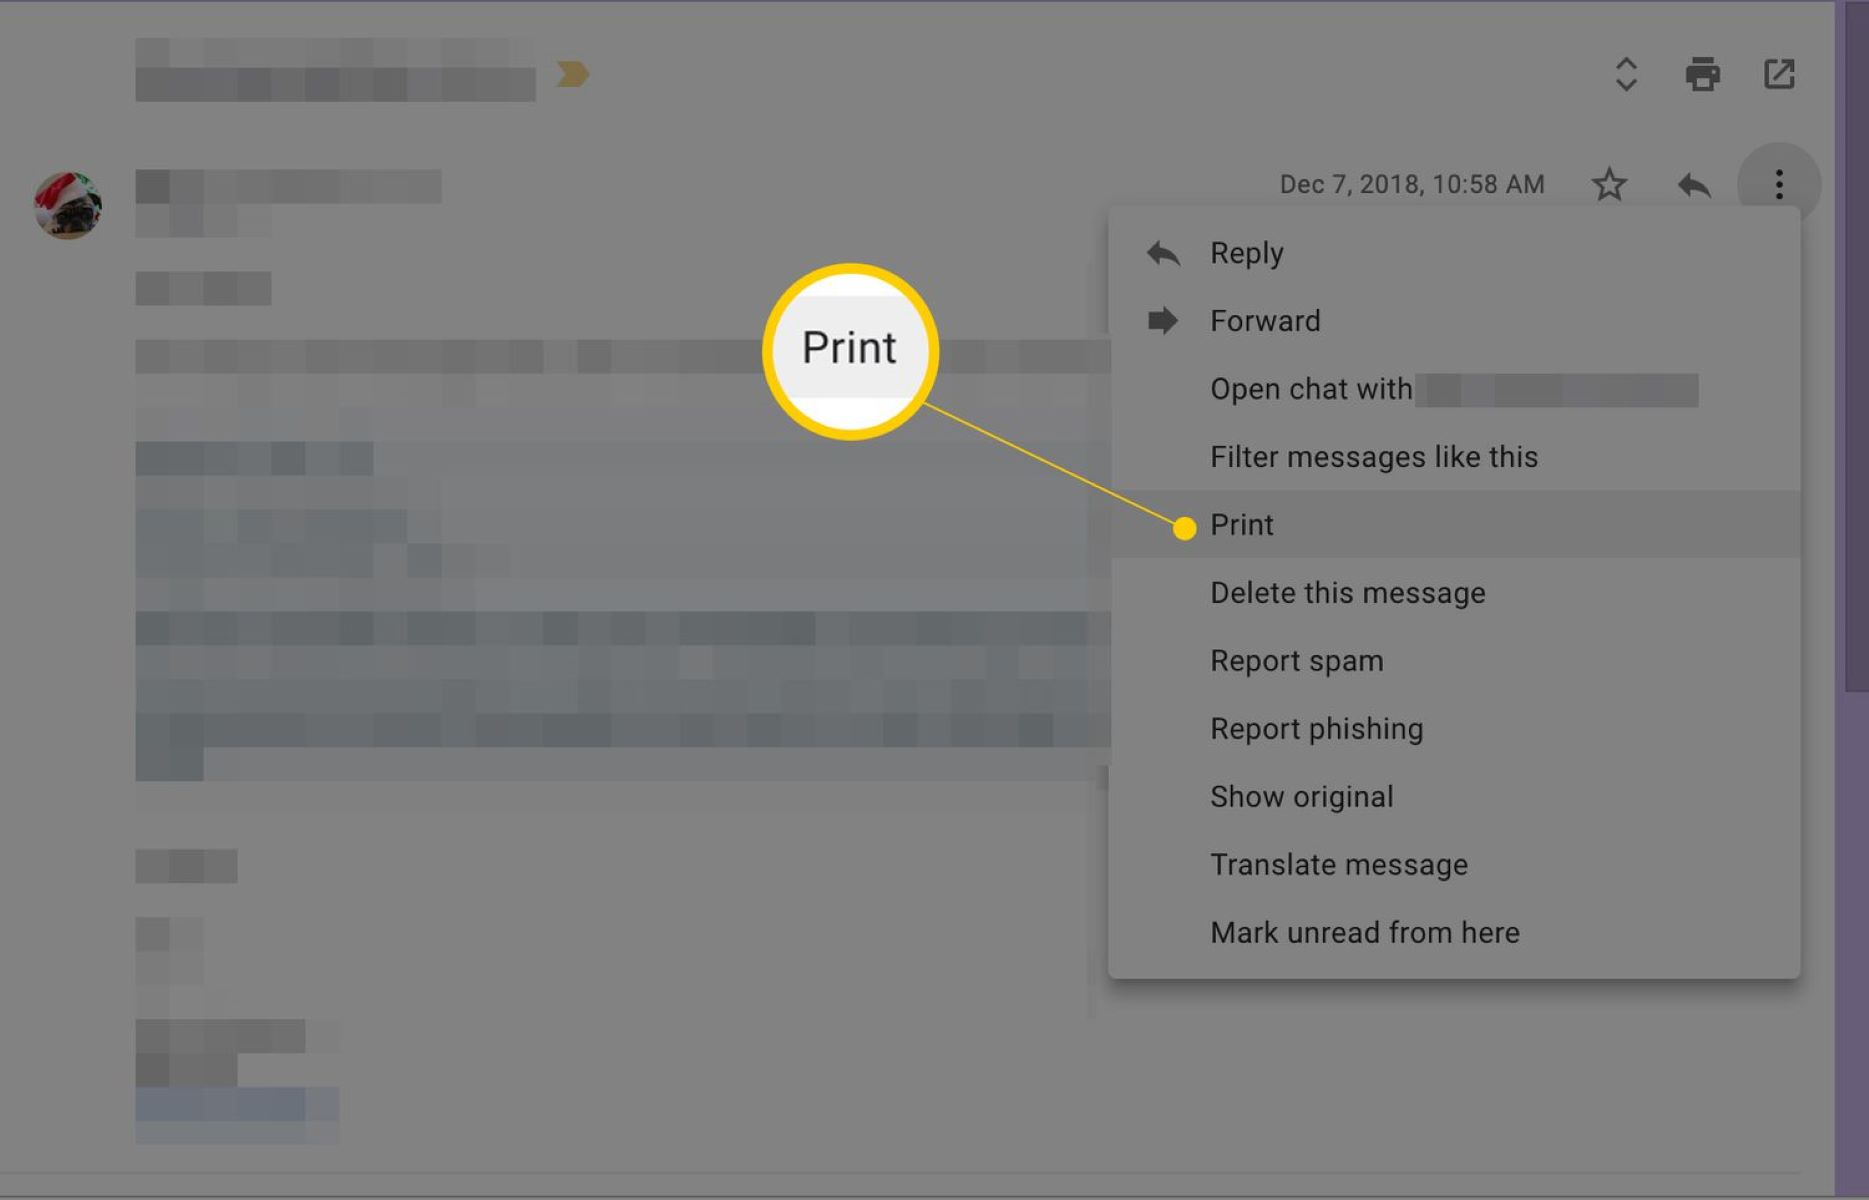
To find the print icon, look for a series of small icons or buttons near the top-right corner of the email window. These icons typically include options for reply, forward, and more. The print icon is usually represented by a printer icon or the word “Print.”
When you locate the print icon, click on it to initiate the printing process. A print dialog box will appear, presenting you with various options and settings to customize your printout.
Please note that if you are using a mobile device, the location of the print icon may vary, but it is typically found in the menu or settings section of the Gmail app. Look for the three-dot menu icon or the options icon and select the “Print” option.
Now that you’ve successfully clicked on the print icon, let’s move on to the next step, where we will explore how to customize the print settings to ensure that your printed email meets your requirements.
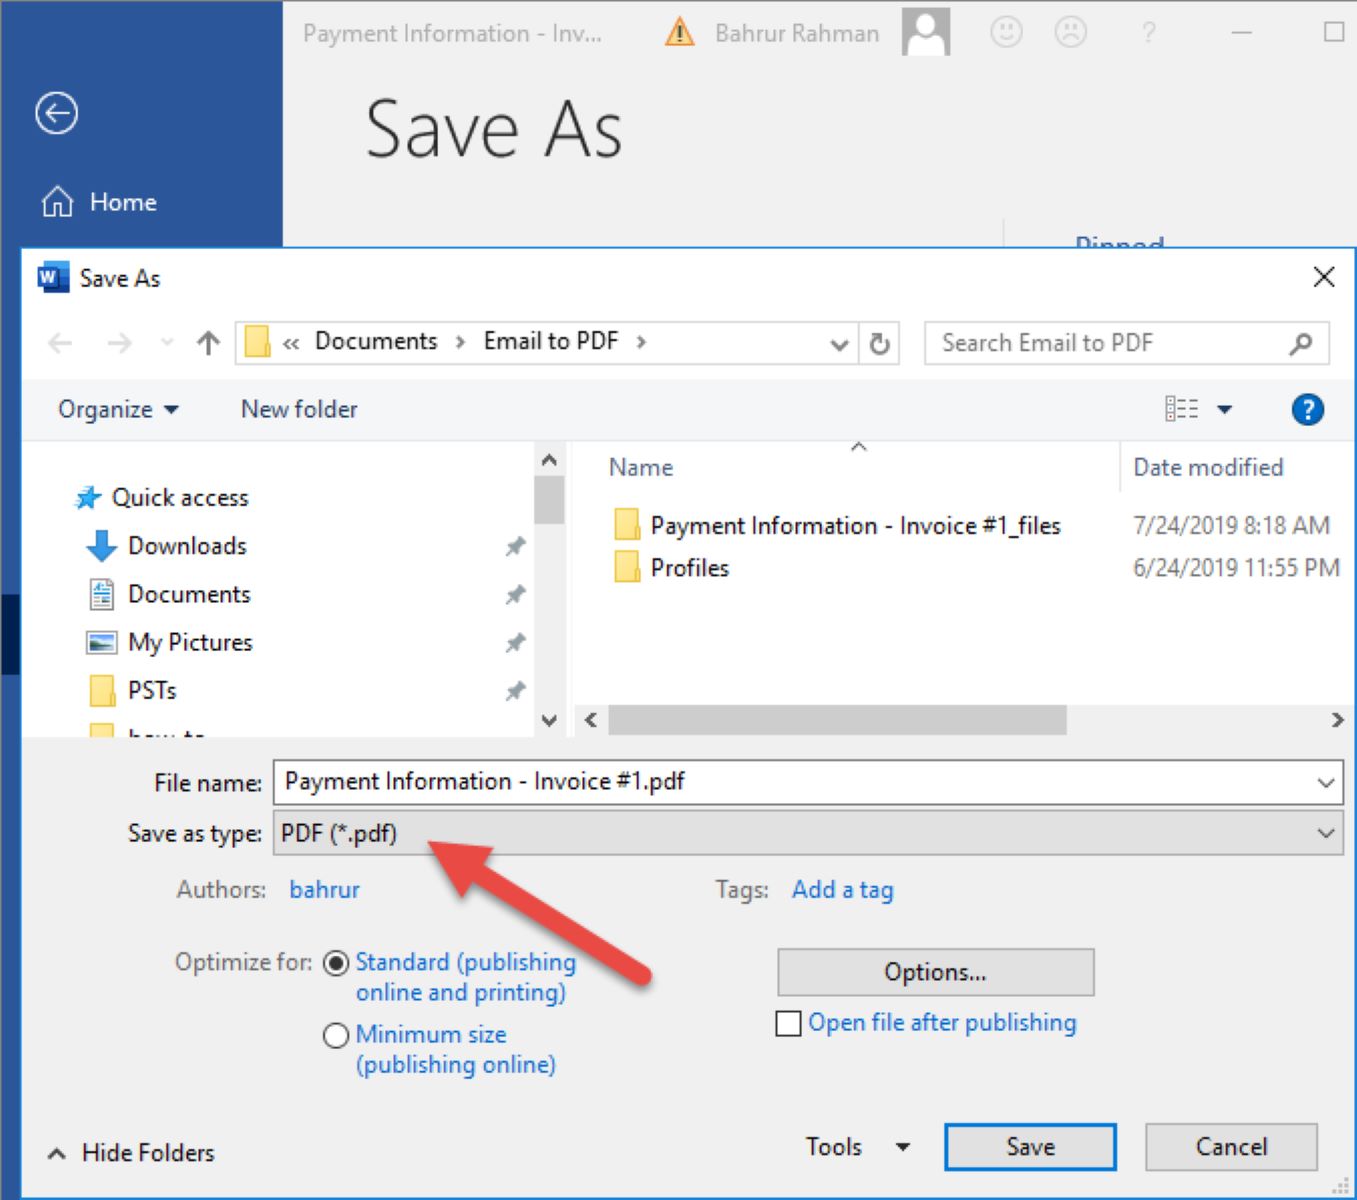
Step 4: Customize Print Settings (Optional)
After clicking on the print icon, a print dialog box will appear, giving you the option to customize the print settings according to your preferences. While these settings are optional, they allow you to tailor the printout to meet your specific needs.
Within the print dialog box, you’ll find a range of settings to choose from. These settings may include:
- Printer Selection: If you have multiple printers connected to your device, you can select the desired printer from the available options. Ensure that you have the correct printer selected before proceeding.
- Page Range: This setting allows you to specify the specific pages or range of pages you want to print from the email. You can choose to print the entire email, select specific pages, or enter a custom page range.
- Layout: The layout settings provide options for the orientation (portrait or landscape) and the number of copies you want to print.
- Paper Size: You can adjust the paper size to match the size of the paper you are using for printing. Common paper sizes include letter, legal, A4, and more.
- Margins: This setting allows you to adjust the margins of the printout. You can choose from predefined margin options or enter custom margin values.
- Headers and Footers: The headers and footers settings enable you to include or exclude headers and footers from your printout. You can choose to display the email subject, date, page numbers, or your own custom text.
- Color and Quality: Depending on your printer capabilities, you may have options to select color or grayscale printing and adjust the print quality.
Take your time to review and adjust these settings according to your requirements. Once you are satisfied with your selections, click on the “Print” button to proceed with printing the email.
Remember, the customization settings may vary depending on the device, operating system, and printer that you are using. If you are unsure about certain options or need further assistance, consult your printer’s user manual or refer to the manufacturer’s website for detailed instructions.
Now that you have customized the print settings (if desired), let’s move on to the final step, where we will select the printer and initiate the printing process.
Step 5: Select Printer and Print
Once you have customized the print settings (if desired), the next step is to select the printer and begin the printing process. In the print dialog box, you should see a dropdown menu or list that displays the available printers connected to your device.
To select a printer, click on the printer dropdown menu and choose the printer you want to use for the printout. Ensure that the selected printer is turned on and properly connected to your device. You may also want to check the printer settings, such as paper availability and ink levels, to ensure a smooth printing experience.
After selecting the printer, double-check the other settings and options in the print dialog box to verify that everything is set up correctly. Once you are satisfied with the settings, click the “Print” button to initiate the printing process.
Depending on the size and complexity of the email, it may take a few moments for the print job to complete. You can monitor the progress of the print job through the printer queue or status window on your device. Once the printing is complete, the hardcopy of the email will be delivered to the printer’s output tray.
Before considering the printing process complete, it is essential to ensure that the printout is of satisfactory quality and all the relevant information is legible. Take a moment to review the printed email and verify that the content, formatting, and attachments are accurately reproduced on paper.
If you are not satisfied with the printout or notice any issues, you may need to troubleshoot printer settings, check ink or toner levels, or consider reprinting the email with different settings. The exact steps for troubleshooting and resolving printing problems may vary depending on the printer model and manufacturer.
With the printout in your hands, you have successfully completed the process of printing an email on Gmail. Congratulations!
To recap, here are the five steps to print an email on Gmail:
- Open Gmail and sign in.
- Open the email you want to print.
- Click on the print icon.
- Customize print settings (optional).
- Select the printer and print.
Printing emails can be useful for various purposes, such as record-keeping, archiving important information, or simply having a hardcopy for convenience. Now that you have the knowledge, you can easily print any email you need within Gmail.
Conclusion
Printing an email on Gmail is a straightforward process that allows you to have a physical copy of important conversations, documents, or any other information you want to keep. By following the steps we’ve outlined, you can easily print your emails and have them readily accessible offline.
Gmail provides a user-friendly interface that makes it easy to navigate and perform various tasks, including printing. From opening Gmail and signing in to customizing print settings and selecting a printer, each step has been designed to ensure a seamless and efficient printing experience.
Remember to review the email before printing to ensure that all the relevant information is included and that the formatting remains intact. If necessary, you can customize the print settings to tailor the printout to your specific needs, such as selecting certain pages, adjusting margins, or including headers and footers.
Additionally, it’s important to ensure that your printer is properly connected and that you have sufficient paper and ink or toner levels for the print job. Taking these precautions will help you avoid any interruptions or issues during the printing process.
Printing emails can be beneficial for various purposes, such as creating hardcopy backups, archiving important communications, or having physical copies for reference. It offers convenience and accessibility, allowing you to access information even when you don’t have internet access or digital devices at hand.
We hope this step-by-step guide has been helpful in showing you how to print an email on Gmail. Whether you’re a professional who needs to print work-related correspondence or an individual who wants to keep a record of important personal emails, Gmail provides a reliable and efficient platform for all your email printing needs.
So, next time you come across an email that you need to have in print, simply follow the steps outlined in this guide, and you’ll be able to create a hardcopy of your email in no time.
Happy printing!