Managing and contacting clients can be a difficult task for modern businesses. It’s not exactly practical to send emails one by one to individual email addresses. Moreover, the larger the audience, the harder it is to reach and manage each individual. That is why learning how to use Mailchimp is one of the most important skills you can master. Mailchimp is one of the best tools to help businesses get started with email marketing. Moreover, it’s fairly simple to use and easy to understand. Without further ado, here’s how to use Mailchimp for complete beginners.
What Is Mailchimp?
If you’re new to the world of email marketing, then you might not even know what Mailchimp is. Simply put, it’s an all-in-one platform for marketing that enables businesses to manage and communicate with their clients. You can reach customers and other interested parties through emails, campaigns, and increase effectiveness through Mailchimp’s data analysis tools.
However, Mailchimp isn’t a service limited to online businesses and shops. In fact, some content creators also learn how to use Mailchimp for newsletters that they can send to subscribers. As long as you need a marketing tool for emails, ads, and others, Mailchimp is a great tool to use.
Moreover, what’s great about Mailchimp is that it isn’t some third-party software that you have to download on your computer. It’s a purely web-based application so you can simply use a web browser to run it. However, you need to allow cookies, pop-ups, and JavaScript on your browser before you get started.
How to Use Mailchimp
Learning how to use Mailchimp is easy. There are very specific steps you need to take that is similar to setting up an online account. Just follow the guide to begin your first email marketing campaign.
Step 1: Account Setup
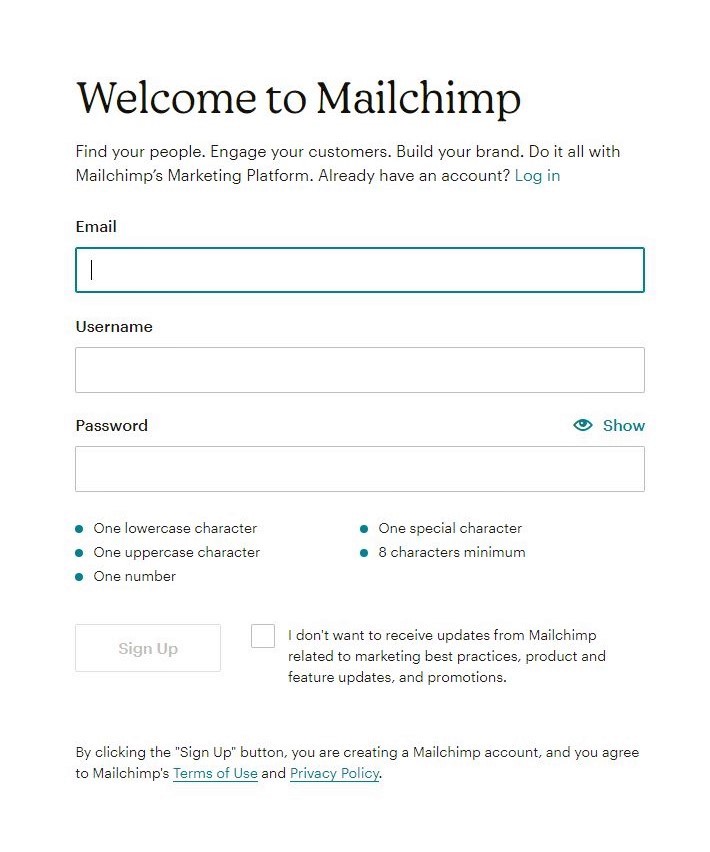
Like any other web-based platform, the first thing you need to do is to set up an account. Just go to the Mailchimp website and click Get Started Today. Once you’re at the signup screen, Mailchimp will ask for your details. More specifically, you’ll need to enter your email address, username, and password.
Mailchimp will then send an activation link to your email address. Just head to your email’s inbox and click on the activation link from Mailchimp’s email. If the activation email isn’t there yet, take a few minutes to wait for it to land in your inbox. Make sure to check the Spam folder as well in case the email was redirected. Once you find the activation email, just click the activation button and click “I’m Not A Robot” to finish.
After activating your account, it’s time to navigate back to the website and log in. Just type in your username and password to get started. Mailchimp should walk you through a setup process to put things in motion. You’ll be able to create a profile, enter your website and physical address, and connect social media accounts.
In addition, Mailchimp will try to assist you with your marketing path through a quiz. This is just Mailchimp asking for more information to give you marketing suggestions further down the line.
Step 2: Audience Setup
After setting up your profile, it’s time to set up your audience. This step allows you to add and keep a record of your clients, customers, and other contacts for email marketing. Mailchimp will automatically generate your audience based on the setup details you inputted earlier. However, you can also modify the default information when necessary.
Keep in mind that Mailchimp prioritizes one audience when you set up your target market. However, you can also create another audience if you so desire, but the data won’t be shared across audiences. Moreover, if a subscriber fits in both audience categories, they’ll still count separately to each subscriber limit.
With that in mind, Mailchimp’s audience management is pretty handy for businesses. You can manage, organize, and separate your audience through the various tools provided.
How to Use Mailchimp to Import Contacts
If you already have a file of your audience, you can import the details into Mailchimp directly. All you need is a CSV file and use Mailchimp’s import audience feature. Just follow this format on your CSV file to make sure Mailchimp reads it correctly:
| Email Address | First Name | Last Name |
|---|---|---|
| johnsmith@email.com | John | Smith |
Note that you can also add other columns if you want to import more data about each client. Just check out Mailchimp’s format guidelines for more information.
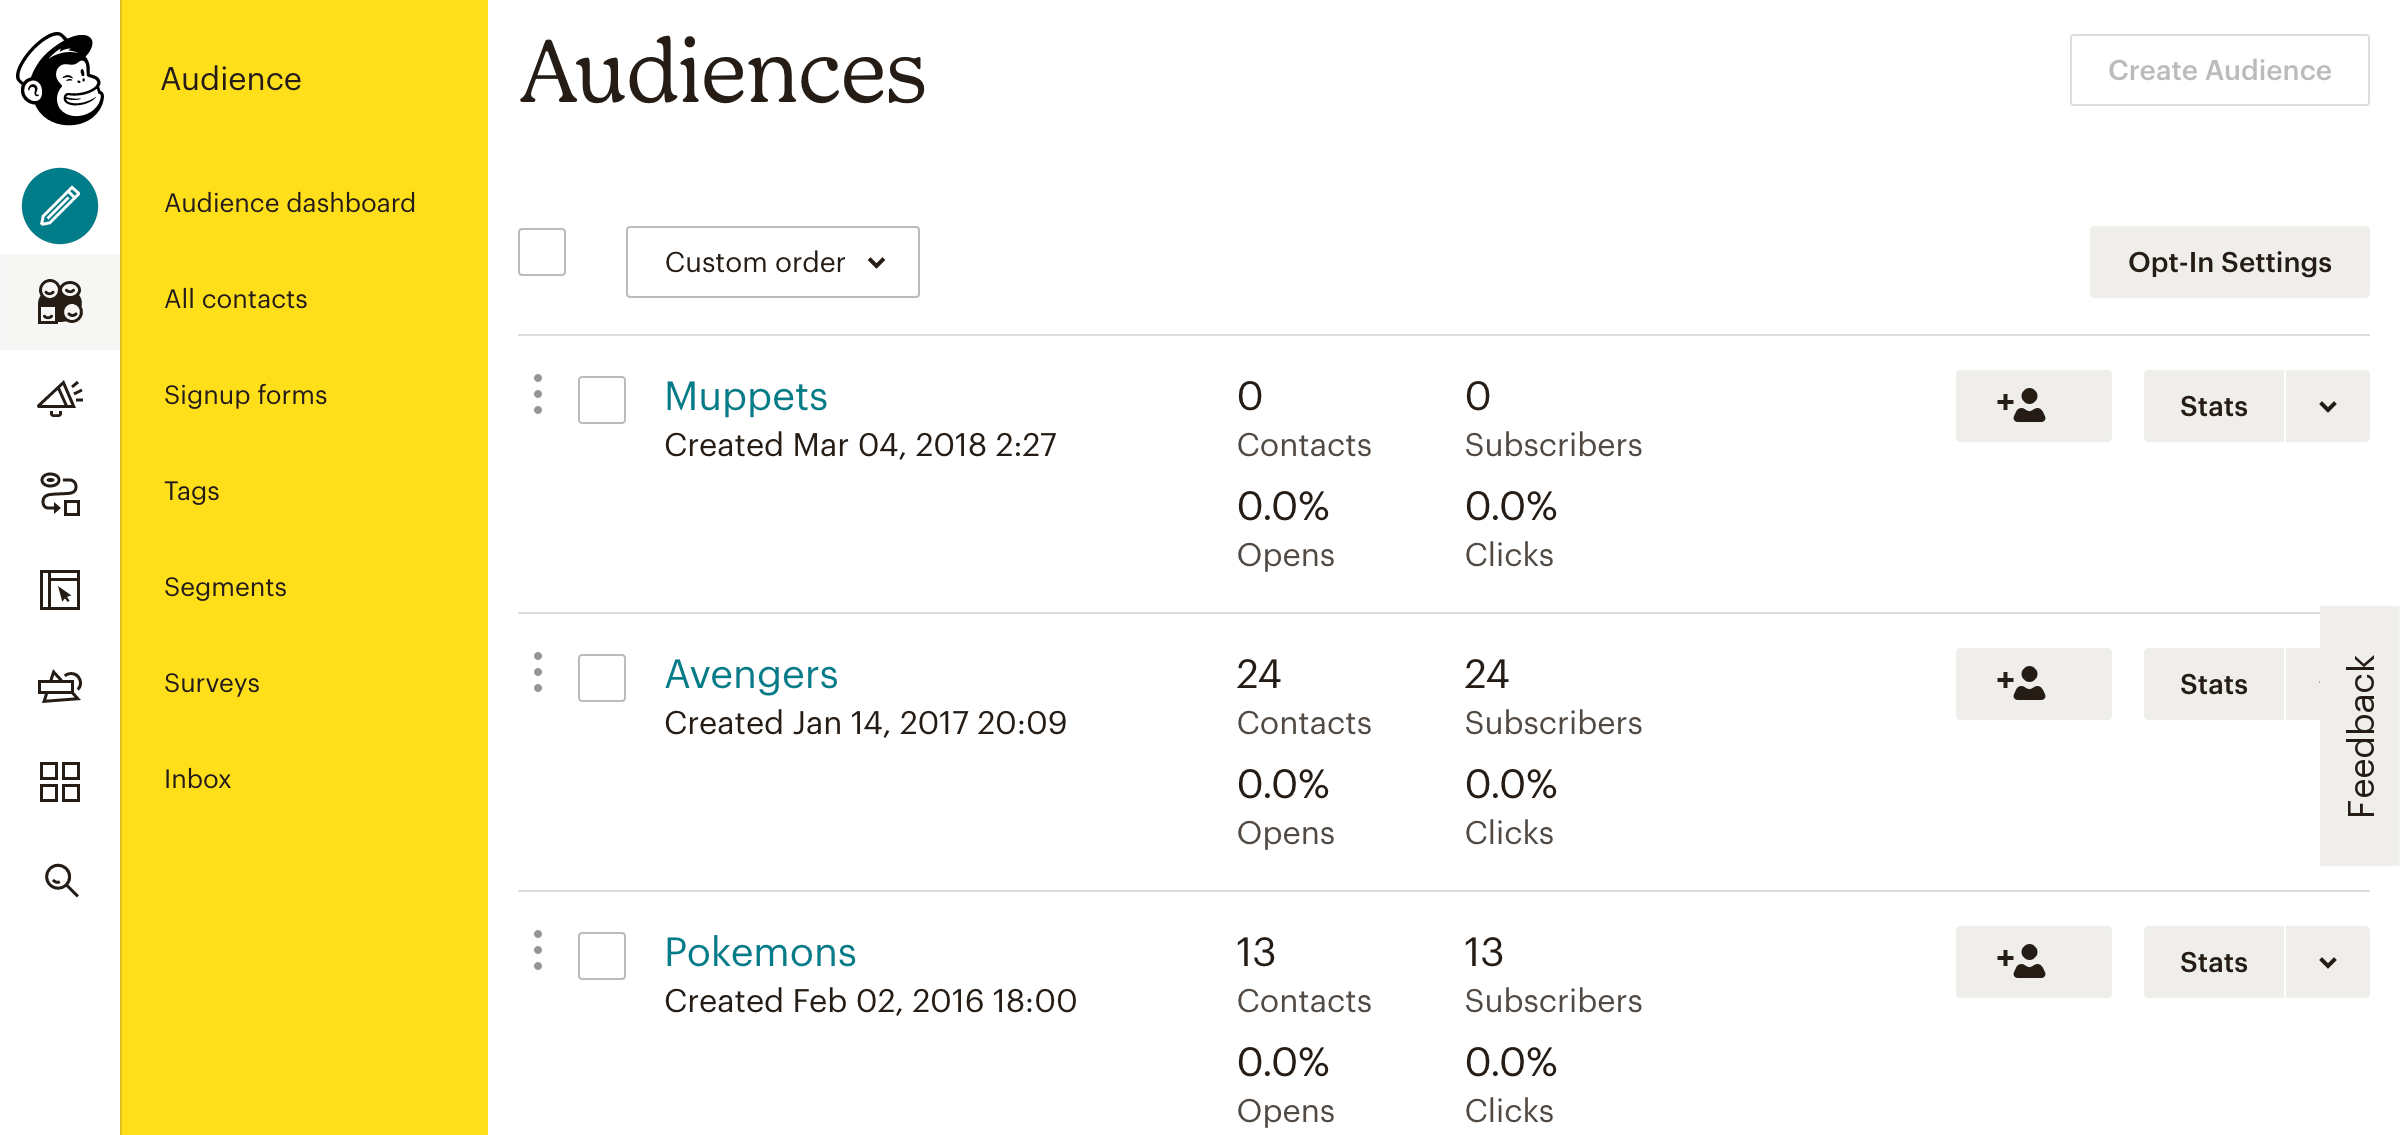
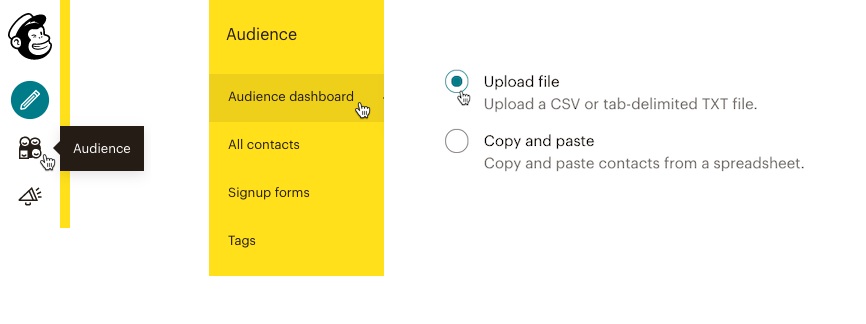
Once you’re done with the file, go to your account and click the Audience icon (icon with multiple smiley faces). Navigate to Audience dashboard > Current audience and choose the audience you want. Select Upload File and hit Continue to Upload. Then, just click the Browse link and search for your CSV file.
- Click Continue to Organize then confirm your audience through the Select an audience dropdown.

- Choose the status of your audience as well, whether Subscribed, Unsubscribed, Non-Subscribed, or Cleaned. You can also choose the groups your audience is in if you already have groups.
- Otherwise, click Continue to Tag to assign contact tags and click Continue to Match afterward.
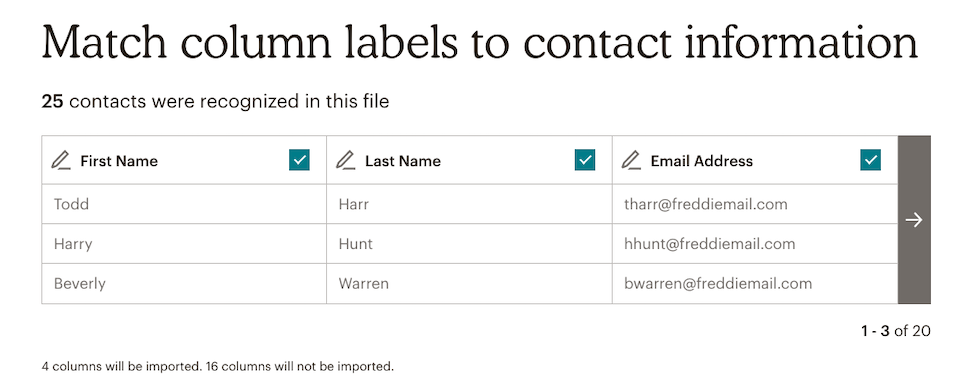
- In the next area, match your import file’s columns to Mailchimp’s fields. Some columns should automatically match while others may not be. After everything is settled, click Finalize Import > Complete Import.


Step 3: Sign-Up Form
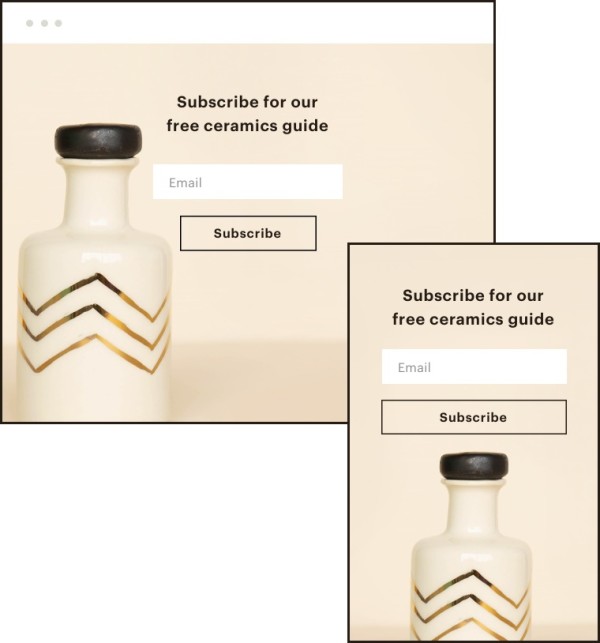
On the other hand, some businesses might not have a contacts list on hand to import to Mailchimp. If that’s the case, then you don’t need to worry because you can create a subscriber sign-up form. Mailchimp will generate this automatically and you can use it on your Facebook page later on. To do this, just follow these steps:
- Go to the Audience icon (icon with multiple smiley faces).
- Click Audience dashboard.
- Select the Current audience dropdown and choose your audience if you have multiple audiences.
- Choose Signup forms from the Manage Audience dropdown.
- Select Form builder.
- Hit the Forms and response emails dropdown menu and choose the form you want.
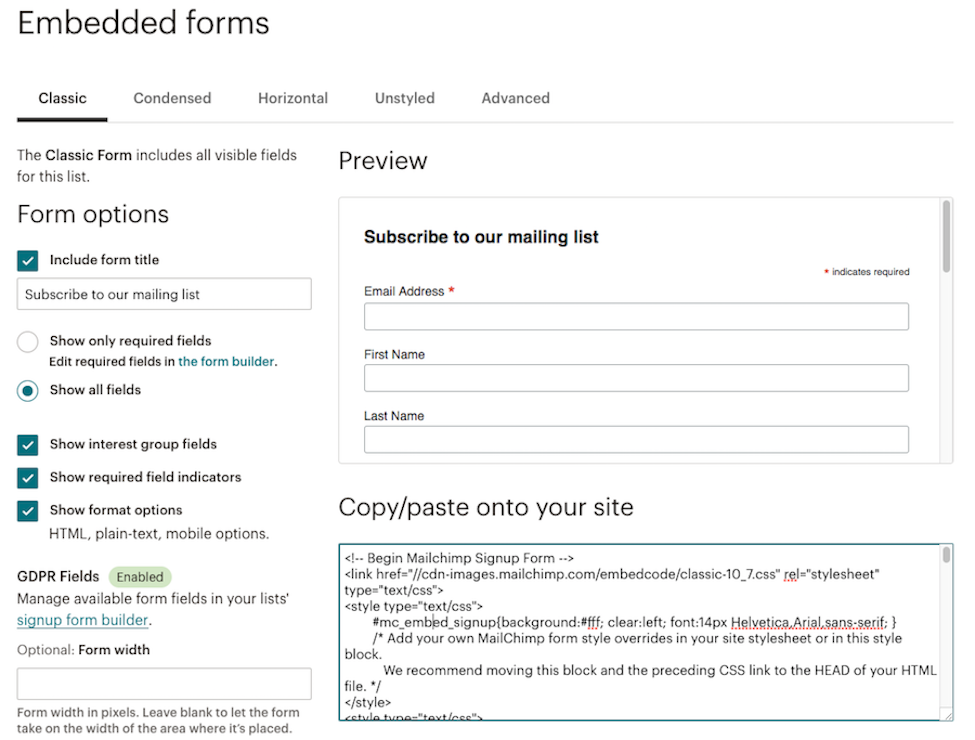
Photo by Mailchimp - Select the Design it tab.
Photo by Mailchimp - Review the various customization options through the various tabs (Page, Body, Forms, and Referral).
- Here, you can create and customize menus and add the styles, colors, and fields that you want.
- Click Save & Close after you finish.

Step 4: Campaign Creation
After getting your contacts ready, it’s time to create your first campaign. If you’re not sure what a campaign is, it’s merely a message that you share through ads and emails. Usually, Mailchimp users start by using an email campaign. To do this, follow these instructions:

- Click the Create icon (pencil icon).
- Select Email > Regular > Begin.
Afterward, Mailchimp will navigate you to the campaign builder. Here, you can choose from various settings and designs to create your first campaign. You can add your recipients in the To section and the “from” name and email in the From section. Like a regular email, you can add the subject under the Subject section and design it under Content.
Step 5: Campaign Reports

After clicking Send on your first campaign, it’s time to track audience engagement. This will help inform you of what your audience responds to and what they don’t like. To view this, login back to Mailchimp after sending your first email campaign.
Within the website, you’ll see how many of your contacts clicked, opened, or unsubscribed from your campaign. Just view these details on the Dashboard and click Reports for more specific details. You can also download the report or share and print them, depending on your needs.
Mailchimp also has open- and click-tracking data to tell you how many subscribers clicked or opened your campaign. It should also inform you of the links they clicked, their geolocation, and any other relevant information. Moreover, Mailchimp also allows you to integrate your Google Analytics account for more detailed reports.
Step 6: Next Steps
Lastly, it’s time to create the next steps after sending your first email campaign. Mailchimp has some nifty basic tools and features to improve your online marketing. These include tools for automated campaigns, ads, postcards, landing pages, apps, and even APIs for developers. We won’t get into the details of each tool, but here’s a rough idea of what they can do.
Firstly, automation tools allow users to create automated campaigns or responses to send to their audience. These tools can also send targeted emails or messages when specific conditions like dates, activities, or other events are met.
Secondly, ads can allow marketers to use Google or Facebook audiences to reach more customers from similar backgrounds. Of course, you have to buy these ads through Mailchimp, but there won’t be additional fees to account for.
Thirdly, postcards are printed campaigns that allow you to provide something more tangible to your contacts. These assist and reinforce the ideas you send through email or other campaigns and ads and diversify your marketing channels.
Fourthly, creating landing pages allows marketers to expand their audience and promote their services and products better. Moreover, potential customers can even share those landing pages to increase traffic. They’re best used for short-term marketing goals, like events or promotions.
Fifthly, Mailchimp has a mobile app for iOS and Android that can help you easily manage your account. If you don’t have access to your computer, you can simply use these apps to manage your contacts. Moreover, you can also use them to view campaigns, reports, activities, and other information.
Lastly, developers can use Mailchimp’s API 3.0 to create more advanced integration with different applications. This allows for more customization and diverse utility for users who are more familiar with advanced API development.
How to Use Mailchimp With WordPress

Mailchimp is a handy tool that you can integrate with many third-party platforms, one of which being WordPress. To do this, all you’ll need is to set up both systems and install a specific WordPress-Mailchimp plugin. Of course, you could integrate the platforms without using third-party tools. However, this plugin makes the process a lot easier, especially for beginners.
Just head to the website linked above and then install and activate it. Go to your WordPress Dashboard and click the Mailchimp Settings option. You can connect your Mailchimp account here using an API key.
To find your API key, just go to Mailchimp for WP > WordPress > Mailchimp and find the API Key field. Afterward, click on the link that says “Get your API key here.” You will then be redirected to Mailchimp’s website where you can select Create a Key. Select it and then copy the code they give you.

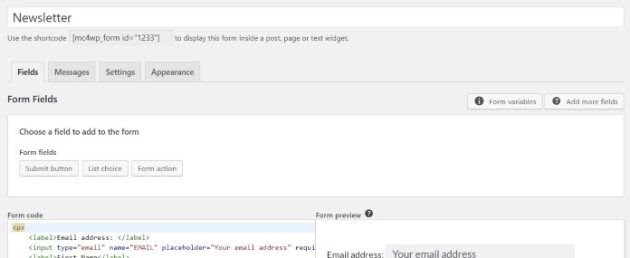
Afterward, head back to WordPress and paste the code you received in the API Key field. Then, click Save Changes. From then on, you’ll be able to access your forms, lists, and other integrations within your WordPress dashboard. You should also be able to make new forms if you head to Mailchimp for WP > Form.
How to Use Mailchimp With Gmail
One of the best things about Mailchimp is how flexible it is when it comes to integrating with other clients. In fact, you can also do so with Gmail and use your Mailchimp templates with any email you create.
This allows you to make more flexible content while keeping the branding consistent across all your emails. It’s great for sales or support emails or if you just want to broadcast internal announcements. Without further ado, here’s how to use Mailchimp templates with Gmail:
Step 1: Install Gmail Email Templates
The first step is to download a free online extension from the Chrome Web store called Gmail Email Templates.

Step 2: Import Mailchimp Template
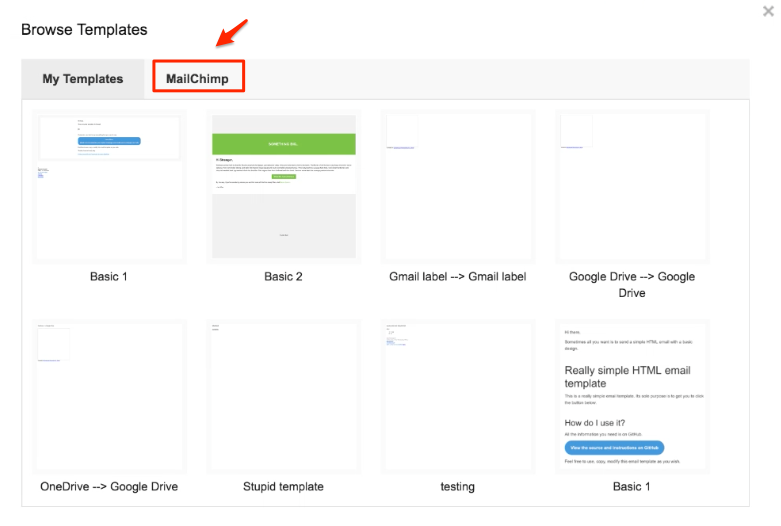
Afterward, open your Gmail account on your browser and create a new blank email. Within this new window, click on the More menu (grid icon). Select the Insert Template icon (third icon that looks like a paper) and navigate to the Mailchimp tab.
Afterward, you should find all your Mailchimp templates automatically imported. Just select the template you want to write your email.
Conclusion: How to Use Mailchimp
Learning how to use Mailchimp is pretty easy. All you need to do is create an account, set up your audience, and start using Mailchimp’s various marketing tools. With it, you can create newsletters, email campaigns, ads, and more. You can even use other tools that connect Mailchimp to third-party websites through plugins and APIs. It’s one of the simplest tools to use for businesses that need an easy way to do online marketing.