Introduction
Welcome to this guide on how to save a Gmail email as a PDF. With the increasing use of emails for important communication and document sharing, it’s crucial to know how to save these emails as PDF files for easy reference and archiving. By converting emails to PDF format, you can securely store them on your device or in cloud storage, ensuring that they remain accessible and unaltered over time.
Gmail is one of the most popular email platforms, utilized by individuals and businesses worldwide. While Gmail provides various options for organizing and searching emails, saving them as PDFs allows for convenient offline access and sharing with others who may not have a Gmail account. Whether you want to save an important conversation thread, an invoice, or a confirmation email, this step-by-step guide will walk you through the process with ease.
In the following sections, we will cover the necessary steps to save a Gmail email as a PDF. Starting from opening the email to customizing the page settings, you’ll learn how to navigate the Gmail interface and make use of key features to achieve your goal. By the end of this guide, you’ll be equipped with the knowledge to quickly save your Gmail emails as PDFs whenever needed.
Step 1: Open the Gmail email
The first step in saving a Gmail email as a PDF is to open the email that you want to convert. To do this, log in to your Gmail account using your preferred web browser and navigate to the inbox.
Once you’re in your inbox, scroll or search for the email you wish to save as a PDF. Gmail allows you to organize your emails using labels, categories, and search filters, making it easier to find specific messages. If you know the sender’s name, subject, or a keyword from the email, you can use the Gmail search bar at the top of the page to locate the email quickly.
When you have located the email, click on it to open it in a new tab or window. Gmail will display the email with its content, including any attachments that may be present. Take a moment to review the email and ensure it is the correct one you want to save as a PDF.
If the email has long threads or includes previous replies, Gmail will group them together for easier navigation. You can expand or collapse these threads by clicking on the small arrow next to the sender’s name or subject line. This feature is particularly useful when dealing with lengthy email conversations.
Once you have opened the Gmail email in its entirety and verified that it’s the correct one, you are ready to proceed to the next step where we will discuss how to access the print option in Gmail.
Step 2: Click on the print button
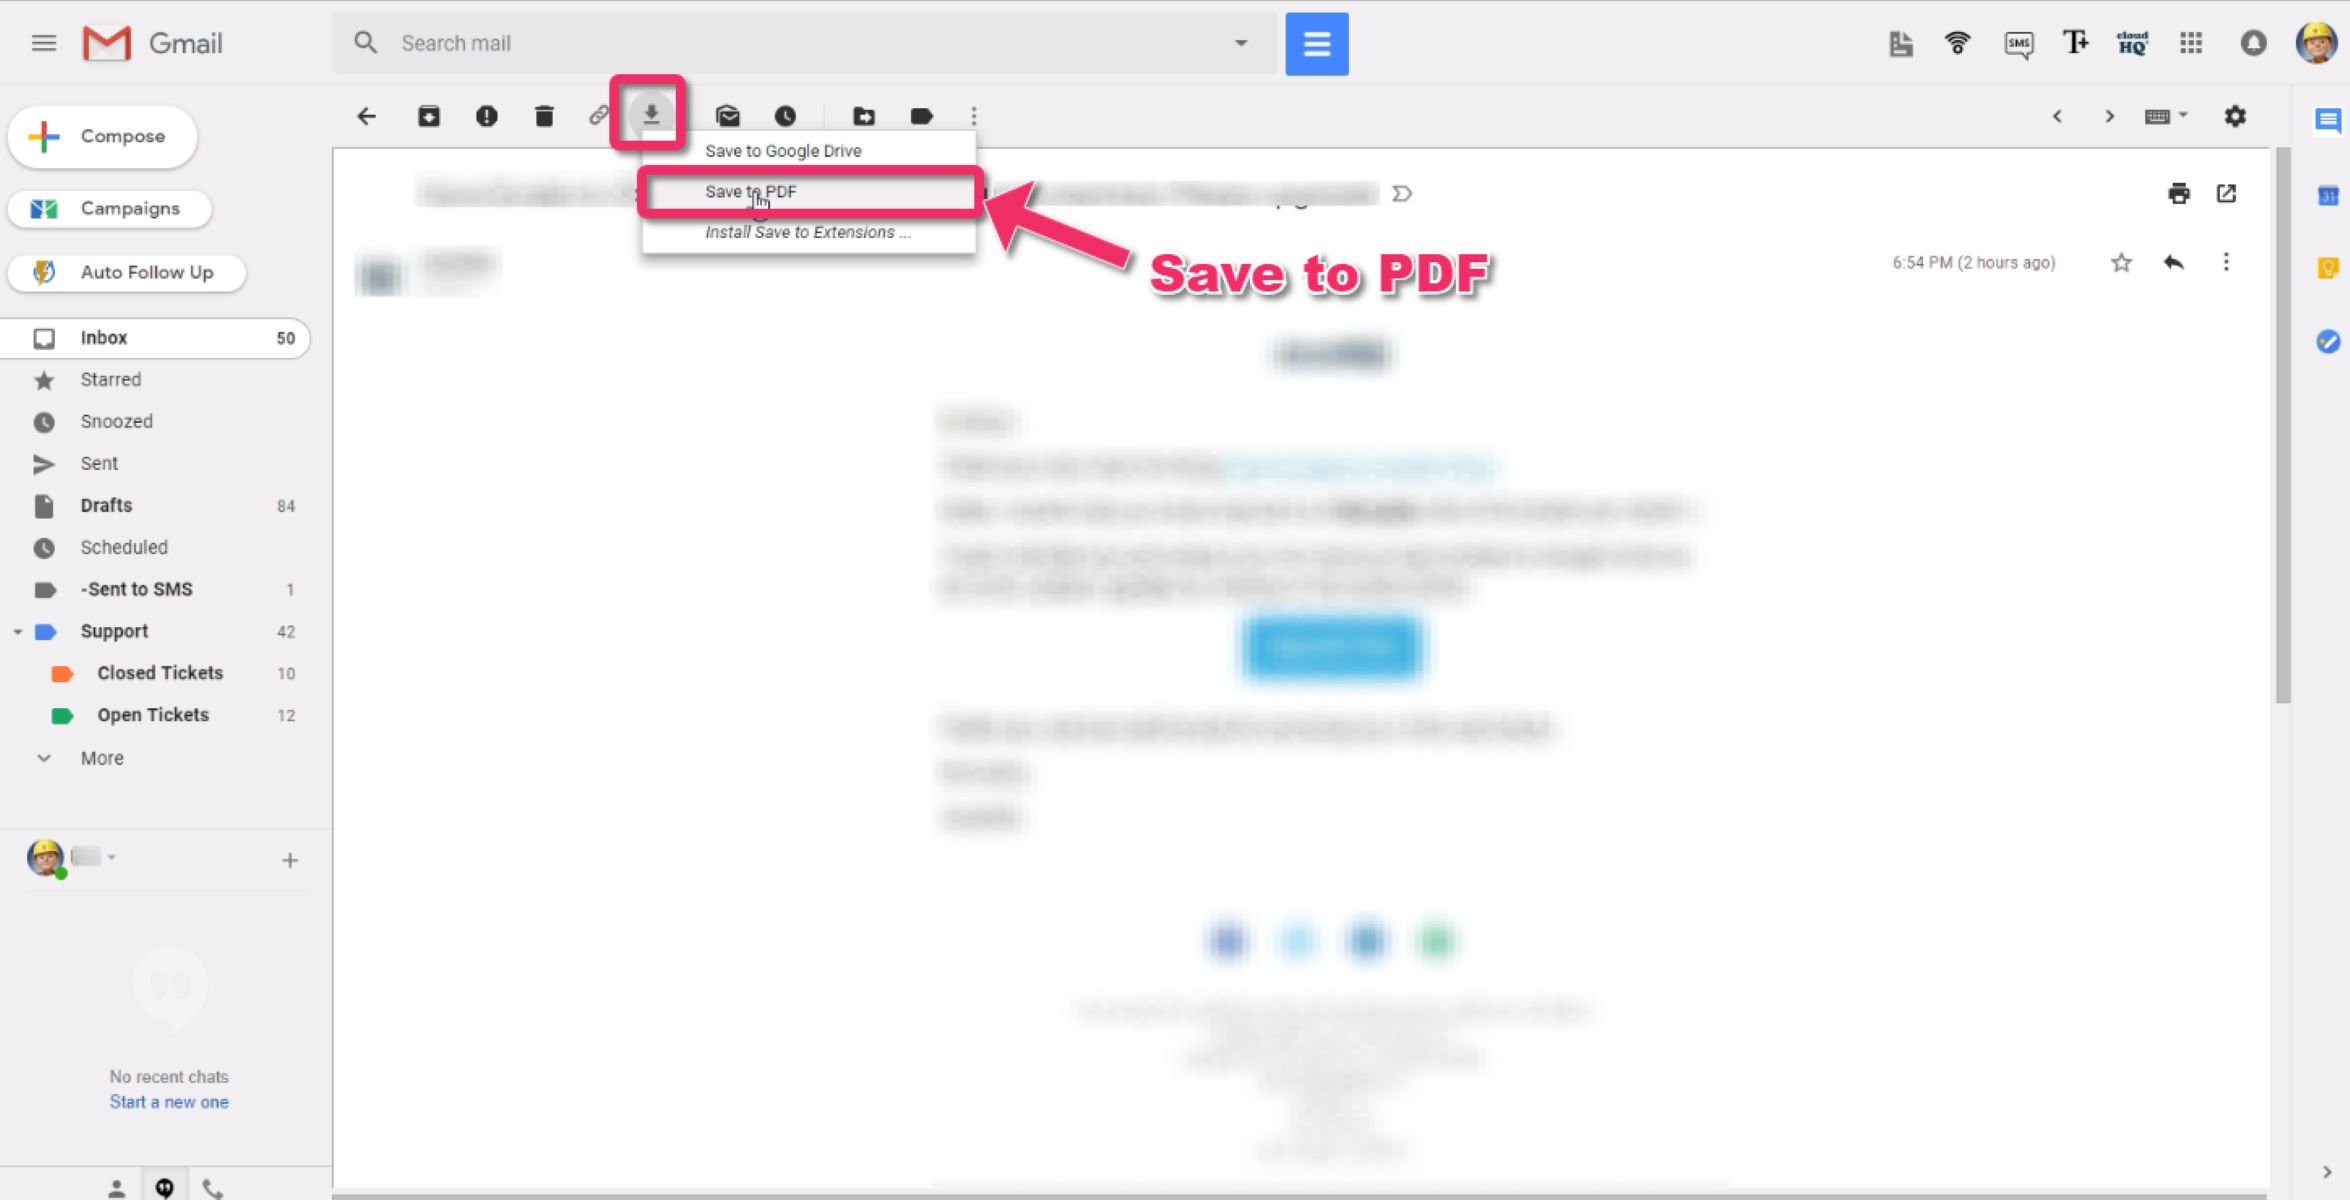
After opening the Gmail email you wish to save as a PDF, the next step is to locate and click on the print button. Gmail provides a simple and convenient way to access the print options for any email you have opened.
To find the print button, look for the printer icon that usually appears in the top-right corner of the email window. It is located within the Gmail toolbar, along with other commonly used functions such as reply, forward, and delete.
Clicking on the print button will bring up a print preview or a dialog box showing the print settings. This preview allows you to see how the email will be formatted when printed or saved as a PDF. The preview window may vary slightly depending on your web browser and operating system.
Take a moment to review the print preview and ensure that the email appears as desired. You can use the zoom option within the preview to adjust the display size if needed. Keep in mind that the PDF you save will resemble the content shown in the print preview, so it’s important to check the formatting, images, and any other elements that are crucial to the email’s appearance.
It’s worth mentioning that Gmail automatically removes advertisements, signatures, and other non-essential elements from the print version of the email to provide a cleaner and more focused output. This ensures that the saved PDF contains only the necessary content.
Once you are satisfied with the print preview and are ready to proceed, continue to the next step where we will discuss how to change the destination to save the email as a PDF.
Step 3: Change the destination to save as PDF
Once you have accessed the print settings for the Gmail email, the next step is to change the destination to save the email as a PDF instead of printing it on paper.
In the print preview or dialog box, locate the “Destination” section. It is typically found in the same window where you selected the printer or print settings. Depending on your web browser and operating system, the options in this section may vary.
In most cases, you will see a dropdown menu under the “Destination” section that allows you to choose the output format. Look for an option with the label “Save as PDF” or similar wording. Selecting this option will change the destination from a physical printer to a digital file format.
Some browsers may have a separate “Print to PDF” option in the list of printers, while others may require you to choose the “Save as PDF” option and then proceed to the next step. Regardless of the specific wording or method, the objective is to designate the PDF format as the destination for saving the Gmail email.
Once you have selected the appropriate PDF option, you may also have the opportunity to further customize the print settings. This includes adjusting the paper size, orientation, margins, and other formatting options. Customize these settings based on your preferences or requirements, keeping in mind that they may affect the appearance of the saved PDF.
After configuring the destination and print settings, you’re ready to move on to the next step where we will discuss how to customize the page settings before saving the Gmail email as a PDF.
Step 4: Customize the page settings
Once you have designated the PDF format as the destination for saving the Gmail email, the next step is to customize the page settings according to your preferences. This allows you to control how the content is displayed and organized in the saved PDF.
Depending on your web browser and operating system, you may have different options available for customizing the page settings. Look for a section or tab within the print settings that is dedicated to adjusting the page layout, size, margins, and other related parameters.
Here are some common page settings you may encounter:
- Page orientation: Choose between portrait (vertical) or landscape (horizontal) orientation for the PDF. Consider the content of the email and how it will be best presented in the saved PDF.
- Page size: Select the appropriate paper size for the PDF, such as letter, legal, A4, or custom dimensions. This ensures that the content is displayed within the desired dimensions in the saved PDF.
- Margins: Adjust the margins to control the spacing between the content and the edges of the page. You can choose predefined margin options or set custom margin values.
- Headers and footers: Determine whether to include headers and footers in the PDF, and if so, what information should be displayed. This can include the date, page number, email subject, and other details.
- Scale: Adjust the scale to resize the content of the email. You can choose to fit the content to the page width, height, or a specific percentage.
Take some time to explore and configure the page settings that best suit your needs. Consider factors such as readability, aesthetics, and space utilization when making these choices. Remember that the settings you select will determine how the email appears in the saved PDF.
Once you are satisfied with the customized page settings, proceed to the next step where we will discuss how to save the Gmail email as a PDF.
Step 5: Save the email as a PDF
After customizing the page settings to your liking, you are now ready to save the Gmail email as a PDF. This final step will transform the email into a digital file that can be accessed and shared easily.
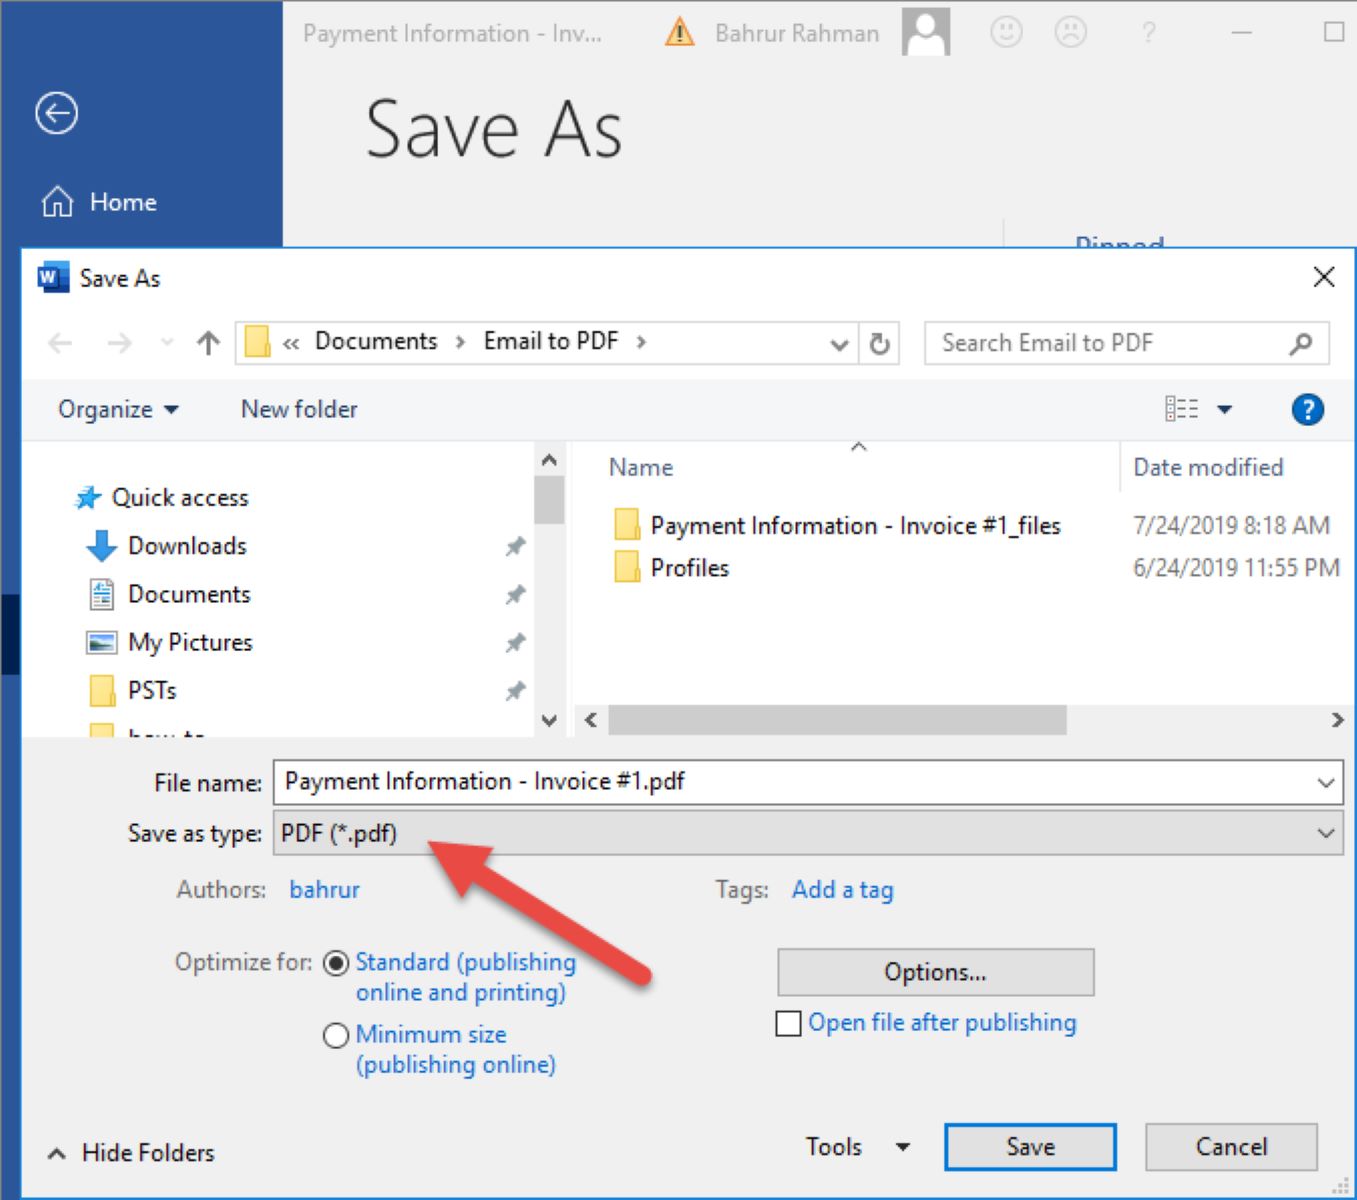
In the print settings window, look for a button or option with the label “Save” or “Save as PDF.” Click on this button to initiate the saving process.
A file dialog box will appear, prompting you to choose a location on your computer or cloud storage where you want to save the PDF. Navigate to the desired folder or directory and provide a name for the PDF file.
Remember to choose a descriptive and meaningful name that will help you easily identify the email when you need to access it in the future. Consider including relevant keywords or information such as sender’s name, subject, or date to make it easier to locate.
Once you have selected the location and named the file, click on the “Save” or “OK” button to initiate the saving process. The Gmail email will now be converted into a PDF and saved in the designated location.
Depending on your web browser and operating system, you may receive a notification or confirmation message indicating that the email has been successfully saved as a PDF. This serves as an assurance that the process was completed without any issues.
After saving the email as a PDF, you can now access the digital file from the designated location. You can open it using any PDF reader or viewer software, and you will be able to view and share the email’s content exactly as it appeared in the print preview.
Congratulations! You have successfully saved a Gmail email as a PDF. You can now enjoy the benefits of easy access, offline viewing, and secure archiving of your important communication and documents.
Remember to organize your saved PDFs in a logical and structured manner to maintain an efficient and easily navigable digital archive.
Conclusion
Saving a Gmail email as a PDF is a valuable skill that allows you to have offline access to important communications and documents. By following the steps outlined in this guide, you can easily convert Gmail emails into PDF files for convenient storage and sharing.
We started by opening the Gmail email of interest, ensuring that it was the correct one we wanted to save as a PDF. Then, we located the print button within Gmail and accessed the print settings. We changed the destination to save the email as a PDF instead of printing it on paper.
Next, we customized the page settings according to our preferences, adjusting the orientation, size, margins, and other parameters to achieve the desired layout. Once satisfied with the settings, we saved the email as a PDF, giving it a meaningful name and choosing a suitable location on our computer or cloud storage.
By saving Gmail emails as PDFs, we can benefit from offline accessibility, secure archiving, and easy sharing with others who may not have a Gmail account. This can be particularly useful for important conversations, invoices, confirmations, and other types of essential information.
Remember to organize your saved PDFs in a thoughtful manner, employing a logical folder structure and using descriptive names to make retrieval easier in the future. With a well-organized digital archive, you can quickly locate and retrieve specific Gmail emails as needed.
We hope this guide has provided you with the knowledge and confidence to save Gmail emails as PDFs effectively. With this skill in hand, you can enhance your productivity, maintain better records, and have peace of mind knowing that your important Gmail communications are easily accessible and safeguarded for the long term.