Introduction
Google Photos is one of the most popular cloud-based photo storage services, offering users a convenient way to store and organize their digital photo collections. With its powerful features, including the ability to create and manage albums, Google Photos makes it easy to organize your photos into meaningful collections.
However, there may come a time when you realize that you have multiple albums with overlapping content or similar themes. In such cases, merging albums can help you streamline your photo organization and eliminate duplicates. This process combines the content of multiple albums into a single album, making it easier to access and manage your photos.
In this article, we will guide you through the steps to merge albums in Google Photos. Whether you want to merge similar vacation albums, combine family event albums, or create a centralized album for specific subjects, this step-by-step tutorial will simplify the process for you.
By merging albums in Google Photos, you can save time searching for photos across multiple albums, create a more cohesive photo collection, and declutter your album list. Let’s dive into the details and learn how to merge albums in Google Photos.
Why Merge Albums in Google Photos?
Merging albums in Google Photos offers several benefits that can greatly enhance your photo organization and management experience. Here are some compelling reasons why you should consider merging albums:
- Eliminate duplicate content: When you have multiple albums with similar or overlapping content, it can be cumbersome to navigate through them. By merging these albums, you can consolidate duplicates and have all the photos in one place, saving valuable storage space and simplifying your photo library.
- Create a cohesive photo collection: Merging albums allows you to create a unified and cohesive collection of photos. Instead of having separate albums for similar events or subjects, merging them brings all the related photos together, making it easier to browse and enjoy your memories.
- Simplify photo organization: Having multiple albums that cover similar topics can lead to confusion and make it difficult to locate specific photos. By merging these albums, you can streamline your organization process and reduce clutter, making it more efficient to find and organize your photos.
- Enhance accessibility: When you merge albums, you consolidate the photos into a single album, making it more convenient to access and view your pictures. This can be especially helpful when sharing your photos with others, as you only need to share one album instead of multiple ones.
- Improve searchability: Merging albums can improve the searchability of your photos. Instead of having to search through multiple albums, you can search within a single merged album to find the desired photo, saving time and effort.
By considering these advantages, it becomes clear that merging albums in Google Photos can greatly enhance your photo management and organization. It simplifies the process of finding and enjoying your photos, while also freeing up storage space and reducing unnecessary duplicates.
Step 1: Open Google Photos
The first step to merging albums in Google Photos is to open the Google Photos app or access the Google Photos website on your device. You can do this by launching the app on your mobile device or opening your preferred web browser and navigating to photos.google.com.
If you’re using a mobile device, such as an Android smartphone or an iPhone, you can easily find the Google Photos app in your app drawer or home screen. Tap on the app icon to launch it.
If you prefer to use the Google Photos website on your computer, open your web browser and type “photos.google.com” in the address bar. Press Enter, and the Google Photos website will load.
Make sure you’re signed in to your Google account before proceeding. If you’re not already signed in, enter your Google account credentials to log in.
Once you’ve successfully opened Google Photos and signed in, you’ll be ready to proceed with the next step of merging your albums.
Step 2: Select Albums
After you have opened Google Photos, the next step is to select the albums that you want to merge. To do this, follow the instructions below:
- On the Google Photos app, tap on the “Albums” tab located at the bottom of the screen. If you’re using the Google Photos website, click on the “Albums” icon on the left side of the screen.
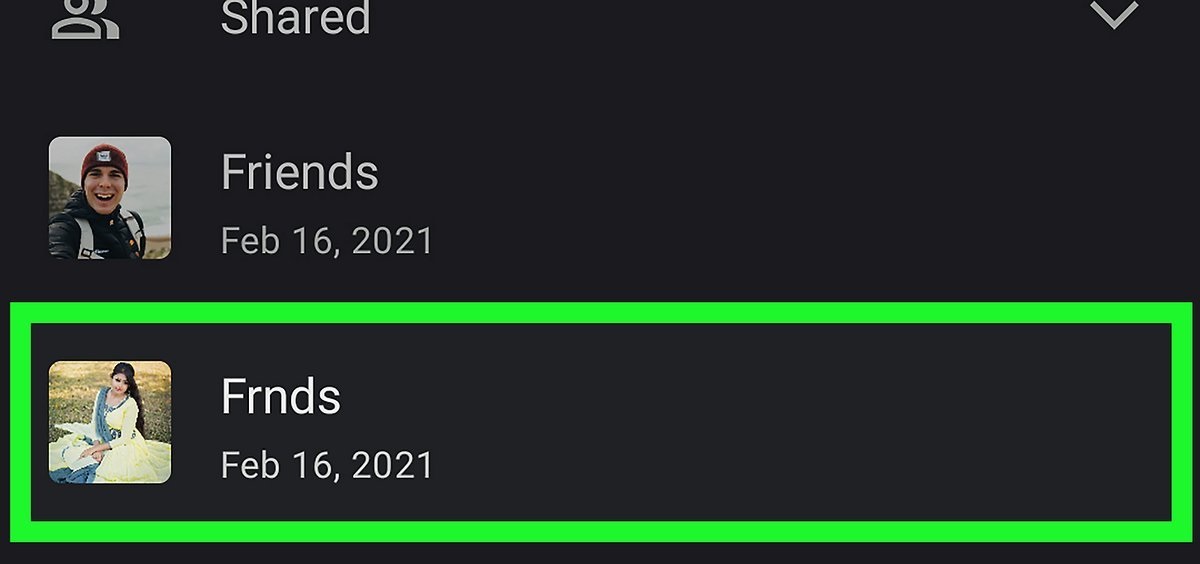
- Scroll through the list of albums and identify the ones that you want to merge. You can select multiple albums by tapping on the album cover or clicking on the checkbox next to each album name.
- If you have a large number of albums and it’s difficult to locate the specific ones you want to merge, you can use the search bar at the top of the screen to search for album names or keywords associated with the albums.
Take your time to review your albums and ensure that you’ve selected all the albums you want to merge. Double-check to make sure you haven’t missed any albums that should be included in the merge. Once you are confident that you have selected the correct albums, proceed to the next step to merge them together.
Step 3: Choose the Albums to Merge
With the albums selected in the previous step, it’s now time to choose which albums you want to merge. Follow these steps to continue the merging process:
- Once you have selected the albums, look for the three-dot menu icon (⋮) located at the top-right corner of the screen. On the Google Photos app, you’ll find it in the album view. On the Google Photos website, you’ll find it next to the album names.
- Click on the three-dot menu icon to open a dropdown menu of options.
- In the dropdown menu, select the option labeled “Merge albums” or something similar. This will initiate the album merging process.
- A confirmation prompt may appear to ensure that you want to proceed with merging the selected albums. Read the prompt carefully and confirm your decision to continue.
By following these steps, you will successfully choose the albums that you want to merge together. Make sure to review the selected albums one last time to verify that you’ve chosen the correct ones. Once you’re confident in your selection, move on to the next step to complete the album merging process.
Step 4: Merge Selected Albums
Once you have chosen the albums you want to merge in Google Photos, the next step is to actually merge them together. Follow these steps to complete the merging process:
- After confirming your selection, Google Photos will begin merging the selected albums. The time it takes to merge the albums may vary depending on the number of photos in each album and the speed of your internet connection.
- During the merging process, Google Photos will combine the photos from the selected albums into a single, unified album. The original albums will still exist but will no longer have their individual contents.
- While the albums are being merged, you can continue to navigate within Google Photos or perform other tasks. It’s important to avoid manually rearranging or editing the albums until the merging process is complete to prevent any loss of data.
- You may see a progress indicator or a message indicating that the merging is in progress. Once the merging process is done, you’ll receive a notification or see a confirmation message.
By following these steps, you will successfully merge the selected albums in Google Photos. The photos from these albums will be combined into one cohesive album, making it easier for you to manage and enjoy your photo collection. Now, let’s move on to the next step to finalize the merging process.
Step 5: Confirm the Merge
After the merging process is complete in Google Photos, it’s important to review and confirm the merge to ensure that the desired albums have been successfully combined. Here’s what you need to do:
- Once the merging process is finished, navigate to the albums section of Google Photos and look for the newly merged album. It should have a name that reflects the content of the merged albums.
- Open the merged album by clicking on it or tapping on its cover photo.
- Take a moment to go through the photos in the merged album and verify that the content is as expected. Check for any missing or duplicate photos that may have occurred during the merging process.
- If you are satisfied with the results and everything looks correct, you can proceed with confirming the merge. Keep in mind that the original albums are still intact, but their individual content has been combined into the new merged album.
- Click on the “Confirm” button or a similar option to finalize the merge and accept the changes. The confirmation process may vary depending on whether you’re using the Google Photos app or the website.
By following these steps and confirming the merge, you can ensure that the selected albums have been successfully merged into one cohesive album in Google Photos. Now, let’s move on to the final step to review the merged album and make any necessary adjustments.
Step 6: Review the Merged Album
Once you have confirmed the merge of albums in Google Photos, it’s important to take the time to review the merged album and make any necessary adjustments. Here’s what you should do:
- Open the merged album by clicking on it or tapping on its cover photo. This will allow you to view the combined content of the merged albums.
- Scroll through the photos in the merged album and carefully examine the order, arrangement, and any potential duplicates. Take note of any photos that may need to be rearranged or removed to ensure a seamless and organized album.
- If you notice any duplicate photos, you can easily remove them by selecting the photo and clicking on the “Delete” button or a similar option. Be cautious when deleting photos, as they will be permanently removed from your Google Photos library.
- If you find that the order of the photos needs adjustment, you can manually rearrange them within the merged album. Simply click and drag the photos to the desired position.
- Take this opportunity to add captions or edit any other metadata associated with the photos in the merged album. This will help you further organize and personalize your photo collection.
- Once you’re satisfied with the arrangement and content of the merged album, you can consider giving it a new name that accurately reflects its contents. This can be done by clicking on the album’s title or a similar editing option.
By following these steps and reviewing the merged album, you can ensure that it meets your expectations and is organized to your liking. Making the necessary adjustments will help you create a more streamlined and enjoyable photo collection in Google Photos.
Conclusion
Merging albums in Google Photos is a valuable technique that allows you to streamline your photo organization and enhance your overall experience with the platform. By combining albums with similar content or themes, you can create a cohesive and well-organized photo collection.
In this article, we walked through the step-by-step process of merging albums in Google Photos. We started by opening the Google Photos app or website, selecting the albums to merge, and confirming the merge. After that, we reviewed the merged album and made any necessary adjustments to ensure a seamless and organized photo collection.
By merging albums, you eliminate duplicates, create a more cohesive collection, simplify your photo organization, enhance accessibility, and improve searchability. These benefits contribute to a more efficient and enjoyable photo management experience.
Whether you have multiple vacation albums, family event albums, or albums on specific subjects, merging them in Google Photos can make it easier to locate, manage, and enjoy your photos. Take advantage of this powerful feature to declutter your album list and create a more streamlined photo collection.
So, why wait? Start merging your albums in Google Photos today and experience the benefits of a well-organized and consolidated photo library.