


Introduction
Welcome to the digital era, where capturing moments has become effortless with smartphones and digital cameras. With that comes the challenge of managing and organizing these precious memories. Google Photos, a widely popular photo storage and sharing platform, offers a convenient solution to keep your photos safe and accessible.
However, many individuals find themselves dealing with the need to merge multiple Google Photos accounts. Whether it’s due to the consolidation of personal accounts, combining accounts with a partner, or merging work-related accounts, the process can seem daunting at first.
In this article, we will guide you through the steps to merge Google Photos accounts seamlessly. We will cover various aspects, including compatibility, storage considerations, transferring photos, handling duplicates, organizing albums, and sharing collaborative albums with others.
By the end of this article, you will have a clear understanding of how to merge your Google Photos accounts efficiently and ensure that your precious memories are consolidated in one place. So, let’s dive in and get started on this journey to streamline your photo storage and enjoy a clutter-free experience on Google Photos!
Why Merge Google Photos Accounts
There are several reasons why you may want to merge your Google Photos accounts. Let’s explore some of the most common motivations for this consolidation:
- Streamlined photo management: Having multiple Google Photos accounts can lead to a scattered collection of photos. By merging your accounts, you can centralize your photos in one place, making it easier to manage, search, and organize them.
- Increased storage capacity: Each Google Photos account comes with a limited amount of free storage. By merging accounts, you can combine the free storage quotas, increasing the overall capacity for your photos without having to pay for additional storage.
- Efficient sharing: Managing and sharing photos becomes more convenient when they are all stored in one account. Merging accounts allows you to have a cohesive library of photos, simplifying the sharing process with friends, family, or colleagues.
- Collaboration on albums: If you have been working on shared albums or collaborating with others on specific projects or events, merging your Google Photos accounts ensures that all contributors’ photos are consolidated in one place.
- Seamless access: With merged accounts, you won’t have to switch between multiple Google Photos accounts to access different sets of photos. It saves you time and allows for a seamless and hassle-free browsing experience.
Whether you want to bring together personal and professional accounts, merge accounts after combining households, or simply streamline your photo management, merging Google Photos accounts offers numerous benefits. It simplifies organization, maximizes storage capacity, enhances collaboration, and makes sharing photos with loved ones much easier.
Now that we understand the advantages of merging Google Photos accounts, let’s move on to the practical steps involved in the process.
Step 1: Check Compatibility and Storage
Before merging your Google Photos accounts, it’s important to ensure compatibility and assess your storage requirements. Here’s what you need to do:
- Check account compatibility: Verify that all the accounts you want to merge are eligible to be combined. Google Photos allows you to merge personal accounts or personal and work accounts. However, certain restrictions may apply based on your organization’s policies or account types.
- Evaluate storage needs: Consider the total size of your photo library across all accounts and check if you have sufficient storage space to accommodate them in a single account. Keep in mind that Google Photos provides free storage up to a certain limit, beyond which you may need to purchase additional storage.
- Estimate storage requirements: To get an idea of how much space your photos will occupy, you can use Google’s helpful “Storage Estimator” tool. This tool analyzes your current photo collection and estimates the additional storage needed for merging the accounts.
- Review image quality settings: It’s essential to consider the quality settings of your photos. Google Photos provides two options – High quality (unlimited storage, but with slight compression) and Original quality (uses your available storage quota). Decide if you want to maintain the original quality or opt for the high-quality storage option to conserve space.
- Backup your photos: Before you begin the merging process, it’s always a good idea to create a backup of your photos. This extra layer of protection ensures that you don’t lose any precious memories during the merge. You can use a cloud storage service, an external hard drive, or any other reliable backup method.
By checking compatibility, assessing storage needs, estimating storage requirements, reviewing image quality settings, and creating backups, you set the stage for a smooth merging process. Taking these preparatory steps helps ensure that your photos are safe, can be accommodated in a single account, and maintain the desired quality.
Once you have completed these checks and preparations, you’re ready to move on to the next step: transferring photos from one account to another.
Step 2: Transfer Photos from One Account to Another
Now that you have checked compatibility and storage requirements, it’s time to start the process of transferring photos from one Google Photos account to another. Follow these steps to ensure a successful transfer:
- Select photos to transfer: Begin by identifying the photos you want to move from the source account to the destination account. You can choose individual photos, albums, or even entire folders.
- Open the source account: Sign in to the Google Photos account from which you want to transfer the photos.
- Select the photos: Use the various selection tools in Google Photos, such as checkboxes or shift-click, to select the desired photos, albums, or folders. You can select multiple items at once.
- Click on the “Share” button: Once the photos are selected, click on the “Share” button. A sharing menu will appear.
- Choose the destination account: In the sharing menu, select the option to share with another account, then enter the email address associated with the destination Google Photos account.
- Confirm the transfer: Once you have entered the email address, click on the “Send” or “Share” button to initiate the transfer process. The selected photos will be transferred to the destination account.
- Monitor the transfer: Depending on the size of your photo collection, the transfer process may take some time. You can monitor the progress in the source account until all the photos have been successfully moved.
It’s important to note that when you transfer photos to another account, they will be copied, not moved. The original photos will remain in the source account, and copies will be created in the destination account.
Repeat these steps as necessary to transfer all the desired photos from the source account to the destination account. Once the transfer is complete, you can proceed to the next step to delete any duplicate photos.
Step 3: Delete Duplicate Photos
After transferring your photos to the destination account, it’s important to eliminate any duplicate copies to keep your photo collection organized. Follow these steps to identify and remove duplicate photos:
- Open the destination account: Sign in to the Google Photos account where you transferred the photos from the source account.
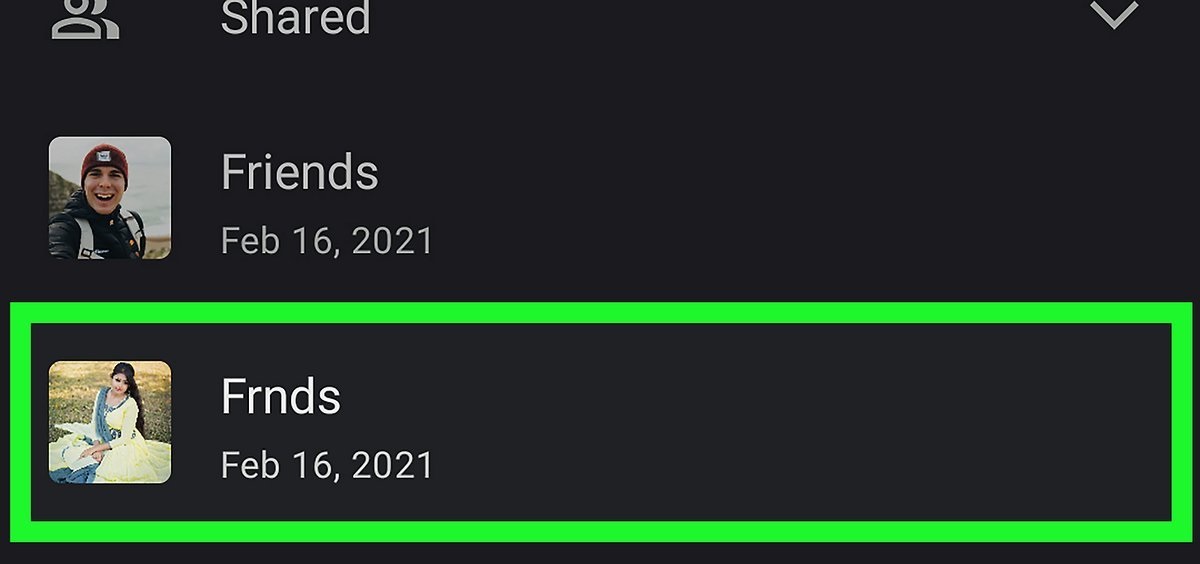
- Review the photo library: Take some time to navigate through your photo library and identify any duplicate photos. Pay attention to similar or identical photos that may have been copied during the transfer.
- Use the “Similar” feature: Google Photos has a built-in “Similar” feature that helps identify similar-looking photos. Click on a photo, then look for the “Info” button (represented by an “i” or the letter “i” in a circle). Click on it to access the “Similar” feature.
- Delete duplicate photos: Once you have identified the duplicates, select the duplicate photos and click on the “Delete” button. This will remove the duplicate copies from your Google Photos account. Take caution when deleting photos and make sure you only delete the duplicates.
- Review deleted photos: After deleting the duplicate photos, it’s a good practice to review the deleted photos in the “Trash” or “Bin” folder of your Google Photos account. This step ensures that no important photos were mistakenly deleted. If you find any photos that should not have been deleted, restore them to their original location.
- Empty the trash: Once you are satisfied with the deleted photos, empty the “Trash” or “Bin” folder to permanently remove the duplicate copies from your account.
By deleting duplicate photos, you declutter your Google Photos account and ensure that your photo library only contains unique, high-quality images. This step is crucial for maintaining an organized collection and optimizing storage space within your account.
Now that you have successfully removed duplicate photos, it’s time to move on to the next step: organizing albums and folders.
Step 4: Organize Albums and Folders
Now that your photos are transferred and duplicate copies are removed, it’s time to organize your albums and folders within Google Photos. Follow these steps to keep your photo collection structured and easy to navigate:
- Create new albums: Identify common themes or events within your photo collection and create new albums based on these categories. For example, you could create albums for family vacations, birthdays, or special occasions.
- Move photos to albums: Select relevant photos and move them into their respective albums. This can be done by selecting the photos and using the “Move to” or “Add to album” option. Alternatively, you can drag and drop photos into the desired albums.
- Create subfolders: If you have a large photo library, consider creating subfolders within albums to further organize your pictures. For instance, within a “Family Vacations” album, you can create subfolders for different years or destinations.
- Use descriptive titles: When creating albums or subfolders, use descriptive titles that clearly indicate the content they hold. This will make it easier to locate specific photos in the future.
- Add captions and descriptions: Enhance the storytelling aspect of your photos by adding captions or descriptions to individual photos. This can help provide context or highlight memorable details.
- Arrange albums: Consider arranging your albums in a logical order, such as chronological or thematic arrangement. This will make it easier to browse through your photo collection.
- Tag people and locations: Take advantage of the tagging feature in Google Photos to tag people in your photos or add location information. This makes it simpler to search for specific individuals or places within your collection.
By organizing your albums and folders, you create a well-structured and easily navigable photo library within Google Photos. This ensures that you can quickly locate specific photos and relive your cherished memories with ease.
Now that your albums and folders are organized, it’s time to explore the next step: sharing albums and collaborating with others.
Step 5: Share Albums and Collaborate
One of the great advantages of Google Photos is the ability to easily share your albums with others and collaborate on them. Follow these steps to share your albums and collaborate with friends, family, or colleagues:
- Select the album to share: Choose the album you want to share with others from your organized collection. Ensure that the album contains the desired photos and is ready for sharing.
- Click on the “Share” button: Open the selected album and click on the “Share” button. This will open the sharing options for the album.
- Choose the sharing method: Decide how you want to share the album. You can choose to share it via email, generate a shareable link, or directly share it to social media platforms.
- Invite collaborators: If you wish to collaborate on the album, invite others by entering their email addresses or sharing the generated link. Collaborators can then contribute their own photos or add comments and likes to existing photos in the shared album.
- Set permissions: Determine the level of access you want to grant to collaborators. You can choose to allow them to only view the album, contribute photos, or even make edits to the album and its contents.
- Manage collaborators: Monitor and manage the list of collaborators for each shared album. You can remove collaborators or adjust their permissions as necessary.
- Receive notifications: Stay updated on any changes made to the shared album by enabling notifications. This way, you’ll be informed when new photos are added or if any comments or edits are made.
Sharing albums and collaborating with others allows you to collectively create memorable experiences and relive precious moments together. Whether it’s a family vacation album, a project collaboration, or a shared event album, collaboration adds a new dimension to your Google Photos experience.
With this final step, you have successfully merged your Google Photos accounts, transferred photos, eliminated duplicates, organized albums and folders, and enabled collaboration. Your photo collection is now consolidated, well-structured, and ready to be enjoyed and shared!
As you continue to use Google Photos, remember to regularly back up your photos, review and update albums, and adjust sharing settings as needed. Enjoy your newfound organized and collaborative photo storage!
Conclusion
Managing multiple Google Photos accounts can be quite overwhelming, but by following the steps outlined in this guide, you can successfully merge your accounts and streamline your photo management process.
We started by emphasizing the importance of checking compatibility and storage to ensure a smooth merging process. By evaluating these factors, you can determine if merging accounts is the right decision for you and avoid any potential storage limitations.
We then discussed the process of transferring photos from one account to another. This step allows you to consolidate your photo collection into a single account, eliminating the need to switch between multiple accounts to access your memories.
After the transfer, it’s crucial to delete any duplicate photos that may have been created during the merging process. By removing these duplicates, you declutter your library and ensure that your photos are kept organized and optimized for storage efficiency.
Next, we explored the importance of organizing albums and folders within Google Photos. Creating descriptive titles, arranging albums in a logical order, and using tags for people and locations allows for easy navigation and retrieval of specific photos.
Finally, we touched on the benefits of sharing albums and collaborating with others on Google Photos. This feature enables you to involve friends, family, or colleagues in creating and curating shared albums, fostering a sense of collaboration and shared memories.
By following these steps, you can now enjoy a more streamlined and organized Google Photos experience, making it easier to manage, access, and share your cherished memories.
Remember to periodically review and update your photo library, adjust sharing settings, and make backups to ensure the safety and longevity of your photos.
Happy merging and organizing on Google Photos!


![18 Best Online PDF Readers and Editors in 2022 [100% Working]](https://robots.net/wp-content/uploads/2020/06/PDF-image-300x196.jpg)


