Introduction
Combining photos on your Android device can be a fun and creative way to showcase multiple images in one visually appealing composition. Whether you want to create a collage of memorable moments, merge panoramic shots, or simply experiment with different photo combinations, there are several apps available that make the process easy and enjoyable. By using these apps, you can seamlessly blend photos together, add effects and filters, and adjust the layout to achieve the desired result.
One of the first steps in combining photos on Android is choosing the right app for your specific needs. There are numerous apps available on the Google Play Store, each offering unique features and functionalities. Some apps come with built-in collage makers, perfect for creating artistic collages or photo grids. Others focus on editing capabilities, allowing you to merge and blend photos with precision. Lastly, there are apps specifically designed for stitching together panoramic shots or creating seamless panoramas. Depending on your requirements, you can choose the app that best suits your preferences.
In this article, we will explore various methods for combining photos on Android devices. Whether you prefer using the built-in collage maker, an editing app, or a photo stitching app, each method offers its own set of advantages. We will also cover additional features such as adding filters and effects, adjusting layout and composition, and saving and sharing the final combined photo.
So, if you’re ready to unlock your creativity and transform your collection of photos into stunning compositions, let’s dive into the world of combining photos on Android!
Choosing the Right App
When it comes to combining photos on your Android device, the first step is to choose the right app for the job. With the plethora of options available on the Google Play Store, it can be overwhelming to decide which app will best suit your needs. Here are a few factors to consider to make the selection process easier:
- Features: Different apps offer different features. Some apps specialize in creating collages, allowing you to arrange multiple photos in various layouts and designs. Others focus on editing capabilities, providing tools to merge and blend photos seamlessly. Consider the specific features you require and choose an app that aligns with your needs.
- User-Friendliness: A user-friendly interface is crucial, especially if you’re new to combining photos on Android. Look for apps that have intuitive controls, clear instructions, and a layout that makes it easy to navigate through the editing process.
- Customization Options: If you’re someone who enjoys customization, look for apps that offer a wide range of options. This can include the ability to adjust image opacity, add borders, include text overlays, and choose from various filter effects. The more customization options an app provides, the more creative possibilities you’ll have.
- Compatibility: Ensure that the app you choose is compatible with your Android device’s operating system and version. Some apps may require specific software requirements or have limitations on older devices.
- User Reviews and Ratings: Take the time to read user reviews and ratings of the apps you’re considering. This can provide insights into the app’s performance, stability, and overall user satisfaction. Look for apps with positive reviews and high ratings to increase the likelihood of a positive experience.
By considering these factors, you’ll be able to narrow down your options and choose an app that suits your specific needs and preferences. Remember, there’s no one-size-fits-all solution, so take your time to explore and find an app that resonates with your creative vision.
Using the Built-in Collage Maker
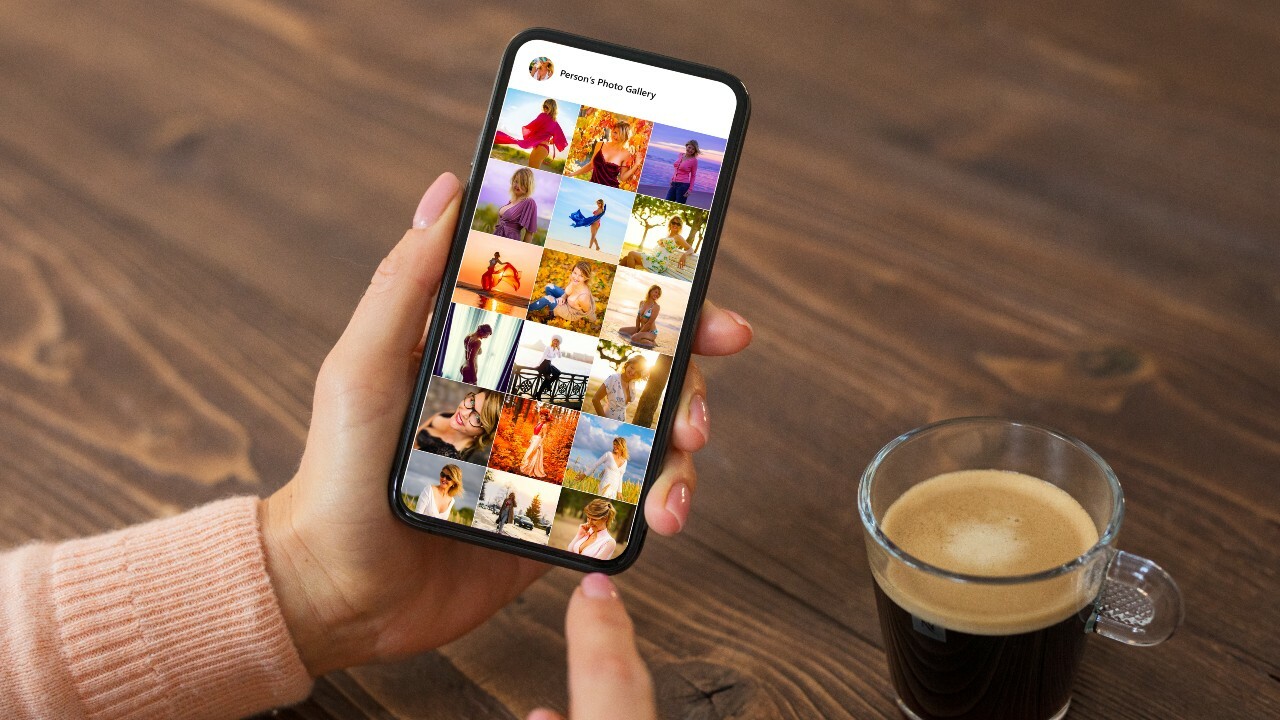
If you’re looking for a quick and easy way to combine photos on your Android device, utilizing the built-in collage maker is a great option. Many photo gallery apps and social media platforms offer this feature, allowing you to create stunning collages with just a few taps. Here’s how you can use the built-in collage maker:
- Open the App: Launch the photo gallery app or social media platform on your Android device that has the built-in collage maker feature. Examples of such apps include Google Photos, Instagram, and Facebook.
- Select Photos: Choose the photos you want to include in your collage. You can select multiple photos from your gallery by tapping on them or using the multi-select option.
- Choose a Layout: Once you’ve selected the photos, the app will provide you with a variety of layout options. These layouts determine how your photos will be arranged within the collage. Select a layout that best suits your aesthetic preferences.
- Arrange and Customize: After selecting a layout, you can further customize your collage. Some apps allow you to adjust the size and position of each photo, add borders or frames, and apply filters or effects.
- Save or Share: Once you’re satisfied with your collage, save it to your Android device’s gallery or share it directly through social media platforms or messaging apps. You can choose to save it as an image file or share it with friends and family to showcase your creative work.
Using the built-in collage maker is a convenient option for quickly combining photos without the need for additional apps. However, keep in mind that the customization options might be limited compared to dedicated photo editing apps. If you’re looking for more control and advanced features, consider exploring the other methods mentioned later in this article.
Now that you’re familiar with using the built-in collage maker, it’s time to move on to the next method: merging photos with an editing app.
Merging Photos with an Editing App
If you’re seeking more control and customization options for combining photos on your Android device, using a dedicated photo editing app is an excellent choice. These apps provide a wide range of tools and features that allow you to merge photos seamlessly and enhance them creatively. Here’s how you can merge photos using an editing app:
- Select an Editing App: Choose a photo editing app from the Google Play Store that offers merging capabilities. Some popular options include Adobe Photoshop Express, Snapseed, and Pixlr.
- Open the App and Import Photos: Launch the editing app and import the photos you want to merge. Most editing apps provide an option to open images directly from your Android device’s gallery.
- Choose the Merging Tool: Once your photos are loaded, look for the merging or blending tool within the editing app. The tool may be named differently depending on the app you’re using, but it should allow you to combine multiple photos into one composition.
- Adjust and Arrange Photos: Use the merging tool to adjust the size, position, and opacity of each photo. This gives you the freedom to create unique and visually appealing combinations. Experiment with different arrangements until you achieve the desired result.
- Enhance and Customize: Take advantage of the additional editing features provided by the app to enhance your merged photo. This can include applying filters, adjusting brightness and contrast, adding text overlays, or even creating overlays and textures.
- Save and Share: Once you’re satisfied with the merged and edited photo, save it to your Android device’s gallery in the desired format. You can then share it directly through social media platforms, messaging apps, or other sharing options provided by the editing app.
Merging photos with an editing app gives you greater control over the final composition and allows you to unleash your creativity. With a wide array of editing tools at your disposal, you can experiment with different effects, blending modes, and adjustments to create unique and captivating combinations.
Now that you’ve learned how to merge photos using an editing app, let’s explore another method: combining photos with a photo stitching app.
Combining Photos with a Photo Stitching App
If you have a series of photos that you want to combine into a seamless panoramic shot or create a wider composition, using a photo stitching app is the ideal solution. These apps are specifically designed to merge multiple photos together, aligning and blending them to create a cohesive image. Here’s how you can combine photos using a photo stitching app on your Android device:
- Select a Photo Stitching App: Search for a photo stitching app on the Google Play Store that suits your needs. Some popular options include Panorama 360, PhotoStitcher, and Pano.
- Open the App and Import Photos: Launch the photo stitching app and import the series of photos you want to combine. These photos should capture different parts of the scene you want to stitch together.
- Arrange and Align Photos: The app will automatically align and overlap the imported photos based on their content. However, you may need to manually adjust the alignment if the app doesn’t align them perfectly. This step ensures that the photos fit seamlessly together when merged.
- Merge and Blend Photos: Once the photos are aligned, the app will stitch them together to create a panoramic or wider image. The app will blend the edges of each photo to create a smooth transition between them, giving the final image a seamless appearance.
- Adjust and Enhance: Most photo stitching apps offer editing tools to refine the final merged image. You can adjust the brightness, contrast, and color balance, as well as apply filters or other effects to achieve your desired look.
- Save and Share: After you’re satisfied with the merged and edited photo, save it to your Android device’s gallery. From there, you can share it with others through social media platforms, messaging apps, or any other sharing options provided by the photo stitching app.
Combining photos with a photo stitching app allows you to create breathtaking panoramic shots or wider compositions that capture more of the scene. Whether you’re trying to capture the vastness of a landscape, a group photo, or an architectural marvel, a photo stitching app can help you achieve stunning results.
Now that you have learned how to combine photos using a photo stitching app, let’s move on to the next section: adding filters and effects.
Adding Filters and Effects
Once you have combined your photos on your Android device, you can take your compositions to the next level by adding filters and effects. Filters and effects can transform the mood and tone of your photos, making them more visually striking and captivating. Android photo editing apps offer a wide range of filters and effects to choose from. Here’s how you can enhance your combined photos with filters and effects:
- Select an Editing App: Choose a photo editing app from the Google Play Store that provides a variety of filters and effects. Popular options include VSCO, Adobe Lightroom, and Snapseed.
- Open the App and Import the Combined Photo: Launch the editing app and import the combined photo you want to enhance. You can either open the image directly from your Android device’s gallery or use the app’s importing feature.
- Explore Filters and Effects: Browse through the app’s collection of filters and effects to find the ones that best suit the mood and style you want to convey. Some apps offer a wide range of presets, while others allow for more extensive customization.
- Apply Filters and Effects: Once you’ve selected a filter or effect, apply it to your combined photo. You can adjust the intensity of the effect to ensure it complements the overall composition. Experiment with different filters and effects to see which ones enhance your photo the most.
- Make Additional Edits: Besides filters and effects, the editing app may offer additional editing tools. You can further enhance your photo by adjusting brightness, contrast, saturation, sharpness, and other settings to achieve the desired look.
- Save and Share: After you’re satisfied with the final result, save the edited photo to your Android device’s gallery. From there, you can share it with others through social media platforms, messaging apps, or any other sharing options provided by the editing app.
Adding filters and effects can elevate your combined photos, giving them a unique and eye-catching appeal. Whether you prefer a vintage look, a vibrant and bold expression, or a more subtle and muted tone, filters and effects allow you to infuse your photos with your preferred aesthetic.
Now that you’ve learned how to add filters and effects to your combined photos, let’s move on to the next section: adjusting the layout and composition.
Adjusting the Layout and Composition
After combining photos on your Android device, you may want to fine-tune the layout and composition to ensure the final image is visually pleasing and well-balanced. Adjusting the layout and composition allows you to optimize the placement, size, and orientation of the combined photos. Here’s how you can refine the layout and composition:
- Select an Editing App: Open a photo editing app on your Android device that offers layout and composition adjustment tools. Some popular options include Canva, Adobe Photoshop Express, and PicsArt.
- Import Your Combined Photo: Import the combined photo into the editing app. You can either open the image directly from your Android device’s gallery or use the app’s importing feature.
- Resize and Re-Position: Use the editing app’s tools to resize and reposition the individual photos within the composition. You can adjust the size of each photo to create a more balanced layout and experiment with different positions to find the best arrangement.
- Crop and Rotate: If necessary, you can crop the combined photo to remove any unwanted elements or to create a specific aspect ratio. Additionally, the app may offer the option to rotate the photo if you want to change its orientation.
- Consider Aspect Ratios: Pay attention to the aspect ratio of the final composition. Some platforms or printing services may have specific requirements or preferences for aspect ratios. Adjusting the composition to match these requirements will ensure that your photo looks its best when shared or printed.
- Experiment with Symmetry and Balance: To add visual interest and appeal, consider creating symmetry or balance within your composition. This can be achieved by placing photos strategically or using repetition and mirroring effects.
- Save and Share: Once you’re satisfied with the layout and composition adjustments, save the edited photo to your Android device’s gallery. From there, you can easily share it with others through social media platforms, messaging apps, or other sharing options provided by the editing app.
Adjusting the layout and composition of your combined photos can make a significant difference in the overall visual impact of the image. By carefully arranging and resizing the photos, you can create a harmonious and aesthetically pleasing composition that effectively communicates your vision.
Now that you’ve learned how to adjust the layout and composition of your combined photos, let’s move on to the next section: saving and sharing the final result.
Saving and Sharing the Combined Photo
After you have combined, edited, and finalized your photo composition on your Android device, it’s time to save and share the final result with others. Saving and sharing your combined photo allows you to showcase your creativity and share memorable moments with your friends, family, or social media followers. Here’s how to save and share your combined photo:
- Review and Confirm: Before saving and sharing, make sure to carefully review the final composition to ensure it meets your expectations. Check for any last-minute adjustments or edits that need to be made.
- Save the Photo: Save the combined photo to your Android device’s gallery. Most editing apps have a dedicated save or export option that allows you to choose the format and quality of the saved image. Consider saving it in a high-resolution format to maintain image quality.
- Choose Sharing Method: Depending on your preference, decide how you want to share your combined photo. You can use social media platforms, messaging apps, email, or cloud storage services to share the photo with others.
- Share on Social Media: If you want to share your combined photo on social media platforms, open the respective app, choose the photo from your gallery, and select the sharing option. Customize your post by adding captions, hashtags, or mentions to engage your audience.
- Send via Messaging Apps or Email: If you prefer to share the combined photo directly with specific individuals, open your preferred messaging app or email client, choose the photo from your gallery, and select the recipient(s) you want to send it to.
- Upload to Cloud Storage: Another option is to upload your combined photo to a cloud storage service like Google Drive or Dropbox. This allows you to share a download link with others, granting them access to the photo without having to send it directly.
- Consider Photo Credit and Copyright: If you’re planning to share your combined photo publicly, consider giving proper photo credit to the original photographers (if applicable). Also, be mindful of any copyright restrictions or licensing agreements associated with the included photos. Always seek permission or use photos that are licensed for free use.
Saving and sharing your combined photo not only allows you to share your creativity and photography skills but also enables you to connect with others, evoke emotions, and inspire others through your visual storytelling.
Now that you have learned how to save and share your combined photo, let’s conclude this article and summarize the key points discussed.
Conclusion
Combining photos on your Android device is a creative and enjoyable way to showcase multiple images in one visually appealing composition. Whether you choose to use the built-in collage maker, an editing app, or a photo stitching app, each method offers its own set of advantages and possibilities. By adding filters and effects, adjusting the layout and composition, and finally saving and sharing the combined photo, you can transform your collection of photos into captivating works of art.
When choosing the right app for combining photos, consider the features, user-friendliness, customization options, compatibility, and user reviews. Each app offers unique tools that cater to different creative needs and preferences.
The built-in collage maker, available in many photo gallery apps and social media platforms, provides a quick and easy way to combine photos, while editing apps offer greater control and customization options. Photo stitching apps are specifically designed for merging multiple photos to create panoramic shots or wider compositions.
By adding filters and effects to your combined photos, you can enhance their aesthetic appeal and create a specific mood or tone. Adjusting the layout and composition allows you to optimize the placement, size, and orientation of the photos, ensuring a visually balanced and pleasing composition.
Finally, saving and sharing the combined photo enables you to showcase your creativity and share memorable moments with others. Whether you choose to share on social media, send via messaging apps or email, or upload to cloud storage, sharing your combined photo allows you to connect with others and evoke emotions through visual storytelling.
So, unleash your creativity, experiment with different techniques, and have fun combining photos on your Android device. Share your creations with the world and let your unique vision shine through!