Introduction
Welcome to the wonderful world of old-fashioned crank ice cream makers! There’s something nostalgic and charming about making your own ice cream from scratch, and using a crank ice cream maker adds an extra layer of fun to the process. Whether you’re a fan of the creamy classic flavors or love experimenting with unique combinations, this guide will walk you through the steps to make delicious chocolate ice cream with an old-fashioned crank ice cream maker.
There’s no denying the allure of homemade ice cream. The rich, creamy texture, the indulgent flavors, and the satisfaction of creating something with your own hands make it a truly rewarding experience. While modern ice cream makers offer convenience, there’s a special magic in using an old-fashioned crank ice cream maker.
Before we get started, let’s talk about the key components of the process. To make chocolate ice cream with a crank ice cream maker, you’ll need a few essential ingredients and equipment. Once you have everything ready, we’ll dive into the step-by-step instructions to churn out the perfect batch of chocolate ice cream.
So, gather your ingredients, dust off that crank ice cream maker, and get ready to embark on a delicious journey. Whether you’re making ice cream for a special occasion or simply indulging in a sweet treat, making your own chocolate ice cream with an old-fashioned crank ice cream maker is a delightful activity that will surely satisfy your cravings.
Ingredients
To create scrumptious chocolate ice cream with an old-fashioned crank ice cream maker, you’ll need the following ingredients:
- 2 cups of heavy cream
- 1 cup of whole milk
- 3/4 cup of granulated sugar
- 1/2 cup of unsweetened cocoa powder
- 4 egg yolks
- 1 teaspoon of vanilla extract
- A pinch of salt
These ingredients will come together to form a rich and creamy chocolate ice cream base that is both decadent and delightful. You can adjust the sugar and cocoa powder amounts to suit your taste preferences, allowing you to create a chocolate ice cream that is perfectly balanced for your palate.
Using high-quality ingredients is essential to achieving the best flavor and texture in your ice cream. Opt for organic dairy products if possible, as they tend to have a creamier and more pronounced flavor. Additionally, choose a cocoa powder that is unsweetened to control the sweetness level of your ice cream.
With these basic ingredients, you’re well on your way to creating a delectable batch of chocolate ice cream using your trusty crank ice cream maker. So let’s move on to the next section to explore the equipment you’ll need for the process.
Equipment
To make chocolate ice cream using an old-fashioned crank ice cream maker, you’ll need the following equipment:
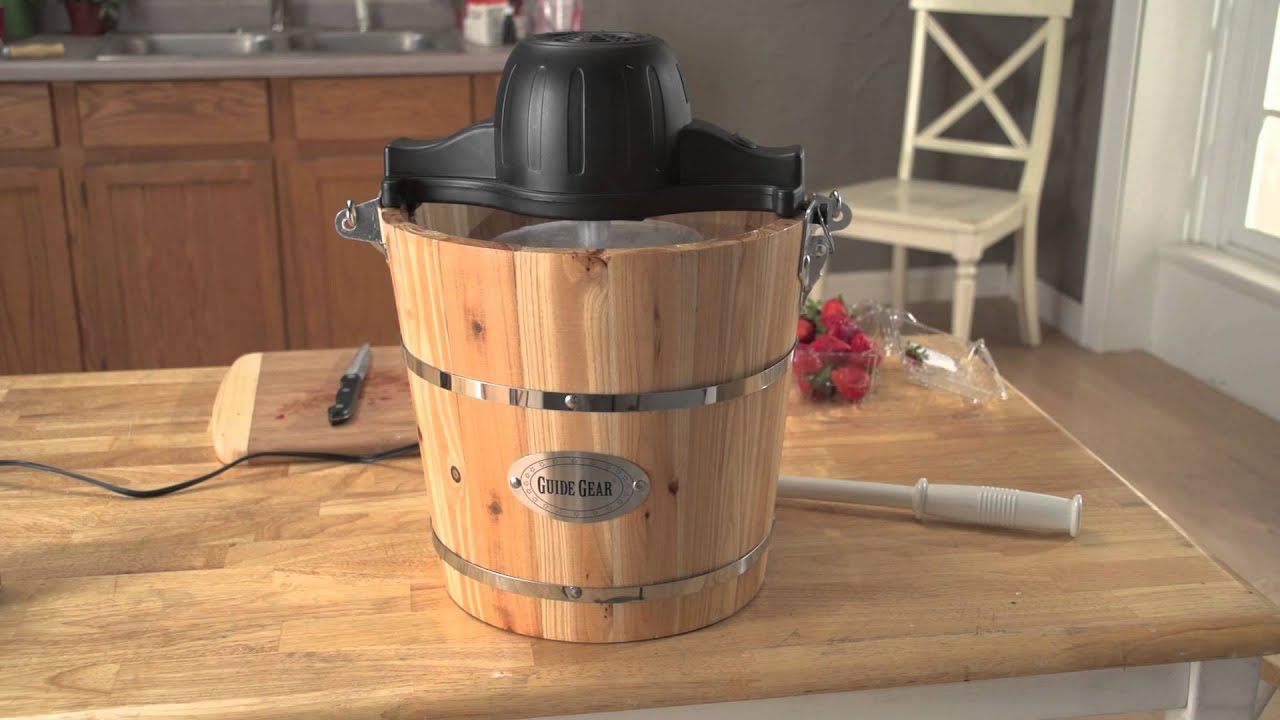
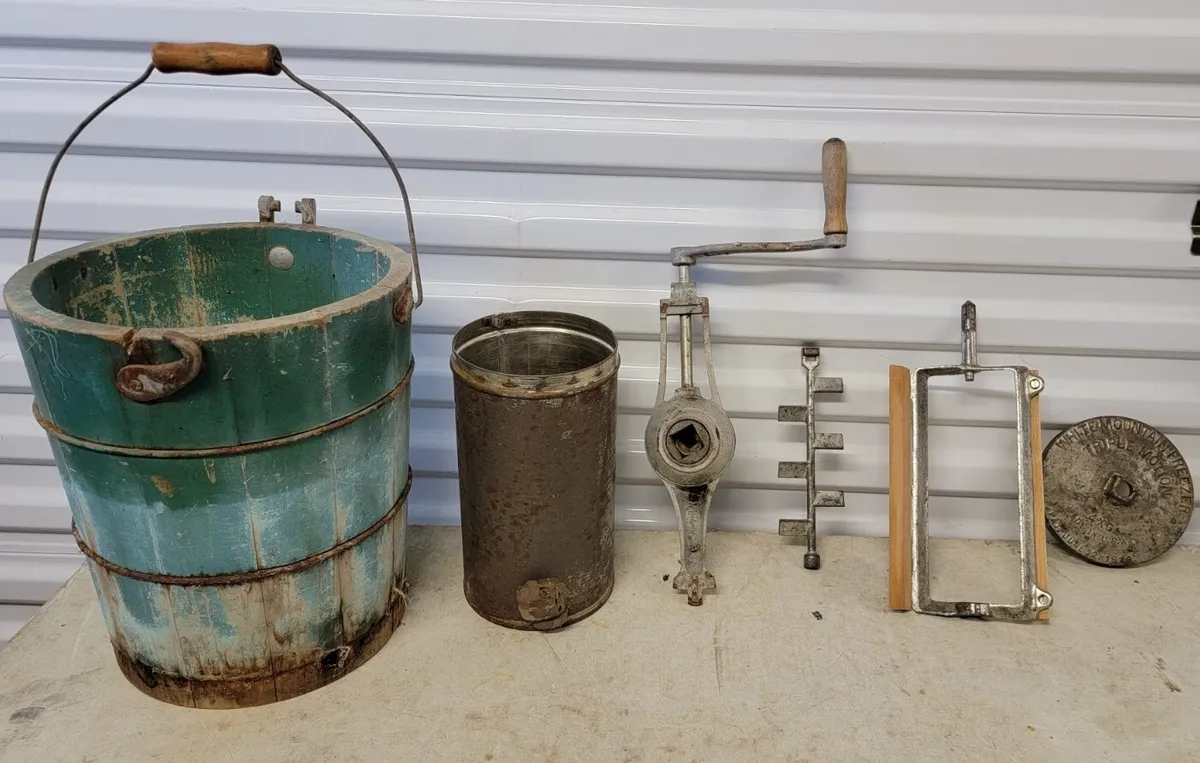
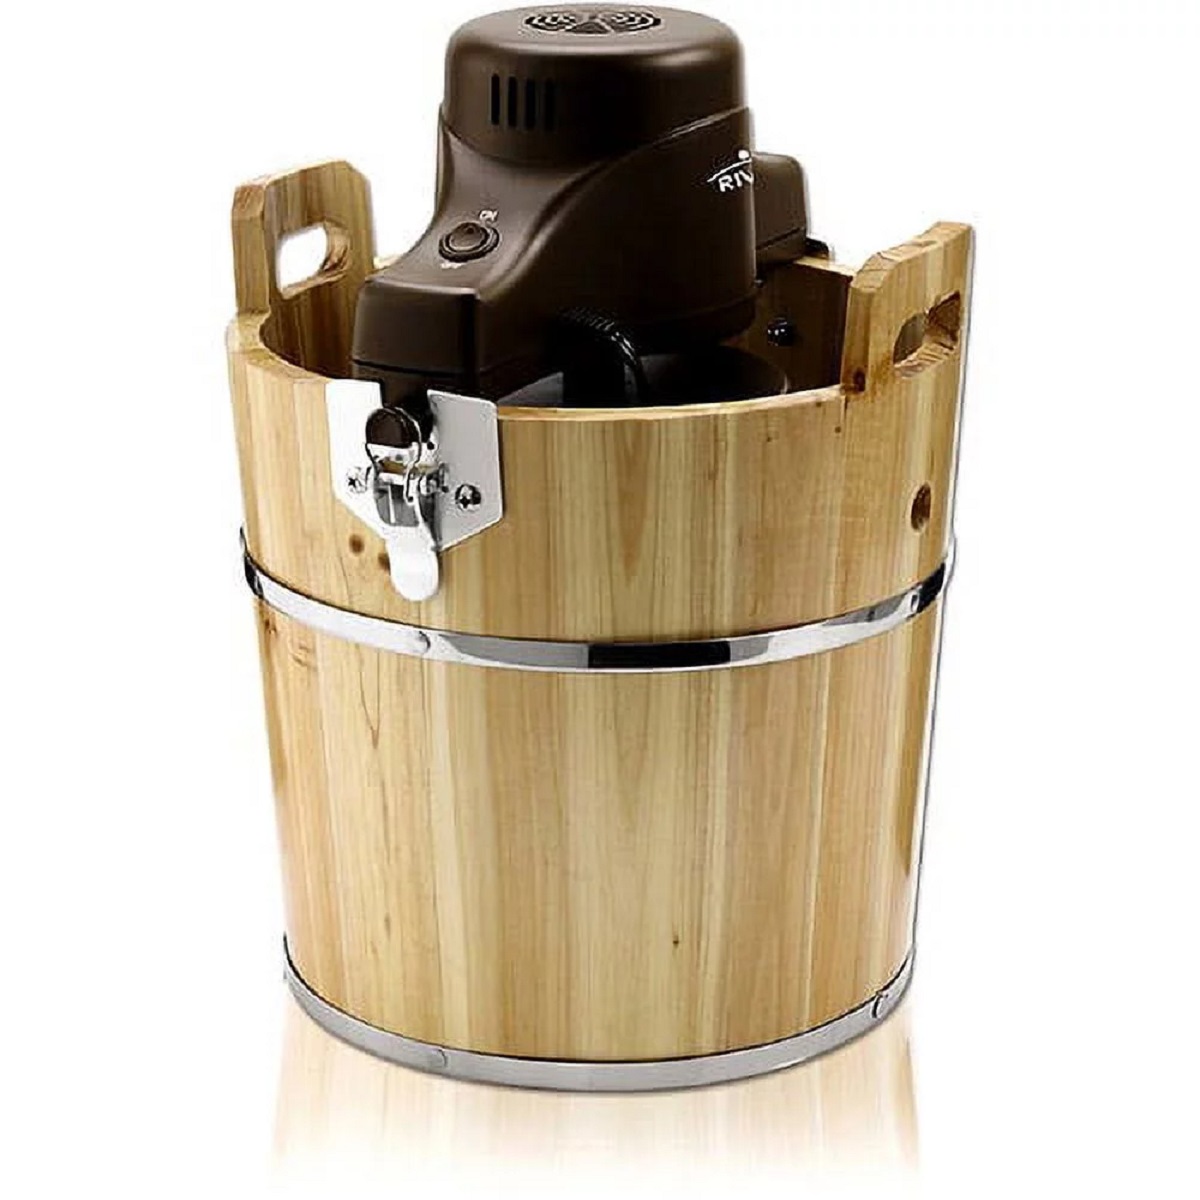
- Old-fashioned crank ice cream maker: This is the star of the show! Look for a sturdy and well-functioning hand-crank ice cream maker. You can find these at kitchen supply stores or online.
- Mixing bowls: You’ll need a few bowls of different sizes to mix your ingredients. Make sure they are large enough to accommodate the ice cream base and allow room for mixing.
- Whisk or electric mixer: Use a whisk or an electric mixer to combine the ingredients for the ice cream base. An electric mixer will make the process faster and easier, but a whisk will do the job just fine.
- Spatula: A spatula is essential for scraping the sides of the bowl and ensuring that all the ingredients are well mixed.
- Measuring cups and spoons: Accurate measurements are crucial for a successful ice cream recipe. Have a set of measuring cups and spoons handy to measure your ingredients precisely.
- Strainer: A fine-mesh strainer will help remove any lumps or clumps in the ice cream base, resulting in a smoother texture.
- Ice and rock salt: Ice and rock salt are necessary for creating the freezing environment inside the ice cream maker. The rock salt lowers the freezing point of the ice, allowing it to chill the ice cream mixture effectively.
- Ice cream storage container: Once the ice cream is churned and ready, you’ll need a container to store it in. Choose an airtight container that can hold the desired amount of ice cream.
With these essential equipment items, you’ll be well-equipped to make delicious chocolate ice cream with your old-fashioned crank ice cream maker. So let’s move on to the next section, where we’ll dive into the process of preparing the ice cream base.
Preparing the Ice Cream Base
Before you can churn the ice cream, you need to prepare the base. Follow these steps to create a luscious chocolate ice cream base:
- In a mixing bowl, combine the heavy cream, whole milk, granulated sugar, unsweetened cocoa powder, and a pinch of salt. Whisk the mixture until the sugar and cocoa powder are fully dissolved.
- In a separate bowl, beat the egg yolks until they are smooth and slightly thickened.
- Slowly pour the egg yolks into the cream mixture while whisking continuously. This will help temper the yolks and prevent them from curdling when adding them to the warm cream.
- Pour the mixture back into a saucepan and heat it over medium-low heat. Stir continuously until the mixture thickens and coats the back of a spoon. This process, known as “tempering,” ensures that the egg yolks are cooked and the base thickens properly.
- Remove the saucepan from the heat and stir in the vanilla extract. Allow the mixture to cool to room temperature.
Once the ice cream base is prepared, cover the bowl with plastic wrap and refrigerate it for at least 4 hours or overnight. Chilling the base is crucial as it helps the flavors meld together and creates a smoother texture when churned.
Now that you have the ice cream base ready, it’s time to move on to the next section where we’ll cover the steps for preparing the ice cream maker itself.
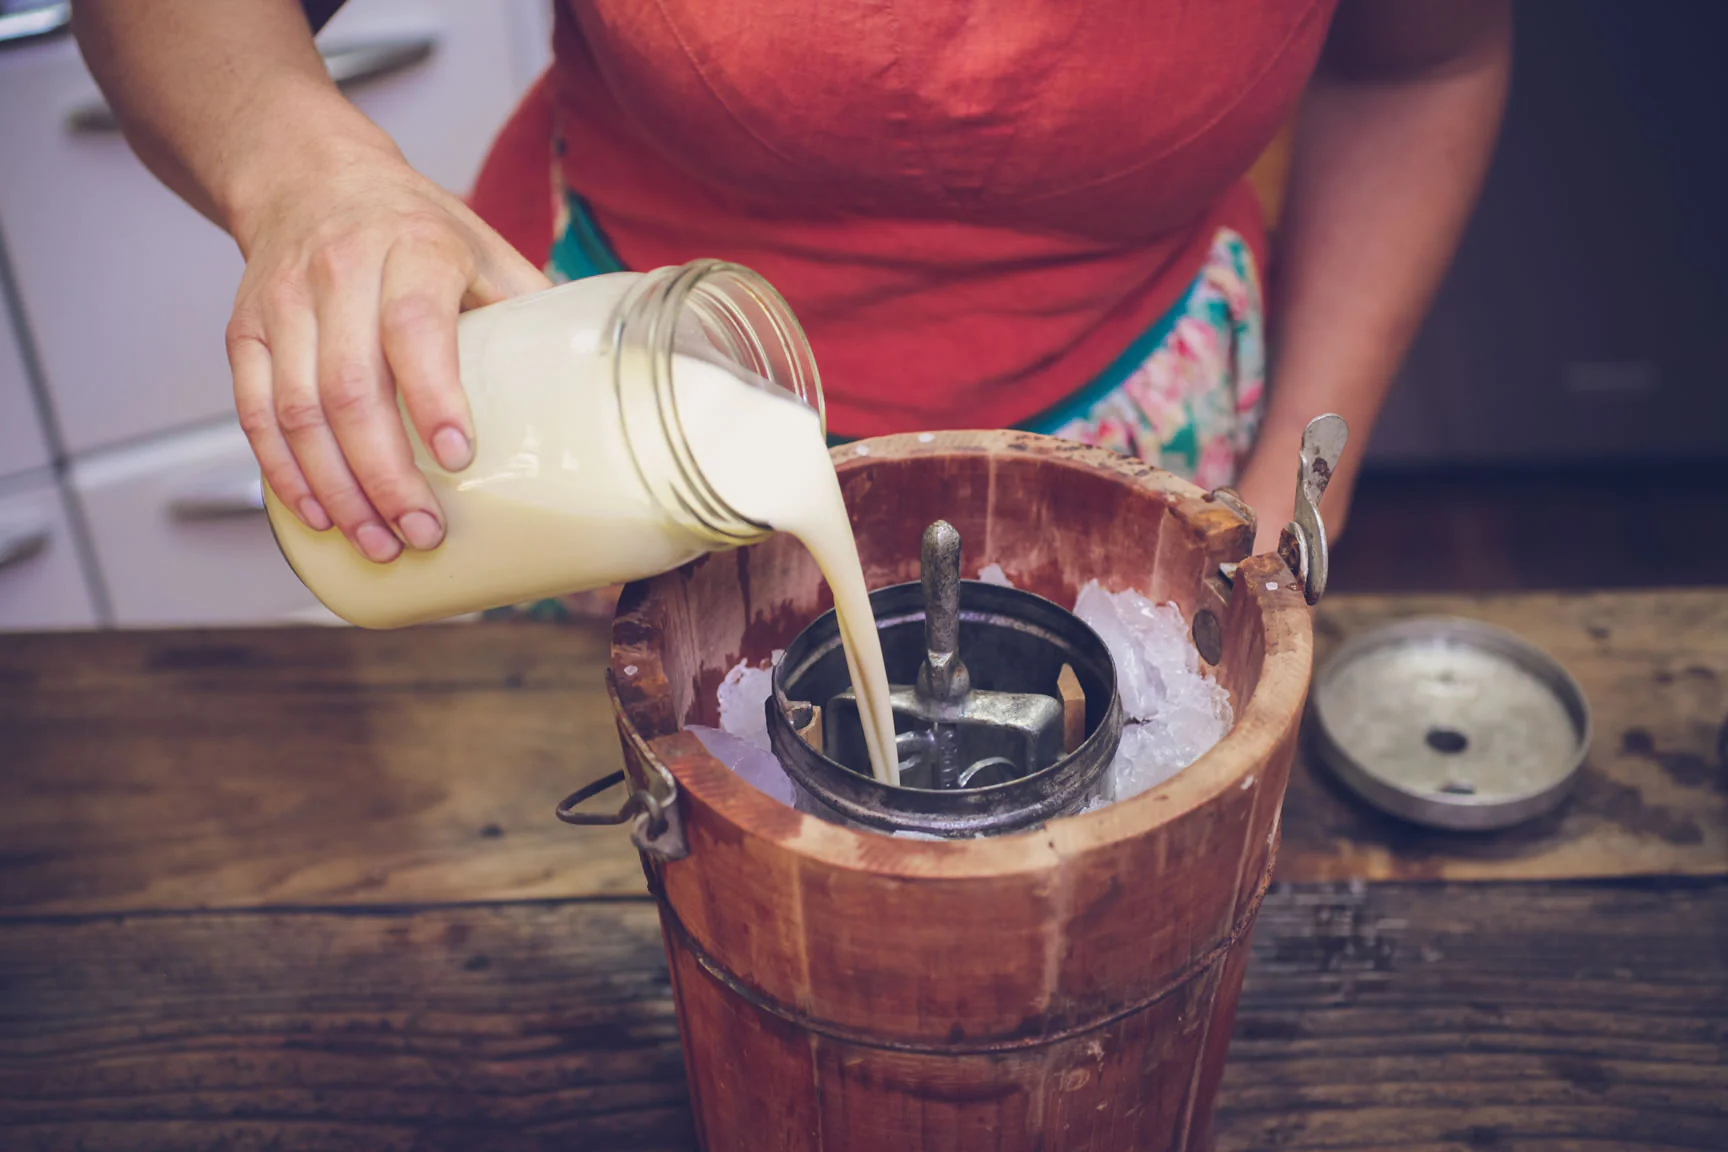
Preparing the Ice Cream Maker
Before you can start churning your chocolate ice cream, it’s important to properly prepare the old-fashioned crank ice cream maker. Follow these steps to get your ice cream maker ready:
- Set up your ice cream maker on a sturdy and level surface. Ensure that it won’t wobble or tip while you’re churning the ice cream.
- Remove the freezer canister from the ice cream maker. Some models may require you to freeze the canister in advance, so make sure it has been adequately chilled according to the manufacturer’s instructions.
- Insert the dasher, which is the paddle-like attachment, into the canister. Make sure it is securely in place.
- Carefully pour the chilled chocolate ice cream base into the canister. Leave about an inch of space at the top to allow for expansion as the ice cream freezes.
- Attach the lid securely onto the canister. Ensure a tight fit to prevent any leakage during the churning process.
- Place the canister back into the ice cream maker, making sure it sits properly in the bucket.
Now that your old-fashioned crank ice cream maker is set up and the ice cream base is loaded inside, it’s time to move on to the exciting part – churning the ice cream!
Note: Each ice cream maker may have specific instructions and variations, so always refer to the manufacturer’s manual for any specific guidelines for your particular model.
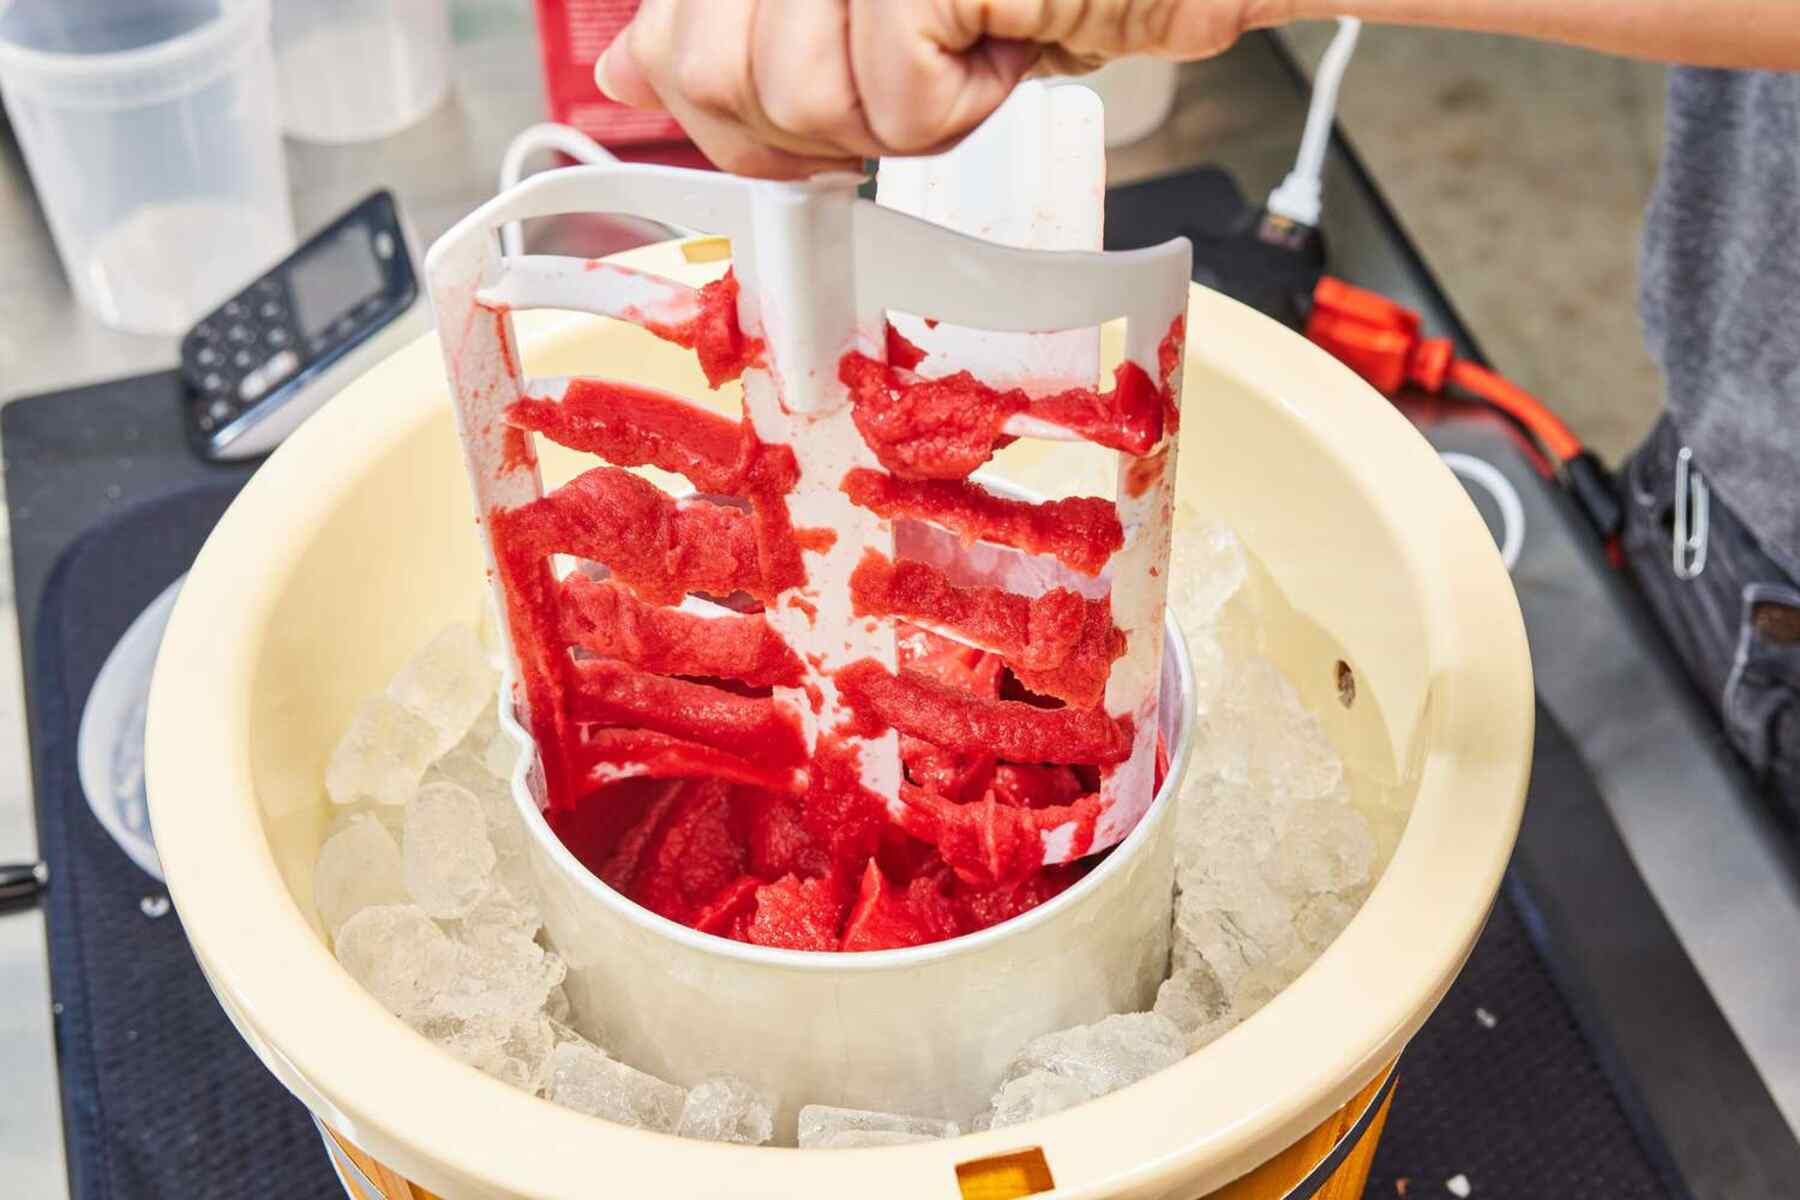
Churning the Ice Cream
Now comes the exciting part – churning the chocolate ice cream in your old-fashioned crank ice cream maker. Follow these steps to achieve that creamy, dreamy texture:
- Place the assembled ice cream maker on a stable surface and ensure it won’t move or tip during the churning process.
- Add a layer of ice around the canister, followed by a layer of rock salt. Repeat this process until the ice and salt reach the top of the canister. The ice and salt create a freezing environment, allowing the ice cream to solidify.
- Securely attach the crank handle to the top of the lid, making sure it fits tightly. The handle will be used to rotate the canister as the ice cream churns.
- Start cranking the handle clockwise at a steady and consistent pace. The ice cream maker requires some effort to turn, so be prepared for a little workout!
- Continue cranking the handle for around 20 to 30 minutes. As you rotate the canister, the dasher will continuously scrape the sides and incorporate air into the ice cream mixture, resulting in a smooth and creamy texture.
- Periodically check the canister to ensure it doesn’t become too loose or overly tight. Adjust as needed to keep it securely in place.
- After the recommended churning time, remove the crank handle and carefully lift the lid. You’ll notice that the ice cream has thickened and increased in volume.
At this stage, the ice cream will have a soft-serve consistency. If you prefer a firmer texture, transfer the ice cream to a freezer-safe container and freeze it for a couple of hours to allow it to harden further.
Now that you’ve successfully churned the chocolate ice cream, it’s time to add some delectable mix-ins if desired. We’ll cover that in the next section.
Adding Mix-ins
Adding mix-ins to your chocolate ice cream can take it to the next level in terms of flavor and texture. While the ice cream is still soft and pliable, you can incorporate various mix-ins of your choice. Here are some popular mix-in options:
- Chocolate chips: Sprinkle in some chocolate chips, either semi-sweet, milk chocolate, or even white chocolate, for extra bursts of chocolate goodness.
- Nuts: Chopped nuts like almonds, peanuts, or walnuts add a delightful crunch and nutty flavor to the ice cream.
- Cookie pieces: Crushed cookies, such as chocolate sandwich cookies or chocolate wafer cookies, create a delightful cookie crunch throughout the ice cream.
- Caramel or fudge swirls: Swirls of gooey caramel or fudge can be added in layers or mixed throughout the ice cream, creating ribbons of sweet indulgence.
- Fruit pieces: Fresh fruit chunks like strawberries, cherries, or sliced bananas can add a refreshing and fruity element to the chocolate ice cream.
To add mix-ins, simply sprinkle or layer them into the partially churned ice cream in your ice cream maker. Use a spatula or wooden spoon to gently fold them into the mixture. Avoid overmixing as it can deflate the ice cream and result in a less creamy texture.
Once the mix-ins are evenly distributed, continue churning the ice cream for a few more turns of the crank to ensure everything is well incorporated. After that, your ice cream will be ready to transfer to a freezer-safe container for the final freezing step.
Remember, mix-ins are a personal preference, and you can get as creative as you like. Feel free to experiment with different combinations and flavors to create your signature chocolate ice cream masterpiece!
Freezing the Ice Cream
After churning the chocolate ice cream and incorporating any desired mix-ins, it’s time to freeze the ice cream to achieve the perfect texture. Follow these steps for optimal freezing:
- Transfer the churned ice cream from the canister into a freezer-safe container with an airtight lid. Use a spatula to scrape all the ice cream from the canister, ensuring nothing goes to waste.
- Smooth the top of the ice cream with the back of a spoon or spatula, creating an even surface.
- Place the lid on the container, ensuring a tight seal to prevent any air from entering and causing freezer burn.
- Label the container with the date and flavor of the ice cream.
- Put the container in the freezer, and allow the ice cream to freeze for at least 4 to 6 hours, or until it reaches your desired firmness.
During the freezing process, the ice cream will continue to solidify and develop a creamy, scoopable texture. It’s important to resist the temptation to open the container and check on the ice cream too frequently. Opening the container can cause temperature fluctuations and ice crystals to form, which can affect the texture of the ice cream.
Once the ice cream is fully frozen, it’s ready to be enjoyed! Now, all that’s left to do is prepare your serving bowls or cones, gather your favorite toppings, and indulge in the delicious homemade chocolate ice cream you’ve created.
Remember to keep the ice cream container stored properly in the freezer to maintain its freshness and quality. Consume the ice cream within a few weeks for the best flavor.
Now that you’ve successfully frozen your chocolate ice cream, it’s time to learn how to properly clean and maintain your old-fashioned crank ice cream maker. We’ll cover that in the next section.
Cleaning the Ice Cream Maker
After enjoying your homemade chocolate ice cream, it’s essential to properly clean and maintain your old-fashioned crank ice cream maker to ensure its longevity and optimal performance for future batches of ice cream. Follow these steps to clean your ice cream maker:
- Start by unplugging the ice cream maker and disassembling all removable parts, such as the canister, dasher, and lid.
- Rinse the canister, dasher, and lid with warm water to remove any leftover ice cream or residue.
- Use a mild dish soap and a non-abrasive sponge or cloth to scrub the parts gently. Avoid using harsh chemicals or abrasive cleaners, as they can damage the surfaces.
- Rinse the cleaned parts with warm water until all soap residue is removed.
- Dry the parts thoroughly with a clean towel or air dry them before reassembling.
- Wipe the exterior of the ice cream maker with a damp cloth to remove any spills or splatters.
- Store the ice cream maker and its parts in a clean and dry area, ensuring they are fully dry to prevent mold or bacteria growth.
Regular cleaning of your ice cream maker will help maintain its functionality and prevent any unwanted flavors from transferring to future batches of ice cream. Always refer to the manufacturer’s specific instructions for cleaning your particular model, as some ice cream makers may have additional care requirements.
Now that your ice cream maker is clean and ready for its next use, you can start planning your next batch of homemade ice cream flavors!
Serving and Enjoying
It’s time to savor the fruits of your labor and indulge in the creamy deliciousness of your homemade chocolate ice cream. Follow these tips to serve and enjoy your frozen creation:
- Remove the container of frozen chocolate ice cream from the freezer and let it sit at room temperature for a few minutes. This will allow the ice cream to soften slightly, making it easier to scoop.
- Using an ice cream scoop, gently scoop out generous portions of the chocolate ice cream into serving bowls, cones, or dishes.
- Add an extra touch of decadence by drizzling some chocolate syrup, caramel sauce, or your favorite topping over the ice cream.
- Sprinkle crushed nuts, sprinkles, or chocolate shavings on top for added texture and visual appeal.
- For a festive touch, garnish with a fresh mint sprig or a maraschino cherry.
- Serve the chocolate ice cream immediately and enjoy its smooth, rich flavor.
- Remember to savor each bite and appreciate the effort and love you put into making your own homemade treat.
Whether enjoyed on a hot summer day or as a sweet indulgence year-round, your homemade chocolate ice cream is sure to impress your family and friends. It also provides endless opportunities for experimentation, allowing you to customize the flavor with different mix-ins or toppings.
So, gather your loved ones, sit back, and enjoy the fruits of your labor. Share the joy of homemade ice cream with those around you, and let the sweet memories of your ice cream-making adventure linger long after the last scoop has been savored.
Conclusion
Making chocolate ice cream with an old-fashioned crank ice cream maker is a delightful and rewarding experience. From preparing the creamy ice cream base to churning it to perfection, and adding delicious mix-ins, the process allows you to create a homemade treat that is truly special.
By following the steps outlined in this guide, you can easily create smooth and indulgent chocolate ice cream that rivals any store-bought brand. The rich flavors and creamy texture will captivate your taste buds and leave you wanting more.
Remember to gather all the necessary ingredients, including heavy cream, whole milk, sugar, cocoa powder, and eggs, to create the perfect ice cream base. Additionally, make sure to equip yourself with a high-quality old-fashioned crank ice cream maker, as well as the essential utensils and equipment.
Churning the ice cream in your ice cream maker is a fun and engaging process. The rhythmic turning of the handle and the anticipation of the final result adds a touch of excitement to the experience. Don’t forget to incorporate delicious mix-ins like chocolate chips, nuts, or cookie pieces to add extra flavor and texture to your creation.
Once your ice cream is churned to perfection, freezing it in a dedicated container will give it the right consistency. Follow proper cleaning techniques to maintain the lifespan of your ice cream maker, ensuring it continues to churn out delectable frozen treats for years to come.
Finally, serve and enjoy your homemade chocolate ice cream with your favorite toppings and share the joy with family and friends. Let your taste buds revel in the rewards of your efforts and cherish the memories created.
So, what are you waiting for? Unleash your creativity, let the nostalgia of the old-fashioned crank ice cream maker guide you, and embark on a delightful ice cream-making journey that will leave you with delicious results and satisfied smiles all around.