Introduction
Welcome to the world of hand crank ice cream makers! If you’re a fan of homemade ice cream, this device will take your ice cream-making experience to a whole new level. With its charming simplicity and old-school charm, the hand crank ice cream maker allows you to create velvety smooth and delicious ice cream right in the comfort of your own kitchen.
What sets the hand crank ice cream maker apart from other types of ice cream makers is that it doesn’t require electricity to operate. Instead, it relies on good old-fashioned manual labor to churn and freeze the ice cream mixture. This gives you complete control over the process and allows you to create ice cream with the perfect texture and consistency.
In this article, we will explore the inner workings of a hand crank ice cream maker, how it functions, and provide a step-by-step guide on how to use it. We’ll also discuss the benefits of using a hand crank ice cream maker, share some useful tips and tricks, and provide guidance on the maintenance and cleaning of this wonderful contraption.
Whether you’re a seasoned ice cream aficionado or a curious beginner, this article will equip you with the knowledge and insights needed to create scrumptious homemade ice cream with your very own hand crank ice cream maker. So, let’s dive in and discover the magic behind this delightful dessert-making machine!
What is a Hand Crank Ice Cream Maker?
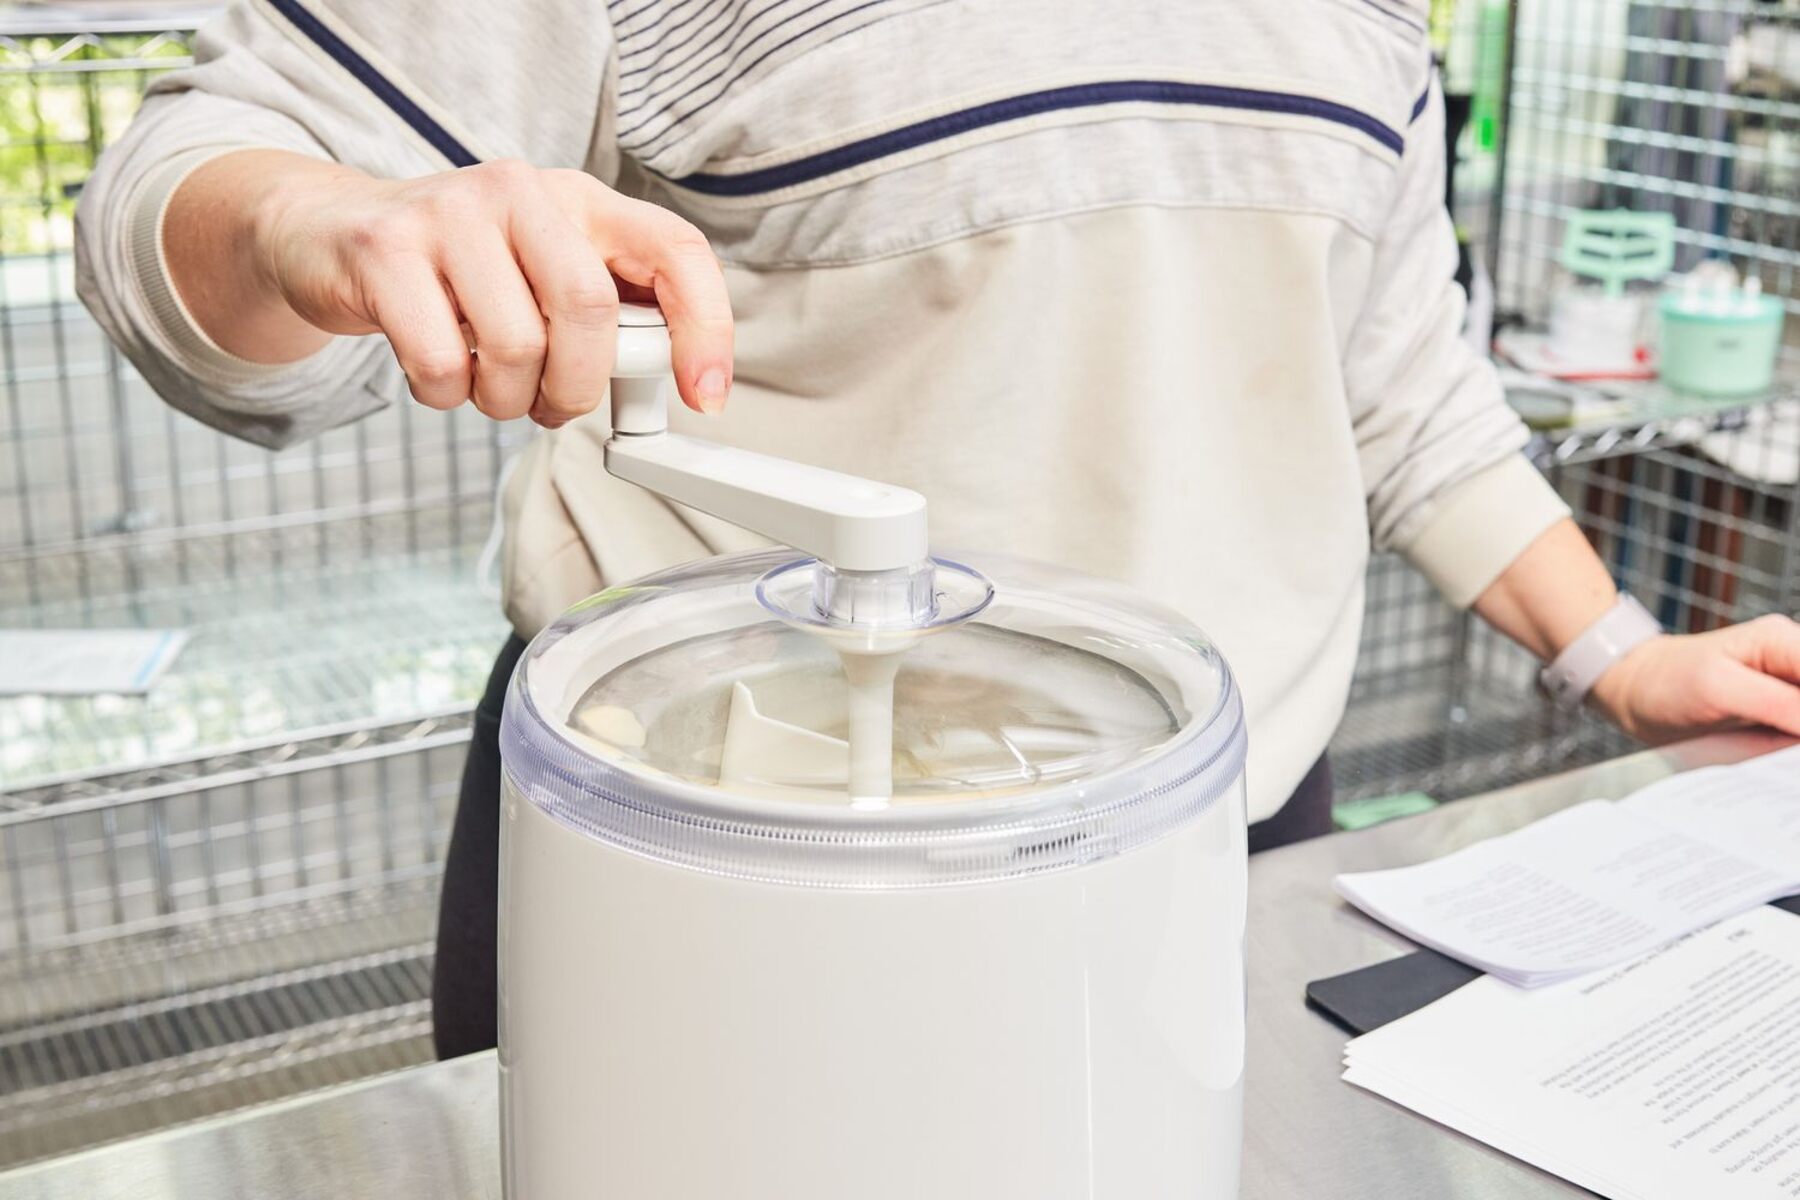
A hand crank ice cream maker is a kitchen appliance designed specifically for making homemade ice cream. It consists of a large, insulated container or drum that holds the ice cream mixture, a paddle or dasher that churns the mixture, and a hand crank attached to the lid or top of the container.
Unlike electric ice cream makers that use a motor to turn the paddle, a hand crank ice cream maker relies on manual effort to churn and freeze the ice cream mixture. This means that you have to physically turn the hand crank to rotate the paddle inside the container. As you turn the crank, the paddle scrapes the frozen mixture off the sides of the container, incorporating air and creating a smooth and creamy texture.
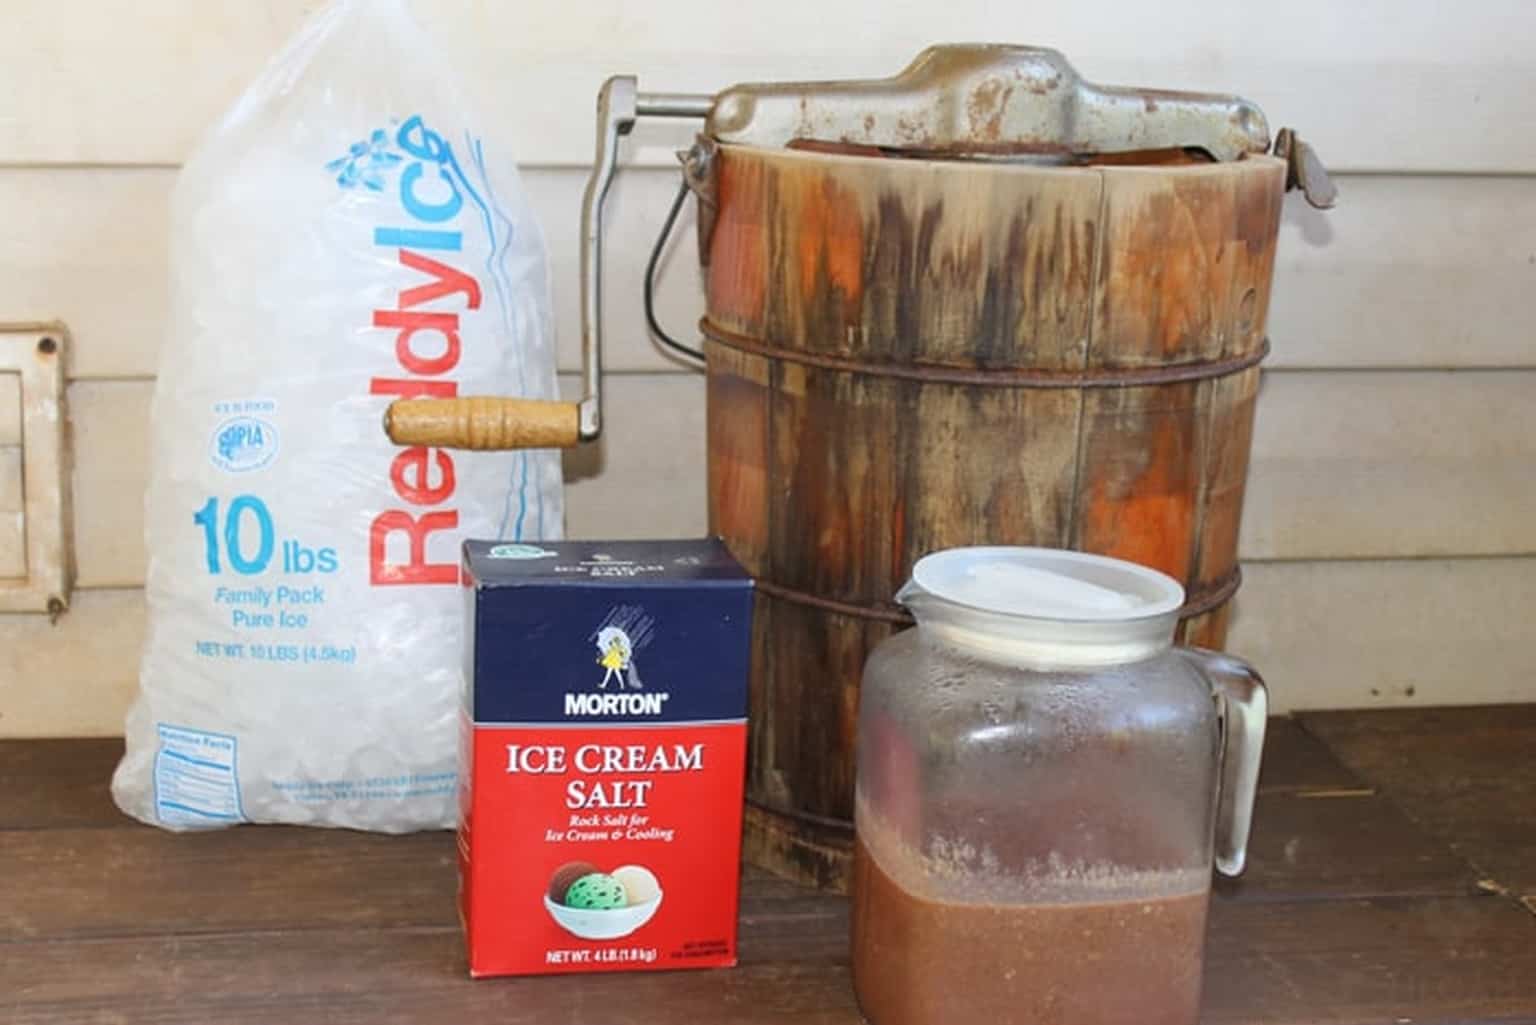
Hand crank ice cream makers come in various sizes and designs, but they all operate on the same principle of using a combination of ice and rock salt to freeze the mixture. The ice and salt create a super cold environment inside the container, causing the mixture to freeze quickly as it is being churned. This process ensures that the ice cream freezes evenly and prevents the formation of large ice crystals, resulting in a smoother and creamier final product.
One of the main advantages of a hand crank ice cream maker is its simplicity. Unlike more complex machines that require electricity and multiple settings, a hand crank ice cream maker is intuitive and easy to use. It’s a great option for those who enjoy a hands-on approach and want to have full control over the ice cream-making process.
In the next sections, we will delve deeper into the construction, functioning, and usage of a hand crank ice cream maker. Get ready to embark on a delightful journey of creating your own homemade frozen treats!
The Construction of a Hand Crank Ice Cream Maker
A hand crank ice cream maker is a simple yet ingenious device that is built to withstand the rigors of churning and freezing ice cream. Understanding its construction will give you a deeper appreciation for how it works. Let’s take a closer look at the components that make up a typical hand crank ice cream maker:
- Container: The container, also known as the drum, is the main body of the ice cream maker. It is typically made of a durable and well-insulated material such as stainless steel or high-quality plastic. The container is where the ice cream mixture is poured and churned.
- Paddle or Dasher: Attached to the lid of the container is the paddle or dasher. It is a large, flat, or curved blade that mixes and churns the ice cream mixture as the crank is turned. The paddle is designed to scrape the sides of the container, ensuring even freezing and incorporating air into the mixture for a smoother texture.
- Hand Crank: The hand crank is the key component of the ice cream maker that requires manual effort to operate. It is attached to the lid or top of the container and is used to rotate the paddle inside the drum. As you turn the crank, the paddle churns the mixture, creating the desired consistency and texture.
- Lid: The lid covers the container and keeps the ice cream mixture securely in place. It usually has a small opening or vent to allow excess air to escape during the churning process.
- Outer Bucket: Some hand crank ice cream makers come with an outer bucket or casing. This bucket is designed to hold the ice and rock salt mixture, creating a freezing environment around the container. The outer bucket helps to insulate the ice cream mixture and accelerates the freezing process.
The construction of a hand crank ice cream maker is relatively straightforward, yet each component plays a crucial role in ensuring the success of your homemade ice cream. Now that we have a good understanding of how a hand crank ice cream maker is built, let’s explore how it functions and brings your frozen treats to life!
The Functioning of a Hand Crank Ice Cream Maker
Now that we understand the construction of a hand crank ice cream maker, let’s dive into how it actually works to create creamy, homemade ice cream:
- Preparation: Before you start using a hand crank ice cream maker, it’s important to ensure that the drum is properly frozen. This usually involves placing the drum in the freezer for several hours or overnight, depending on the manufacturer’s instructions.
- Mixing the Ice Cream Base: While the drum is freezing, you can prepare your ice cream base. This typically involves mixing ingredients such as cream, milk, sugar, and flavorings to create a sweet and creamy mixture. Once your base is ready, refrigerate it until it’s chilled.
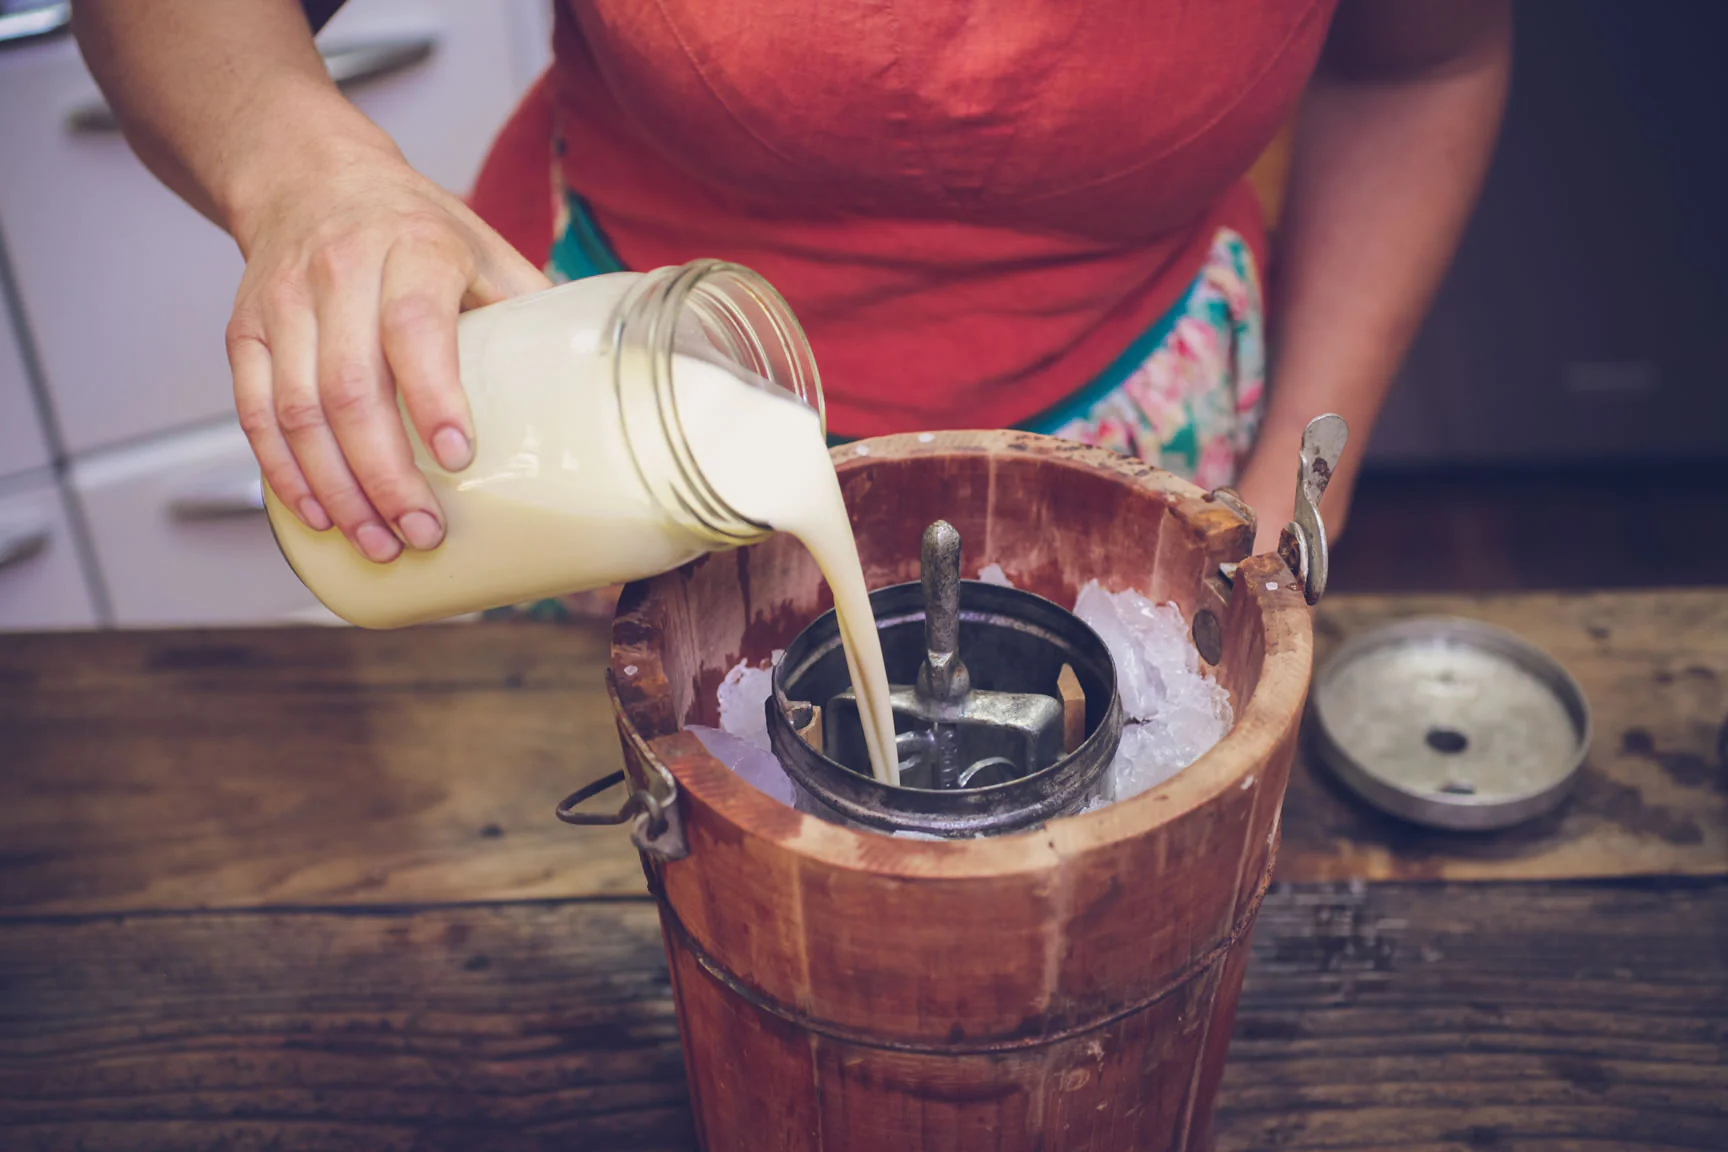
- Assembling the Ice Cream Maker: Once the drum is properly frozen and the ice cream base is chilled, it’s time to assemble the ice cream maker. Place the paddle or dasher in the drum and pour the chilled ice cream base into the container.
- Adding Ice and Salt: If your ice cream maker has an outer bucket, fill it with a layer of ice followed by a layer of rock salt. The salt helps to lower the freezing point of the ice, creating a colder environment that is necessary for freezing the ice cream mixture. Repeat this process until the ice is packed around the drum.
- Churning Process: Once the ice and salt are added, secure the lid tightly on the drum. Begin turning the hand crank at a steady pace, ensuring that the paddle is rotating smoothly inside the container. As you turn the crank, the paddle will scrape the sides of the drum, incorporating air and preventing the formation of ice crystals. This churning process should continue for about 20-30 minutes or until the ice cream reaches the desired consistency.
- Monitoring the Temperature: Throughout the churning process, it’s important to monitor the temperature. The ice and salt mixture will gradually melt as the ice cream freezes, and you may need to add more ice and salt to maintain the freezing temperature. The ideal temperature for freezing ice cream is around 18-20 degrees Fahrenheit (-7 to -6 degrees Celsius).
- Finalizing the Freezing: Once the ice cream reaches the desired consistency, remove the paddle and give the mixture a final stir. Transfer the ice cream to a storage container and place it in the freezer for a few hours to firm up further.
By following these steps, you can create delectable homemade ice cream using a hand crank ice cream maker. The manual effort involved in turning the crank allows you to actively participate in the creation of your frozen treat, resulting in a rewarding and enjoyable experience.
In the next section, we will provide a step-by-step guide on how to use a hand crank ice cream maker, ensuring that you have all the necessary information to embark on your ice cream-making adventure!
Step-by-Step Guide on How to Use a Hand Crank Ice Cream Maker
Using a hand crank ice cream maker is a delightful and rewarding experience that allows you to create homemade ice cream with your own hands. Here’s a step-by-step guide to help you make the most of your ice cream maker:
- Prepare the Drum: Place the drum of the ice cream maker in the freezer for the recommended amount of time, usually several hours or overnight. Ensure that the drum is frozen solid before proceeding.
- Mix the Ice Cream Base: While the drum is freezing, prepare your ice cream base by combining your desired ingredients, such as cream, sugar, and flavorings, in a separate mixing bowl. Stir the mixture until well combined and smooth.
- Chill the Ice Cream Base: After mixing the ice cream base, cover the bowl and refrigerate it for a few hours until it is thoroughly chilled. This step helps ensure that the mixture is at the right temperature for freezing in the ice cream maker.
- Assemble the Ice Cream Maker: Once the drum is frozen and the ice cream base is chilled, assemble the ice cream maker. Attach the paddle or dasher to the lid or top of the drum, ensuring it is securely in place.
- Pour in the Ice Cream Base: Take the chilled ice cream base out of the refrigerator and pour it into the drum of the ice cream maker. Make sure not to overfill the drum as the mixture will expand during the churning process.
- Add Ice and Salt: If your ice cream maker has an outer bucket, layer the drum with ice and rock salt. The salt helps create a colder environment that aids in freezing the ice cream mixture. Repeat the layering process until the ice is packed around the drum.
- Secure the Lid: Place the lid securely on the drum, ensuring that it fits tightly. This will prevent any ice or salt from entering the ice cream mixture during the churning process.
- Begin Churning: Grab the hand crank and start turning it slowly but steadily. As you turn the crank, the paddle inside the drum will begin churning the ice cream mixture. Continue to churn for approximately 20-30 minutes or until the mixture reaches the desired consistency.
- Monitor the Temperature: Throughout the churning process, check the temperature inside the drum. If the ice begins to melt too quickly, consider adding more ice and salt to maintain a freezing temperature.
- Remove the Ice Cream: Once the ice cream reaches the desired consistency, remove the paddle from the drum. Scrape off any excess mixture from the paddle and give the churned ice cream a quick stir.
- Transfer and Freeze: Transfer the churned ice cream into a freezer-safe container and place it in the freezer for a few hours or until it has firmed up to the desired texture.
- Serve and Enjoy: Once the ice cream has completely frozen, it’s ready to be enjoyed! Scoop it into bowls or cones, and savor the delicious taste of homemade ice cream made with love.
By following these steps, you will be able to use your hand crank ice cream maker effectively and create homemade ice cream that will impress your friends and family. Get creative with flavors and mix-ins to make your ice cream creations truly unique and memorable!
Benefits of Using a Hand Crank Ice Cream Maker
Using a hand crank ice cream maker comes with a plethora of benefits that add to the charm and appeal of making homemade ice cream. Here are some advantages of using a hand crank ice cream maker:
- Control over Ingredients: One of the greatest benefits of using a hand crank ice cream maker is having complete control over the ingredients. You can choose high-quality, natural ingredients and adjust the sweetness and flavors to your liking. This allows you to create healthier versions of your favorite ice cream flavors or experiment with unique and exciting combinations.
- Simplicity: Unlike electric ice cream makers with complicated settings and buttons, a hand crank ice cream maker is simple and straightforward. It doesn’t rely on complex mechanisms or technology, making it easy to operate and understand. All you need is your arm strength and a little patience to churn the perfect batch of ice cream.
- Interaction and Fun: Using a hand crank ice cream maker brings a sense of nostalgia and fun to the process of making ice cream. It allows you to actively participate in the creation of your frozen treat, providing a satisfying and engaging experience for both kids and adults alike.
- Homemade Taste and Quality: By making your own ice cream with a hand crank ice cream maker, you can enjoy the unmistakable taste and quality of homemade ice cream. The slow churning process and the careful attention to detail ensure that every spoonful is smooth, creamy, and packed with flavor.
- Portability: Hand crank ice cream makers are usually compact and lightweight, making them more portable compared to their electric counterparts. This means you can take them on picnics, camping trips, or any outdoor gathering, allowing you to enjoy freshly churned ice cream wherever you go.
- Creative Flexibility: With a hand crank ice cream maker, you have the freedom to experiment with different flavors, mix-ins, and textures. You can customize your ice cream to match your cravings and get creative with unique combinations that simply aren’t available in store-bought options.
- Cost-effective: Investing in a hand crank ice cream maker can save you money over time. Instead of purchasing expensive pints of premium ice cream from the store, you can make your own at a fraction of the price. Plus, you can make larger batches and customize them to suit your preferences, making it a cost-effective solution for satisfying your ice cream cravings.
These are just a few of the benefits you can enjoy by using a hand crank ice cream maker. It’s a wonderful appliance that allows you to unleash your creativity while indulging in the deliciousness of homemade ice cream.
In the next section, we will share some useful tips and tricks that will help you make the most of your hand crank ice cream maker and achieve exceptional results every time.
Tips and Tricks for Using a Hand Crank Ice Cream Maker
Using a hand crank ice cream maker can be a delightful experience, and with a few tips and tricks, you can elevate your ice cream-making game to new heights. Here are some helpful suggestions to ensure successful and delicious results:
- Pre-Freeze the Drum: To achieve optimal results, make sure to pre-freeze the drum for the recommended amount of time specified by the manufacturer. A properly frozen drum ensures that the ice cream mixture freezes evenly and churns smoothly.
- Chill the Ice Cream Base: Before pouring the ice cream base into the drum, ensure that it is thoroughly chilled. This helps the mixture freeze faster and encourages a smoother texture in the final product.
- Don’t Overfill the Drum: Avoid overfilling the drum with the ice cream base. Leave some room for expansion during the churning process, as the mixture will increase in volume as air is incorporated.
- Layer Ice and Salt: If your ice cream maker has an outer bucket, layer the drum with ice and salt, ensuring even distribution. This creates a colder environment for freezing the ice cream mixture and speeds up the freezing process.
- Turn the Crank at a Steady Pace: When churning the ice cream, maintain a steady and consistent pace while turning the crank. Avoid rushing or applying excessive force, as this can lead to inconsistent freezing and texture issues.
- Monitor and Maintain Temperature: Keep an eye on the temperature inside the drum during the churning process. If the ice begins to melt rapidly, add more ice and salt to maintain a freezing temperature and ensure even freezing of the ice cream mixture.
- Experiment with Flavors and Mix-Ins: Have fun and get creative with flavors and mix-ins. Incorporate your favorite ingredients such as fresh fruits, nuts, chocolate chunks, or cookie dough to add a personal touch to your homemade ice cream.
- Allow for Proper Firming in the Freezer: After churning, transfer the ice cream to a separate container and give it a few hours to firm up in the freezer. This step allows the ice cream to reach the desired texture and consistency before serving.
- Clean and Care for Your Ice Cream Maker: Proper maintenance and cleaning of your hand crank ice cream maker ensure its longevity and optimal performance. Follow the manufacturer’s instructions for cleaning and storage to keep your ice cream maker in top shape.
By following these tips and tricks, you can enhance your ice cream-making experience, achieve excellent results, and indulge in delectable homemade ice cream. Get creative, experiment with flavors, and enjoy the satisfaction of creating your own frozen treats!
In the next section, we will dive into the topic of maintenance and cleaning of a hand crank ice cream maker, ensuring that you can keep your appliance in pristine condition for many batches of ice cream to come.
Maintenance and Cleaning of a Hand Crank Ice Cream Maker
Proper maintenance and regular cleaning of your hand crank ice cream maker are essential to keep it in optimal condition and ensure its longevity. Here are some tips for maintaining and cleaning your ice cream maker:
- Read the Manufacturer’s Instructions: Always refer to the manufacturer’s instructions specific to your hand crank ice cream maker model. These guidelines will provide you with important information on maintenance, cleaning, and any specific precautions to be taken.
- Detach and Clean Removable Parts: Begin by detaching any removable parts, such as the paddle or dasher, from the ice cream maker. Rinse them thoroughly with warm soapy water and use a soft brush or sponge to remove any residue or build-up.
- Wipe Down the Container and Lid: Use a damp cloth or sponge to wipe down the inside of the container and the lid. Pay attention to any areas where ice cream residue may have accumulated and gently clean them.
- Avoid Submerging the Drum in Water: While cleaning the drum, avoid submerging it in water or immersing it fully. Instead, wipe the interior and exterior surfaces of the drum with a damp cloth or sponge.
- Remove Stubborn Stains: If there are stubborn stains or residue on the drum or paddle, create a paste using a mixture of baking soda and water. Apply the paste to the affected areas, let it sit for a few minutes, and then gently scrub with a sponge or brush.
- Thoroughly Dry all the Parts: After cleaning, ensure that all parts, including the drum, paddle, and lid, are completely dry before reassembling the ice cream maker or storing it. Moisture can lead to mold or damage the components.
- Store Properly: When not in use, store the ice cream maker in a clean and dry location. Make sure that all the components are properly dried and stored together to avoid misplacing any parts.
- Inspect for Wear and Tear: Regularly inspect your hand crank ice cream maker for any signs of wear and tear, such as loose screws or cracks. Address any issues promptly to prevent further damage or compromise to the performance of the appliance.
- Follow Recommended Maintenance Schedule: Follow the recommended maintenance schedule provided by the manufacturer. This may include lubricating any moving parts, tightening screws, or other specific maintenance tasks to keep your ice cream maker functioning optimally.
By following these maintenance and cleaning practices, you will ensure that your hand crank ice cream maker remains in excellent condition, providing you with many batches of delicious homemade ice cream for years to come.
Now that you know how to properly maintain and clean your ice cream maker, it’s time to wrap up this article. Remember, with a hand crank ice cream maker, you have the power to create incredible frozen treats and share the joy of homemade ice cream with your loved ones. So, grab that hand crank and start churning your way to ice cream perfection!
Conclusion
In conclusion, a hand crank ice cream maker offers a unique and enjoyable way to create delicious homemade ice cream. With its simple design and manual operation, it puts you in control of the entire ice cream-making process, allowing you to experiment with flavors, textures, and ingredients to suit your preferences.
We explored what a hand crank ice cream maker is and learned about its construction and functioning. By following a step-by-step guide, you can use this delightful appliance to churn out creamy and irresistible ice cream in the comfort of your own kitchen.
Using a hand crank ice cream maker brings numerous benefits, including the ability to control the ingredients and tailor the flavors to your liking. It also provides an opportunity for fun and interactive family or social gatherings. The portable nature of these devices allows you to enjoy homemade ice cream wherever you go.
We shared tips and tricks to enhance your hand crank ice cream maker experience, from preparing the ingredients to achieving the perfect texture. Additionally, we highlighted the importance of proper maintenance and cleaning to keep your ice cream maker in top-notch condition for consistent and impressive results.
So, whether you’re a seasoned ice cream enthusiast or a newbie to the world of homemade frozen treats, a hand crank ice cream maker is a wonderful addition to your kitchen. It unlocks the creativity within you and lets you experiment with flavors, textures, and combinations, resulting in icy delights that will put a smile on your face.
Now, it’s time to embark on your own hand crank ice cream adventure. Gather your favorite ingredients, turn that crank with enthusiasm, and create unforgettable homemade ice cream that will leave your taste buds wanting more!