Introduction
Welcome to our guide on how to keep the screen on your Android device from turning off. By default, Android devices are designed to automatically turn off the screen after a certain period of inactivity. While this feature helps conserve battery life, it can be a bit inconvenient when you need to continuously view or interact with your device without having to constantly touch the screen to keep it awake.
Fortunately, there are several ways to override the screen timeout setting and ensure that your Android screen stays on for as long as you need it. In this article, we will explore various methods and options that will allow you to keep the screen on, whether you’re reading an e-book, watching a video, or simply using your device as a digital clock.
We will start by discussing the most straightforward method, which involves adjusting the screen timeout setting in your Android device’s system settings. Next, we will explore the use of specialized apps that can override the default screen timeout behavior. For users with devices that have an ambient display feature, we’ll explain how to disable it to prevent the screen from turning off unexpectedly. Lastly, we’ll delve into the advanced options available through Developer Settings that allow for greater control over the screen timeout behavior.
Whether you’re a casual user looking for a quick solution or a more tech-savvy individual seeking advanced options, this guide has got you covered. So without further ado, let’s dive into the world of keeping your Android screen on!
Using the Screen Timeout Setting
One of the simplest ways to keep your Android screen on is to adjust the screen timeout setting in your device’s system settings. This setting determines how long your device will remain idle before the screen turns off automatically.
To access the screen timeout setting, follow these steps:
- Unlock your Android device and go to the Home screen.
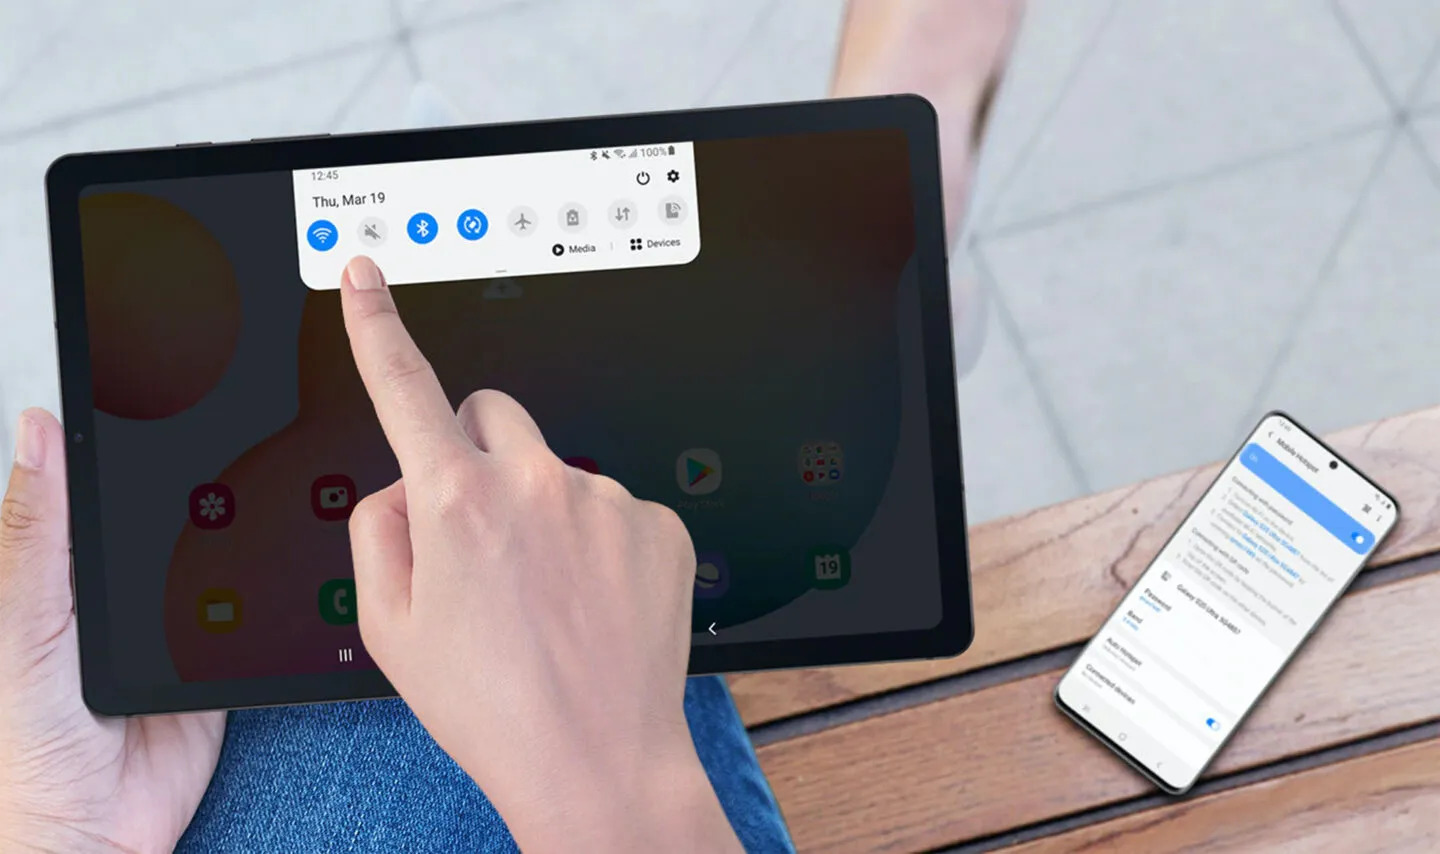
- Swipe down from the top of the screen to open the notification panel.
- Tap on the gear icon or the settings option to open the Settings menu.
- Scroll down and find the “Display” or “Display & Brightness” option, then tap on it.
- Look for the “Screen timeout” or “Sleep” option, and tap on it.
- Choose the desired timeout duration from the available options, such as 30 seconds, 1 minute, 2 minutes, etc. Alternatively, select the “Never” option to disable the screen timeout altogether.
By increasing the screen timeout duration or setting it to “Never,” you can ensure that your Android screen stays on for a longer period of time. Keep in mind that setting the timeout to a very high value or disabling it completely will have an impact on your device’s battery life.
This method is suitable for users who only need to keep the screen on temporarily, as it requires manual adjustment of the screen timeout setting. If you often find yourself needing to keep the screen on for extended periods, you may want to explore alternative methods discussed in the following sections.
Using an App to Keep the Screen On
If you frequently need to keep your Android screen on for extended periods or want more flexibility in controlling the screen timeout behavior, using a dedicated app can be a great solution. There are several apps available on the Google Play Store that specialize in keeping the screen awake.
To use an app to keep the screen on, follow these steps:
- Open the Google Play Store on your Android device.
- Search for “screen on” or “keep screen on” in the search bar.
- Choose a suitable app from the search results, making sure to read reviews and check the app’s ratings.
- Tap on the selected app to open its page in the Play Store.
- Read the app’s description, features, and user reviews to ensure it meets your requirements.
- Tap on the “Install” button to download and install the app on your device.
- After installation, open the app and follow the provided instructions to configure its settings.
- Typically, these apps offer options to customize the screen timeout duration, enable or disable specific apps from overriding the screen timeout, and even provide advanced features like screen dimming or gesture controls.
Using a dedicated app gives you greater control over the screen timeout behavior and allows you to fine-tune it according to your specific needs. It eliminates the hassle of manually adjusting the system settings every time you want to keep the screen on.
Keep in mind that some apps may display ads or offer in-app purchases for additional features. Additionally, using third-party apps may consume additional system resources and potentially impact battery life. It’s important to choose a reputable and well-reviewed app to ensure a smooth experience.
Using an app to keep the screen on is particularly useful for users who frequently use their devices for media consumption, reading, or any other tasks that require constant screen viewing. It offers convenience and flexibility without the need for continuous manual adjustments.
Disabling the Ambient Display Feature
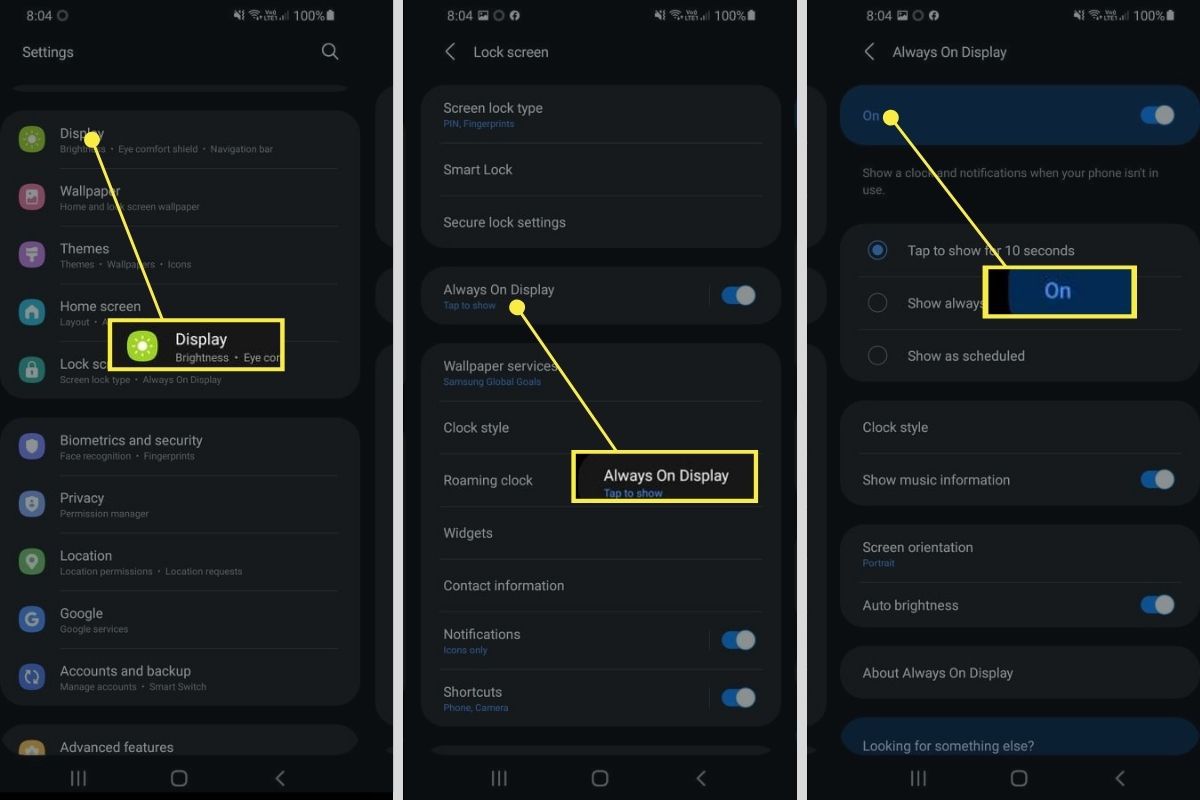
If you own an Android device that has an ambient display feature, you may experience the screen turning off unexpectedly due to the device’s ability to detect when it’s not in use. The ambient display is designed to conserve battery life by dimming the screen or turning it off when not actively being viewed. However, this can be inconvenient if you want to keep the screen on.
To disable the ambient display feature and prevent the screen from turning off unexpectedly, follow these steps:
- Unlock your Android device and go to the Home screen.
- Swipe down from the top of the screen to open the notification panel.
- Tap on the gear icon or the settings option to open the Settings menu.
- Scroll down and find the “Display” or “Display & Brightness” option, then tap on it.
- Look for the “Ambient Display” or “Tap to Wake” option, and tap on it.
- Toggle the switch or checkbox to disable the ambient display feature.
Once disabled, the ambient display feature will no longer dim or turn off the screen when not in use, allowing you to keep the screen on for as long as you need without interruption.
It’s worth noting that not all Android devices have the ambient display feature, as it is commonly found in devices that have OLED or AMOLED screens. If your device doesn’t have this feature, you can skip this step and proceed to explore alternative methods to keep the screen on.
Disabling the ambient display feature is especially helpful for users who frequently use their devices for activities that require continuous screen viewing, such as navigation, monitoring a process, or using the device as a digital clock. It ensures that the screen stays on without any unexpected interruptions.
Utilizing Developer Options to Keep the Screen On
For more advanced users, Android provides a set of hidden options called Developer Options, which offer additional functionalities and customization options. Among these options is the ability to keep the screen on indefinitely, overriding the default screen timeout behavior.
To utilize Developer Options and keep the screen on, follow these steps:
- Unlock your Android device and go to the Home screen.
- Swipe down from the top of the screen to open the notification panel.
- Tap on the gear icon or the settings option to open the Settings menu.
- Scroll down and find the “About phone” or “About device” option, then tap on it.
- Locate the “Build number” or “Build version” option and tap on it seven times in quick succession. This will enable Developer Options.
- Go back to the main Settings menu and scroll down to find the newly enabled “Developer Options” menu.
- Tap on “Developer Options” to open the menu.
- Scroll down and find the “Stay awake” or “Keep screen on while charging” option, then toggle the switch to enable it.
Once enabled, the “Stay awake” option will prevent the screen from turning off as long as the device is connected to a power source or charging. This is convenient for scenarios where you want to use your device continuously, such as during presentations, testing apps, or reading lengthy documents.
It’s important to note that Developer Options provide a range of advanced options that can potentially affect the performance and stability of your device. Proceed with caution and only modify settings that you understand and are confident in changing.
Utilizing Developer Options to keep the screen on is ideal for users who want complete control over their device’s screen timeout behavior and are comfortable exploring advanced settings. It offers flexibility and customization options beyond what the default system settings provide.
Conclusion
In this guide, we have explored various methods to keep the screen on your Android device from turning off. Whether you need to continuously view or interact with your device for an extended period, there are options available to meet your needs.
Adjusting the screen timeout setting in your device’s system settings provides a simple and straightforward solution. By increasing the timeout duration or disabling it altogether, you can keep the screen on for longer periods. This method is suitable for temporary needs and requires manual adjustment.
Using dedicated apps designed to keep the screen on offers more flexibility and control. These apps allow you to customize the screen timeout duration, specify which apps should override the timeout, and even provide additional features like screen dimming or gesture controls. It is a convenient option for users who frequently require continuous screen viewing.
For users with devices that have an ambient display feature, disabling it prevents the screen from turning off unexpectedly. This feature can be found in the display settings, and turning it off ensures a consistent screen-on experience.
Advanced users can take advantage of Developer Options, a hidden set of options in Android, to keep the screen on indefinitely. Enabling the “Stay awake” option overrides the default screen timeout behavior, making it ideal for situations where continuous screen usage is necessary.
By utilizing these methods, you can customize your Android device to keep the screen on as needed, enhancing your user experience and eliminating the inconvenience of the screen constantly turning off. Choose the method that suits your requirements and enjoy uninterrupted screen viewing.


