Introduction
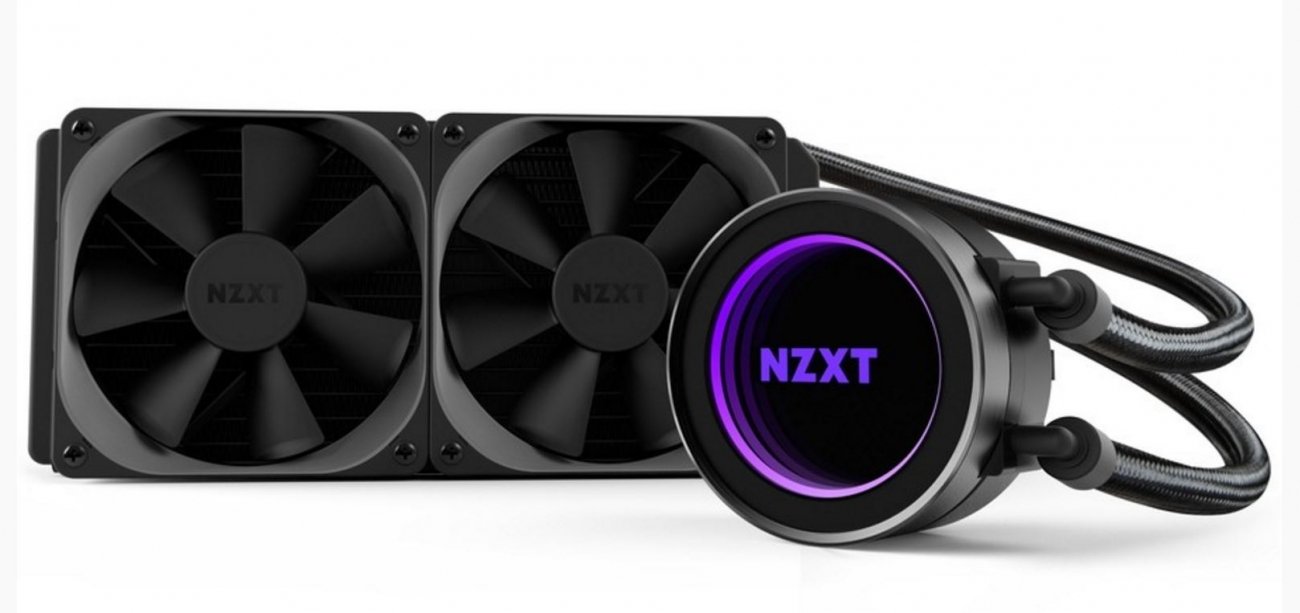
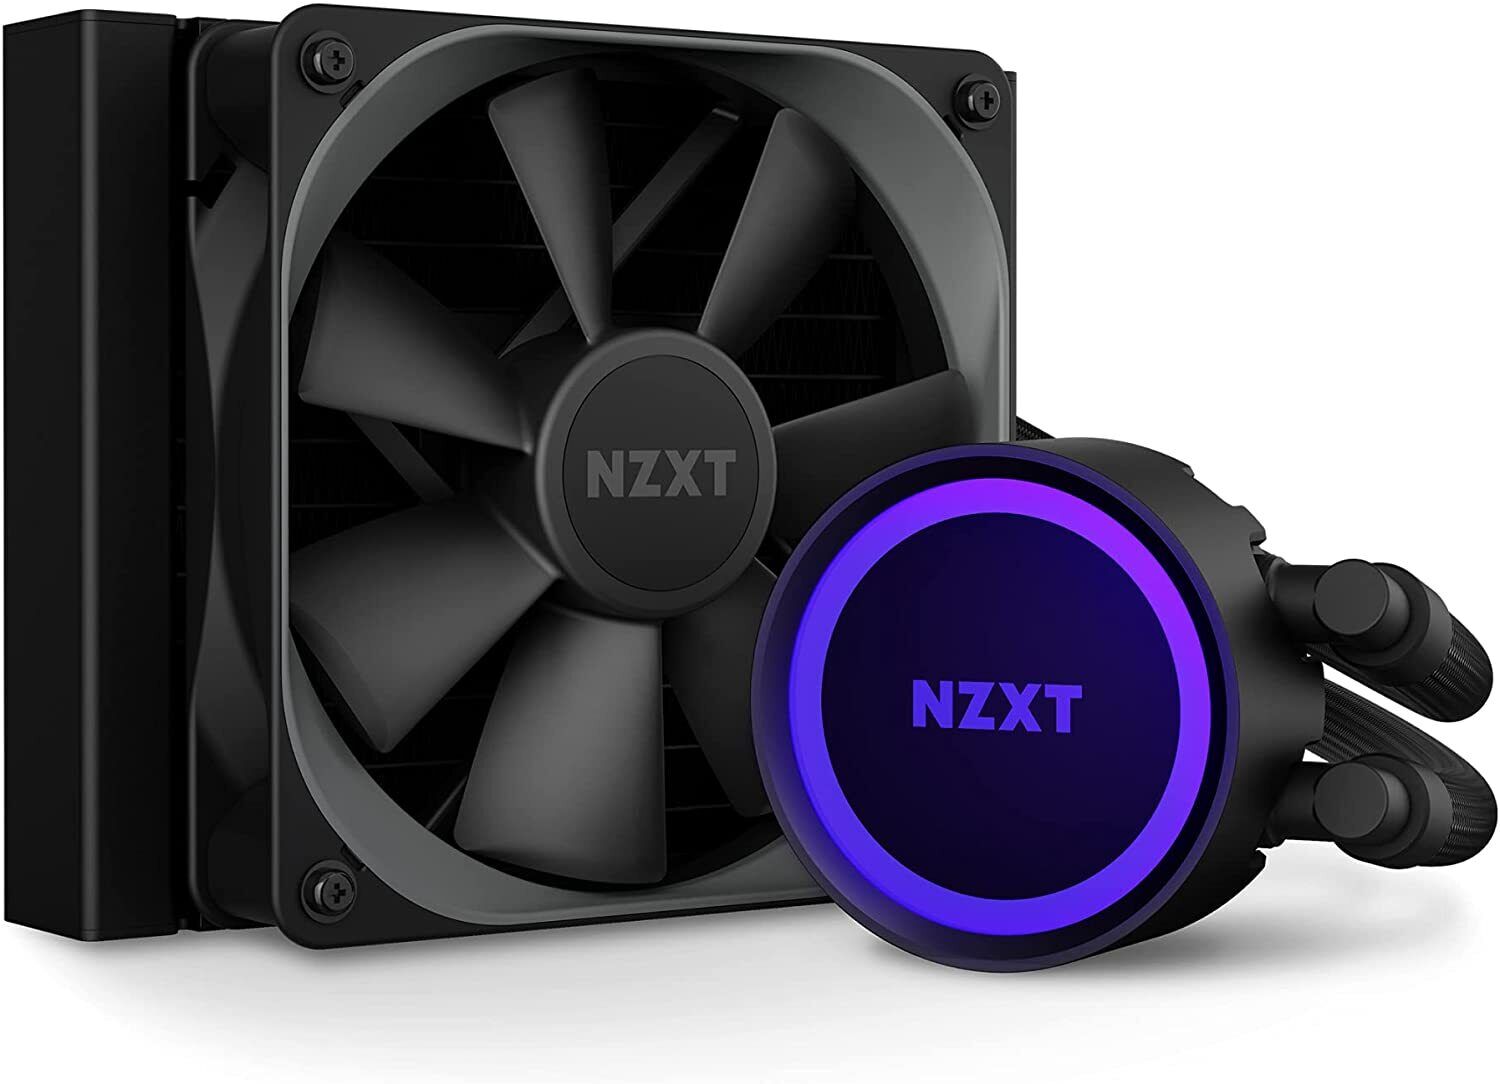
Welcome to the step-by-step guide on how to install the NZXT Kraken X52 Rev 2 73.11 CFM Liquid CPU Cooler. If you’re looking to upgrade your PC’s cooling system and enhance its performance, the NZXT Kraken X52 is an excellent choice. This all-in-one liquid cooler offers superior heat dissipation and quiet operation, making it perfect for both gaming enthusiasts and professionals who require high-performance cooling.
Installing a liquid CPU cooler may sound intimidating at first, but with our detailed instructions, you’ll find it surprisingly easy. In this guide, we’ll walk you through each step of the process, ensuring a safe and seamless installation.
Before we begin, it’s essential to gather all necessary materials. You’ll need the NZXT Kraken X52 Rev 2 Liquid CPU Cooler, a compatible computer case with 240mm radiator mounting support, a thermal compound, a screwdriver set, and an antistatic wristband (recommended).
Note: It’s crucial to read the instructions supplied with the NZXT Kraken X52 Rev 2 and consult your computer case manual for any specific instructions or compatibility requirements. Additionally, ensure the computer is powered off and unplugged before starting the installation.
Are you ready to dive into the installation process? Let’s get started!
Step 1: Gather all necessary materials
Before beginning the installation process, it’s essential to gather all the necessary materials. This ensures that you have everything you need, making the installation smooth and hassle-free. Here’s a list of items you’ll need:
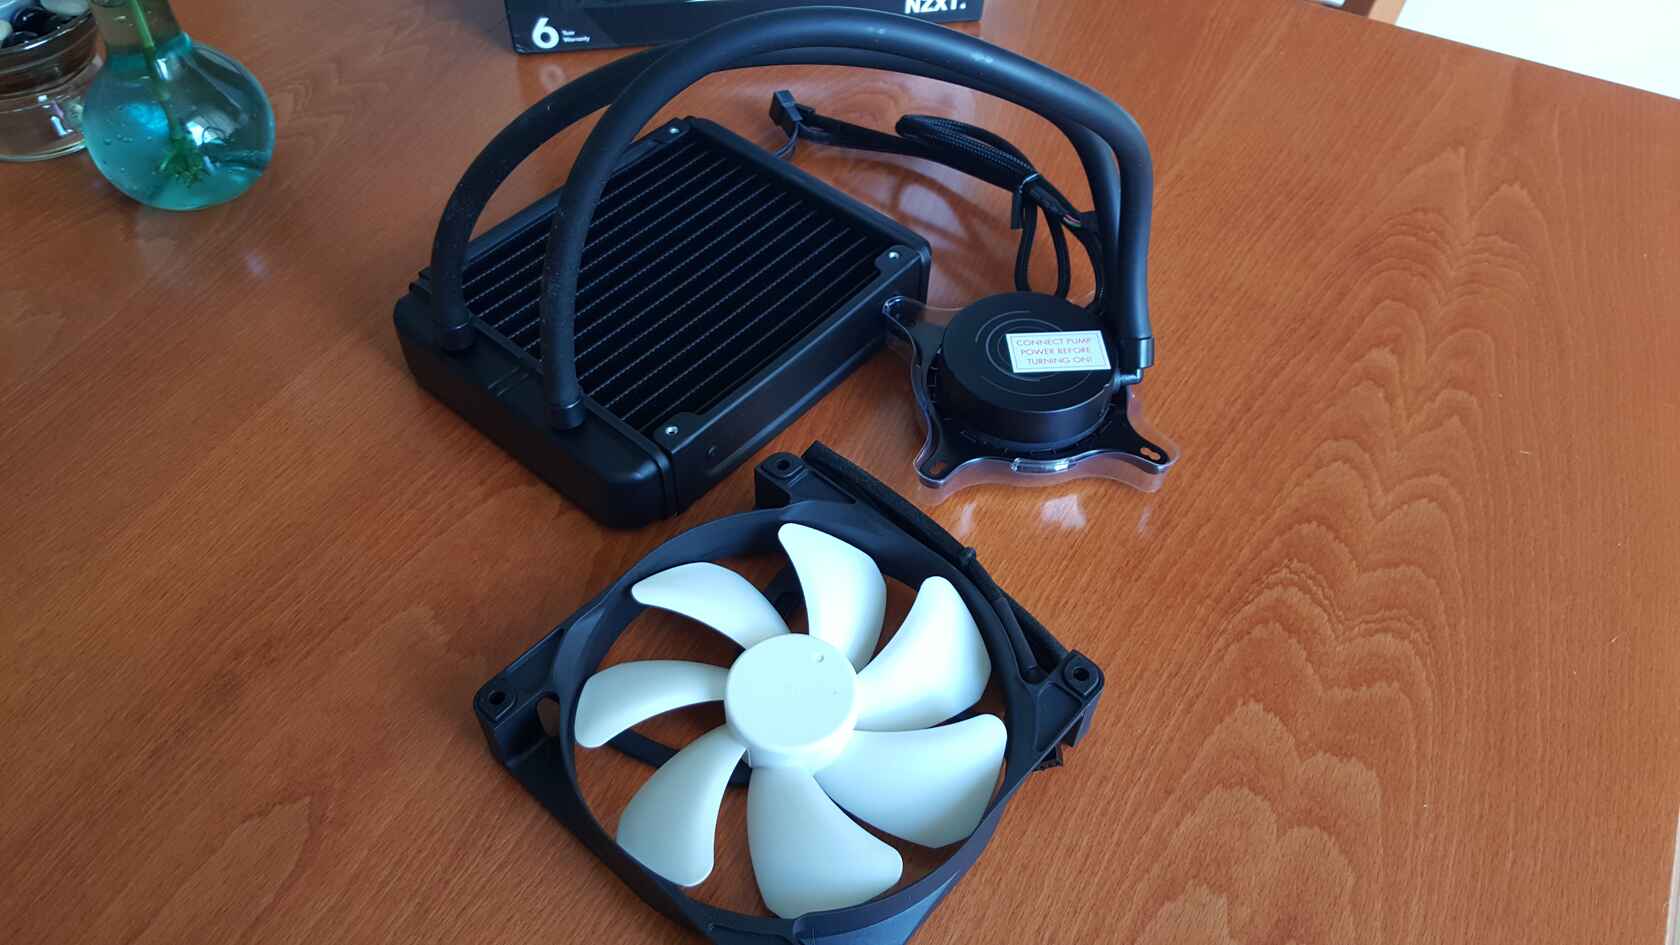
- NZXT Kraken X52 Rev 2 Liquid CPU Cooler
- Computer case with 240mm radiator mounting support
- Thermal compound
- Screwdriver set
- Antistatic wristband (recommended)
The NZXT Kraken X52 Rev 2 Liquid CPU Cooler is the heart of this installation. It’s a high-performance liquid cooling solution designed to keep your CPU temperatures in check, even during intense gaming or demanding workloads. Make sure you have the correct version of the cooler and inspect it for any damages or missing parts.
Next, check your computer case for compatibility. The case should have support for a 240mm radiator so that you can mount the NZXT Kraken X52 correctly. Consult the case manual or manufacturer’s website for detailed specifications and instructions on radiator mounting locations.
Thermal compound is vital for effective heat transfer between the CPU and the cooler’s cold plate. Most CPU coolers, including the NZXT Kraken X52, come with pre-applied thermal paste. However, if you prefer using your own thermal compound or need to reapply it, ensure that you have a high-quality thermal compound on hand.
A standard screwdriver set will be required for various stages of the installation, including securing the CPU block and mounting the radiator. Ensure that you have the appropriate screwdriver heads, including Phillips and flat-head, to accommodate different types of screws.
Using an antistatic wristband is highly recommended to prevent any accidental damage to sensitive electronic components during the installation process. It helps protect against static electricity, which can potentially harm your CPU or other internal components. If you don’t have an antistatic wristband, make sure to discharge any static build-up by touching a metal object before handling any components.
With all the necessary materials at hand, you’re now ready to proceed with the installation of the NZXT Kraken X52 Rev 2 Liquid CPU Cooler. Follow the remaining steps in this guide to ensure a successful installation and optimal performance of your cooling system.
Step 2: Preparing the case
Before installing the NZXT Kraken X52 Rev 2 Liquid CPU Cooler, it’s essential to prepare your computer case. Proper preparation ensures that the installation process goes smoothly and that the cooler is mounted securely. Follow these steps to prepare the case:
- Power off your computer and unplug it from the wall outlet. This precautionary measure protects you from electrical shocks and prevents any accidental damage to your components.
- Open the side panel of your computer case. The method of removing the side panel may vary depending on the case model. Refer to your computer case manual for specific instructions if needed.
- Clear out any obstructions or cables that could interfere with the installation process, ensuring a clean and spacious area for mounting the cooler. Also, remove any pre-installed rear case fan that might obstruct the placement of the radiator.
- Identify the mounting location for the radiator. Most mid-tower and full-tower cases have designated mounting spots for 240mm radiators. Look for two mounting points, usually near the top or front of the case, with corresponding screw holes.
- Inspect the mounting location and ensure that there are no obstructions, such as cable routing brackets or drive cages, that might interfere with the placement of the radiator. If necessary, remove or reposition any components that are blocking the mounting area.
- If your case supports multiple radiator mounting options, consider the airflow and cooling requirements of your system. Mounting the radiator at the front of the case is ideal for creating a positive pressure setup, while a top-mounting position allows for better exhaust airflow.
- Once the mounting area is clear and ready, examine the radiator screw holes to determine the appropriate screw size. Typically, cases include long screws specifically designed for mounting radiators. Ensure you have the correct screws that match the screw holes on the radiator.
- At this stage, it is also recommended to clean any dust or debris from the case fans, radiator fins, and other components using compressed air or a soft brush. This helps maintain optimal cooling performance throughout the installation process.
By properly preparing your computer case, you’ll ensure a smooth and hassle-free installation of the NZXT Kraken X52 Rev 2 Liquid CPU Cooler. Take your time to clear out any obstructions, locate the appropriate mounting position, and clean the case for optimal cooling. With the case ready, you’re now ready to move on to the next step: installing the backplate.
Step 3: Installing the backplate
Installing the backplate is a crucial step in securing the NZXT Kraken X52 Rev 2 Liquid CPU Cooler to your motherboard. The backplate provides stability and ensures proper alignment of the cooler. Follow these steps to install the backplate:
- Refer to your motherboard manual to determine the appropriate orientation of the backplate for your specific motherboard model.
- Locate the back of your motherboard and identify the CPU socket area. Remove any pre-existing backplate if present.
- Take the NZXT Kraken X52 backplate and align it with the CPU socket area on the back of the motherboard. Ensure that the orientation matches that specified in your motherboard manual.
- With the backplate in position, insert the four mounting screws into the corresponding holes on the backplate and thread them through to the front of the motherboard.
- Hold the backplate in place with one hand while using the other hand to tighten the mounting screws evenly. Start with a few gentle turns for each screw and gradually increase the tightening, rotating in a diagonal pattern. Be careful not to overtighten, as this can damage the motherboard.
- Once the backplate is securely attached, double-check that it is aligned properly and firmly seated against the motherboard. If necessary, readjust the screws to achieve proper alignment.
- After confirming that the backplate is securely in place, remove any excess thermal compound on the CPU socket using a lint-free cloth or alcohol wipe. This ensures a clean contact surface for the CPU block.
By following these steps, you can successfully install the backplate for the NZXT Kraken X52 Rev 2 Liquid CPU Cooler. The backplate provides essential stability and alignment, ensuring a secure installation of the cooler. With the backplate in place, we can now move on to the next step: mounting the radiator.
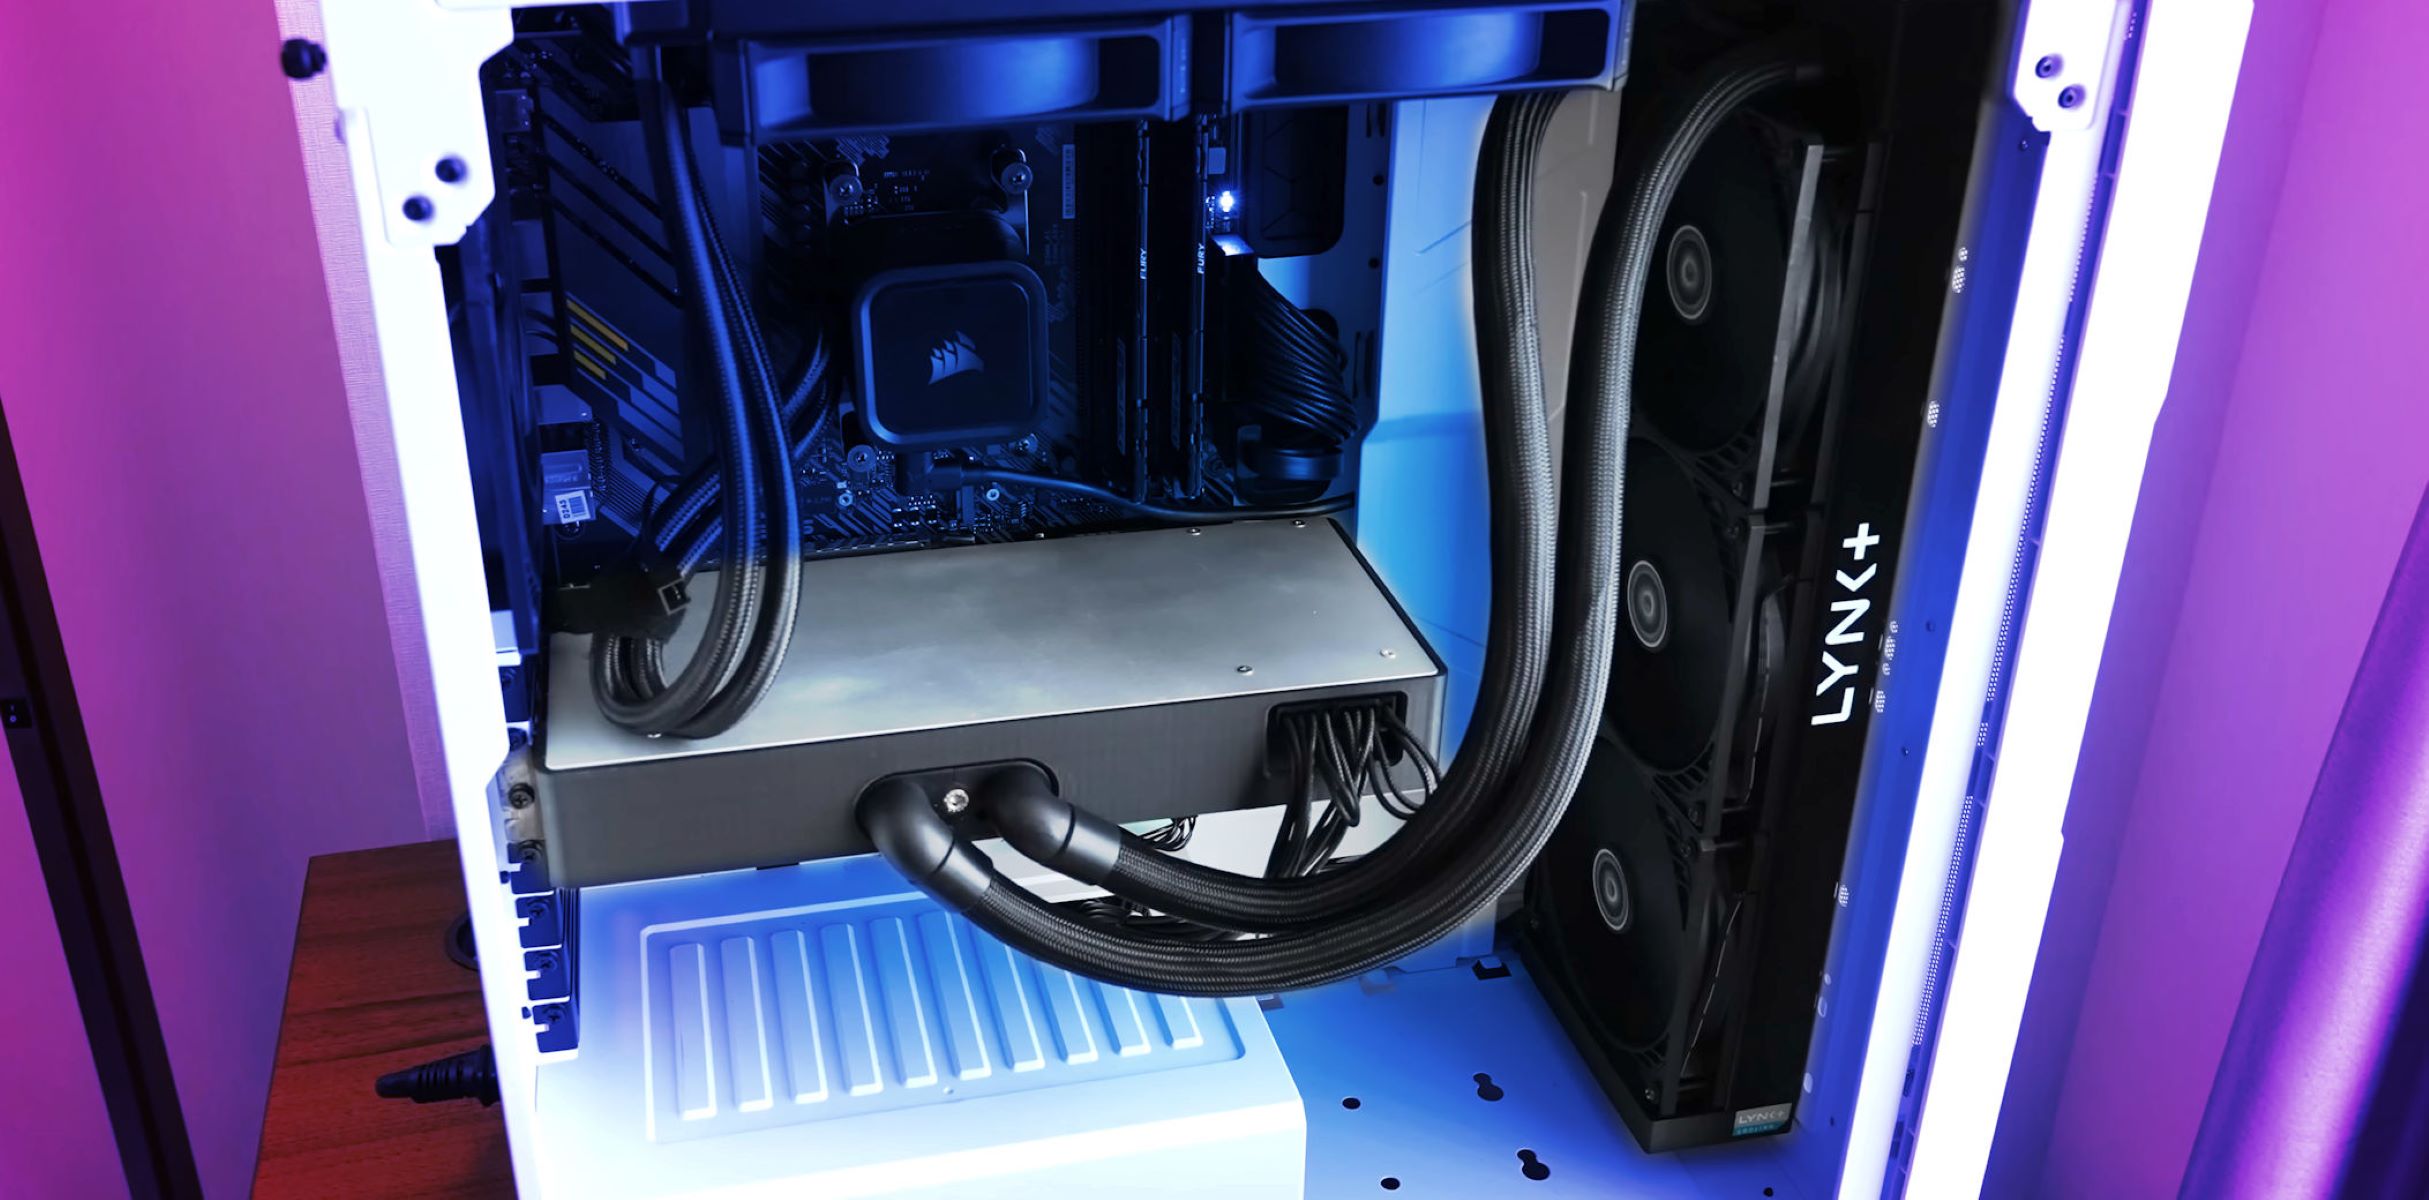
Step 4: Mounting the radiator
Mounting the radiator is a critical step in installing the NZXT Kraken X52 Rev 2 Liquid CPU Cooler. The radiator is responsible for dissipating heat from the CPU, ensuring optimal cooling performance. Follow these steps to mount the radiator:
- Examine the radiator and identify the tubes and cable connections. Orient the radiator so that the tubes are positioned appropriately for connecting to the CPU block and the cable connections are easily accessible.
- Locate the mounting points on your computer case for the 240mm radiator. These are typically found at the top or front of the case. Ensure that the mounting points match the size of the radiator.
- Place the radiator at the designated mounting points and align the screw holes on the radiator with the corresponding holes on the case. It’s important to handle the radiator with care, ensuring not to damage the delicate fins or the tubes.
- Using the appropriate screws, secure the radiator to the case by gently tightening the screws in a diagonal pattern. Start with a few turns for each screw and gradually increase the tightening, ensuring an even and secure mount.
- Once all the screws are securely tightened, double-check the alignment of the radiator. Make sure it is level and properly positioned in the case, with the tubes and cable connections oriented as desired for easy cable management.
- At this stage, it’s a good idea to check the clearance between the radiator and other components in your system, such as RAM modules or graphics cards. Ensure that there is sufficient clearance for proper airflow and to avoid any potential conflicts.
- If your case has additional mounting options for fans on the radiator, consider attaching the fans at this point. This step can help enhance cooling performance by promoting optimal airflow through the radiator fins.
By carefully following these steps, you can successfully mount the NZXT Kraken X52 Rev 2 Liquid CPU Cooler’s radiator in your computer case. The radiator plays a crucial role in heat dissipation, ensuring that your CPU stays cool under heavy loads. With the radiator securely mounted, we’re ready to move on to the next step: attaching the fans.
Step 5: Attaching the fans
Attaching the fans to the radiator is an important step in maximizing the cooling performance of the NZXT Kraken X52 Rev 2 Liquid CPU Cooler. The fans help to push airflow through the radiator, effectively dissipating heat from the CPU. Follow these steps to attach the fans:
- Check the package contents to ensure that you have the appropriate number of fans included with your NZXT Kraken X52 Rev 2. Typically, a 240mm radiator setup requires two fans.
- Identify the mounting points on the radiator where the fans will be attached. These mounting points are usually located on either side of the radiator, aligned with the screw holes.
- Take one of the fans and align it with the mounting points on the radiator. Ensure that the fan cables are positioned in a way that allows for easy cable management later on.
- Secure the fan to the radiator by inserting the screws through the fan mounting holes and threading them into the corresponding holes on the radiator. Use a screwdriver to tighten the screws, ensuring a secure attachment.
- Repeat the process for the second fan, aligning it with the remaining mounting points on the radiator. Ensure that both fans are oriented in the same direction for consistent airflow through the radiator.
- Double-check the alignment and stability of the fans. Make sure they are firmly attached to the radiator and positioned correctly for optimal airflow.
- Once the fans are securely attached, you can connect their power cables. Locate the fan headers on your motherboard or fan controller and connect the fans’ cables accordingly. Ensure a secure connection to provide power to the fans.
- If your NZXT Kraken X52 Rev 2 comes with RGB lighting on the fans, you may have additional cables for controlling the lighting effects. Consult the user manual that came with your cooler for specific instructions on connecting and controlling the RGB lighting.
By following these steps, you can successfully attach the fans to the radiator of the NZXT Kraken X52 Rev 2 Liquid CPU Cooler. The fans play a crucial role in maximizing airflow and enhancing cooling performance. With the fans securely in place, we’re ready to move on to the next step: connecting the pump.
Step 6: Connecting the pump
Connecting the pump is a crucial step in ensuring the proper operation of the NZXT Kraken X52 Rev 2 Liquid CPU Cooler. The pump is responsible for circulating the coolant through the system, effectively transferring heat away from the CPU. Follow these steps to connect the pump:
- Locate the pump unit of the NZXT Kraken X52 Rev 2, which contains both the pump and the CPU block.
- Take a look at the CPU socket on your motherboard and determine the appropriate connector for powering the pump. This connector is typically labeled as “CPU_FAN” or “AIO_PUMP” and is located near the CPU socket.
- Connect the pump’s power cable to the designated CPU fan header or AIO pump header on your motherboard. Ensure a secure connection by aligning the pins and pushing the connector in firmly. You will hear a click when the connection is properly made.
- Some motherboards may require you to adjust the CPU fan speed control settings in the BIOS. Refer to your motherboard manual for specific instructions on setting the fan speed control mode to “DC” or “PWM” for the pump connector.
- If your NZXT Kraken X52 Rev 2 pump unit features RGB lighting, locate the RGB connector on the pump and the corresponding RGB header on your motherboard. Connect the RGB cable to the header, ensuring proper alignment and a secure connection.
- Depending on your personal preference or the specific features of your cooler model, you may have additional cables for controlling the pump speed or lighting effects. Consult the user manual provided with your NZXT Kraken X52 Rev 2 for any specific instructions on connecting and controlling these additional features.
- Ensure that the cables connecting the pump are routed neatly and securely, avoiding any obstructions or potential tangling with other components.
By following these steps, you can successfully connect the pump of the NZXT Kraken X52 Rev 2 Liquid CPU Cooler. The pump plays a vital role in circulating the coolant and maintaining optimal CPU temperatures. With the pump connected, we can now move on to the next step: securing the CPU block.
Step 7: Securing the CPU block
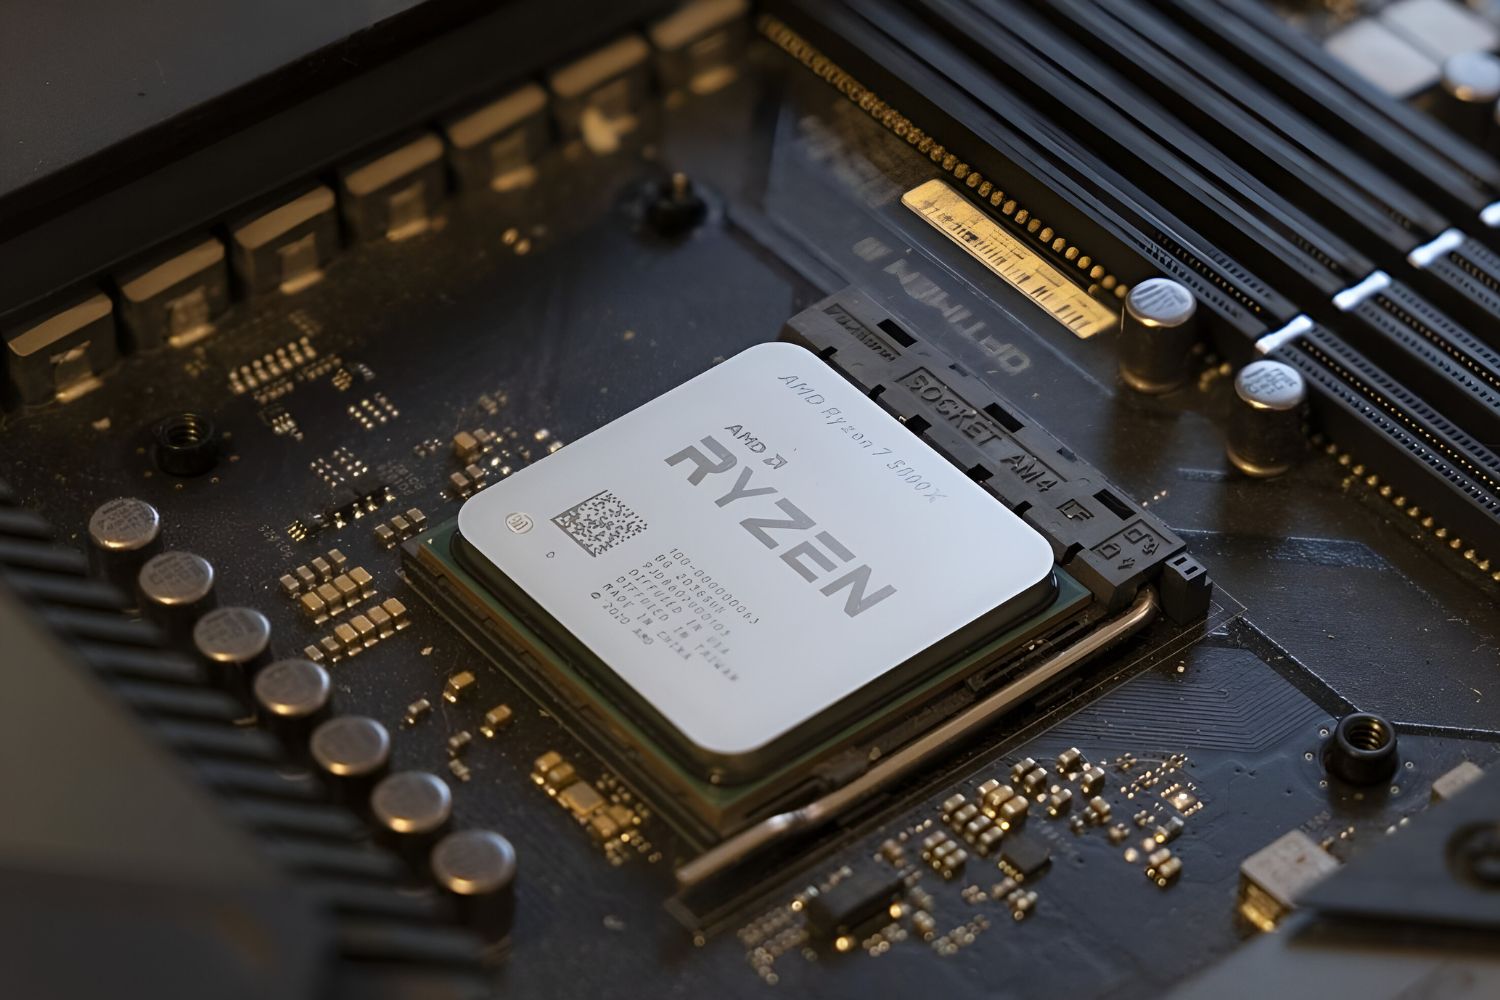
Securing the CPU block is a crucial step in ensuring proper contact and efficient heat transfer between the CPU and the NZXT Kraken X52 Rev 2 Liquid CPU Cooler. The CPU block is responsible for removing heat from the CPU and transferring it to the liquid coolant. Follow these steps to securely install the CPU block:
- Apply a small amount of thermal compound to the center of the CPU. The thermal compound helps in achieving optimal heat transfer between the CPU and the cold plate of the CPU block. Use an appropriate thermal compound and follow the manufacturer’s instructions.
- Lower the CPU block onto the CPU, aligning the screw holes on the block with the mounting holes around the CPU socket.
- Ease the CPU block gently downward, ensuring that it makes full contact with the CPU. Be cautious not to apply excessive pressure, as it can damage the CPU.
- With the CPU block in position, insert the mounting screws into the designated holes on the block and tighten them diagonally. Start with a few gentle turns for each screw and gradually increase the tightening while maintaining a diagonal pattern.
- Take extra care not to overtighten the mounting screws, as it can lead to uneven pressure distribution and potentially damage the CPU or the CPU socket.
- If your NZXT Kraken X52 Rev 2 features an adjustable mounting bracket, make sure it is properly aligned and securely fastened to the CPU block. Follow the manufacturer’s instructions for your specific cooler model.
- After securing the CPU block, inspect the mounting screws and double-check that they are tight and secure. Additionally, ensure that the block is level and making uniform contact with the CPU.
By following these steps, you can successfully secure the CPU block of the NZXT Kraken X52 Rev 2 Liquid CPU Cooler. Proper installation ensures efficient heat transfer and optimal cooling performance for your CPU. With the CPU block securely in place, we’re ready to move on to the next step: connecting the power cables.
Step 8: Connecting the power cables
Connecting the power cables is a crucial step in ensuring that the NZXT Kraken X52 Rev 2 Liquid CPU Cooler receives the necessary power to operate effectively. This step involves connecting the power cables for both the fans and the pump. Follow these steps to connect the power cables:
- Locate the fan power cables that are coming from the fans attached to the radiator. These cables are typically labeled and have a 4-pin connector.
- Identify the appropriate fan headers on your motherboard for connecting the fan power cables. These headers are typically labeled “SYS_FAN” or “CHA_FAN.” Consult your motherboard manual for specific locations and labeling.
- Connect the fan power cables to the fan headers on the motherboard. Ensure that the orientation of the connectors is correct and that they are firmly plugged in. You will hear a click when the connection is properly made.
- If your NZXT Kraken X52 Rev 2 includes RGB lighting on the fans, check the package contents for any additional cables for controlling the RGB lighting effects. Connect these cables according to the manufacturer’s instructions and connect them to the appropriate RGB header on your motherboard.
- Next, locate the power cable coming from the pump unit of the NZXT Kraken X52 Rev 2. This cable is typically labeled and has a 3-pin connector.
- Identify the appropriate CPU fan header or AIO pump header on your motherboard for connecting the pump power cable. Refer to your motherboard manual for specific labeling and location.
- Connect the pump power cable to the designated CPU fan header or AIO pump header on the motherboard. Ensure a secure connection and verify that it is properly aligned.
- Double-check all the connections to ensure that the fan power cables and the pump power cable are securely connected. Take the time to tidy up the cables and ensure they are neatly routed and not obstructing any components or airflow.
By following these steps, you can successfully connect the power cables for both the fans and the pump of the NZXT Kraken X52 Rev 2 Liquid CPU Cooler. These connections are crucial for supplying power to the cooler and allowing it to operate effectively. With the power cables connected, we’re ready to move on to the next step: testing the installation.
Step 9: Testing the installation
Testing the installation of the NZXT Kraken X52 Rev 2 Liquid CPU Cooler is an important final step to ensure that everything is functioning properly and that your CPU is receiving adequate cooling. Follow these steps to test the installation:
- Double-check all connections and ensure that all cables are securely plugged in.
- Power on your computer and enter the BIOS or UEFI settings. Check the CPU temperature readings to ensure that the cooler is successfully dissipating heat from the CPU.
- If your NZXT Kraken X52 Rev 2 has software or driver support, install the necessary software and make any desired adjustments to fan speeds, pump speeds, or RGB lighting effects.
- Run stress tests or CPU-intensive tasks to put a significant load on the CPU. Monitor the CPU temperatures to ensure that they stay within safe limits.
- Listen for any abnormal noises coming from the pump or fans. If you notice any unusual sounds, ensure that the cooler is properly installed and that all connections are secure.
- Closely observe the cooling performance over an extended period of time. If you notice any temperature spikes or instability, recheck the installation to ensure proper contact between the CPU and the cooler.
- If everything is functioning smoothly, close up your computer case and enjoy the enhanced cooling performance of the NZXT Kraken X52 Rev 2 Liquid CPU Cooler.
- Periodically monitor the CPU temperatures and performance to ensure that the cooler continues to operate effectively.
By following these steps and thoroughly testing the installation, you can ensure that the NZXT Kraken X52 Rev 2 Liquid CPU Cooler is properly installed and functioning as expected. Regularly monitoring the temperatures and performance of your CPU will help you identify any potential issues early on. Congratulations on successfully installing the NZXT Kraken X52 Rev 2, and enjoy the benefits of improved cooling for your system!
Conclusion
Congratulations! You have successfully completed the installation of the NZXT Kraken X52 Rev 2 73.11 CFM Liquid CPU Cooler. By following the step-by-step instructions outlined in this guide, you have upgraded your PC’s cooling system, enhancing its performance and ensuring smooth and efficient heat dissipation from your CPU.
Throughout the installation process, you gathered all the necessary materials, prepared the case, installed the backplate, mounted the radiator, attached the fans, connected the pump, secured the CPU block, connected the power cables, and tested the installation to ensure optimal functionality and cooling performance.
With the NZXT Kraken X52 Rev 2 Liquid CPU Cooler properly installed, you can expect improved thermal management, lower CPU temperatures, and enhanced system stability, especially during demanding tasks such as gaming or intensive workloads. The efficient liquid cooling system of the Kraken X52 Rev 2 ensures quiet operation and high-performance cooling for your CPU.
Remember to periodically monitor your CPU temperatures and performance to ensure that the cooler continues to operate effectively. Regular maintenance, such as cleaning the radiator fins and updating the software or drivers, will help maintain the optimal performance of your cooling system.
Thank you for following this guide, and we hope that your experience with the NZXT Kraken X52 Rev 2 Liquid CPU Cooler brings you improved cooling efficiency and an overall enhanced computing experience!