Introduction
Welcome to our guide on how to install a new case fan! If you’re experiencing overheating issues or simply want to improve the airflow in your computer, adding a new case fan can be an effective solution. A case fan helps dissipate heat generated by the components inside your computer, preventing damage and ensuring optimal performance.
Whether you’re a seasoned computer enthusiast or a beginner, this step-by-step guide will walk you through the process of installing a new case fan. No previous technical experience is required – all you need is a few tools, some basic knowledge, and a bit of patience.
In this guide, we’ll cover everything from gathering the necessary tools and materials, to identifying the right type and size of case fan for your computer. We’ll also explain how to properly shut down your computer, open the case, remove the old fan (if necessary), and position and connect the new fan.
By the end of this guide, you’ll have a fully operational, efficiently cooled computer that will run smoothly even during resource-intensive tasks. So, let’s get started!
Step 1: Gather the necessary tools and materials
Before you begin the installation process, it’s important to make sure you have all the tools and materials you’ll need. Here’s a list of items you should have on hand:
- Screwdriver – Most case fans are secured using screws, so having a screwdriver with the appropriate size and type (usually Phillips or flathead) is essential for a smooth installation.
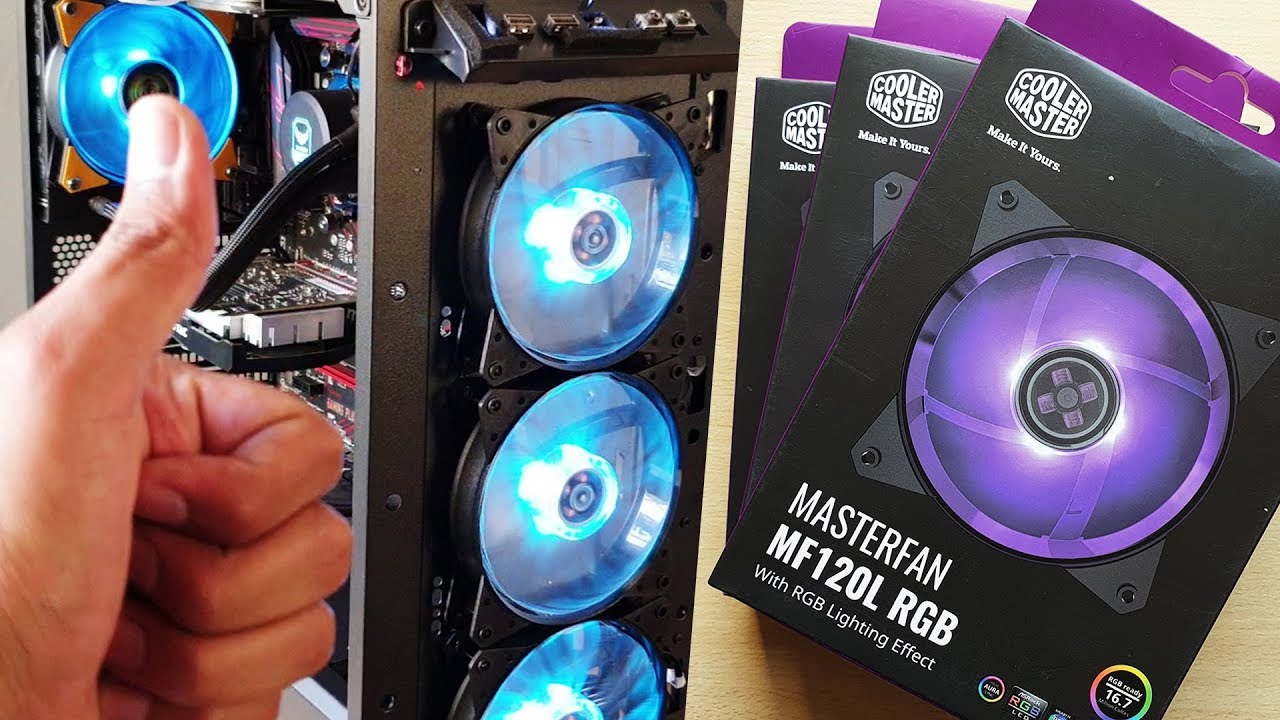
- New Case Fan – Make sure you have a brand new case fan ready to be installed. Consider the size, type (such as exhaust or intake), and compatibility with your computer’s motherboard.
- Anti-static wrist strap – It’s always a good idea to wear an anti-static wrist strap to prevent any electrostatic discharge that could potentially damage your computer’s components.
- Thermal paste (optional) – If you’re replacing an existing case fan or installing a fan on a heatsink, you may need thermal paste to ensure proper heat transfer.
- Cable ties – Cable ties can be handy for securing cables and keeping them organized during the installation process.
- Cotton swabs and Isopropyl alcohol (optional) – If you’re removing an old case fan, you may need cotton swabs and isopropyl alcohol to clean any dust or debris from the mounting area.
Once you have all the necessary tools and materials assembled, you’re ready to move on to the next step. Having everything prepared beforehand will streamline the installation process and minimize any potential interruptions.
Before proceeding, it’s always a good idea to read the manufacturer’s instructions that come with the case fan. These instructions may include specific guidelines or additional tools required for the installation process.
Step 2: Determine the type and size of case fan needed
When choosing a case fan, it’s important to consider both the type and size that will best suit your computer’s needs. Here are the factors to keep in mind:
Type of Case Fan:
There are two main types of case fans: exhaust fans and intake fans. Exhaust fans are typically mounted on the rear or top of the case and help expel hot air from your computer. Intake fans are usually placed on the front or side of the case and bring in cool air to lower the overall temperature inside the system. Depending on your computer’s configuration and airflow requirements, you may need one or both types of fans.
Size of Case Fan:
Case fans come in various sizes, with 120mm and 140mm being the most common. The size refers to the fan’s diameter, and it’s crucial to ensure compatibility with your computer’s case. Check the available mounting points and measurements of your case to determine the maximum size of fan that can be installed. Additionally, consider the clearance space between the fan and components such as the CPU cooler or RAM modules.
Noise Level and Airflow:
Another important factor to consider is the noise level and airflow of the case fan. Fans with higher RPM (rotations per minute) tend to generate more noise, so if you prioritize a quiet operation, look for fans with a lower RPM rating. However, keep in mind that higher RPM fans typically provide better airflow. Strike a balance between noise reduction and sufficient airflow based on your preferences and computer’s cooling requirements.
Connectivity:
Check the connectivity options of the case fan to ensure compatibility with your computer’s motherboard or power supply. Most fans will have a 3-pin connector for motherboard connection or a 4-pin Molex connector for direct connection to the power supply. Verify that you have the appropriate connectors or adapters to properly connect the fan to your system.
By assessing these factors and selecting the appropriate type and size of case fan, you can ensure efficient cooling and optimal performance for your computer system.
Step 3: Shut down and unplug your computer
Before you begin the installation process, it is crucial to shut down your computer properly and disconnect it from the power source. This step ensures your safety and prevents any potential damage to your computer’s components.
Follow these steps:
- Save your work and close all open applications.
- Click on the “Start” button in the bottom left corner of your screen.
- Select “Shut Down” from the options.
- Wait for your computer to power off completely. You may notice the fans slowing down and the display turning off.
- Once the computer is completely shut down, unplug the power cord from the wall outlet or power strip. It’s essential to disconnect the power source to ensure your safety and protect your computer from any electrical damage.
Keep in mind that some computers may have a power switch on the back of the system unit or on the power supply itself. If your computer has this switch, make sure to turn it off after shutting down the computer and before unplugging.
Additionally, it’s a good idea to ground yourself before handling any computer components to prevent electrostatic discharge. You can do this by touching a metal surface or wearing an anti-static wrist strap.
By following these precautions, you can safely proceed to the next steps of the installation process without any risk to yourself or your computer.
Step 4: Open your computer’s case
Now that your computer is shut down and unplugged, you can proceed to open the case. Opening the case grants access to the internal components, allowing you to install the new case fan. Follow these steps:
- Place your computer on a stable surface with ample workspace.
- Locate the screws or fasteners holding the side panel of your computer case in place. The exact location and type may vary depending on your case model.
- Use the appropriate screwdriver to remove the screws. Some cases may have thumb screws for easy removal, while others might require a Phillips or flathead screwdriver.
- Once the screws are removed, gently slide or lift the side panel to detach it from the case. Be mindful of any cables that might be connected to the panel.
- Set the side panel aside in a safe place.
With the side panel removed, you now have access to the internal components of your computer. Take a moment to familiarize yourself with the layout and identify the existing case fan(s) if they are already installed.
It’s worth noting that some computer cases may have a separate overlay or shroud covering the fan mounting points. In such cases, remove the overlay or shroud to expose the mounting area for the case fan.
Remember to handle the side panel and any internal components with care. Avoid forcefully pulling or bending any cables, as this can cause damage or disconnection. If you encounter any resistance while removing the side panel, double-check for any screws you may have missed.
Once the case is open, you’re ready to proceed to the next step of identifying the mounting points for the new case fan.
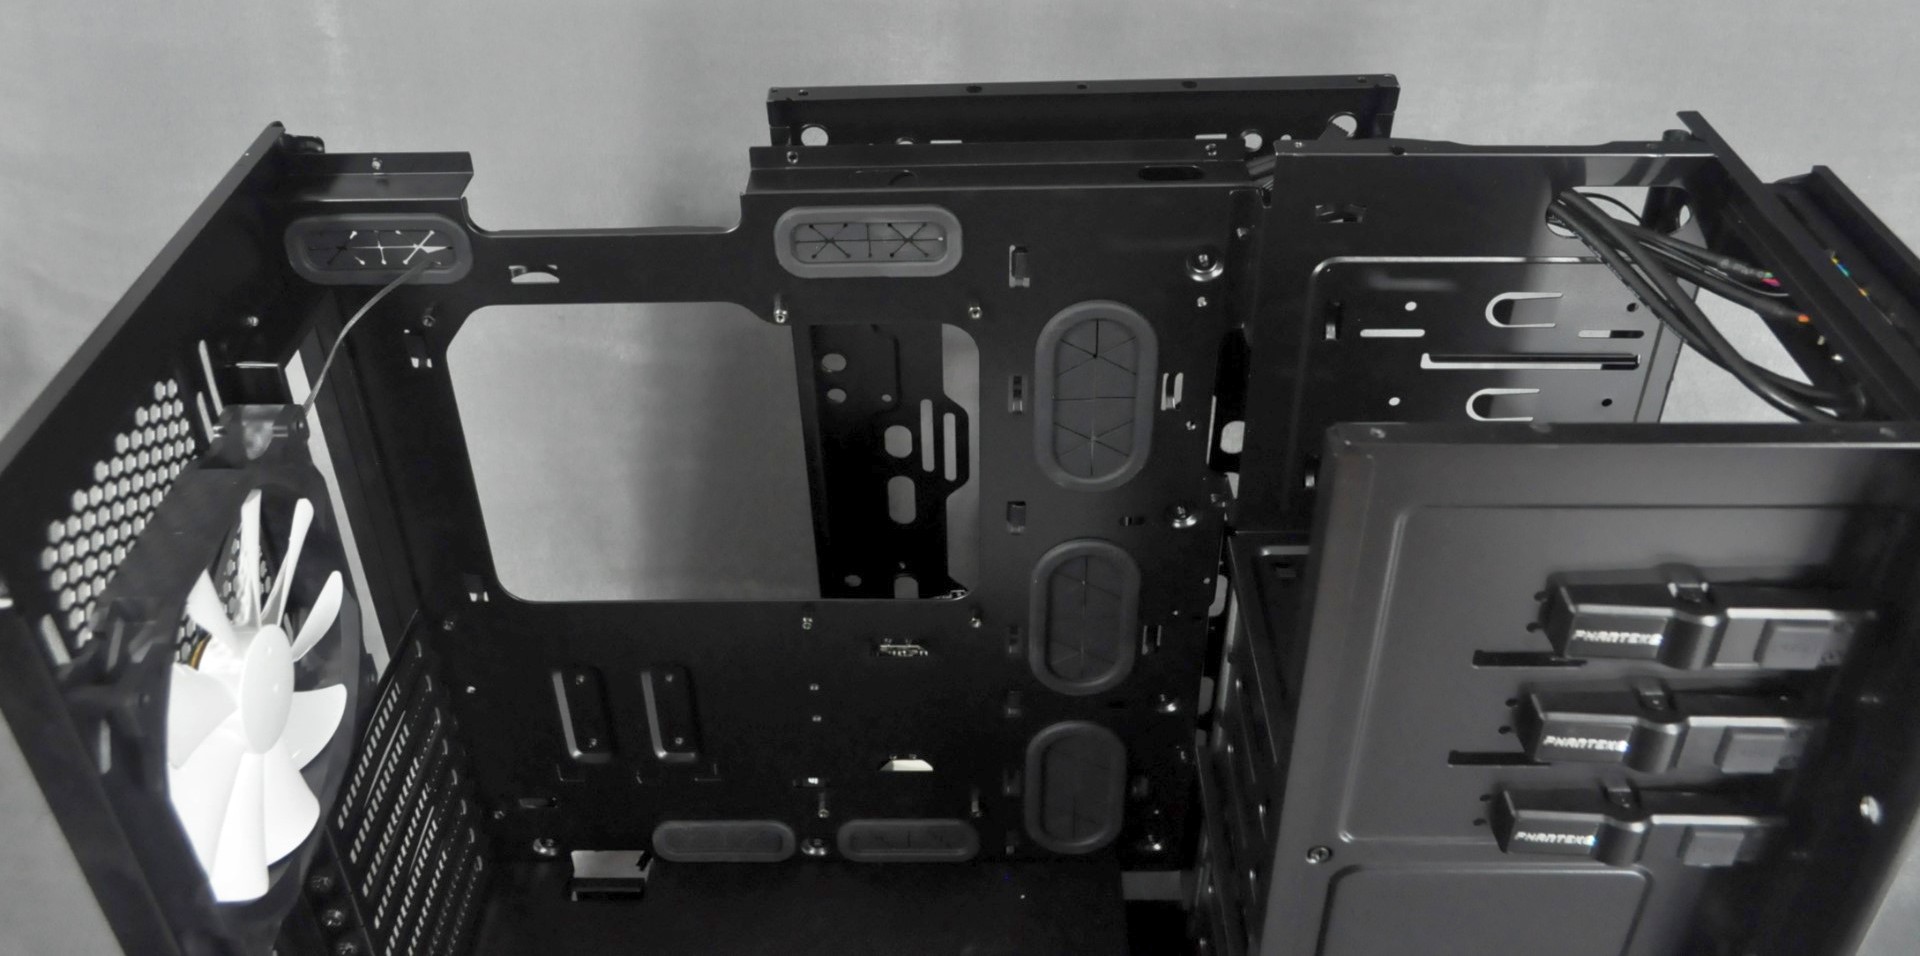
Step 5: Identify the mounting points for the case fan
Now that you have opened your computer’s case, the next step is to identify the mounting points where the new case fan will be installed. These mounting points can vary depending on the case design, so it’s important to take a close look at your computer’s interior. Here’s what you need to do:
- Inspect the inside of your computer case and locate the existing case fan(s) if there are any. Take note of their positions and how they are mounted.
- Look for vacant or marked areas specifically designated for case fan installation. These areas are typically labeled with labels like “Fan 1”, “Fan 2”, or “SYS_FAN”.
- If your computer doesn’t have pre-designated mounting areas, search for any other suitable locations where you can place the case fan without obstructing other components or impeding airflow.
- Assess the orientation of the mounting points. Depending on the case design, the mounting points can be positioned horizontally or vertically.
- Consider the direction of airflow in your computer case. Ideally, you want to install the case fan(s) in a way that promotes proper air circulation and ventilation.
It’s worth noting that some cases may have removable mounting brackets or cages that need to be taken out before installing the case fan. If this applies to your case, carefully detach and set aside these components until the fan installation is complete.
Take a moment to inspect the mounting points for any signs of dust or debris. If necessary, use a can of compressed air to blow away any accumulated dust. This will ensure a clean and efficient installation.
Once you have identified the mounting points and assessed the airflow direction, you’re now ready to proceed with removing the old case fan (if applicable) or directly installing the new fan.
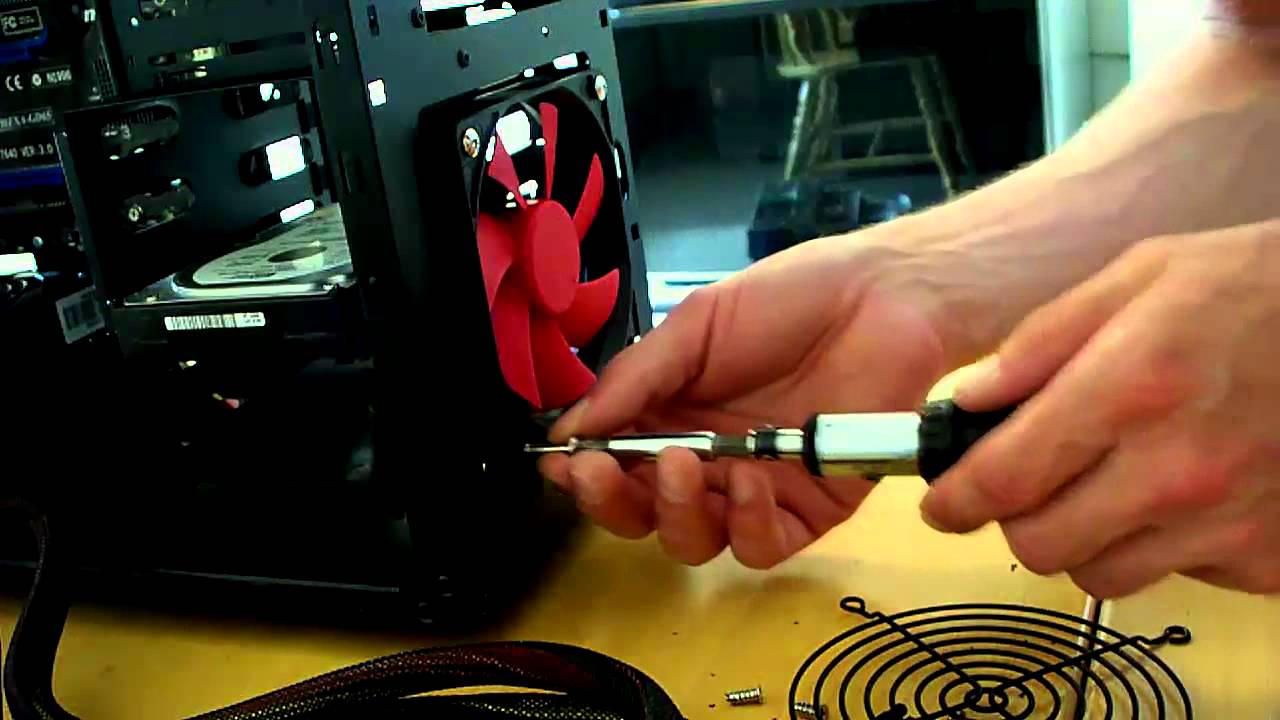
Step 6: Remove the old case fan (if necessary)
If you are replacing an existing case fan, you’ll need to remove it before installing the new one. Removing the old fan involves a few simple steps. Here’s what you need to do:
- Identify the old case fan that needs to be replaced. Take note of its position and how it is installed.
- Inspect the fan to see how it is connected to the computer. Most case fans are connected either to the motherboard or directly to the power supply.
- If the fan is connected to the motherboard, carefully detach the fan connector. Hold the connector firmly and gently pull it away from the motherboard, ensuring you do not damage any other components or cables.
- If the fan is connected directly to the power supply, locate the fan’s power cable and unplug it. Again, be gentle to avoid causing any harm to surrounding components.
- Once the fan is disconnected, examine how the fan is secured to the case. Typically, case fans are held in place by screws. Use a screwdriver to remove the screws, keeping them in a safe place as you’ll need them for the installation of the new fan.
- Gently lift the old fan out of its mounting area, taking care not to damage any nearby components.
After removing the old fan, it’s a good idea to inspect the mounting area and clean away any accumulated dust or debris. This will ensure a clean and smooth installation for the new fan.
Keep in mind that not all computer cases come pre-installed with case fans. In such cases, you can skip this step and proceed to install the new case fan directly.
With the old fan successfully removed (if applicable), you’re now ready to move on to the next step of positioning the new case fan in place.
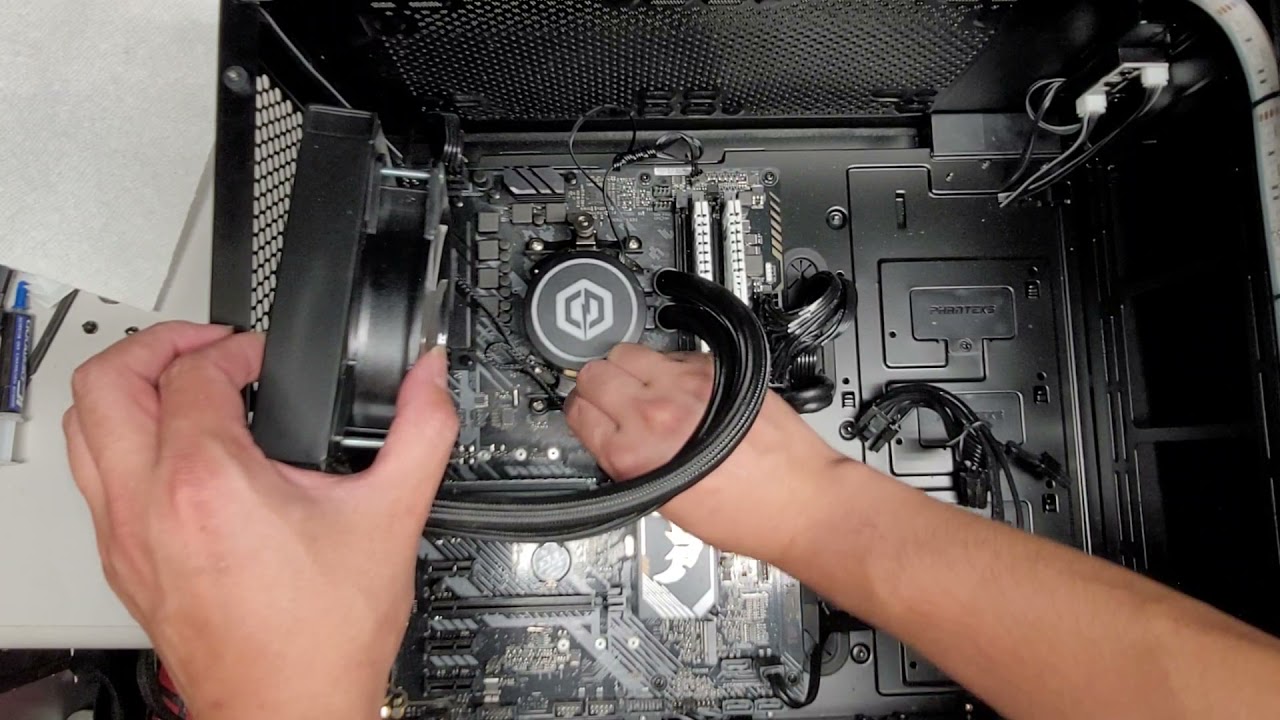
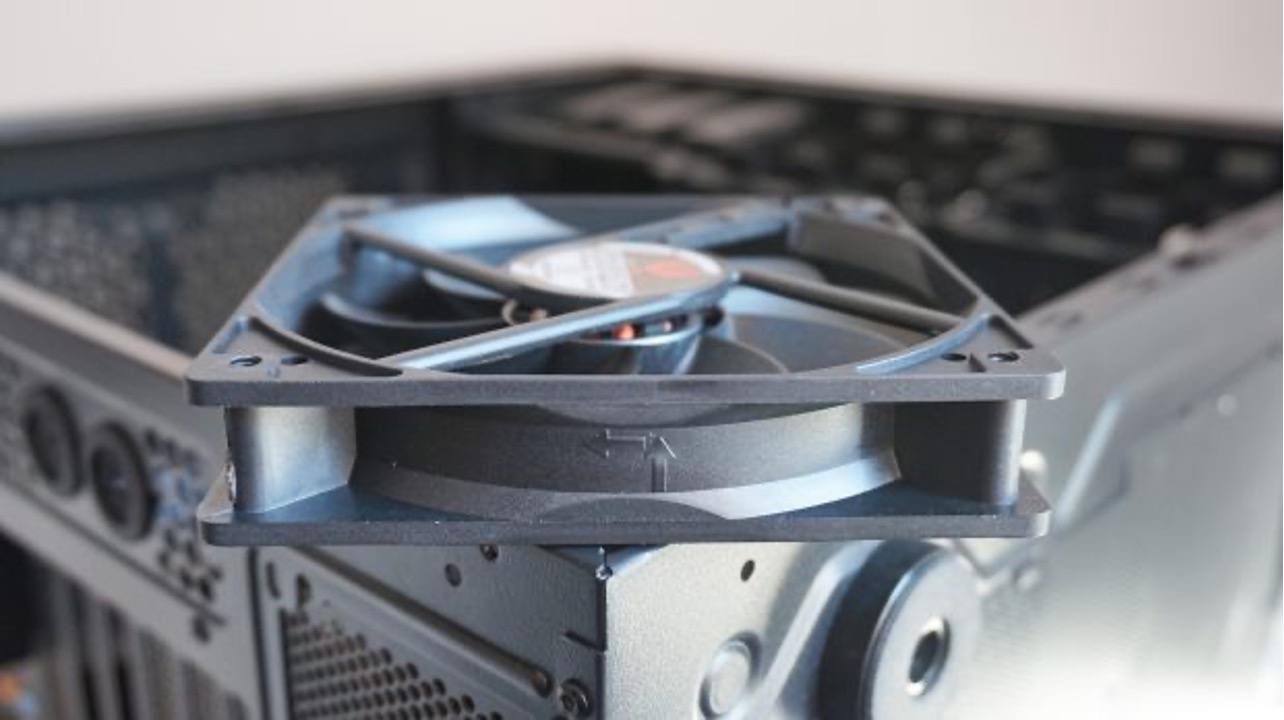
Step 7: Position the new case fan in place
Now that you have removed the old case fan (if necessary), it’s time to position the new fan in its designated mounting area. Properly positioning the fan is crucial for optimal airflow and cooling within your computer. Follow these steps:
- Take your new case fan and align it with the mounting points you identified earlier. Ensure that the screw holes on the fan line up with the holes on the case or mounting brackets.
- Carefully place the fan into the mounting area, making sure that it fits securely and evenly.
- If your case has mounting brackets, align the fan with the brackets and slide it into place.
- Double-check the orientation of the fan. If necessary, refer to the arrows or markings on the fan indicating the direction of airflow. Ensure that the airflow is aligned with your desired cooling setup.
- If you removed any mounting brackets or cages earlier, reattach them if needed, securing them in place to hold the fan firmly.
It’s important to position the case fan in such a way that its cables can reach the appropriate connectors on the motherboard or power supply. Ensure that the fan’s cables are not stretched or strained, as this can lead to connection issues or damage.
Take care not to obstruct any nearby components or cables with the new fan. Ensure there is enough clearance for the fan to operate efficiently without coming into contact with other parts of your computer.
Once the fan is properly positioned, you’re ready to move on to the next step of connecting the case fan to the motherboard or power supply.
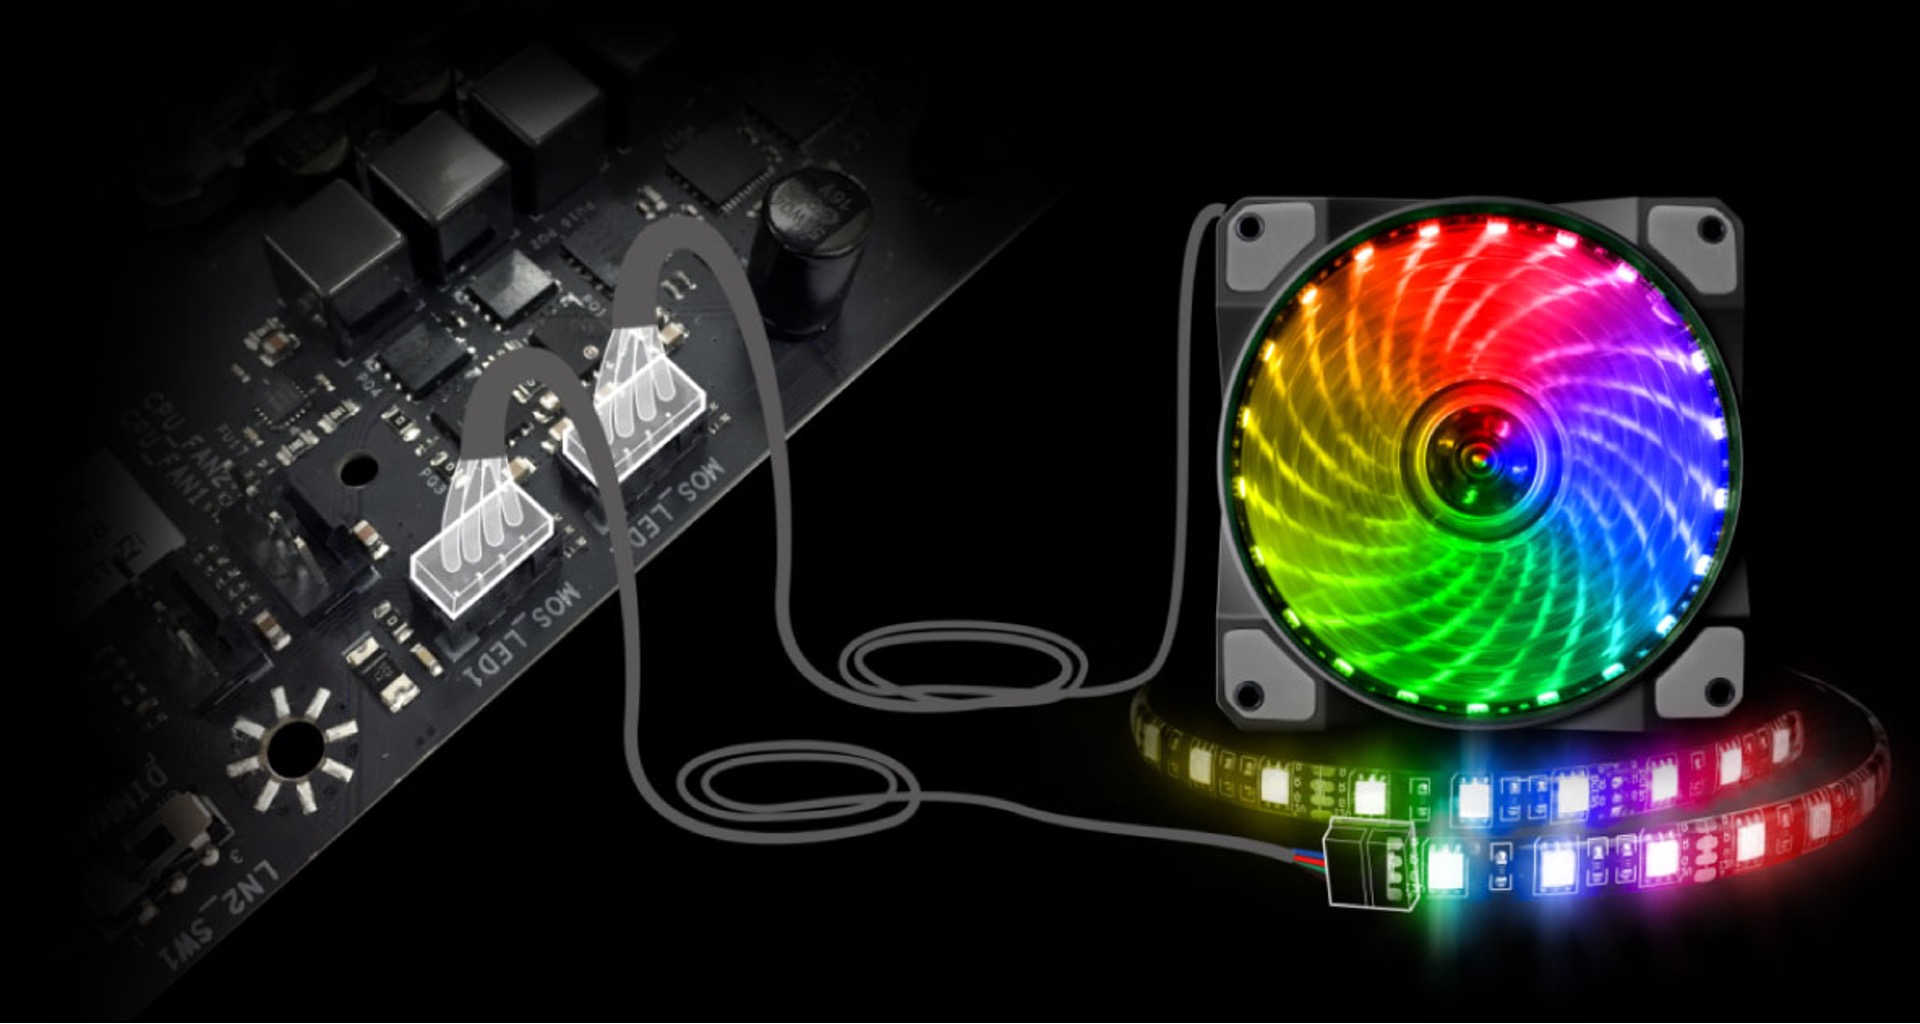
Step 8: Connect the case fan to the motherboard or power supply
Now that you’ve positioned the new case fan in its mounting area, it’s time to connect it to either the motherboard or the power supply. The method of connection will depend on the type of fan and your computer’s configuration. Follow these steps:
- Inspect the fan’s cable and connector. Most fans come with either a 3-pin or 4-pin connector.
- If your fan has a 3-pin connector, locate the corresponding fan header on your motherboard. The fan header may be labeled as “SYS_FAN”, “CHA_FAN”, or something similar. Align the pins on the fan connector with the slots on the header, and gently press the connector into place.
- If your fan has a 4-pin connector, it can be connected either to a 4-pin fan header on the motherboard or directly to the power supply. If connecting to the motherboard, align the pins on the connector with the slots on the header, and firmly push the connector into place. If connecting directly to the power supply, locate a suitable cable from the power supply unit and attach the fan connector securely.
- Ensure that the connection is secure and that the fan’s cable is not stretched or strained. A loose or improperly connected fan may not function correctly or could cause unnecessary noise.
If you are replacing an existing case fan, make sure to remove any old cables or connectors from the motherboard or power supply and replace them with the new fan’s cables.
It’s important to note that some motherboards may have additional fan headers or connectors specifically designed for case fans. Check your motherboard’s documentation for guidance on the optimal fan header to use based on your computer’s configuration.
Once connected, give the fan’s cable a gentle tug to ensure it is firmly in place. Avoid pulling too forcefully to prevent any damage to the connector or cables.
With the case fan properly connected to either the motherboard or power supply, you’re ready to move on to the next step of securing the fan in place.
Step 9: Secure the case fan in place
Now that you have connected the case fan to the motherboard or power supply, it’s important to secure it in place to ensure stability and proper functioning. Follow these steps to securely fasten the fan:
- Locate the screws that came with your new case fan, or retrieve the screws that were removed from the old fan if you are replacing it.
- Align the screw holes on the fan with the corresponding mounting holes on your computer’s case.
- Using a screwdriver, carefully insert and tighten the screws to secure the fan in place. Start by tightening each screw a little at a time, evenly distributing the pressure across all screws. This will prevent any stress on the fan or the case.
- Be sure not to overtighten the screws, as this can damage the fan or the case threads.
If your case uses mounting brackets or cages to secure the fan, make sure they are properly positioned and securely fastened as well. Reattach any removed brackets or cages, ensuring they hold the fan firmly in place without obstructing its operation or interfering with other components.
Once the fan is securely fastened, gently give it a slight wiggle to ensure that it is stable and tightly mounted. This will help prevent any unwanted vibrations or movement during operation.
Double-check all connections and cables to ensure they are secure and properly routed, without any strain or interference. Take a moment to tidy up any loose cables using cable ties, ensuring they are neatly organized and do not obstruct the fan’s airflow or interfere with other components.
Once the case fan is securely installed and all connections are double-checked, you can proceed to the next step of closing your computer’s case.
Step 10: Close the computer’s case
Now that the new case fan is securely installed and all connections have been double-checked, it’s time to close your computer’s case. Closing the case will protect the internal components and ensure the proper airflow within the system. Follow these steps to securely close the case:
- Take the side panel that you removed earlier and align it with the case.
- Gently slide or place the side panel back into position, ensuring that it fits snugly and aligns with the screw holes.
- Securely fasten the screws back into their respective holes. Use the appropriate screwdriver to tighten them, but be careful not to overtighten.
- Ensure that the side panel is evenly aligned and flush with the rest of the case.
Take a moment to inspect the case and panel once more, making sure that there are no obstructions, loose cables, or any other potential issues that could interfere with the proper functioning of the case fan or other components.
If your case has any additional panels, such as a front panel or top cover, make sure to securely attach them as well, following the manufacturer’s instructions if necessary.
Once the case is closed and all panels are securely in place, you can move on to the final step of this process: testing the new case fan.
Remember to handle the case with care during the closing process to avoid any accidental damage to the components or the case itself.
Congratulations! Your computer’s case is now closed, and the new case fan is properly installed and ready to provide efficient airflow and cooling to your system.
Step 11: Test the new case fan
The final step in the installation process is to test the new case fan to ensure that it is working properly. Testing the fan will confirm that it is spinning and generating airflow as expected. Follow these steps to test the new case fan:
- Plug in your computer and turn on the power.
- Make sure that all other components are functioning correctly and that your computer boots up normally.
- Listen for any unusual noises coming from the fan. A faint humming sound is normal, but any loud grinding or rattling noises could indicate a problem.
- Observe the movement of the fan blades. They should be rotating smoothly and consistently.
- Check the airflow inside your computer’s case. You can do this by placing your hand near the fan or using a piece of tissue or lightweight paper. You should feel or see a gentle breeze indicating proper airflow.
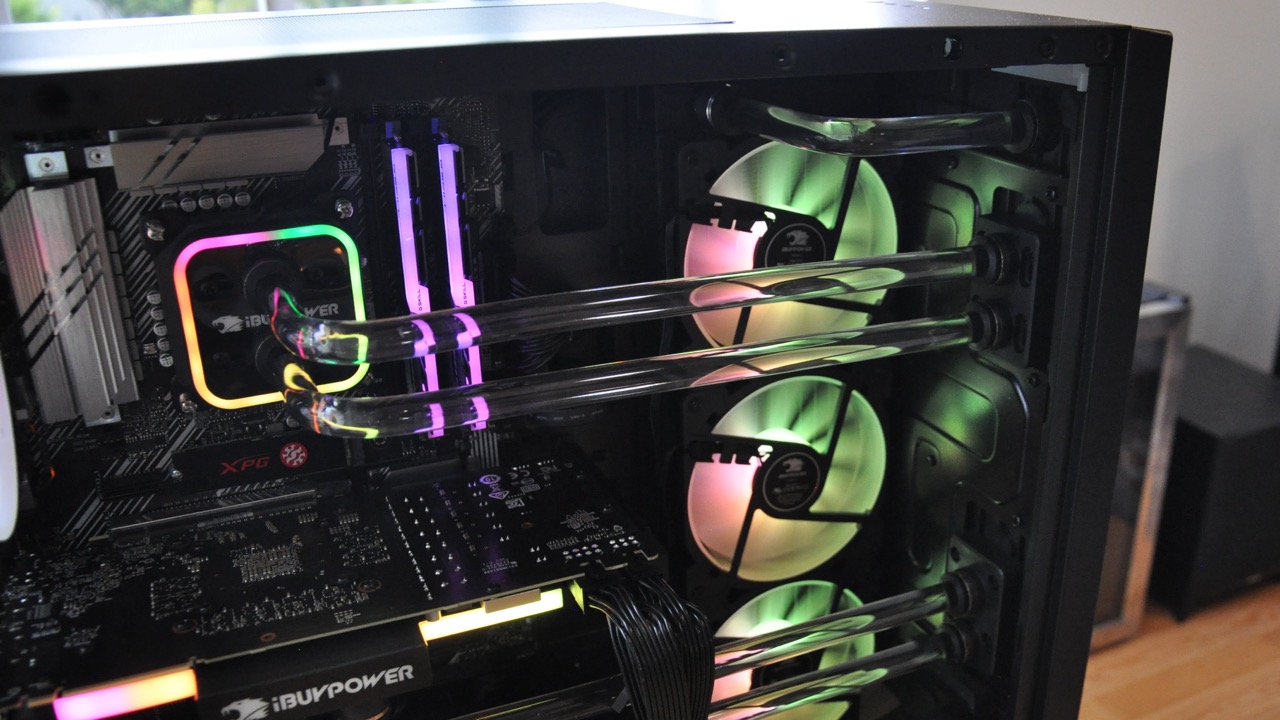
- Monitor the temperature of your computer. The new fan should help keep the system temperature at a reasonable level, preventing overheating and ensuring optimal performance.
If you notice any issues during the testing phase, such as unusual noises or lack of airflow, there may be a problem with the fan installation or the fan itself. In such cases, double-check the connections and make sure the fan is securely mounted. If the issue persists, you might need to troubleshoot further or contact technical support for assistance.
By thoroughly testing the new case fan, you can ensure that it is functioning correctly and providing the desired cooling effect to improve the overall performance and longevity of your computer.
Congratulations! You have successfully installed and tested your new case fan. Your computer should now operate more efficiently with improved airflow and temperature regulation.
Conclusion
Congratulations on successfully installing your new case fan! By following this step-by-step guide, you have taken an important step towards improving the airflow and cooling within your computer. The installation process may seem daunting at first, but with the right tools, materials, and careful execution, you were able to replace or add a case fan to your computer system.
Remember, the case fan plays a crucial role in maintaining optimal temperatures for your computer’s components, preventing overheating, and improving overall performance. Proper airflow ensures that hot air is efficiently expelled, while cool air is drawn into the system, creating a balanced and regulated environment.
Throughout this guide, you learned how to gather the necessary tools, determine the type and size of the case fan needed, shut down and unplug your computer, open the case, identify the mounting points, remove the old fan (if necessary), position and connect the new fan, secure it in place, close the computer’s case, and finally, test the new case fan.
Now that you have successfully completed the installation process, it is important to periodically clean and maintain your case fan to ensure its continued performance. Regularly checking for dust buildup and cleaning the fan blades will help maintain proper airflow and extend the fan’s lifespan.
By installing a new case fan, you have taken a proactive step in protecting your computer’s components and optimizing its performance. Enjoy your newly improved airflow, cooler temperatures, and the benefits they bring to your computer experience!
Thank you for following this guide, and we hope that it has been informative and helpful in your case fan installation journey. Happy computing!