Introduction
Welcome to the world of server racks! Whether you are a tech enthusiast or a professional IT expert, you probably understand the importance of keeping your server equipment safe and secure. However, while the focus is often on the technical aspects of setting up and maintaining a server rack, one crucial factor that should never be overlooked is grounding.
Grounding plays a vital role in ensuring the functionality and longevity of your server rack. It provides a path for any excess electrical charge to dissipate safely into the ground, protecting your sensitive equipment from power surges and potential damage. In this guide, we will explore the significance of grounding for server racks and walk you through the steps to properly ground your setup.
Whether you already have a server rack or are planning to set one up, understanding grounding is essential. By implementing proper grounding techniques, you can minimize the risk of equipment failures, maintain optimal performance, and protect your valuable data.
In this comprehensive guide, we will explain what grounding is and why it is crucial for server racks. We will also provide step-by-step instructions on how to determine if your server rack is properly grounded and walk you through the process of grounding it if needed. So, let’s dive in and unravel the world of grounding server racks!
What is Grounding?
Grounding, also known as earthing, is a fundamental concept in electrical systems that ensures electrical safety and helps prevent damage to equipment. It involves establishing a connection between an electrical circuit or device and the Earth’s conductive surface, typically the ground or a grounding electrode.
In simple terms, grounding provides a pathway for electrical current to flow into the Earth, creating a reference point for voltages and reducing the risk of electric shock, fire, and equipment damage. It works by redirecting excessive electrical charges and static electricity from the circuit to the ground.
There are two main types of grounding: equipment grounding and system grounding.
Equipment grounding involves connecting the non-current-carrying metal parts of electrical equipment, such as the server rack, to the ground. By doing so, any electrical fault or leakage currents are directed safely to the ground, preventing potential harm to individuals and minimizing the risk of electrical fires.
System grounding, on the other hand, involves connecting one of the electrical system conductors, typically the neutral wire, to the ground. This grounding method is crucial for maintaining stable voltage levels, preventing overvoltages, and improving the reliability and performance of the electrical system.
In the context of server racks, grounding is essential to protect sensitive equipment from power surges, static electricity, and other electrical disturbances. Without proper grounding, there is a higher risk of equipment malfunctions, data loss, and even safety hazards.
It is important to note that grounding should be implemented in compliance with national and local electrical codes and standards. These codes provide guidelines and requirements for proper grounding practices to ensure the safety and reliability of electrical systems.
In the next section, we will delve deeper into why grounding is specifically important for server racks and the potential risks associated with improper or inadequate grounding.
Why is Grounding Important for Server Racks?
Proper grounding is of utmost importance when it comes to server racks. These racks house critical IT infrastructure, including servers, switches, and other networking equipment that are essential for the operation of businesses and organizations.
Here are a few key reasons why grounding is crucial for server racks:
- Protection against power surges: Power surges, caused by lightning strikes, utility grid fluctuations, or internal electrical issues, can be detrimental to your server equipment. Proper grounding provides a safe path for excess electrical charges to escape, reducing the risk of damage and ensuring the continuous operation of your servers.
- Prevention of static electricity: Static electricity can build up in server racks and other electronic equipment, especially in environments with low humidity. Without grounding, static charges can accumulate and discharge, causing component damage or even system failure. Grounding helps dissipate static electricity and prevents it from harming your equipment.
- Elimination of electrical noise: Electrical noise, such as electromagnetic interference (EMI) and radio frequency interference (RFI), can negatively impact the performance and reliability of your servers. Grounding helps minimize these interferences by redirecting unwanted electrical currents to the ground, ensuring the smooth operation of your equipment.
- Protection against electrical faults: In the event of a short circuit or other electrical faults, proper grounding ensures that fault currents are safely redirected, preventing damage to the rack and other connected equipment. It also helps protect personnel from potential electrical hazards, reducing the risk of electric shock.
- Compliance with electrical codes and regulations: Many electrical codes and regulations require proper grounding for server racks and other electrical systems. Meeting these requirements not only ensures the safety of your equipment and personnel but also helps you comply with legal standards and prevent potential liability issues.
Overall, grounding is essential for ensuring the reliable operation, safety, and longevity of your server rack equipment. By properly grounding your server rack, you can minimize the risk of equipment failures, downtime, and data loss caused by electrical issues, while also improving the overall performance of your IT infrastructure.
Now that we understand the importance of grounding for server racks, let’s move on to the next section to learn how to determine if your server rack is properly grounded.
How to Determine if Your Server Rack is Properly Grounded
Ensuring that your server rack is properly grounded is essential for maintaining a safe and reliable IT infrastructure. Before proceeding with grounding or troubleshooting, it is crucial to determine whether your server rack is already grounded. Here are some steps to help you determine the grounding status of your server rack:
- Inspect the power cords: Check the power cords of the devices in your rack. Look for a third prong on each plug. The third prong, commonly referred to as the grounding pin, indicates that the device is designed to be grounded. If the power cords do not have a grounding pin, it is likely that the devices are not grounded.
- Examine the rack chassis: Look for grounding wires or conductors connected to the metal chassis of the server rack. Some server rack frames may have a built-in grounding system, such as a metal strip or conductor that establishes electrical connection between the rack components and the grounding source. If there are no grounding wires or conductors visible, it may indicate that the rack is not properly grounded.
- Use a continuity tester: A continuity tester can help determine if there is a proper electrical connection between components of the rack and the grounding point. Start by turning off the power to the rack and disconnecting all devices. Then, using the continuity tester, touch one probe to the metal chassis of the rack and the other probe to a known ground, such as a properly grounded outlet. If there is continuity, it indicates that the rack is grounded.
- Consult a qualified electrician: If you are unsure about the grounding status of your server rack or if you identify any potential issues, it is advisable to consult a qualified electrician. They can assess the wiring and grounding system, perform necessary tests, and provide expert advice on ensuring proper grounding for your rack.
Remember, proper grounding is crucial for the safety and performance of your server rack. If you determine that your rack is not adequately grounded or if you encounter any doubts or concerns, it is essential to address the issue promptly to avoid potential risks.
Now that we know how to determine the grounding status of your server rack, let’s move on to the next section to learn the step-by-step process of grounding a server rack.
Steps to Ground a Server Rack
If you have determined that your server rack is not properly grounded or you are starting from scratch, here are the steps to ensure a proper grounding connection:
- Gather the necessary tools and equipment: Before beginning the grounding process, gather the essential tools and equipment. This may include grounding wires, grounding clamps, a grounding block or strip, a screwdriver, and any other necessary hardware.
- Locate a suitable grounding point: Identify a suitable grounding point near your server rack. This is typically a metal rod driven into the ground or a designated grounding bus bar. Ensure that the grounding point meets local electrical codes and regulations.
- Prepare the server rack for grounding: Disconnect all power sources and equipment from the rack. Remove any obstructing items or debris, ensuring easy access to the rack’s metal components.
- Attach a grounding wire to the server rack: Using a grounding clamp, securely attach one end of a grounding wire to the metal frame or mounting rails of the server rack. It is best to choose a sturdy and easily accessible point for attachment.
- Connect the other end of the grounding wire to the grounding point: Extend the grounding wire from the server rack to the identified grounding point. Attach the other end of the wire to the grounding point, ensuring a secure and proper connection. Use appropriate grounding clamps or connectors to establish a reliable electrical bond.
- Test the grounding connection: Once the grounding wire is connected, perform a continuity test to verify the effectiveness of the grounding connection. Use a multimeter or a continuity tester to check for the continuity between the rack’s metal frame and the grounding point. If the test shows continuity, it indicates that the rack is properly grounded.
It is crucial to follow local electrical codes, regulations, and best practices when grounding your server rack. If you are unsure about any step or encounter difficulties, it is advisable to seek the assistance of a qualified electrician or an IT professional knowledgeable in electrical systems.
By properly grounding your server rack, you can help ensure the safety of your equipment, minimize the risk of electrical issues, and promote optimal performance and reliability.
Now that you have successfully grounded your server rack, it is important to regularly inspect and maintain the grounding system to ensure its ongoing effectiveness. This will help keep your IT infrastructure protected and operating smoothly.
Step 1: Gather the Necessary Tools and Equipment
Before you begin the process of grounding your server rack, it is important to gather all the necessary tools and equipment. Having the right tools on hand will ensure a smooth and efficient grounding process. Here are the essential tools and equipment you will need:
- Grounding wires: Select high-quality grounding wires specifically designed for electrical grounding purposes. These wires should be able to handle the electrical current of your server rack and provide a reliable connection to the grounding point.
- Grounding clamps: Grounding clamps are used to securely attach the grounding wire to the metal frame or mounting rails of the server rack. Choose clamps that are suitable for the gauge of your grounding wire and can tightly grip the rack’s metal components.
- Grounding block or strip: Depending on your specific setup, you may require a grounding block or strip to consolidate multiple grounding wires or provide additional grounding points for devices within the rack.
- Screwdriver: A screwdriver will be necessary to loosen or remove screws and tighten grounding clamps. Make sure you have the appropriate screwdriver size and type for the screws used in your server rack.
- Hardware: Depending on your server rack and grounding setup, you may need additional hardware, such as nuts, bolts, washers, or grounding connectors, to establish proper electrical connections and ensure secure attachment.
- PPE (Personal Protective Equipment): It is always important to prioritize safety when working with electrical systems. As such, it is recommended to have personal protective equipment, such as gloves, safety glasses, and proper footwear, to protect yourself from potential electrical hazards.
By gathering these tools and equipment beforehand, you can ensure that you have everything you need to complete the grounding process without any delays or frustrations.
It is worth mentioning that it is essential to use high-quality and certified equipment when working with electrical systems. This will help ensure the reliability and longevity of your grounding setup and reduce the risk of potential issues.
With all the necessary tools and equipment in hand, you are now ready to move on to the next step: locating a suitable grounding point for your server rack.
Step 2: Locate a Suitable Grounding Point
Once you have gathered the necessary tools and equipment, the next step in grounding your server rack is to identify a suitable grounding point. A grounding point provides a connection to the Earth’s conductive surface and ensures the safe dissipation of electrical charges. Here’s how to locate a suitable grounding point:
- Review electrical codes and regulations: Familiarize yourself with the electrical codes and regulations in your area. These codes provide guidelines on the requirements for grounding systems and can assist you in identifying acceptable grounding points.
- Consult a professional: If you are uncertain about which grounding point to choose or have specific requirements, it is advised to seek the assistance of a qualified electrician. They can evaluate your server rack setup and help you determine the best location for grounding.
- Consider proximity: Look for a grounding point that is in close proximity to your server rack. This reduces the length of grounding wires, minimizing the resistance and improving the effectiveness of the grounding system.
- Verify stability and conductivity: Ensure that the chosen grounding point is stable and securely connected to the Earth. It should be capable of providing a low-resistance pathway for electrical currents. Common grounding points include metal rods driven into the ground or a designated grounding bus bar in your electrical system.
- Comply with codes and regulations: Make sure that the selected grounding point adheres to local electrical codes and regulations. It should meet the requirements specified by the authorities to ensure the safety of your grounding system.
- Document the grounding point: Once you have identified a suitable grounding point, document the location for future reference. This documentation will be helpful for maintenance and troubleshooting purposes.
Remember, establishing a proper grounding point is essential to maintain the integrity and effectiveness of your grounding system. By choosing the right location, you can ensure the safe dissipation of electrical charges and protect your server rack equipment from potential electrical hazards and damage.
Now that you have located a suitable grounding point, you are ready to move on to the next step: preparing the server rack for grounding.
Step 3: Prepare the Server Rack for Grounding
After identifying a suitable grounding point for your server rack, the next step is to prepare the rack itself for grounding. Proper preparation ensures that the grounding process is smooth and that the grounding connection is secure. Follow these steps to prepare your server rack for grounding:
- Turn off and unplug: Before doing any work on your server rack, make sure to turn off and unplug all power sources and equipment connected to it. This ensures your safety and prevents any electrical mishaps during the preparation process.
- Remove obstacles: Clear the server rack of any obstacles, debris, or unnecessary equipment that may obstruct access to the metal components. This will make it easier to attach the grounding wire securely.
- Identify grounding points: Examine the server rack’s metal frame or mounting rails and identify suitable grounding points. Look for areas that have direct contact with the metal parts of your equipment. The grounding wire will be securely attached to these points later in the grounding process.
- Ensure clean contact surfaces: To establish a reliable electrical connection, it is important to ensure that the contact surfaces where the grounding wire will be attached are clean and free from any corrosion, dirt, or paint. Use a wire brush or a suitable cleaning solution to clean these surfaces if necessary.
- Inspect equipment grounding: Check the power cords and connections of your equipment to ensure that they are properly grounded. Look for any loose or damaged grounding wires or terminals. If you come across any issues, resolve them before proceeding with the grounding process.
- Organize cables: Take the opportunity to organize and tidy up the cables within the server rack. Proper cable management improves airflow and reduces the risk of accidental disconnection, making maintenance and troubleshooting easier in the future.
By thoroughly preparing your server rack for grounding, you create the groundwork for a successful and secure grounding process. These steps help ensure that the grounding connection will be reliable and effective in providing protection to your equipment.
Now that you have prepared the server rack for grounding, you can move on to the next step: attaching a grounding wire to the rack.
Step 4: Attach a Grounding Wire to the Server Rack
With your server rack prepared for grounding, it’s time to attach a grounding wire to the rack. A grounding wire establishes a direct electrical connection between the metal components of the rack and the grounding point you identified earlier. Follow these steps to attach a grounding wire to your server rack:
- Select an appropriate grounding wire: Choose a grounding wire that is suitable for electrical grounding and can handle the electrical current of your server rack. The wire should be of sufficient gauge and length to reach from the rack to the grounding point.
- Locate a secure attachment point on the rack: Identify a sturdy metal point on the server rack for attaching the grounding wire. This point should have direct contact with the metal frame or mounting rails of the rack.
- Securely attach the grounding wire to the rack: Use a grounding clamp to fasten one end of the grounding wire to the chosen attachment point on the rack. Ensure that the clamp makes secure contact with the metal surface, providing a solid and reliable electrical connection.
- Rout the grounding wire: Carefully route the grounding wire along the rack, ensuring that it is securely fastened and does not interfere with any other cables or equipment. Use cable ties or other suitable methods to secure the wire in place, maintaining a neat and organized appearance.
- Leave slack for movement: Allow some slack in the grounding wire to accommodate any movement or adjustments of the rack. This ensures that the wire remains connected even if the rack is repositioned or components are added or removed.
- Avoid sharp edges: When routing the grounding wire, be mindful of any sharp edges or rough surfaces that could damage or cut the wire. Use protective covering or wrap the wire with electrical tape at potential contact points to prevent any damage or fraying.
By attaching the grounding wire securely to your server rack, you establish a critical electrical connection to safeguard your equipment from electrical faults and ensure the effective dissipation of excess electrical charges.
Now that the grounding wire is securely attached to your server rack, you can proceed to the next step: connecting the other end of the grounding wire to the grounding point.
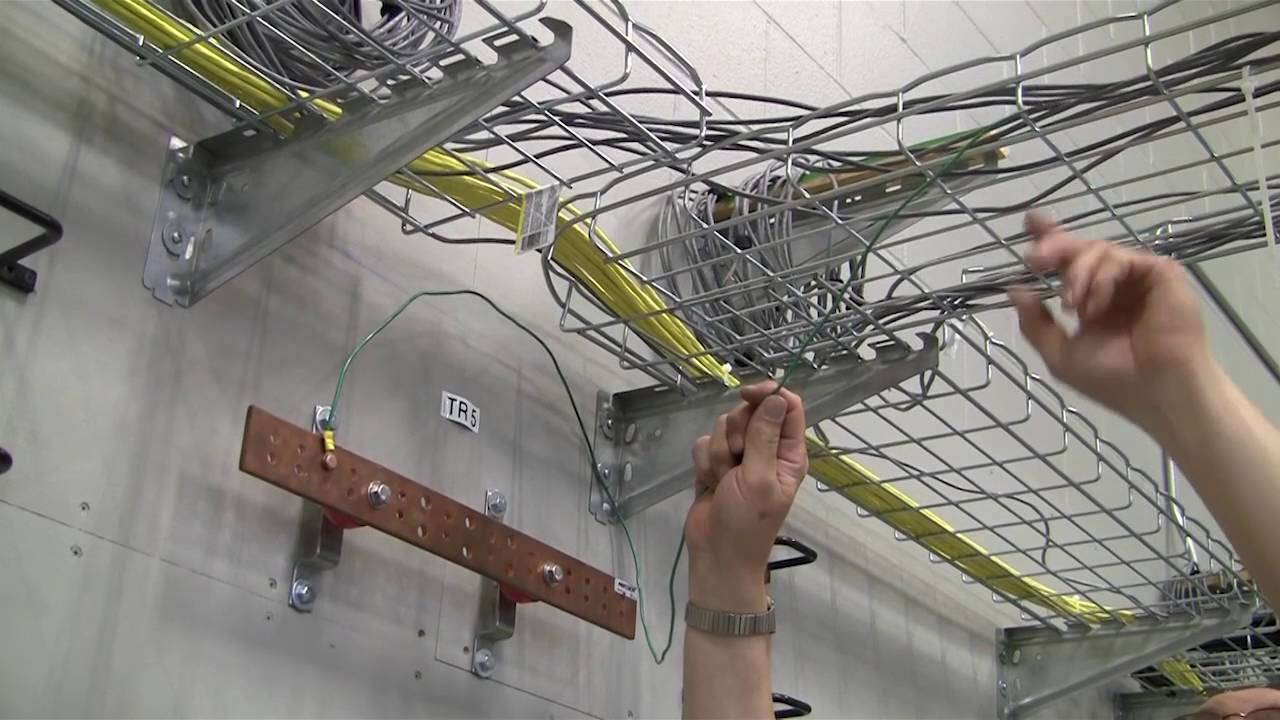
Step 5: Connect the Other End of the Grounding Wire to the Grounding Point
After properly attaching the grounding wire to your server rack, the next step is to connect the other end of the wire to the grounding point you previously identified. This connection ensures that the excess electrical charges from the rack are safely discharged into the ground. Follow these steps to connect the grounding wire to the grounding point:
- Route the grounding wire to the grounding point: Carefully route the grounding wire from the server rack to the grounding point. Make sure to securely fasten the wire along the pathway, using clips or other appropriate methods to prevent it from becoming loose or tangled with other cables.
- Prepare the grounding point: If you are using a grounding rod, ensure that it is securely driven into the ground. Clear away any dirt or debris around the grounding point to ensure a clean connection. If you are connecting to a grounding bus bar or other designated grounding point, ensure that it is clean and free from any obstructions.
- Establish a secure connection: Attach the exposed end of the grounding wire to the grounding point using a suitable grounding clamp or connector. Make sure the connection is tight and secure, ensuring a solid electrical bond between the wire and the grounding point.
- Verify a solid electrical connection: Check the connection between the grounding wire and the grounding point to ensure that there is proper electrical conductivity. Wiggle the wire gently to ensure it is securely fastened and does not come loose. Perform a visual inspection to confirm that the wire is making direct contact with the grounding point.
- Follow guidelines and regulations: It is important to follow local electrical codes, guidelines, and regulations when connecting the grounding wire to the grounding point. Adhere to the specified requirements to ensure the integrity and effectiveness of your grounding system.
By establishing a secure and reliable connection between the grounding wire and the grounding point, you ensure that any electrical faults or excess charges from your server rack are safely dissipated into the ground, thus protecting your equipment from potential damage and maintaining a safe operation.
Now that the grounding wire is connected to the grounding point, you can proceed to the final step: testing the grounding connection to ensure its effectiveness.
Step 6: Test the Grounding Connection
Once you have completed the grounding process for your server rack, it is crucial to test the grounding connection to ensure its effectiveness. Proper testing confirms that the grounding system is functioning correctly and that your equipment is adequately protected. Follow these steps to test the grounding connection:
- Disconnect all power sources: Before performing any tests, ensure that all power sources and equipment connected to the server rack are turned off and unplugged. This precaution ensures your safety during the testing process.
- Use a multimeter or continuity tester: Obtain a multimeter or continuity tester, which will help determine if there is a continuous electrical pathway between the server rack’s metal components and the grounding point. These tools measure electrical continuity and can detect any breaks or interruptions in the grounding connection.
- Set the multimeter to continuity mode: If you are using a multimeter, set it to continuity mode. This mode allows the device to emit a sound or display a signal when there is a continuous electrical path between two points.
- Test the grounding connection: With the multimeter or continuity tester in hand, touch one probe to a metal component or attachment point on the server rack and the other probe to the grounding point. If there is a continuous electrical pathway, the multimeter will emit a sound or display a positive continuity reading.
- Check for proper continuity: Ensure that the continuity between the server rack and the grounding point is consistent and uninterrupted. Wiggle the grounding wire gently while testing to detect any intermittent connections or loose components.
- Recheck all connections: After conducting the grounding connection test, recheck all connections to ensure they are secure. Verify that the grounding wire is tightly fastened to both the server rack and the grounding point, providing a solid and reliable electrical connection.
By testing the grounding connection, you can confirm the effectiveness of your grounding system and ensure that your server rack equipment is adequately protected against electrical faults and surges.
If the test results indicate any issues with the grounding connection or if you have doubts about its effectiveness, consult a qualified electrician or IT professional. They will be able to provide further guidance, troubleshoot the problem, and help ensure a properly grounded server rack.
Now that you have tested the grounding connection, you can have peace of mind knowing that your server rack is securely grounded and your equipment is well-protected.
Conclusion
Properly grounding your server rack is a critical step in ensuring the safety, functionality, and longevity of your IT infrastructure. Without adequate grounding, your equipment is susceptible to electrical faults, power surges, and potential damage. By following the step-by-step process outlined in this guide, you can effectively ground your server rack and mitigate these risks.
We began by understanding the importance of grounding for server racks. We explored how grounding protects against power surges, static electricity, and electrical noise, and ensures compliance with electrical codes and regulations. With this knowledge, we then moved on to determining if your server rack is properly grounded. By inspecting power cords, examining the rack chassis, and using continuity testers, you can assess the grounding status of your rack and identify any issues.
The guide then walked you through the steps involved in grounding a server rack. From gathering the necessary tools and locating a suitable grounding point to preparing the rack, attaching the grounding wire, connecting it to the grounding point, and testing the grounding connection, each step was meticulously explained to help you achieve a safe and effective grounding system.
Remember, throughout the process, it is crucial to adhere to local electrical codes, regulations, and best practices. If you encounter any difficulties or have doubts about the grounding process, seek the assistance of a qualified electrician or an IT professional with expertise in electrical systems.
By properly grounding your server rack, you not only protect your equipment from potential electrical hazards but also ensure optimal performance, minimize downtime, and safeguard your valuable data. Regularly inspect and maintain your grounding system to ensure its ongoing effectiveness, and be proactive in addressing any grounding issues that may arise.
With the knowledge and guidance provided in this guide, you are now equipped to confidently and securely ground your server rack, creating a solid foundation for your IT infrastructure’s reliability and longevity.