Introduction
Welcome to the world of server racks, where organization and efficiency meet technology. If you’re looking to build your own server rack, you’ve come to the right place. A server rack is a critical component for housing and organizing servers and network equipment in a secure and efficient manner.
Whether you’re a small business owner looking to manage your own network infrastructure or an IT enthusiast wanting to create a custom setup for your home lab, building your own server rack allows you to tailor it to your specific needs and requirements.
In this article, we will guide you through the step-by-step process of building a server rack. We’ll cover everything from choosing the right rack to installing servers and equipment. By the end, you’ll have the knowledge and confidence to create a professional and reliable server rack setup.
Before we dive into the construction process, it’s important to understand the significance of a well-built server rack. A properly designed rack provides a structured environment for servers, ensuring optimal airflow, accessibility, and cable management. This not only improves the efficiency and performance of your equipment but also makes maintenance and troubleshooting much easier.
Building a server rack requires careful planning and consideration. The choice of materials, the arrangement of components, and the organization of cables all play a crucial role in creating a functional and efficient setup. Throughout this article, we’ll provide you with valuable tips and insights to help you make informed decisions and avoid common mistakes.
So, if you’re ready to embark on the journey of building your own server rack, let’s get started! In the next section, we’ll discuss how to choose the right server rack for your needs.
Choosing the Right Server Rack
When it comes to building a server rack, one of the first and most important decisions you’ll need to make is choosing the right rack for your needs. The right rack will depend on factors such as the size of your equipment, the amount of space available, and your future expansion plans.
Here are some key considerations to keep in mind when selecting a server rack:
- Rack Size: Server racks come in various standard sizes, such as 19-inch and 23-inch. The most common size is the 19-inch rack, which is widely used in data centers and server rooms. Make sure to choose a rack size that is compatible with your equipment.
- Rack Depth: The depth of the server rack is another vital factor. Measure the depth of your servers and networking equipment to ensure they will fit comfortably within the rack. It’s important to leave some extra space for future expansion.
- Weight Capacity: Consider the weight of your equipment and choose a server rack that can support the load. Most racks indicate their weight capacity, so be sure to check and choose one that can handle your current and future needs.
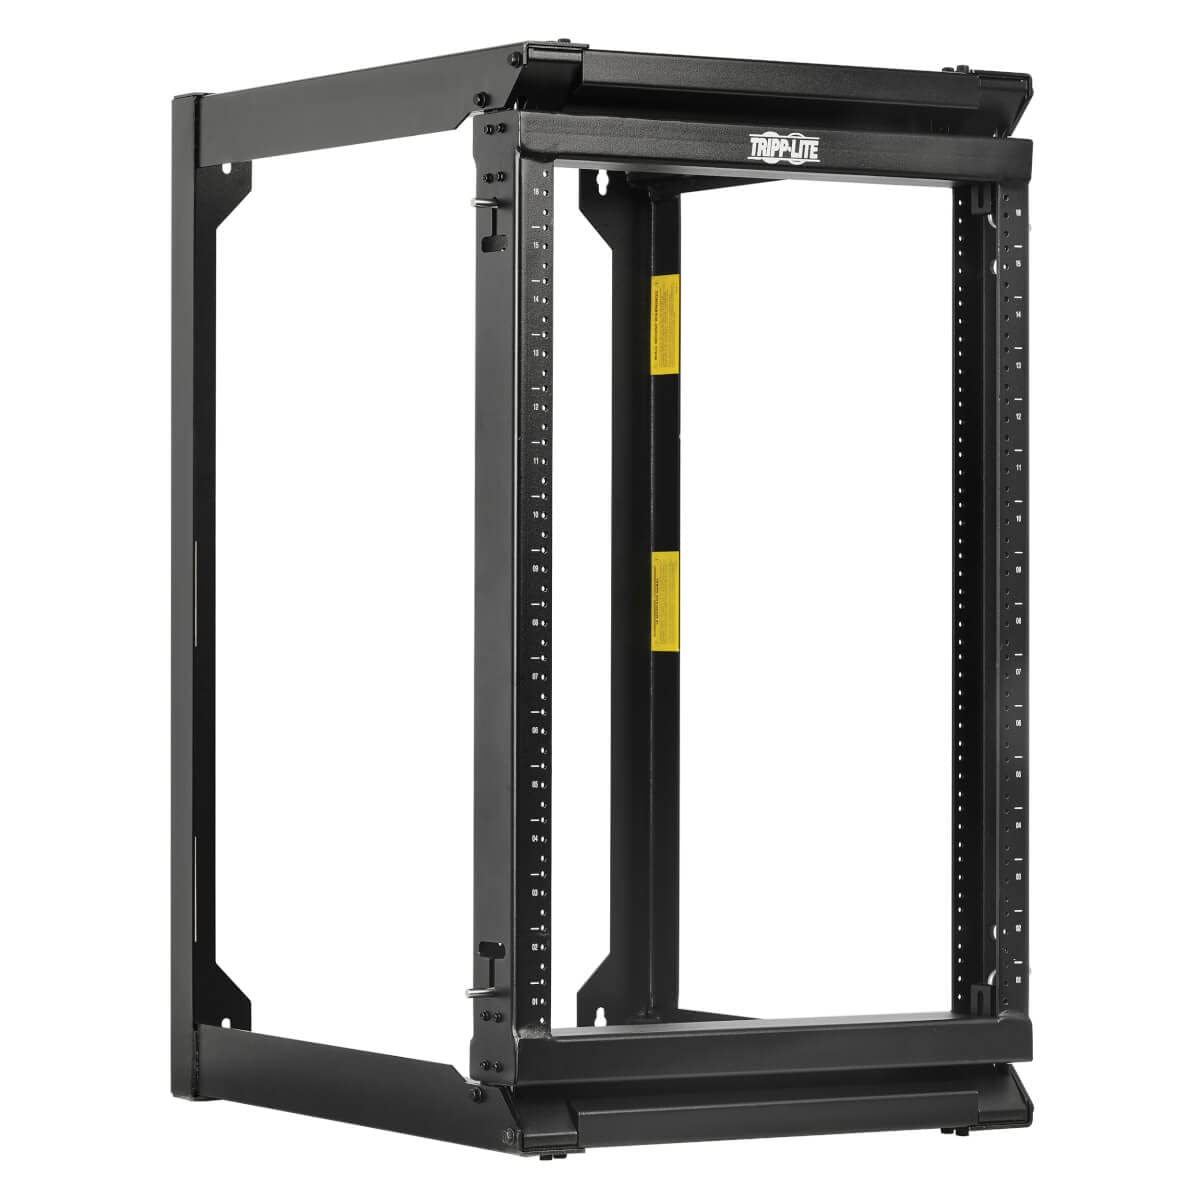
- Rack Type: There are various types of server racks available, such as open frame racks, wall-mounted racks, and enclosed cabinets. Consider your specific requirements in terms of accessibility, security, and cooling to determine the most suitable rack type for your needs.
- Cooling and Airflow: Proper airflow is crucial to prevent overheating and ensure the optimal performance of your servers. Look for racks that offer ventilation features like perforated doors, adjustable fans, and cable management options to maintain a cool and well-ventilated environment.
Additionally, it’s worth considering factors such as cable management features, rack mobility, and any specific requirements or regulations in your industry. Taking the time to research and select the right server rack will not only provide a solid foundation for your infrastructure but also save you time and effort in the long run.
In the next section, we’ll discuss the tools and materials you’ll need to gather before starting the construction of your server rack.
Gathering Tools and Materials
Before you begin building your server rack, it’s important to ensure that you have all the necessary tools and materials at hand. Having the right equipment will not only make the construction process smoother but also ensure the quality and durability of your finished rack. Here are the essential tools and materials you’ll need:
- Rack Frame: The backbone of your server rack is the frame itself. You can either purchase a pre-made rack frame or build one from scratch using metal or wood. Make sure the frame is sturdy and can support the weight of your equipment.
- Screws and Mounting Hardware: You’ll need an assortment of screws and mounting hardware to secure the components of your server rack. Consider the size and thread type required for your specific rack and equipment.
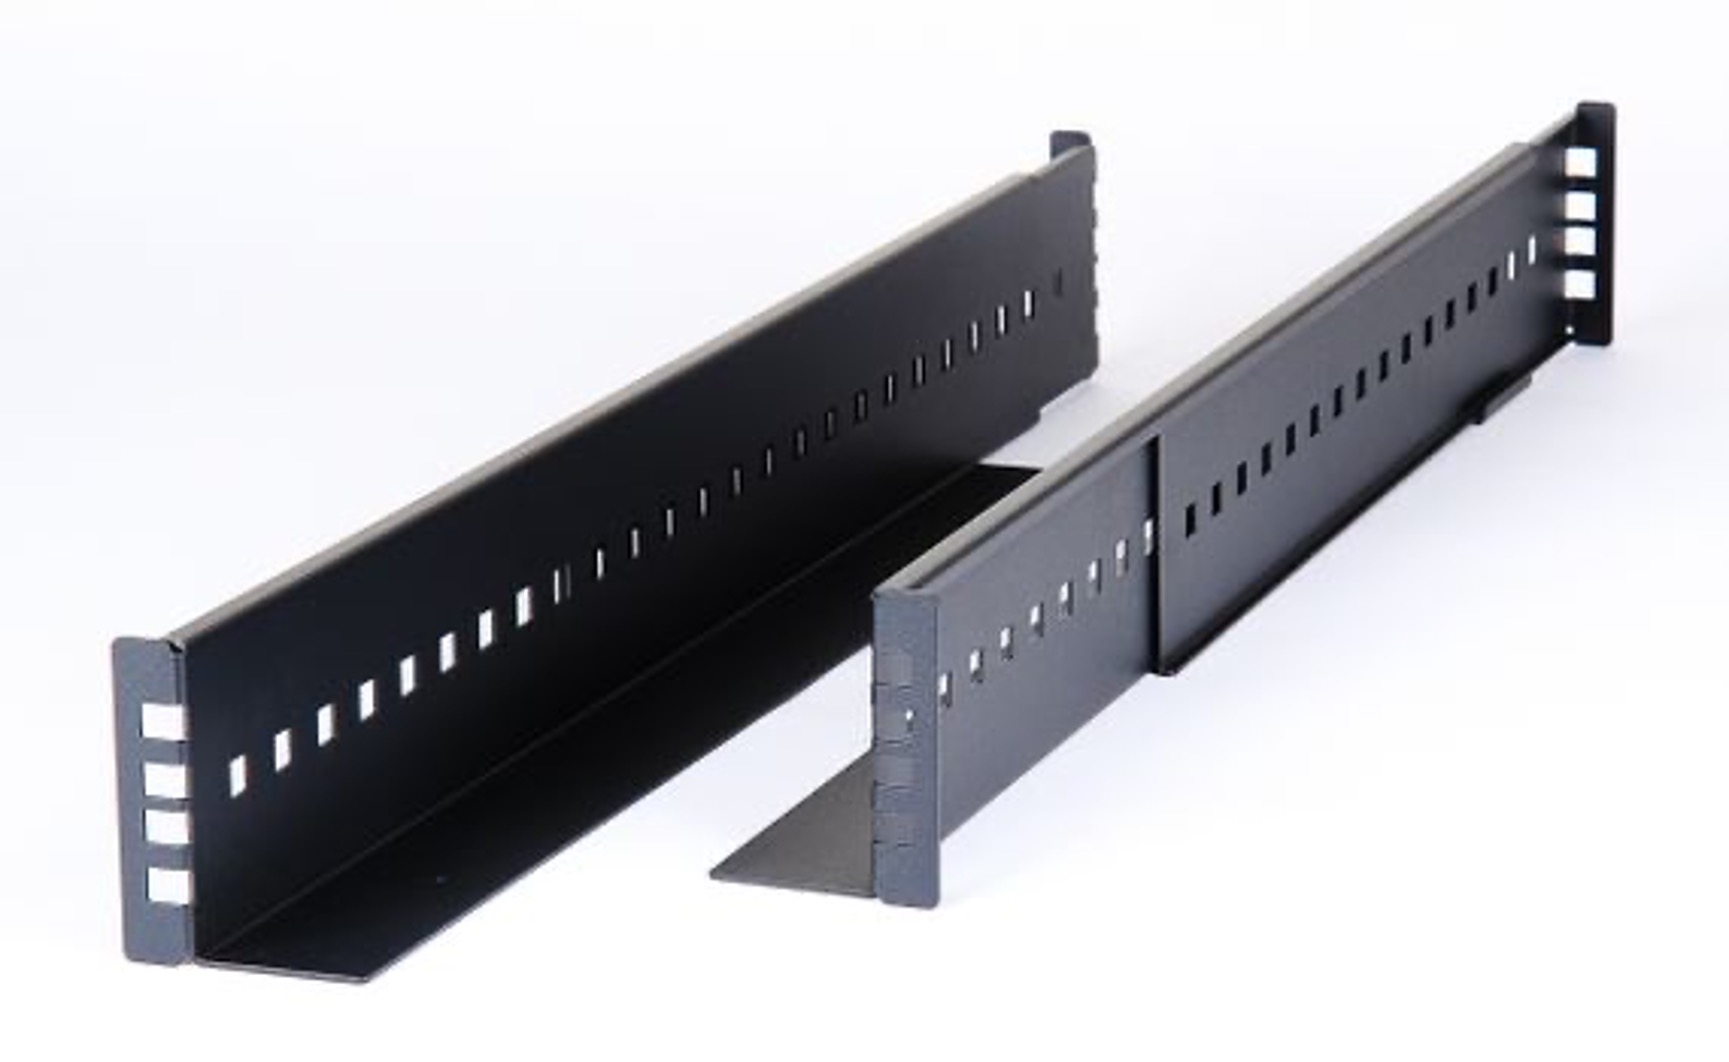
- Shelves and Mounting Rails: If you plan on installing additional shelves or mounting rails within your rack, make sure to acquire them. These components allow you to organize and support non-rackmount equipment.
- Cable Management Solutions: To keep your cables neat and organized, invest in cable management solutions such as cable ties, cable trays, and Velcro straps. These will help prevent cable clutter and make maintenance easier in the long run.
- Power Strips and Surge Protectors: Consider the power requirements of your equipment and choose suitable power strips or surge protectors to provide ample outlets for your servers and networking devices.
- Tools: You’ll need a set of basic tools including screwdrivers, wrenches, pliers, and a drill. These tools will assist you in assembling the rack frame, attaching components, and managing cables.
- Level and Measuring Tape: Checking the levelness of your rack and accurately measuring distances and dimensions are crucial for a well-built rack. Have a level and measuring tape on hand to ensure precise alignment and placement.
- Safety Equipment: Don’t forget to prioritize safety during the construction process. Keep gloves, safety glasses, and a mask nearby to protect yourself from any potential hazards.
By gathering these tools and materials in advance, you’ll be well-prepared and ready to start building your server rack. In the next section, we’ll guide you through the planning process, helping you determine the ideal placement and configuration of your rack.
Planning Placement and Configuration
Before you start assembling your server rack, it’s crucial to plan the placement and configuration of your equipment. A well-thought-out plan will ensure optimal accessibility, airflow, and cable management. Here are some key considerations to help you with the planning process:
- Available Space: Assess the area where you plan to install the server rack. Consider factors such as the dimensions of the room or closet, ceiling height, and any obstructions that may affect the placement and accessibility of the rack.
- Accessibility: Make sure you have enough space around the rack to easily access the front and rear of the equipment. This will facilitate installation, maintenance, and troubleshooting tasks. Consider leaving a minimum of 36 inches (91 cm) of clearance in front of the rack.
- Airflow and Ventilation: Proper airflow is critical for maintaining the temperature within the rack and preventing equipment overheating. Ensure that there is adequate space for air to circulate around the servers and networking devices. Avoid placing the rack near heat sources or in confined spaces without proper ventilation.
- Cable Management: Planning for effective cable management is essential to avoid a tangled mess of wires. Plan the path of cables and take into account the length needed to reach each device. Consider using cable trays, raceways, or vertical cable managers to keep the cables organized and separate them from power cords for better signal integrity.
- Power Requirements: Determine the power requirements of your equipment and ensure that you have enough outlets nearby. Consider the amperage and voltage needed, as well as the type of power connectors required for your servers and networking devices.
- Expansion and Future Needs: Anticipate potential future expansion by leaving some extra space in your rack for additional servers or network equipment. Consider the scalability and flexibility of your rack configuration to accommodate future upgrades or changes in technology.
- Security: If security is a concern, consider the placement of your rack in a secure area or invest in an enclosed cabinet with lockable doors. This will help protect your equipment from unauthorized access and physical damage.
By carefully planning the placement and configuration of your server rack, you can create a functional and efficient setup that meets your current needs and allows for future growth. Once you have a clear plan in place, you can proceed with assembling the rack frame and installing the necessary components. In the next section, we’ll guide you through the process of assembling the rack frame.
Assembling the Rack Frame
Now that you have planned the placement and configuration of your server rack, it’s time to start assembling the rack frame. The rack frame provides the structural support and stability for your equipment, so it’s important to ensure it is built correctly. Follow these steps to assemble your rack frame:
- Prepare the workspace: Choose a clean and well-lit area where you can lay out all the components of the rack frame. Clear any obstructions and ensure you have enough space to work comfortably.
- Identify the frame pieces: Lay out all the frame pieces and identify the vertical posts, horizontal rails, and any additional bracing or crossbars. Refer to the manufacturer’s instructions or the design you’ve chosen to ensure you have all the necessary components.
- Attach the vertical posts: Start by attaching the vertical posts to the base of the rack frame. Use the appropriate screws or bolts provided with your rack kit to secure them tightly. Check that the posts are level and upright before proceeding.
- Attach the horizontal rails: Next, attach the horizontal rails to the vertical posts at the desired height. Use the provided screws or bolts to secure them firmly. Double-check the alignment and adjust if necessary.
- Add additional bracing if needed: Depending on the design and size of your rack frame, you may need to add additional bracing or crossbars for added stability. Attach them according to the manufacturer’s instructions.
- Secure all connections: Once all the components are in place, go through each connection point and ensure they are secure. Re-tighten any screws or bolts that may have come loose during the assembly process.
- Double-check the stability: Give the rack frame a gentle shake to test its stability. If there is any wobbling or movement, check the connections and make any necessary adjustments to ensure a solid and sturdy frame.
During the assembly process, it’s important to refer to the manufacturer’s instructions or any design plans you may be following. Each rack frame may have slight variations in assembly procedures, so make sure you are following the specific guidelines provided.
Once your rack frame is properly assembled, you’re ready to move on to the next step: installing shelves and mounting rails. This will allow you to customize your rack to accommodate non-rackmount equipment. In the following section, we’ll guide you through the process of installing shelves and mounting rails.
Installing Shelves and Mounting Rails
In order to maximize the functionality of your server rack, you may want to install shelves and mounting rails. Shelves provide additional space for non-rackmount equipment, while mounting rails allow you to securely install rackmountable devices. Here’s how you can install shelves and mounting rails in your server rack:
- Measure and mark: Determine the desired height and position for your shelves and mounting rails. Use a measuring tape and a level to ensure accurate placement.
- Install the shelves: If you plan to install shelves in your rack, follow the manufacturer’s instructions to secure them at the desired height. Make sure they are aligned and level before tightening the screws or bolts.
- Attach mounting rails: To install mounting rails, start by identifying the front and rear set. Attach the front set to the desired height on the front vertical posts of the rack. Use the provided screws or bolts to secure them tightly.
- Align rear mounting rails: Once the front mounting rails are installed, align the rear set with the front set. Make sure they are at the same height and level by using a measuring tape and a level.
- Secure rear mounting rails: Once the rear mounting rails are properly aligned, secure them to the rear vertical posts using the provided screws or bolts. Ensure that all connections are tight and secure.
- Test the stability: After installing the shelves and mounting rails, give the rack a gentle shake to test its stability. Make any adjustments or re-tighten any loose connections, if necessary.
It’s important to follow the manufacturer’s instructions for installing shelves and mounting rails as they may have specific guidelines and requirements based on the design of your rack. Proper installation of shelves and mounting rails will ensure the safe and secure placement of your non-rackmount and rackmount equipment.
With the shelves and mounting rails installed, you’re ready to move on to the next step: wiring and cable management. This crucial step will help you maintain a neat and organized server rack while optimizing performance and reducing the risk of cable-related issues. In the following section, we’ll guide you through the process of wiring and cable management.
Wiring and Cable Management
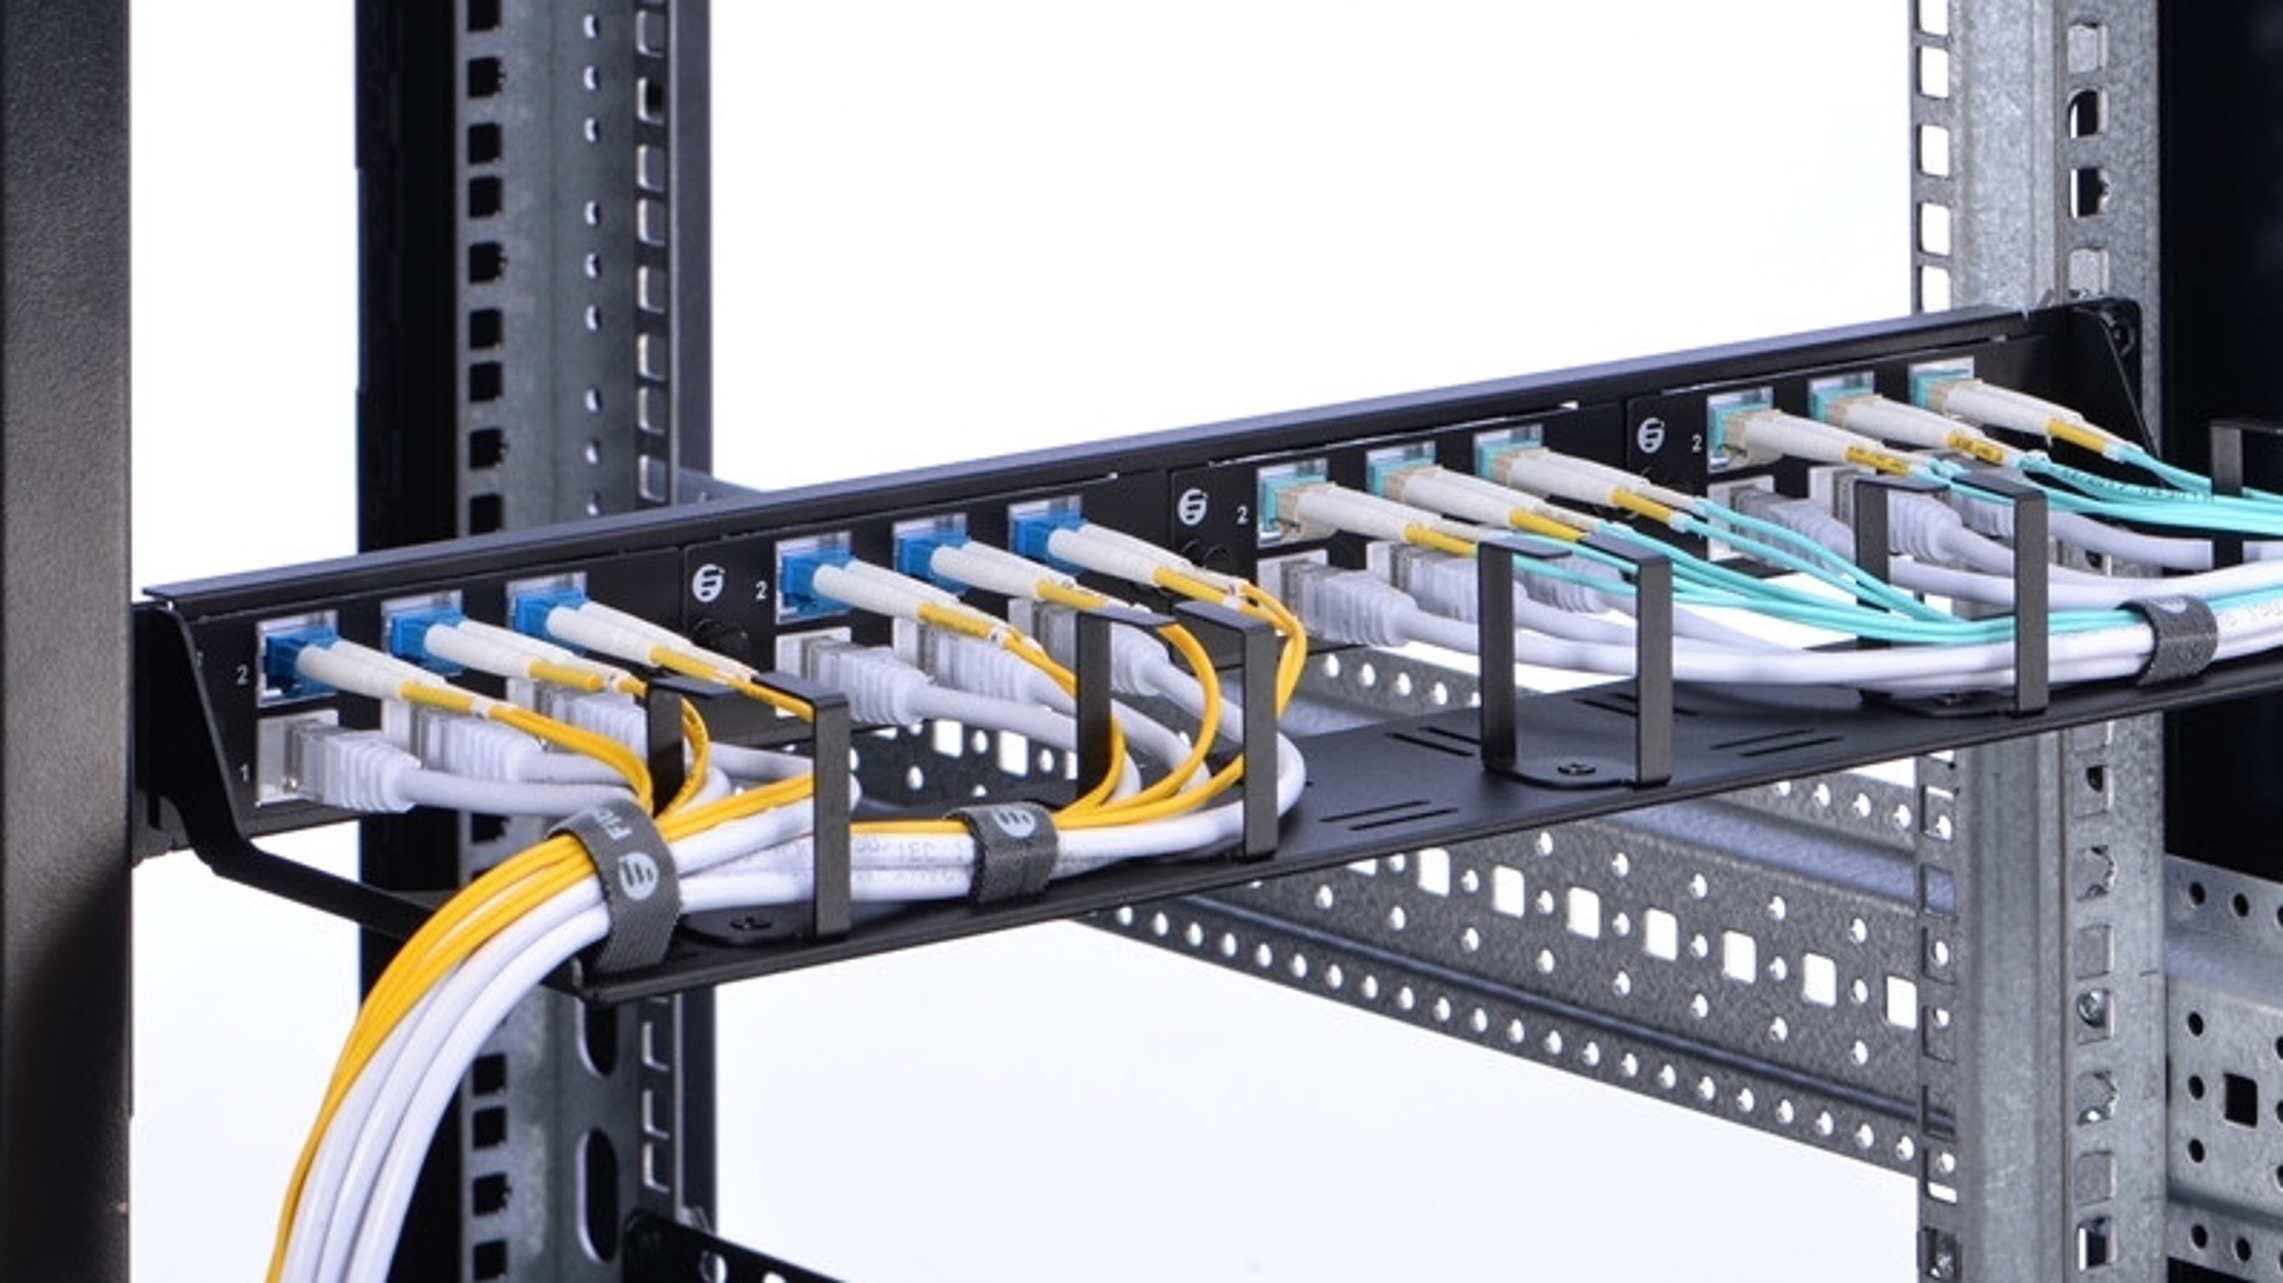
Wiring and cable management are essential aspects of building a server rack. Proper cable management not only improves the aesthetics of your rack but also enhances airflow, accessibility, and overall functionality. Here are some steps to effectively manage your cables:
- Plan your cable routes: Before connecting any cables, plan the routing of your cables within the rack. Consider the length of each cable, the location of your equipment, and the organization of your rack layout.
- Label cables: Properly labeling your cables will make future troubleshooting and maintenance much easier. Use labels, tags, or color coding to identify different types of cables or connections.
- Use cable management solutions: Invest in cable management solutions such as cable ties, Velcro straps, and cable trays. These solutions will keep your cables organized and prevent them from becoming tangled or obstructing airflow.
- Separate power and data cables: To minimize signal interference, separate power cables and data cables within the rack. This will help maintain the integrity of your network signals and improve overall performance.
- Route cables in logical paths: Follow a systematic approach when routing cables. Group cables that go to the same equipment or nearby ports. Use cable management features in your rack, such as cable guides or D-ring panels, to create tidy cable runs.
- Leave slack and utilize cable management loops: Ensure that you leave enough slack in the cables to allow for movement or equipment upgrades. Utilize cable management loops to neatly loop and secure excess cable length.
- Secure cables: Use cable ties or Velcro straps to secure cables to the rack frame or cable management panels. This will prevent cables from becoming loose or accidentally disconnected.
- Regularly inspect and maintain: Periodically inspect your cables for any signs of wear, damage, or loose connections. Maintain proper cable tension and reorganize as needed to ensure a clean and functional cable management system.
Effective cable management will not only improve the overall appearance of your server rack but also contribute to better airflow, easier maintenance, and reduced downtime. Taking the time to properly route and manage your cables will result in a more efficient and reliable server infrastructure.
Once your cables are properly managed, you can move on to installing your servers and other equipment into the rack. In the next section, we’ll guide you through the process of installing servers and equipment into your server rack.
Installing Servers and Equipment
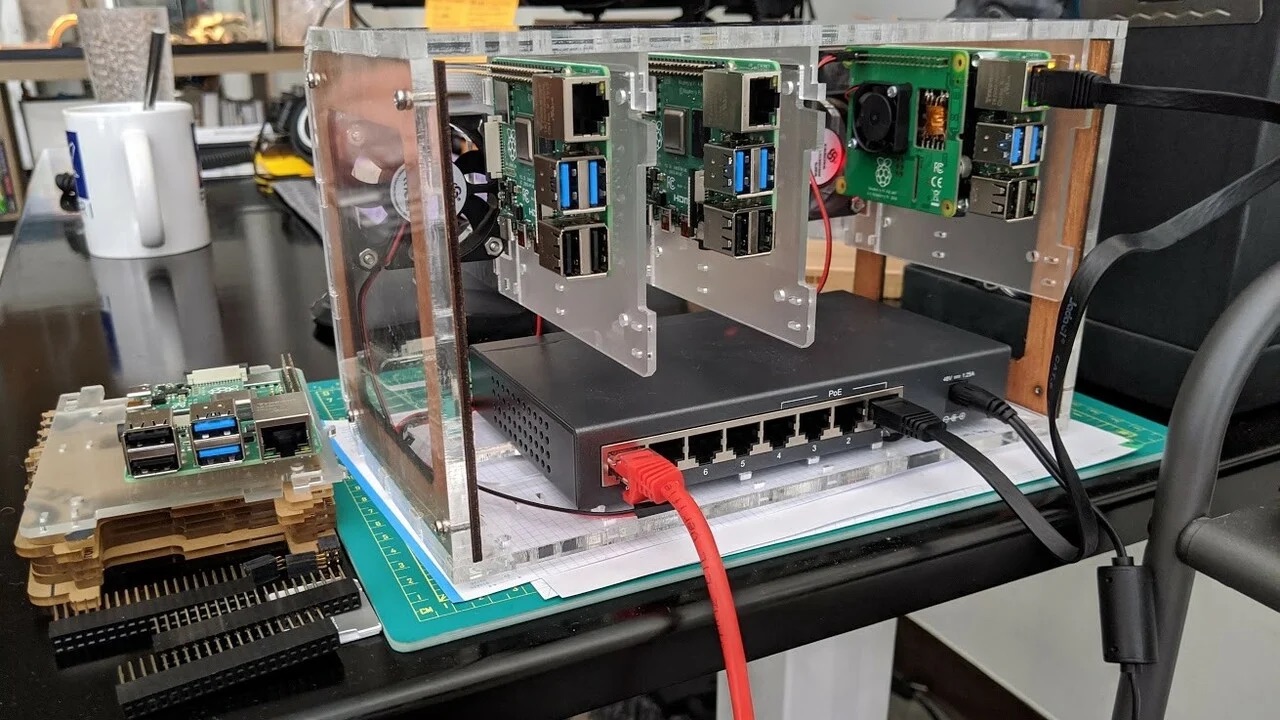
With your server rack assembled, shelves and mounting rails installed, and cables properly managed, it’s time to install your servers and other equipment. Proper installation ensures optimal performance, accessibility, and organization within your rack. Follow these steps to install your servers and equipment:
- Prepare your servers: Ensure that your servers are powered off and disconnected from any power sources or networks. Take this opportunity to clean the servers and check for any physical damage or loose components.
- Align the server: Align the server with the mounting rails and slide it into position. Take care to distribute the weight evenly and support the server with one hand while sliding it in with the other.
- Secure the server: Once the server is properly aligned, use the provided screws or bolts to secure it to the mounting rails. Tighten the screws or bolts firmly, but be cautious not to overtighten and cause damage.
- Connect cables: Connect the necessary power cables, network cables, and any other required connections to the server. Ensure all connections are securely seated and properly labeled for easy identification.
- Repeat for other equipment: If you have additional equipment such as switches, routers, or UPS units, follow the same process to install and connect them to the rack. Consider the weight distribution and airflow of the equipment when installing.
- Verify connections and functionality: Double-check that all cables and connections are properly secured and in the correct ports. Power on the servers and equipment one by one to verify that they start up correctly and are functioning as expected.
- Document the installation: Keep detailed documentation of the installation process, including server and equipment configurations, cable connections, and any specific setup requirements. This documentation will be valuable for future maintenance and troubleshooting.
By following these steps and taking care with the installation process, you can ensure that your servers and equipment are properly secured and function optimally within your server rack. Remember to consider airflow, accessibility, and future expansion when positioning your equipment.
With your servers and equipment successfully installed, it’s time to move on to testing and troubleshooting. In the next section, we’ll guide you through the steps to test and troubleshoot your server rack setup.
Testing and Troubleshooting
Once you have installed your servers and equipment into the server rack, it’s crucial to thoroughly test the setup to ensure everything is functioning as intended. Testing will help identify any issues or performance issues early on, allowing for timely troubleshooting and resolution. Follow these steps to effectively test and troubleshoot your server rack:
- Power on all equipment: Start by powering on all servers and equipment within the rack. Verify that each device starts up without any errors or warning messages.
- Check connectivity: Test the network connectivity of each server and equipment by pinging them from another device on the same network. Verify that all devices can communicate properly.
- Monitor system stability: Observe the stability and performance of your servers and equipment over an extended period. Monitor factors such as resource usage, temperature, and network traffic to ensure they are within acceptable ranges.
- Test software and services: If your servers are running specific software or services, test their functionality to ensure they are working as expected. This may include accessing websites, databases, or applications hosted on the servers.
- Verify backups and disaster recovery: Ensure that your backup systems and disaster recovery procedures are in place and functioning correctly. Perform test restores or failover simulations to validate the effectiveness of your backup and recovery processes.
- Monitor for errors and anomalies: Continuously monitor server logs and system reports for any errors, warnings, or abnormal behavior. Address any issues promptly to prevent potential downtime or data loss.
- Perform load testing: Simulate high loads and heavy usage on your servers to determine if they can handle the expected traffic and workload. Monitor system performance and identify any bottlenecks or resource limitations.
- Troubleshoot issues: If you encounter any issues during testing, conduct thorough troubleshooting to identify the root cause. Refer to documentation, manufacturer resources, or seek assistance from knowledgeable professionals to address the problem effectively.
- Document test results and resolutions: Keep detailed records of the testing process, any issues encountered, and the steps taken to resolve them. This documentation will serve as a valuable reference for future maintenance and troubleshooting.
By following these testing and troubleshooting steps, you can ensure the reliability and performance of your server rack setup. Regular testing and proactive maintenance will help prevent potential issues and optimize the functionality of your infrastructure.
With the testing and troubleshooting process complete, you’ve reached the final stage of securing your server rack. In the next section, we’ll guide you through the essential steps to secure your rack and protect your equipment.
Securing the Rack
Securing your server rack is an essential step to protect your valuable equipment and ensure the integrity of your network infrastructure. By implementing proper security measures, you can minimize the risk of unauthorized access, theft, and physical damage. Follow these steps to secure your rack:
- Choose a secure location: Place your server rack in a locked, well-secured room or enclosure. This will prevent unauthorized access and protect your equipment from tampering or theft.
- Use lockable cabinets or doors: Consider using a server rack enclosure or cabinets with lockable doors. This adds an additional layer of physical security and prevents unauthorized individuals from accessing the equipment.
- Secure the rack to the floor or wall: For added stability and protection against potential tipping or movement, securely anchor the rack to the floor or wall. Use appropriate mounting hardware and follow any specific instructions provided by the manufacturer.
- Protect cabling: Secure the cables within the rack using cable management solutions to prevent them from being easily tampered with or accidentally disconnected. Consider using cable locks or covers to protect the physical connections.
- Implement access control: Restrict access to the server rack by implementing access control measures. This can include using biometric controls, card entry systems, or key-based locks to ensure only authorized personnel can access the rack.
- Monitor with security cameras: Install security cameras in the vicinity of the server rack to monitor and record any suspicious activity. This provides an additional level of surveillance and can aid in identifying potential security breaches.
- Regularly audit and review access: Periodically audit and review the access rights of individuals who have permission to access the server rack. Remove any unnecessary or outdated access privileges to minimize the risk of unauthorized entry.
- Establish a disaster recovery plan: Prepare a comprehensive disaster recovery plan that includes procedures for data backup, offsite storage, and recovery processes. This ensures that in the event of a security breach or physical damage, your data and systems can be quickly restored.
- Train staff on security protocols: Educate and train your staff on security protocols and best practices for accessing and working with the server rack. Foster a culture of security awareness to prevent accidental breaches and ensure the proper handling of sensitive equipment.
Implementing these security measures will help protect your server rack and the data it stores. Remember to regularly review and update your security protocols as technology and threats evolve.
Now that you have secured your server rack, you have successfully completed the process of building and securing your own server rack. With proper maintenance, ongoing monitoring, and regular updates, your server rack will continue to be the backbone of your network infrastructure. Congratulations on your accomplishment!
Conclusion
Building a server rack is a rewarding endeavor that allows you to create a customized and efficient infrastructure for your servers and network equipment. Throughout this article, we have guided you through the various stages of building a server rack, from choosing the right rack to securing it against potential threats.
By carefully considering factors such as rack size, weight capacity, airflow, and cable management, you can select a rack that meets your specific needs. Gathering the necessary tools and materials ensures a smooth assembly process, while planning the placement and configuration of your equipment ensures optimal accessibility and organization.
Assembling the rack frame, installing shelves and mounting rails, and effectively managing your cables contribute to a neat and functional rack setup. Installing servers and other equipment, testing and troubleshooting, and implementing security measures complete the process, ensuring the reliability, performance, and protection of your network infrastructure.
Remember to regularly maintain and monitor your server rack, conduct routine tests, and address any issues promptly. Stay updated with the latest industry practices and technologies to optimize the performance and security of your rack.
Building a server rack is not a one-time task; it is an ongoing commitment to the proper functioning and security of your network. By investing time and effort into building and maintaining your server rack, you can create a robust and efficient system that supports your business operations or personal projects.
We hope that this guide has provided you with valuable insights and practical knowledge to embark on the journey of building your own server rack. Enjoy the satisfaction that comes with creating a sophisticated and reliable infrastructure that meets your unique needs.