Introduction
Welcome to the world of 3D printing! It’s an exciting technology that has revolutionized various industries, from manufacturing to healthcare. However, like any new endeavor, 3D printing comes with its own set of challenges. One common issue that many users face is the presence of blobs in their prints.
Blobs are unwanted bulges or imperfections that appear on the surface of 3D printed objects. They can completely ruin the aesthetics of a print and detract from its overall quality. If you’ve encountered blobs in your 3D prints, fear not! In this article, we’ll guide you through the process of getting rid of them, ensuring that your future prints are smooth, precise, and blob-free.
Understanding the root causes of blobs is essential in effectively addressing this problem. There are several factors that can contribute to the formation of blobs during the 3D printing process. By identifying these causes and implementing the right solutions, you’ll be well on your way to achieving flawless prints.
In the following sections, we’ll delve deeper into the reasons behind blob formation and provide you with step-by-step instructions on how to eliminate them. We’ll cover topics such as calibrating your extruder, optimizing temperature settings, adjusting retraction settings, and more. So, let’s get started on your journey towards achieving smooth, high-quality 3D prints without those pesky blobs!
Understanding blobs in 3D printing
Blobs are a common issue that occurs during the 3D printing process. They are characterized by small bulges or irregularities that appear on the surface of the printed object. These imperfections can be quite frustrating, especially when you’re aiming for a smooth and high-quality print.
The formation of blobs is typically caused by the extrusion of excess filament. When the printer moves from one area to another, it may leave behind a small amount of filament, resulting in a blob. This can happen when there is a sudden change in direction or when the printer pauses and resumes printing.
Another factor that contributes to blob formation is the retraction process. Retraction is when the filament is pulled back slightly to prevent oozing during non-printing moves. If the retraction settings are not optimized, it can lead to inconsistent filament flow and result in blobs.
It’s important to note that blobs can vary in size, depending on the severity of the issue. They may be barely noticeable or large enough to significantly affect the overall appearance of the print. In some cases, blobs can even cause additional problems such as layer shifts or poor adhesion between layers.
Understanding the causes of blobs is crucial in effectively addressing and eliminating them. By identifying the root cause of the issue, you can make the necessary adjustments to your printer settings or take specific actions to minimize or prevent blob formation altogether.
In the next sections, we will explore the various causes of blobs in 3D printing and provide you with practical solutions to get rid of them. Remember, with the right knowledge and techniques, you’ll be able to achieve clean and flawless prints, free from those pesky blobs!
Causes of blobs in 3D printing
There are several factors that can contribute to the formation of blobs in 3D printing. Understanding these causes is essential in effectively troubleshooting and eliminating blobs from your prints. Let’s take a closer look at some of the common culprits:
- Inconsistent retraction settings: When the retraction settings are not optimized, it can lead to filament oozing during non-printing moves. This excess filament can result in blobs on the surface of the print. It’s important to fine-tune the retraction distance and speed to prevent excess filament flow.
- Insufficient cooling: Inadequate cooling can cause filament to remain soft and malleable when it shouldn’t be, leading to blobs. Proper cooling, especially for prints with overhangs or intricate details, is crucial to solidify the filament and prevent unwanted bulges.
- High printing temperature: Printing at a temperature that is too high can cause the filament to become more fluid, resulting in blobs. It’s important to find the optimal temperature for your specific filament to ensure proper flow without excessive blob formation.
- Inconsistent extrusion: Inconsistent extrusion can cause blobs as the printer may extrude varying amounts of filament during the print. This can occur due to issues such as a poorly calibrated extruder or filament slip. Regular maintenance and calibration of your printer can help address extrusion-related problems.
- Incorrect print speed: Printing too fast can cause the printer to struggle to keep up, resulting in blobs. Similarly, sudden changes in print speed can also contribute to blob formation. Adjusting the print speed and ensuring smooth and consistent movements can help reduce blobs.
- Print head collisions: When the print head collides with the printed part or any obstruction, it can cause blobs. This often happens due to inaccurate printer calibration or improper print bed leveling. Ensuring that the print head moves smoothly and does not collide with the print can prevent blob formation.
By addressing these potential causes, you can significantly reduce the occurrence of blobs during your 3D printing process. In the next section, we will explore the tools and materials you will need to implement the necessary solutions and eliminate blobs once and for all.
Tools and materials needed
Before we dive into the step-by-step process of getting rid of blobs in 3D printing, let’s gather the necessary tools and materials. Having these on hand will ensure that you can efficiently address the causes of blobs and achieve optimal print quality. Here’s what you’ll need:
- Hex keys or screwdrivers: These tools are essential for calibrating and adjusting various components of your 3D printer, such as the extruder or print bed. Different printers may require different sizes, so make sure to have a set of hex keys or screwdrivers available.
- Tweezers or needle-nose pliers: These tools come in handy for removing any potential filament blockages or unclogging the nozzle. They allow you to carefully manipulate the filament and clear any obstructions that may be causing blobs.
- Cleaning tools: Keeping your printer clean is key to preventing issues like filament buildup or nozzle clogs. Microfiber cloths, cleaning brushes, or compressed air can be used to gently remove any debris or dust particles that may be affecting the print quality.
- Lubricant: Lubricating certain components of your 3D printer, such as the rods or lead screws, can help optimize their movement and reduce friction. A silicone-based lubricant or grease specifically designed for 3D printers is recommended for this purpose.
- Print cooling fan: If your printer does not have a built-in cooling fan or if the existing fan is not sufficient, consider adding an external print cooling fan. This will enhance the cooling process during printing, minimizing the chances of filament softening and blob formation.
- Filament filter: Filament filters can help remove any dust or contaminants from the filament, ensuring a smoother flow and reducing the risk of clogs or blobs. There are various types of filament filters available, such as sponge or foam filters, which can be easily attached to the filament spool.
Make sure that you have these tools and materials readily available before embarking on the journey to eliminate blobs. Each of these items plays a crucial role in identifying and resolving the underlying causes of blob formation in 3D printing. With the right tools at your disposal, you’ll be well-equipped to take on the subsequent steps and achieve flawless prints!
Step-by-step guide to getting rid of blobs
Now that you have a good understanding of what causes blobs in 3D printing and have gathered the necessary tools and materials, it’s time to tackle the issue head-on. Follow this step-by-step guide to effectively eliminate blobs from your prints:
- Calibrate your extruder: Begin by calibrating your extruder to ensure that it accurately measures and dispenses the filament. Use your printer’s firmware or calibration settings to adjust the extruder steps/mm until it is properly calibrated.
- Use the right temperature settings: Experiment with different temperature settings for your specific filament to find the optimal temperature range. This will help prevent filament from becoming too fluid and causing blobs.
- Adjust retraction settings: Fine-tune the retraction distance and speed in your printer settings. The goal is to minimize filament oozing during non-printing moves, which can lead to blobs.
- Check for filament blockages: Inspect your filament path, including the feed tube and nozzle, for any potential blockages. Use tweezers or needle-nose pliers to carefully remove any obstructions that may be causing filament flow issues and resulting in blobs.
- Clean and lubricate your printer: Regularly clean your printer to prevent debris or filament buildup. Use microfiber cloths or brushes to remove dust and dirt. Additionally, lubricate components such as rods and lead screws with a recommended lubricant to ensure smooth movement.
- Optimize print speed: Adjust the print speed settings to ensure that your printer can handle the movements without struggling. Avoid sudden changes in speed, as they can cause blobs to form. Gradually increase or decrease the print speed if needed.
- Improve cooling: If your printer has a built-in print cooling fan, ensure that it is functioning properly. If not, consider adding an external fan to enhance the cooling process during printing, preventing filament softening and blob formation.
- Consider using a filament filter: Attach a filament filter, such as a sponge or foam filter, to your filament spool to remove any dust or contaminants. This will help maintain a clean and consistent filament flow, reducing the chances of clogs and blob formation.
By following these steps, you’ll be able to tackle the most common causes of blobs in 3D printing. Remember to make incremental changes and test your prints after each adjustment to gauge their impact. With patience and persistence, you’ll be able to fine-tune your printer settings and achieve smooth, high-quality prints without those pesky blobs!
Calibrate your extruder
One of the key steps in eliminating blobs from your 3D prints is to calibrate your extruder. Proper extruder calibration ensures accurate measurement and consistent filament flow, helping to prevent issues like over-extrusion or under-extrusion that can lead to blob formation. Follow these steps to calibrate your extruder:
- Mark your filament: Start by marking a point on your filament, a few centimeters above the extruder. Use a marker or tape to indicate the reference point.
- Preheat your printer: Preheat your printer to the appropriate temperature for your filament material.
- Extrude a specific length of filament: Use your printer’s control panel or software to extrude a specific length of filament, such as 100mm. Make sure to measure the extruded length accurately.
- Measure the actual extruded length: After the extrusion is complete, measure the length of filament that was actually extruded. This can be done using a ruler or calipers.
- Calculate the extruder steps/mm: Use the formula: new_extruder_steps/mm = (current_extruder_steps/mm * marked_length) / actual_length. Calculate the new extruder steps/mm value based on the marked length, actual length, and current extruder steps/mm value.
- Update the extruder steps/mm: Access your printer’s firmware settings or use the printer’s software interface to update the extruder steps/mm value with the calculated new value.
- Repeat the calibration: Repeat the extrusion and measurement process a few times to verify that the new extruder steps/mm value provides accurate and consistent filament extrusion.
By calibrating your extruder, you’ll ensure that the filament is accurately measured and dispensed, minimizing the chances of over-extrusion or under-extrusion that can contribute to blobs. It’s recommended to periodically check and recalibrate your extruder to maintain optimal printing performance.
Use the right temperature settings
Controlling the temperature of your 3D printer is crucial in preventing blob formation. Each filament material has an optimal printing temperature range, and using the right temperature settings can help ensure proper flow and prevent excess filament from causing blobs. Follow these steps to use the right temperature settings:
- Refer to the filament manufacturer’s recommendations: Consult the documentation or packaging of your filament to determine the recommended temperature range for optimal printing results.
- Start with the lower end of the range: Begin by setting your printer’s nozzle temperature to the lower end of the recommended range. This will help avoid overheating the filament and causing it to become too fluid, leading to blob formation.
- Print a test object: Select a test object that allows you to assess the print quality and identify any potential issues like blobs. Observe the print closely for any signs of under-extrusion or excessive filament flow.
- Adjust the temperature incrementally: If the print shows signs of under-extrusion or poor filament flow, gradually increase the nozzle temperature by a few degrees at a time. Print another test object and evaluate the results.
- Observe filament flow and surface quality: Pay attention to the flow of filament and the appearance of the printed object’s surface. Look for any bulges or irregularities that may indicate blob formation.
- Find the optimal temperature: Continue adjusting the temperature settings and printing test objects until you find the temperature that provides the best balance between proper filament flow and minimal blob formation.
- Document your settings: Once you determine the optimal temperature for your specific filament, make a note of it for future reference. This will allow you to consistently use the correct temperature settings for successful prints.
By using the right temperature settings, you can ensure that the filament melts and flows smoothly without becoming too fluid and causing blobs. The temperature adjustment process may require some experimentation, but with practice, you’ll be able to find the optimal temperature for your filament and achieve high-quality prints, free from unwanted imperfections.
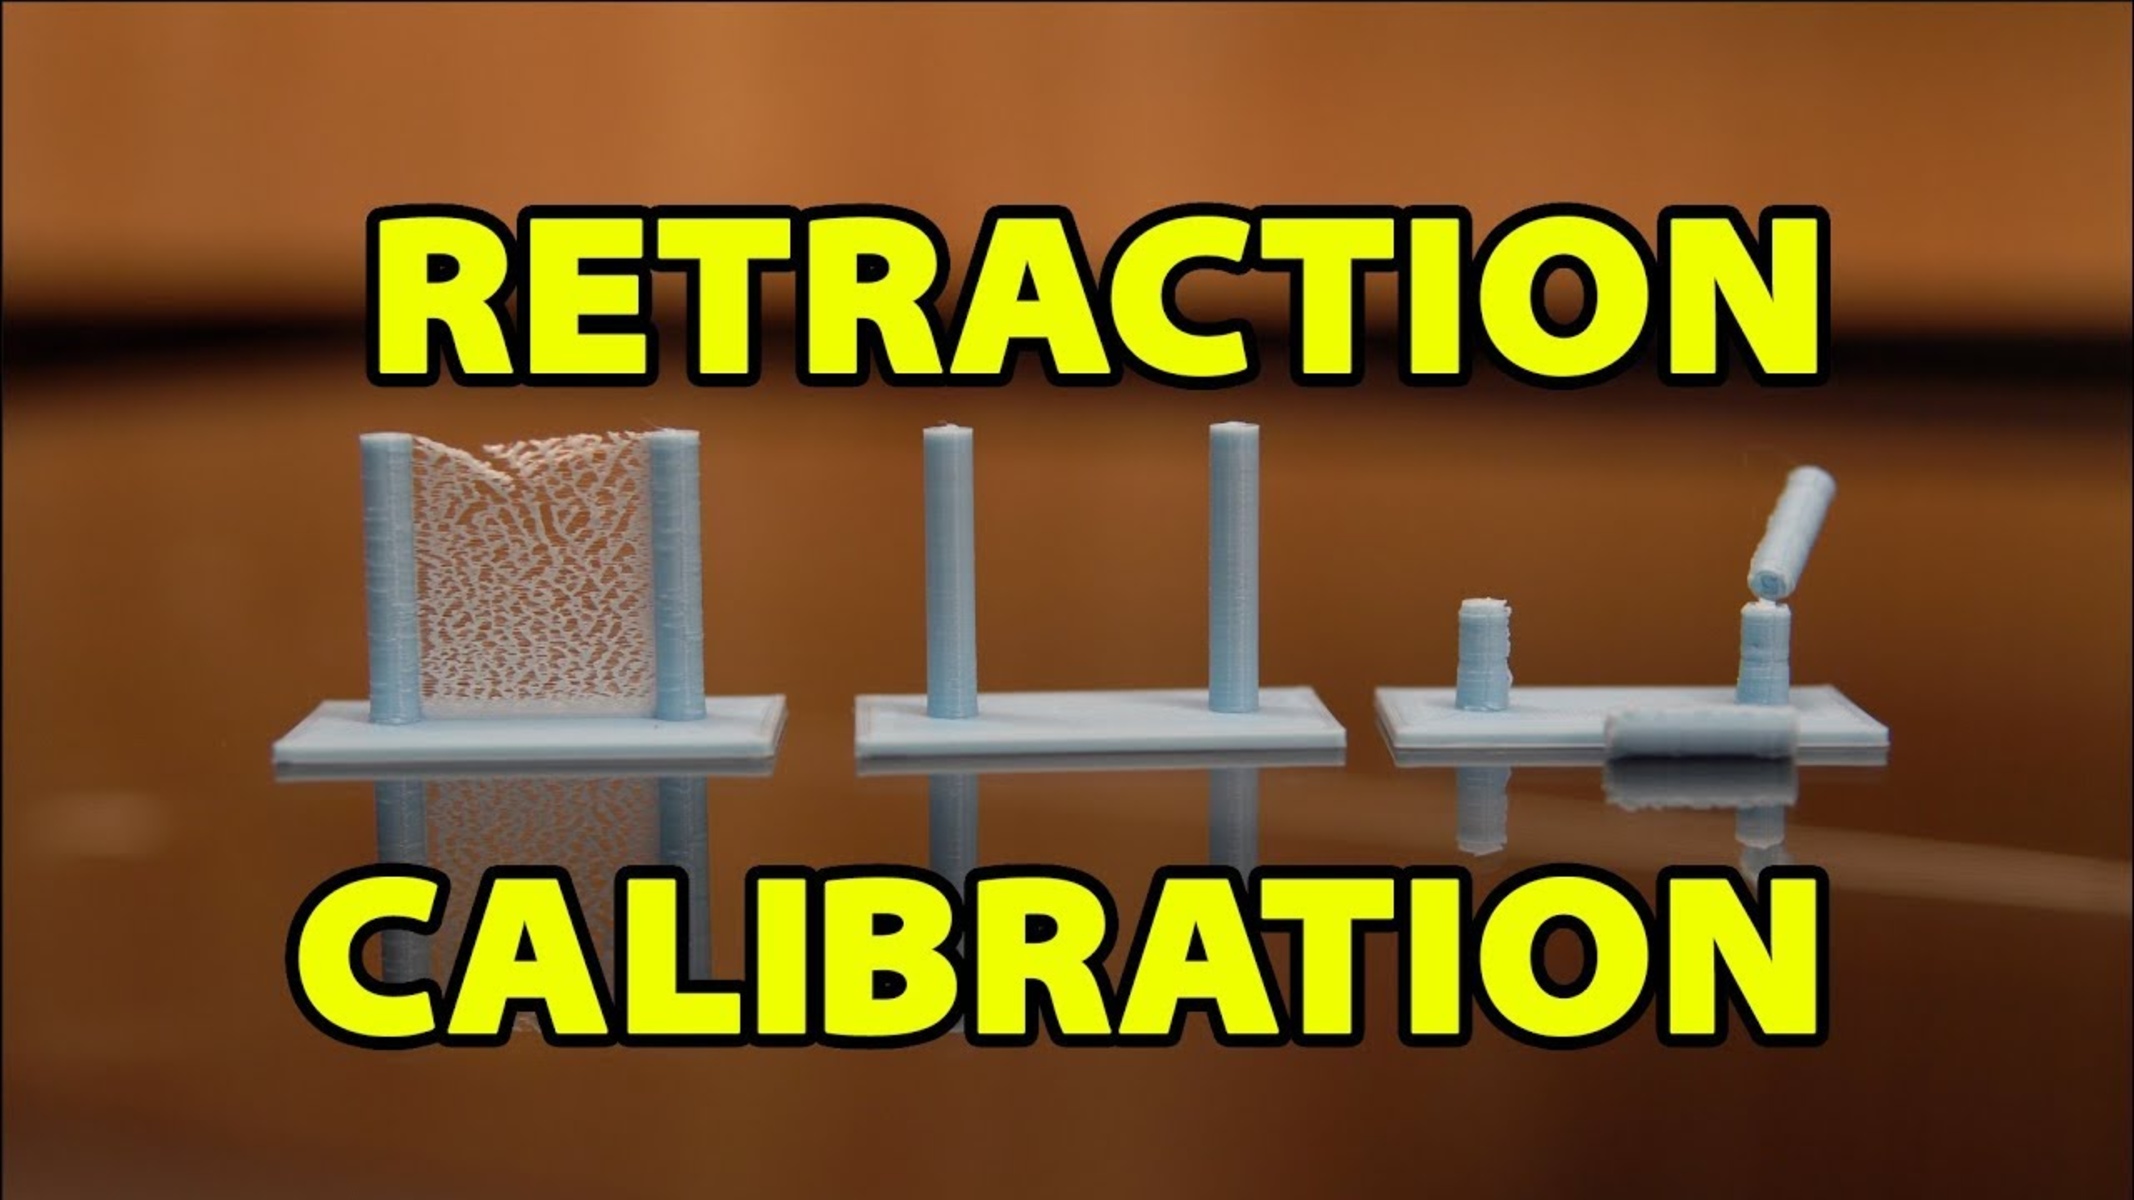
Adjust retraction settings
Adjusting the retraction settings of your 3D printer is essential in minimizing filament oozing during non-printing moves, which can lead to blobs on your prints. Retraction is the process of pulling back the filament slightly to prevent it from oozing out while the printer moves between different areas of the print. By optimizing the retraction settings, you can significantly reduce the occurrence of blobs. Follow these steps to adjust your retraction settings:
- Identify the retraction settings: Access your printer’s settings or software interface to locate the retraction settings. These settings typically include the retraction distance and retraction speed.
- Start with default settings: If you have not adjusted the retraction settings before, begin with the default values set by your printer’s manufacturer. These settings may vary, so consult the printer’s documentation or online resources for guidance.
- Print a test object: Select a test object that showcases areas where blobs are more likely to occur, such as sharp corners or intricate details. Print the test object and observe the print closely for signs of filament oozing and blob formation.
- Gradually increase retraction distance: If the test print shows signs of filament oozing or blobs, increase the retraction distance by small increments, such as 0.5mm at a time. Print another test object and evaluate the results.
- Adjust retraction speed: If increasing the retraction distance does not yield satisfactory results, consider adjusting the retraction speed. A slower retraction speed can allow the filament to retract more effectively and prevent excess filament from causing blobs.
- Iterate and fine-tune: Continue adjusting the retraction distance and speed, printing test objects, and evaluating the results. Fine-tuning the retraction settings may require multiple iterations to find the optimal combination for your specific printer and filament.
- Document your settings: Once you find the retraction settings that provide the best results, make note of them for future reference. Having a documented record of your optimized retraction settings will help you consistently achieve clean prints with minimal blob formation.
By carefully adjusting the retraction settings, you can minimize filament oozing and prevent blobs from appearing on your prints. It may take some trial and error to find the optimal retraction distance and speed, but with persistence, you’ll be able to fine-tune your settings and achieve high-quality prints, free from those unwanted imperfections.
Check for filament blockages
Filament blockages can disrupt the smooth flow of filament through the extruder and nozzle, leading to inconsistencies and potential blob formation in 3D prints. Checking for and clearing any filament blockages is an important step in eliminating blobs. Follow these steps to check for filament blockages:
- Turn off your printer: Start by turning off your 3D printer to ensure your safety during the inspection process.
- Remove the filament: If there is filament loaded in the printer, carefully unload it according to the manufacturer’s instructions. This will allow you to access the extruder and nozzle more easily.
- Inspect the filament path: Examine the filament path, including the feed tube and nozzle, for any signs of blockages. Look for any hardened or melted filament that may be obstructing the path. Use a flashlight if necessary to get a clear view of any potential blockages.
- Clear the nozzle: Heat the nozzle to the recommended temperature for the filament material. Once heated, use tweezers or needle-nose pliers to carefully remove any melted filament that may be blocking the nozzle opening. Be cautious not to damage the nozzle or other components while clearing the blockage.
- Check the feed tube: Inspect the feed tube for any filament remnants or obstructions. Use the tweezers or pliers to remove any debris that may be causing a blockage. Ensure that the feed tube is clear and free of any filament residue.
- Clear the extruder: Check inside the extruder housing for any filament residues that may be hindering the extrusion process. Using the tweezers or pliers, carefully remove any filament remnants to ensure smooth filament flow.
- Reload and test: Once you have cleared any potential blockages, reload the filament into the printer following the manufacturer’s instructions. Print a test object to verify that the filament is flowing smoothly without any signs of filament oozing or blob formation.
Regularly checking for filament blockages and clearing them promptly will help maintain consistent filament flow and prevent unnecessary blobs in your 3D prints. Remember to exercise caution when working with the hot nozzle and other components to avoid injury or damage to the printer. By ensuring a clear filament path, you’ll be one step closer to achieving clean and high-quality prints.
Clean and lubricate your printer
Maintaining a clean and properly lubricated 3D printer is essential for achieving smooth and precise prints while reducing the risk of filament buildup and blob formation. Regular cleaning and lubrication will help optimize the performance of your printer’s mechanical components. Follow these steps to clean and lubricate your printer:
- Power off your printer: Before starting any cleaning or maintenance procedures, ensure that your 3D printer is powered off and unplugged to prevent any accidents or injuries.
- Clean the exterior: Use a microfiber cloth or a soft brush to gently wipe away any dust, dirt, or debris from the exterior surfaces of your printer. Pay attention to areas such as the print bed, frame, and casing.
- Clean the print bed: If your printer has a removable print bed, remove it and clean it thoroughly with water or a gentle cleaning solution. Dry it completely before reinstalling it.
- Clean the nozzle: If the nozzle has hardened or excess filament on it, heat the nozzle to the recommended temperature for your filament material. Once heated, carefully clean the nozzle using a brush or compressed air to remove any buildup.
- Lubricate the moving parts: Apply a small amount of lubricant, such as silicone-based lubricant or a 3D printer-specific grease, to the moving parts of your printer. This includes the rods, lead screws, and any other components that require smooth movement. Wipe away any excess lubricant to prevent it from attracting dust or debris.
- Check the belts: Inspect the belts that drive the movement of the print head and ensure they are tight and properly aligned. If necessary, loosen or tighten the belts to ensure the correct tension.
- Calibrate the print bed: Check the levelness of your print bed and calibrate it if necessary. A well-leveled print bed ensures accurate printing and helps prevent issues like layer shifts or uneven extrusion that can lead to blobs.
- Verify the cleanliness: After cleaning and lubricating your printer, visually inspect all the components to ensure they are clean and free from debris. Remove any remaining dust or particles using a brush or compressed air.
Regularly cleaning and lubricating your 3D printer will help maintain its performance and minimize the chances of filament buildup or other issues that may contribute to blob formation. Make it a routine to perform this maintenance periodically to keep your printer in optimal condition for producing high-quality prints.
Optimize print speed
Print speed plays a vital role in achieving high-quality prints with minimal blob formation. Adjusting and optimizing the print speed settings can help ensure that your printer can handle the movements without struggling, reducing the risk of blobs. Follow these steps to optimize your print speed:
- Start with manufacturer’s recommendations: Refer to the documentation or online resources provided by your printer’s manufacturer for the recommended print speed range for your specific printer model.
- Print a test object: Choose a test object that allows you to evaluate the print quality and identify any signs of blob formation or other issues related to print speed. Print the test object at the default print speed settings.
- Evaluate print quality: Examine the test print for any signs of blobs or other imperfections that may indicate the print speed is too high. Look for smooth transitions between layers and consistent filament flow.
- Decrease print speed: If the test print shows signs of blobs or other issues related to print speed, decrease the print speed by a small increment, such as 5-10%, and print another test object.
- Observe print behavior: Pay close attention to the print behavior, especially during areas that are prone to blob formation, such as sharp corners or intricate details. Look for improvements in filament flow and overall print quality.
- Continue adjusting: Iterate the process of decreasing the print speed, printing test objects, and evaluating the results until you find a print speed that minimizes or eliminates blob formation without negatively impacting the overall print quality.
- Document your settings: Once you determine the optimal print speed for your specific filament and printer, make note of it for future reference. Having a documented record of your optimized print speed will ensure consistency in achieving clean prints.
By finding the optimal print speed for your printer and filament, you can strike a balance between achieving smooth print movements and minimizing the risk of blobs. Keep in mind that the ideal print speed may vary depending on the complexity and size of the object being printed. With experimentation and observation, you’ll be able to fine-tune your print speed settings and achieve high-quality prints without those pesky blobs.
Improve cooling
Effective cooling is crucial in 3D printing to solidify the filament and prevent excessive softening, which can lead to blobs on your prints. Enhancing the cooling capabilities of your printer can help maintain the desired print quality and minimize the risk of blob formation. Follow these steps to improve the cooling of your printer:
- Check the fan: Verify that the fan responsible for cooling the print is functioning properly. Ensure that it is clean and not obstructed by dust or debris that may impede its airflow. If necessary, clean or replace the fan to optimize its cooling performance.
- Adjust the fan speed: Access your printer’s settings or software interface to adjust the fan speed. Experiment with different fan speed settings to find the optimum balance between cooling effectiveness and print quality.
- Position the fan correctly: Ensure that the cooling fan is properly positioned to direct the airflow towards the printed object. Adjust the angle or position of the fan to maximize its effectiveness in cooling the printed layers.
- Modify the cooling duct: Consider printing or installing a custom cooling duct for your printer, designed specifically to enhance cooling. These ducts can help concentrate and direct the airflow precisely where it’s needed, improving cooling efficiency.
- Print in a cooler environment: When possible, ensure that the room or environment where your printer operates is at a moderate temperature. Lower ambient temperatures can aid in cooling the printed object more effectively.
- Utilize cooling towers or brims: Incorporate cooling towers or brims into your prints. These structures serve as sacrificial elements that allow the printer to complete cooling moves, reducing the probability of blobs forming on the actual printed object.
Enhancing the cooling of your printer can significantly reduce the likelihood of filament softening and resulting blobs. By implementing these steps and optimizing the cooling process, you’ll be able to achieve clean and precise prints with fewer imperfections. Remember to experiment with different settings and techniques to find the best cooling solution for your specific printer and filament materials.
Consider using a filament filter
Using a filament filter can be a beneficial addition to your 3D printing setup. Filament filters help remove dust, debris, and other contaminants from the filament, ensuring a smoother flow and reducing the risk of clogs or blobs during the printing process. Consider implementing a filament filter with these steps:
- Select a suitable filament filter: There are various types of filament filters available, such as sponge or foam filters, that can effectively trap debris and dust particles. Choose a filter that is compatible with your filament diameter and is easy to install.
- Prepare the filter: Assemble and prepare the filament filter according to the manufacturer’s instructions. This may involve attaching sponge or foam filters to the filter housing or installing a pre-made filter solution into your filament path.
- Attach the filter: Install the filament filter in the appropriate location along the filament path. This is typically between the filament spool and the extruder. Make sure the filter is securely attached and does not obstruct the filament’s movement.
- Monitor and replace the filter: Regularly monitor the condition of the filament filter during printing. Over time, the filter may become saturated with dust or debris, reducing its effectiveness. Replace the filter when necessary to maintain optimal filtration performance.
A filament filter can help remove unwanted contaminants in your filament, contributing to smoother filament flow and minimizing the risk of clogs and blobs. While not essential for all printing scenarios, using a filament filter can be particularly beneficial when working with filaments prone to debris or when experiencing recurring issues with filament clogs or imperfections.
Remember to research and select a filament filter that is compatible with your printer setup and filament diameter. By incorporating a filament filter into your 3D printing workflow, you can improve the overall quality of your prints and reduce the likelihood of blobs resulting from filament contamination.
Conclusion
Blobs in 3D printing can be a frustrating issue that affects the quality and aesthetics of your prints. However, by understanding the causes of blobs and implementing the right strategies, you can effectively eliminate them and achieve smooth, high-quality prints.
In this article, we explored various causes of blob formation, including inconsistent retraction settings, insufficient cooling, high printing temperatures, and more. We also discussed the importance of calibrating your extruder, using the right temperature settings, adjusting retraction settings, checking for filament blockages, cleaning and lubricating your printer, optimizing print speed, and considering the use of a filament filter. These step-by-step instructions provided practical guidelines to help you overcome the challenges of blob formation.
Remember, achieving successful prints without blobs requires patience, experimentation, and fine-tuning. It’s important to document your findings and optimized settings for future reference. Regular maintenance and periodic calibration of your printer are also essential to ensure consistent performance.
With the knowledge and techniques shared in this article, you’re now equipped to tackle the issue of blobs in 3D printing. By implementing these strategies and troubleshooting steps, you can confidently work towards achieving clean, precise, and blob-free prints in your 3D printing projects.