Introduction
Welcome to the world of 3D printing, where you can bring your imagination to life. Whether you’re a hobbyist or a professional, owning a 3D printer opens up a realm of endless possibilities. While there are many commercial 3D printers available in the market, building your own large-scale 3D printer can give you the freedom to work on bigger projects with greater precision.
In this guide, we will take you through the process of building a large 3D printer from scratch. Before we dive into the technical details, let’s first understand the key benefits of owning a large 3D printer.
Greater Build Volume: One of the main advantages of a large 3D printer is the ability to print bigger objects. This means you can create large-scale prototypes, architectural models, or even functional parts in a single print, saving you time and effort.
Improved Accuracy and Detail: A larger printer allows for finer resolution, resulting in more intricate and detailed prints. This is especially important when working on complex designs or when high precision is required.
Enhanced Flexibility: With a large 3D printer, you can experiment with different materials, including specialty filaments and composites. This enables you to explore new applications, such as printing with flexible or industrial-grade materials.
Cost Savings: Building your own printer can save you money compared to purchasing a pre-built one. Additionally, having the ability to print larger objects in-house can eliminate the need for outsourcing and reduce production costs.
Now that we have highlighted the advantages of a large 3D printer, let’s proceed to the next section, where we will discuss the materials and components you need to consider before embarking on your build.
Choosing the Right Materials and Components
Building a large 3D printer requires careful consideration of the materials and components you will use. Selecting high-quality components will not only ensure the longevity of your printer but also play a crucial role in the accuracy and reliability of your prints. Here are some key factors to keep in mind when choosing materials and components:
Frame Materials: The frame of your printer should be sturdy and rigid to provide stability during the printing process. Aluminum extrusions or steel frames are commonly used for large printers due to their strength and durability. Ensure that the chosen material can support the weight of your printer and minimize vibrations.
Linear Motion System: The quality of your prints relies heavily on the precision and smooth movement of the print head. Consider using high-quality linear motion components, such as linear rails or lead screws, to ensure accurate and reliable movement along the X, Y, and Z axes. This will help reduce backlash and improve overall print quality.
Extruder and Hot End: The extruder is responsible for pushing filament into the hot end, where it melts and gets deposited on the print bed. Choose a reliable extruder with good filament compatibility and a durable hot end that can withstand the high temperatures required for 3D printing.
Electronics and Control Board: Select an electronics setup suitable for driving large motors and handling the power requirements of your printer. Ensure compatibility with popular firmware options such as Marlin or Repetier. Consider using a powerful control board with features like auto-leveling and multiple extruder support if your project requires them.
Power Supply: A robust power supply is essential for running your printer smoothly. Make sure to choose a power supply with sufficient wattage to handle the demands of your printer and its peripherals. Consider safety features like thermal overload protection and short-circuit prevention.
Heated Print Bed: A heated print bed is crucial for preventing warping and ensuring proper adhesion of prints. Choose a large and evenly heated bed that suits the size of your printer. Additionally, consider materials like glass or aluminum for the print surface for better adhesion and easy removal of prints.
Additional Features: Depending on your requirements, you may want to consider additional features such as touchscreen displays, filament runout sensors, or filament dryers. These can enhance the user experience and improve the overall functionality of your printer.
Remember, investing in high-quality components may increase the initial cost, but it will ensure better print quality, reliability, and longevity of your large 3D printer. With the right materials and components, your printer will have a solid foundation for exceptional performance. In the next section, we will delve into the design considerations necessary for building your large 3D printer.
Design Considerations for a Large 3D Printer
Designing a large 3D printer involves careful planning and consideration of various factors to ensure optimal performance and usability. Here are some key design considerations to keep in mind when building your own large 3D printer:
Structural Integrity: Building a stable and rigid frame is crucial to minimize vibrations and maintain accurate prints. Consider using thick aluminum extrusions or steel frames for added strength and stability. Reinforce critical areas and use sturdy brackets or corner connectors to increase structural integrity.
Print Bed Leveling: Proper bed leveling is essential for successful prints. In a large printer, it is important to have a bed leveling system that is robust and easy to calibrate. Consider incorporating an automatic bed leveling mechanism, such as a proximity sensor or a BLTouch, to simplify the leveling process and ensure consistent print results.
Print Surface: The print surface plays a vital role in achieving good adhesion and preventing warping. Utilize a flat and even surface, such as borosilicate glass or aluminum, to provide a stable base for your prints. Ensure that the print surface is easily removable to facilitate print removal and cleanup.
Filament Path: Pay attention to the filament path and ensure it is free from obstructions and unnecessary bends. Use smooth PTFE tubes to guide the filament from the spool holder to the extruder, minimizing friction and ensuring smooth filament feeding. This will help prevent filament jams and improve extrusion consistency.
Cable Management: With a large printer, cable management becomes even more critical. Properly route and secure cables to avoid interference with moving parts and minimize the risk of accidental damage. Use cable chains or sleeves to organize and protect cables, ensuring smooth and reliable operation.
Accessibility: Consider the ease of access to various components for maintenance and repairs. Ensure that key components, such as the extruder assembly or electronics, are easily accessible without disassembling the entire printer. This will save time and effort when troubleshooting or upgrading your printer.
Noise Reduction: Large printers may generate increased noise levels due to larger motors and moving parts. To minimize noise, consider using stepper motor dampers, silent stepper motor drivers, or even an enclosure to muffle sound. This will provide a more pleasant working environment, especially for long printing sessions.
Safety Measures: Incorporate safety features such as thermal runaway protection for the hot end, overcurrent protection for the electronics, and proper grounding for the entire printer system. It is essential to prioritize safety to prevent accidents and ensure a reliable printing experience.
By considering these design aspects, you can create a large 3D printer that provides optimal performance, precision, and ease of use. In the next section, we will explore how to construct the frame for your printer, the foundation that will support the entire printing process.
Constructing the Frame for Your Printer
The frame is the backbone of your large 3D printer, providing stability and support for all its components. Proper construction is necessary to ensure accurate prints and minimize vibrations. Here are the steps to construct the frame for your printer:
Step 1: Gather the Materials: Start by gathering all the materials required for the frame construction. This includes aluminum extrusions, brackets, corner connectors, screws, and any additional reinforcements you may need.
Step 2: Design the Frame: Plan out the frame design based on the dimensions and build volume you desire. Consider the size and weight of the printer, as well as any specific requirements for your project. Use 3D modeling software or paper sketches to visualize the frame design.
Step 3: Cut and Assemble the Extrusions: Cut the aluminum extrusions to the appropriate lengths based on your frame design. Ensure clean and accurate cuts using a miter saw or a similar cutting tool. Assemble the extrusions using brackets and corner connectors according to the design plan.
Step 4: Reinforce Critical Areas: Identify critical areas of the frame that may require additional reinforcement. These areas typically include the corners, where the extrusions join, and any other points that may experience high stress or vibration. Reinforce these areas with additional brackets or connectors to increase overall stability.
Step 5: Attach the Print Bed: Install the print bed onto the frame using appropriate mounting brackets or a leveling mechanism. Ensure that the print bed is securely attached and level according to the design specifications. This will provide a stable surface for printing.
Step 6: Secure the Electronics and Wiring: Mount the electronics, including the control board, power supply, and any other components, onto the frame. Route and secure the wiring neatly, using cable management techniques to prevent entanglement and interfere with the movement of the printer’s components.
Step 7: Test and Adjust: Once the frame is fully assembled, perform a test run to ensure that all components are functioning properly. Check for any signs of misalignment, wobbling, or interference. Adjust and fine-tune the frame as needed to achieve optimal performance and stability.
Step 8: Add Additional Features: If desired, this is the stage to integrate any additional features or accessories to enhance your printer’s functionality. This could include a filament spool holder, an enclosure, or any other custom modifications for your specific requirements.
Remember, building the frame requires accuracy and attention to detail. Take your time to ensure that all components are aligned correctly and securely fastened. With a sturdy and well-constructed frame, you will have a solid foundation for the rest of the printer assembly process. In the next section, we will discuss how to assemble the electronics and wiring for your large 3D printer.
Assembling the Electronics and Wiring
Assembling the electronics and wiring of your large 3D printer is a crucial step in ensuring proper functionality and control over the printing process. Here are the steps to guide you through the process:
Step 1: Prepare the Electronics: Gather all the necessary electronic components, including the control board, stepper motor drivers, power supply, and any other peripherals required for your specific printer model. Ensure that they are compatible with each other and the firmware you plan to use.
Step 2: Mount the Control Board: Locate a suitable position on the frame to mount the control board. Consider easy access for future upgrades or maintenance. Secure the control board to the frame using screws or brackets provided with the board. Ensure that the board is oriented correctly and aligned with the necessary mounting holes.
Step 3: Connect the Electronics: Connect the stepper motors, endstops, thermistors, and other necessary components to the control board. Refer to the manufacturer’s documentation or wiring diagrams for proper connections. Pay attention to the polarity and pin assignments to avoid any wiring mistakes.
Step 4: Route the Wiring: Strategically plan the routing of the wires to prevent tangling, interference, or strain on the connections. Use cable ties, zip ties, or cable management accessories to secure and organize the wiring along the frame. Consider separating the high-voltage wires from the low-voltage ones to minimize electromagnetic interference.
Step 5: Connect the Power Supply: Connect the power supply to the control board and other components as needed. Double-check the voltage and polarity before making any connections. Ensure that the power supply can handle the power requirements of your printer and is securely mounted to the frame.
Step 6: Test the Electronics: Once all connections are made, perform a thorough check of the wiring to ensure proper connections and no loose wires. Apply power to the printer and test the functionality of the electronics. Check if all components are responding correctly and performing their intended functions.
Step 7: Configure Firmware: Once the electronics are successfully connected and tested, it’s time to configure the firmware. Use the appropriate software tool to modify the firmware settings to match your printer’s specifications. Adjust parameters such as steps per millimeter, acceleration, and extruder settings according to your hardware and desired printing performance.
Step 8: Secure and Finalize: After verifying the proper functioning of the electronics and firmware, secure any loose wiring or connectors. Use cable management techniques to ensure the longevity and reliability of the printer’s electrical system. Perform a final check to ensure all components are securely in place and ready for the next assembly steps.
By following these steps, you can assemble the electronics and wiring of your large 3D printer in a systematic and organized manner. Taking the time to properly connect and configure the electronics will ensure a smooth printing experience and reduce the risk of electrical issues. In the next section, we will discuss the installation of the extruder and hot end, key components responsible for extruding and depositing the filament during the printing process.
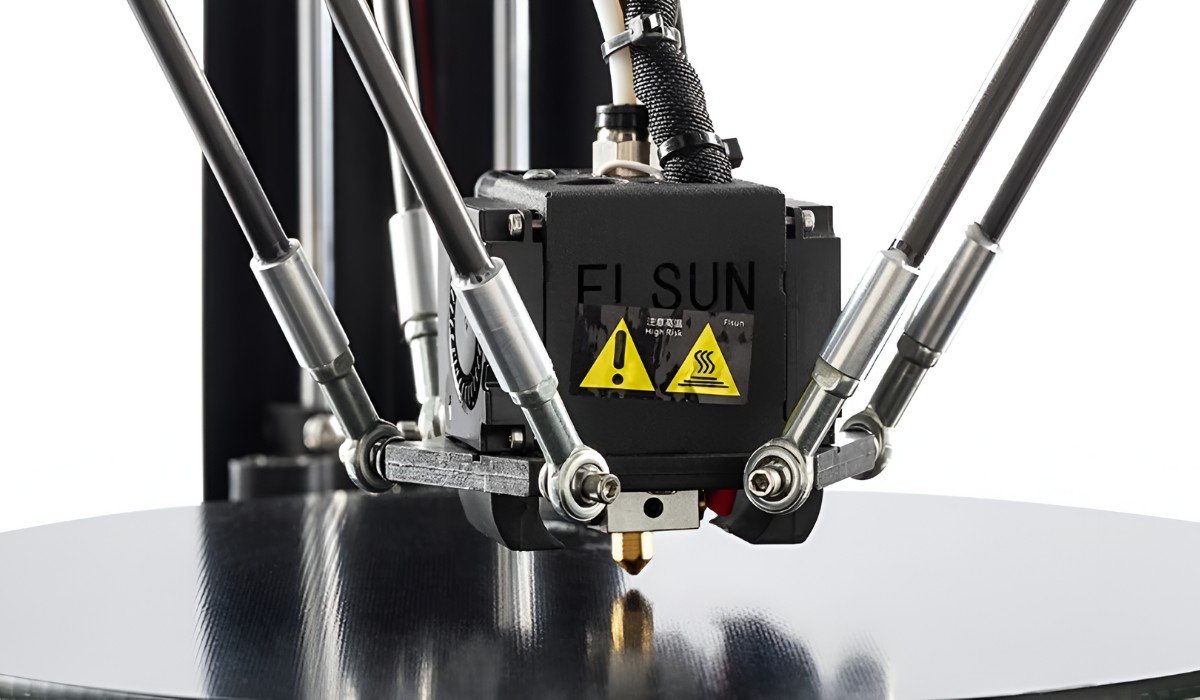
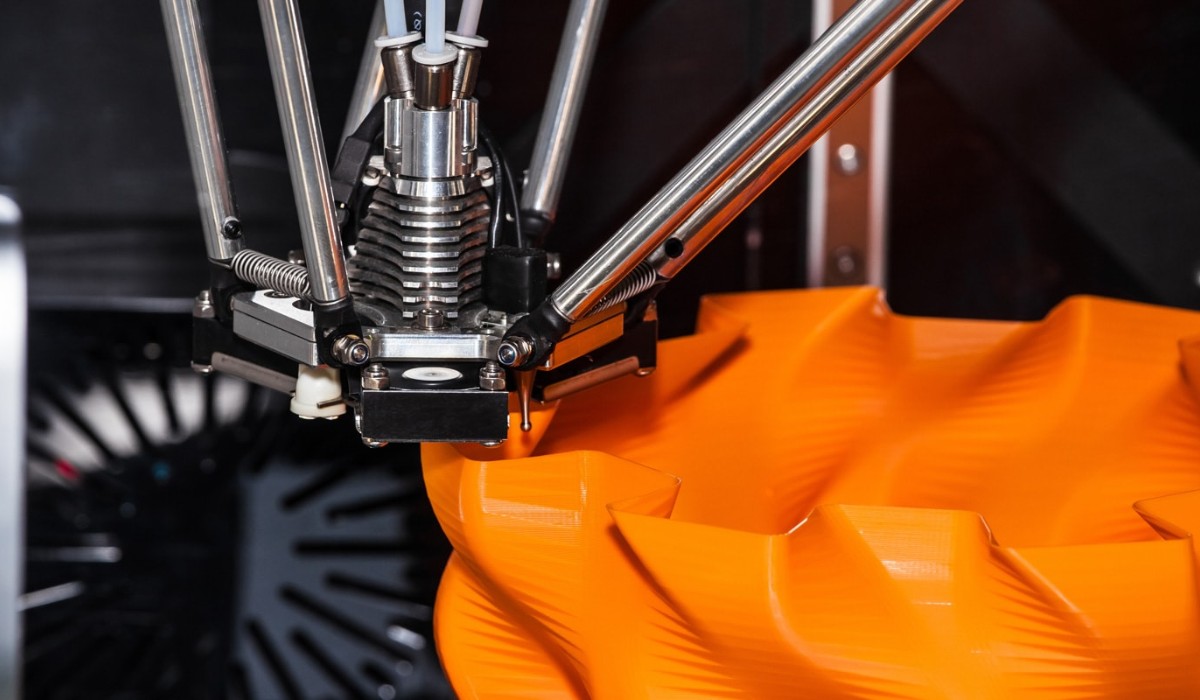
Installing the Extruder and Hot End
The extruder and hot end are vital components of your large 3D printer, responsible for melting and depositing the filament onto the print bed. Proper installation is essential to ensure accurate extrusion and reliable printing. Here are the steps to guide you through the process:
Step 1: Gather the Components: Collect all the necessary extruder and hot end components, including the extruder assembly, hot end, nozzle, and cooling fan. Ensure that they are compatible with your printer model and filament requirements.
Step 2: Mount the Extruder Assembly: Find a suitable position on the printer frame to mount the extruder assembly. Consider accessibility for filament loading and unloading. Secure the extruder assembly to the frame using screws or brackets provided with the assembly. Ensure that it is aligned with the filament path and has a clear view of the print bed.
Step 3: Install the Hot End: Attach the hot end to the extruder assembly. Make sure it is securely attached using the appropriate mounting hardware. Ensure that the hot end is aligned with the axis of the printer and perpendicular to the print bed. This will ensure accurate filament deposition during printing.
Step 4: Connect the Wiring: Connect the wiring from the extruder motor and temperature sensor to the control board. Follow the manufacturer’s instructions or wiring diagrams for proper connections. Pay attention to the polarity and pin assignments to avoid any wiring errors.
Step 5: Install the Nozzle: Carefully insert the nozzle into the hot end and tighten it securely using a wrench. Ensure that it is not over-tightened, as this can damage the threads. Use the appropriate size and type of nozzle for your filament and print requirements.
Step 6: Mount the Cooling Fan: Attach the cooling fan to the extruder assembly or the hot end cooling fins. The cooling fan helps regulate the temperature of the hot end and prevents heat creep, which can lead to filament clogs or inconsistent extrusion. Secure the fan using screws or clips provided with the fan.
Step 7: Test the Extruder: Before proceeding with any prints, check the extruder motion and filament feeding. Ensure that the extruder motor is spinning in the correct direction and that filament is properly loaded and feeding through the hot end. Perform a test extrusion to confirm that filament is coming out smoothly from the nozzle.
Step 8: Calibrate and Fine-Tune: Once the extruder and hot end are installed and functioning correctly, it’s important to calibrate the extrusion settings. Adjust the steps per millimeter value in the firmware to achieve accurate filament extrusion. Fine-tune temperature settings, retraction settings, and other parameters to optimize print quality.
By following these steps, you can ensure the proper installation of the extruder and hot end in your large 3D printer. Taking the time to correctly mount and connect these components will result in reliable filament extrusion, leading to high-quality prints. In the next section, we will discuss the important process of calibrating your printer and leveling the print bed.
Calibrating the Printer and Leveling the Bed
Calibrating your large 3D printer and leveling the print bed are critical steps to ensure accurate and successful prints. Proper calibration and bed leveling contribute to optimal layer adhesion, print surface alignment, and overall print quality. Here’s how to calibrate your printer and level the bed:
Step 1: Check Bed Stability: Ensure that the print bed is firmly and securely attached to the printer frame. Check for any wobbling or instability that could affect the leveling process. Tighten any loose screws or brackets and make sure the bed is level with respect to the printer frame.
Step 2: Disable Stepper Motors: Disable the stepper motors on your printer to allow manual adjustments to the print bed. This prevents any unintentional movement during the leveling process.
Step 3: Home the Print Head: Move the print head to its home position using the printer’s control interface or software. This ensures that the print head is positioned accurately for bed leveling.
Step 4: Start Bed Leveling: Begin the bed leveling process by adjusting the four corners of the print bed to achieve a level surface. Use a piece of printer paper or a feeler gauge to gauge the distance between the nozzle and the print bed. Make small adjustments to the bed leveling screws until you achieve consistent and slight resistance when sliding the paper under the nozzle.
Step 5: Check Bed Leveling Across the Bed: Move the print head to different positions across the bed and re-check the bed leveling at each point. Repeat the paper sliding test to ensure a consistent gap between the nozzle and the bed throughout the entire print bed area. Make further adjustments if necessary.
Step 6: Fine-Tune Bed Leveling: Once the initial bed leveling is complete, print a test object that covers a larger area of the bed to verify the bed leveling. If required, make further adjustments to specific areas that may require minor corrections. Repeat this process until the entire bed is evenly leveled.
Step 7: Save Bed Leveling Settings: Save the bed leveling settings in the printer’s firmware or software to ensure consistent and accurate leveling for future prints. This allows you to recall the calibrated bed leveling settings whenever needed.
Step 8: Perform Calibration Prints: After completing the bed leveling, perform calibration prints to further fine-tune the printer’s settings. These prints can help identify any issues, such as over-extrusion or under-extrusion, and allow you to make software adjustments accordingly.
By following these steps, you can calibrate your large 3D printer and achieve a level print bed, setting the foundation for successful and accurate prints. Proper calibration and bed leveling play a crucial role in ensuring consistent layer adhesion and print quality throughout the printing process. In the next section, we will discuss how to configure software settings for your large 3D printer.
Configuring Software Settings for a Large 3D Printer
Configuring the software settings for your large 3D printer is essential for achieving optimal performance and print quality. The software settings control various parameters that affect the printing process. Here’s how to configure the software settings for your printer:
Step 1: Choose the Right Slicing Software: Select a reliable slicing software that is compatible with your printer and offers the features you require. Popular options include Ultimaker Cura, PrusaSlicer, and Simplify3D. Install the software and ensure that it detects your printer model correctly.
Step 2: Configure Printer Profile: Set up a printer profile within the slicing software to match your printer’s specifications. Input details such as build volume, print bed size, nozzle size, and filament diameter. This ensures accurate slicing and generates G-code tailored to your printer.
Step 3: Adjust Printing Temperatures: Determine the optimal temperatures for your filament material and adjust the settings accordingly. Refer to the filament manufacturer’s recommendations or perform test prints to find the ideal temperature range for your specific filament.
Step 4: Fine-Tune Print Speeds: Experiment with different print speeds to find a balance between print quality and speed. Start with conservative speeds and gradually increase them until you find the optimal settings for your printer. Consider adjusting speeds for infill, perimeters, and support structures separately.
Step 5: Configure Layer Height and Infill Density: Set the desired layer height, which determines the vertical resolution of your prints. Consider the trade-off between print time and quality. Adjust the infill density to achieve the desired internal structure and strength of the printed object.
Step 6: Enable Supports and Rafts: Enable support structures and rafts if your model requires them. Configure the support settings to provide ample support for overhangs and complex geometries. Adjust the raft settings to improve bed adhesion and mitigate warping, especially for larger prints.
Step 7: Manage Retraction Settings: Utilize retraction settings to reduce stringing and blobs during printing. Experiment with different retraction distances and speeds to find the optimal values for your printer. Evaluate the results by printing models with complex geometries and fine details.
Step 8: Post-Processing Settings: Configure any post-processing settings specific to your printer or desired outcomes. This may include features like wiping or purging the nozzle, enabling temperature towers, or adding custom G-code commands at the start or end of a print.
Step 9: Save and Export G-code: Once all the software settings are configured, save your profiles and export the G-code file. Double-check the settings before initiating a print to ensure that all parameters are correct and aligned with your printer’s capabilities.
By following these steps, you can configure the software settings for your large 3D printer, ensuring compatibility, optimizing print quality, and achieving desired outcomes for your prints. Experiment with different settings and techniques to find the ideal configuration that suits your specific needs. In the next section, we will discuss troubleshooting and maintenance tips to help you overcome common challenges and keep your printer in top condition.
Troubleshooting and Maintenance Tips
Even with proper calibration and careful setup, it’s common to encounter issues with your large 3D printer. This section will provide troubleshooting tips to help you overcome common problems, as well as maintenance tips to keep your printer in optimal condition. Here are some guidelines to follow:
1. Poor Adhesion or Warping: If you’re experiencing poor bed adhesion or warping, ensure that your print bed is level and clean. Consider using adhesive aids like painter’s tape, glue stick, or specialty bed adhesion solutions. Adjust the print bed temperature or try using a heated enclosure to maintain consistent printing conditions.
2. Filament Jams or Clogs: Filament jams or clogs can occur due to a variety of reasons. Check for filament path obstructions, such as tangled or misaligned filament spools, debris in the hot end, or improper alignment of the feeder gears. Clear any obstructions and ensure smooth filament flow through the extruder assembly.
3. Stringing and Blobbing: Stringing or blobs of excess filament between printed parts can be reduced by adjusting retraction settings. Increase retraction distance and speed to minimize the amount of molten filament oozing from the nozzle during travel moves. Experiment with different retraction settings to find the optimal values for your printer and filament combination.
4. Layer Shifts: Layer shifts can occur if the printer’s mechanical components, particularly the belts or the print head, are slipping or loose. Check the tightness of belts and ensure that the pulleys or gears are securely fastened. Additionally, ensure that the print head moves smoothly along the axes without obstruction.
5. Nozzle Clogs or Filament Contamination: Nozzle clogs or filament contamination can affect print quality and extrusion. Regularly clean the nozzle and hot end by performing atomic pulls or cold pulls. If the filament is contaminated, consider using cleaner or purging filament to clean the extruder system.
6. Regular Maintenance: Keep your printer well-maintained by regularly cleaning the print bed, removing dust or debris from the extruder assembly, and lubricating moving parts as needed. Check for loose screws or worn-out components, replacing or tightening them as necessary. Follow the manufacturer’s guidelines for maintenance intervals and procedures for your specific printer.
7. Firmware Updates: Stay updated with the latest firmware releases for your printer and take advantage of bug fixes or feature enhancements. Keep your firmware up to date to ensure compatibility with software updates and to benefit from any stability or performance improvements.
8. Document and Learn: Keep a record of troubleshooting steps taken and the solutions implemented for future reference. This will help you quickly identify and resolve recurring issues. Continuously learn about your printer’s capabilities, firmware updates, and any new maintenance or troubleshooting techniques to improve your overall printing experience.
By following these troubleshooting and maintenance tips, you can overcome common challenges and keep your large 3D printer in optimal condition. Regular maintenance, coupled with a proactive approach to troubleshooting, will not only ensure better print quality but also increase the longevity of your printer. Remember to consult the manufacturer’s documentation and join online communities for additional tips and support.
Conclusion
Congratulations on completing this guide to building and optimizing your own large 3D printer! We’ve covered various aspects, from choosing the right materials and components to calibrating the printer and troubleshooting common issues. With these steps, you have gained the knowledge and skills to embark on your 3D printing journey with confidence.
A large 3D printer opens up a world of possibilities for creating bigger and more intricate objects. The greater build volume, improved accuracy, and enhanced flexibility of a large printer provide endless opportunities for prototyping, functional part production, and artistic creations.
Remember to continue exploring and experimenting with different filament types, print settings, and advanced techniques as you become more familiar with your printer. Regular maintenance and troubleshooting will help ensure consistent print quality and the longevity of your machine.
Building and calibrating a large 3D printer may have its challenges, but the rewards are worth the effort. Enjoy the satisfaction of creating your designs and bringing your ideas to life. Embrace the learning process and don’t be discouraged by setbacks – they are all part of the journey towards mastering the art of 3D printing.
Now, armed with the knowledge and skills acquired through this guide, you are ready to unleash your creativity and push the boundaries of what is possible with your large 3D printer. Happy printing!