Introduction
Welcome to this guide on how to get cable on your Samsung Smart TV. If you’re tired of watching streaming services and want to enjoy the vast variety of cable channels on your Smart TV, you’re in the right place. With a few simple steps, you can connect your cable provider box to your Samsung Smart TV and access all your favorite cable channels.
Samsung Smart TVs are equipped with advanced technology that allows you to stream content, browse the internet, and access various apps. However, to watch cable channels on your Smart TV, you’ll need to connect a cable provider box. This box acts as a bridge between your cable service and the TV, allowing you to access and enjoy cable programming.
In this step-by-step guide, we’ll walk you through the process of getting cable on your Samsung Smart TV. Whether you’re a tech-savvy individual or a beginner, don’t worry – this guide is designed to be user-friendly and easy to follow.
Before we dive into the steps, it’s important to note that the process may vary slightly depending on the cable provider and the model of your Samsung Smart TV. However, the overall concept remains the same, and we’ll provide general instructions that should work for most setups.
So grab your remote control and let’s get started on transforming your Samsung Smart TV into a cable watching powerhouse!
Step 1: Check compatibility
Before you begin the process of connecting your cable provider box to your Samsung Smart TV, it’s crucial to ensure compatibility between the TV and the box. Here’s what you need to do:
- Check the TV specifications: Look for the HDMI ports on your Samsung Smart TV. Most cable provider boxes use HDMI cables to connect to the television. It’s important to have at least one available HDMI port on your TV.
- Verify cable box connectivity: Check the outputs on your cable provider box. Ensure that it has an HDMI output that corresponds with the HDMI input on your Samsung Smart TV. If your cable provider box only has other types of outputs, such as coaxial or RCA, you may need additional converters to connect them to the TV.
- Check the TV model compatibility: Some older Samsung Smart TV models may not be compatible with cable provider boxes or have limited functionality. Refer to the user manual or visit the Samsung website to confirm if your TV model supports external cable connections.
If your Samsung Smart TV passes the compatibility check, you’re ready to move on to the next steps. However, if it’s not compatible, you may need to consider alternative methods or upgrades to enjoy cable channels on your TV.
It’s always better to ensure compatibility beforehand to avoid any frustrations or incompatible connections later in the process. Once you’ve confirmed compatibility between your Samsung Smart TV and the cable provider box, you can proceed with the next steps to set up your cable and start enjoying your favorite channels on your Smart TV.
Step 2: Connect cable provider box to TV
Now that you’ve verified the compatibility, it’s time to connect your cable provider box to your Samsung Smart TV. Here’s how to do it:
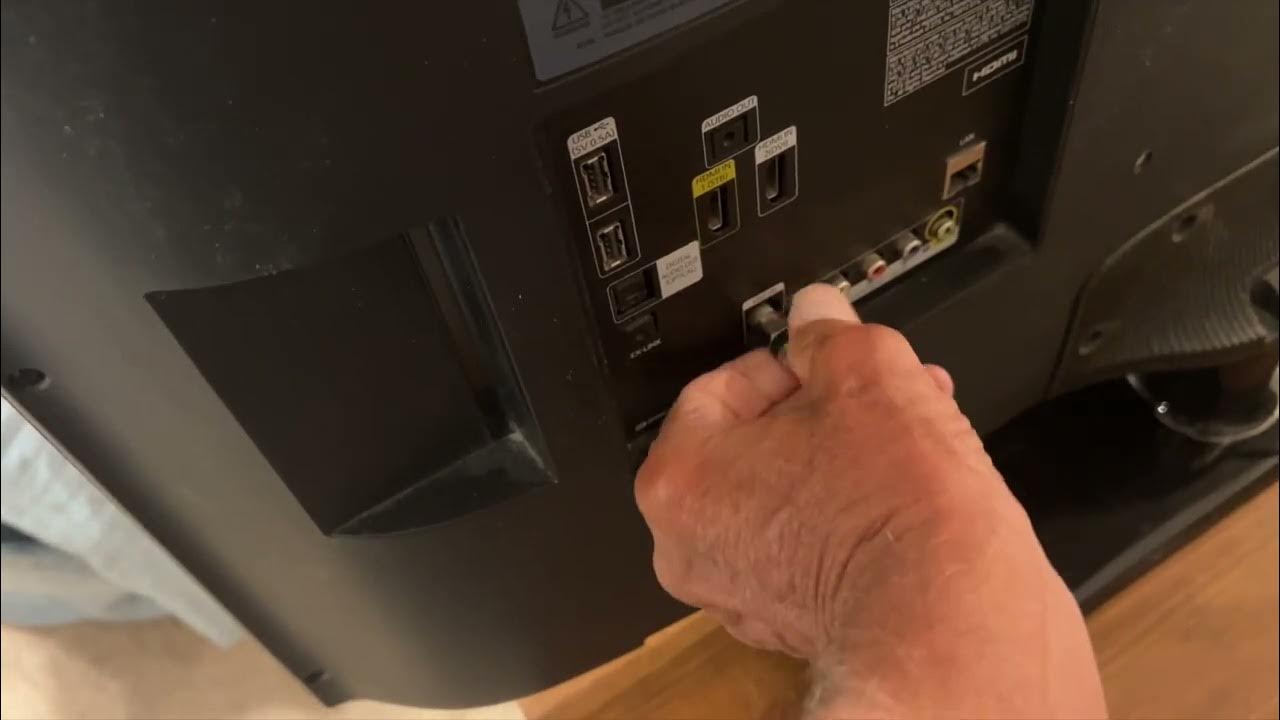
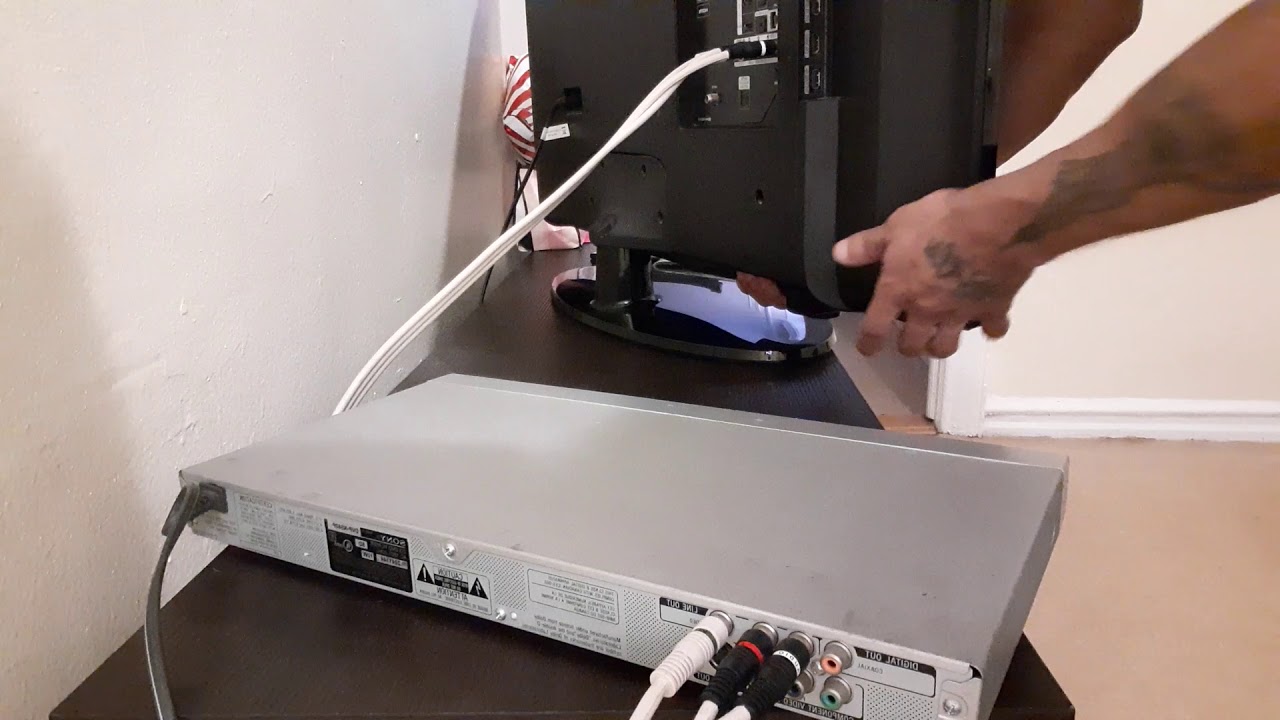
- Locate the HDMI port: On the back of your Samsung Smart TV, find an available HDMI port. It’s usually labeled as “HDMI”. Take note of the port number for reference.
- Connect the HDMI cable: Take the HDMI cable and plug one end into the HDMI port on your Samsung Smart TV. Make sure it’s securely inserted into the port.
- Connect the other end to the cable box: Take the other end of the HDMI cable and plug it into the HDMI output port on your cable provider box.
- Power on the cable box: Connect the power cable to the cable box and plug it into a power outlet. Turn on the cable box using the power button or the remote control.
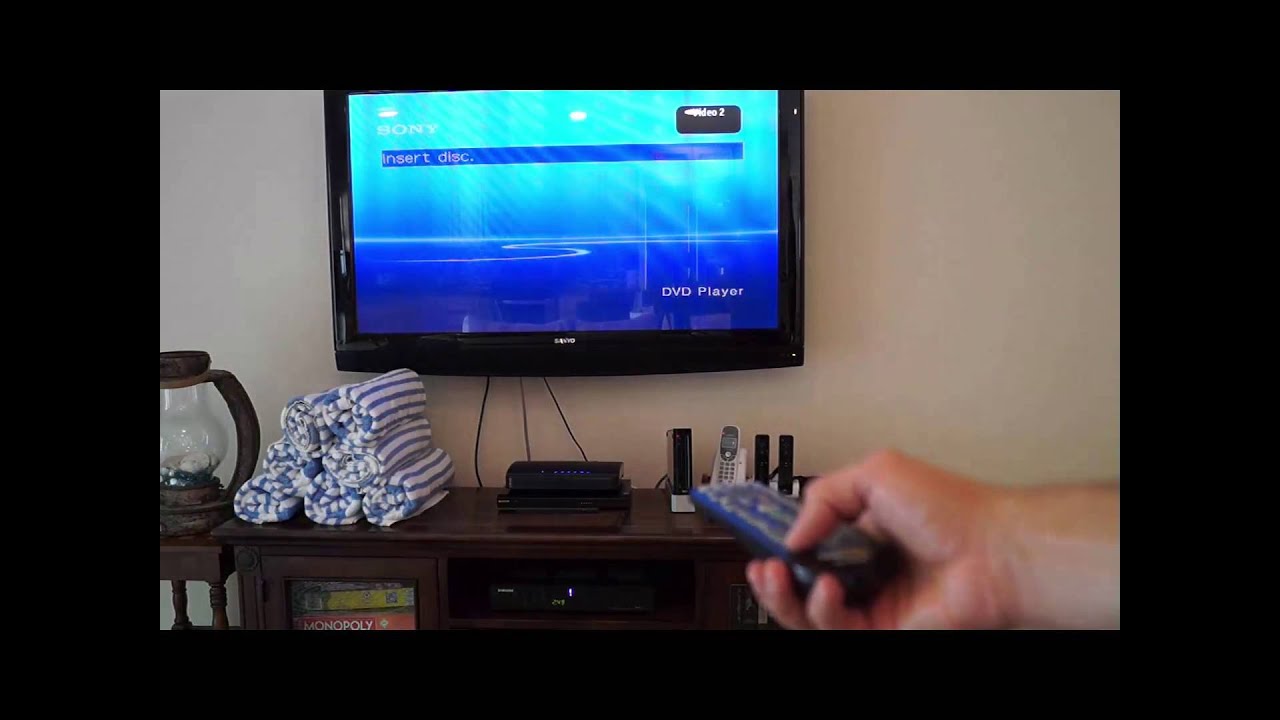
- Power on the Samsung Smart TV: Using the TV remote control, press the power button to turn on the Samsung Smart TV. Ensure that the TV is set to the correct HDMI input. You can use the Input or Source button on your remote control to select the corresponding HDMI input that you connected the cable box to.
Once you’ve completed these steps, your cable provider box should be successfully connected to your Samsung Smart TV. The HDMI connection allows for high-quality audio and video transmission, ensuring an optimal viewing experience.
If you encounter any issues with the connection, double-check the HDMI cable connections and make sure all devices are powered on. You may also need to refer to the user manual for your specific cable provider box or seek assistance from their customer support for troubleshooting.
Now that your cable provider box is connected to your Samsung Smart TV, you’re ready to move on to the next steps to set up the cable box and scan for channels.
Step 3: Set up cable box
With your cable provider box connected to your Samsung Smart TV, it’s time to set up the box to ensure it functions correctly. Follow these steps to complete the set-up process:
- Access the settings menu: Use the remote control that came with your cable provider box to navigate to the settings menu. Look for a button labeled “Settings” or “Menu” on the remote and press it to open the settings menu.
- Select the appropriate language and region: Navigate through the settings menu and select your preferred language and region for the cable box. This step helps customize the user interface and ensure you receive accurate channel listings.
- Choose the display resolution: Depending on your TV and cable box capabilities, you may have the option to select the display resolution. Choose the highest resolution available for the best picture quality.
- Set up your network connection: If your cable provider box supports internet connectivity, you can set up a network connection to access additional features like streaming apps and On-Demand content. Follow the on-screen instructions to connect to your Wi-Fi network or use an Ethernet cable if available.
- Activate your cable box: Some cable provider boxes require activation before you can access the channels. Follow the on-screen instructions or contact your cable provider for assistance with activating your box.
- Update software: Check for any software updates for your cable box and proceed with the installation if available. Keeping your cable box software up to date ensures optimal performance and access to new features.
Once you have completed the set-up process for your cable provider box, your box will be ready to start scanning for channels and programming. Make sure to follow the specific instructions provided by your cable provider for any additional set-up requirements specific to their service.
At this point, you are just a few steps away from enjoying cable channels on your Samsung Smart TV. In the next step, we will show you how to scan for channels and add them to your Smart Hub interface.
Step 4: Scan for channels
Now that your cable box is set up, it’s time to scan for channels on your Samsung Smart TV. The scanning process will detect and store all available channels from your cable provider. Here’s how to do it:
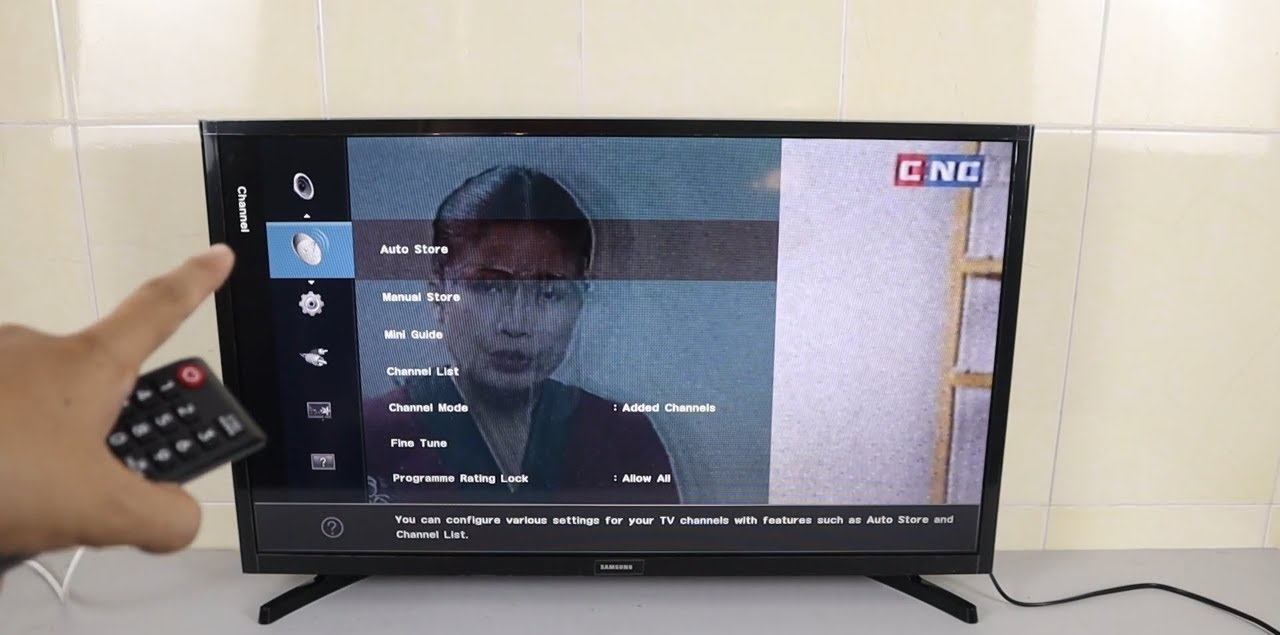
- Access the channel scanning menu: Using your Samsung Smart TV remote, navigate to the TV’s menu. Look for the “Settings” or “Channel” section and select it.
- Choose the scanning option: Within the channel settings, look for an option related to channel scanning or tuning. It may be labeled as “Auto-tune,” “Channel setup,” or something similar.
- Select the cable input: In the scanning menu, you’ll be prompted to select the input source. Choose the input source that corresponds to the HDMI port you connected your cable provider box to. It may be labeled as “HDMI” or the specific port number.
- Begin the channel scan: Once you’ve selected the correct input source, start the channel scanning process. Your Samsung Smart TV will search for all available channels from your cable provider.
- Wait for the scan to complete: The scanning process may take a few minutes to complete. Allow your TV to scan and detect all available channels. Do not interrupt the process or turn off the TV.
- Save the channels: Once the scanning process is finished, you’ll be prompted to save the detected channels. Select the option to save the channels to your TV’s memory.
After the scanning process is complete and the channels are saved, you can navigate through the channel list using your Samsung Smart TV remote. Use the channel up and down buttons to switch between the different channels available in your cable subscription.
Note that depending on your cable provider and location, you may have access to different types of channels, such as standard definition (SD), high definition (HD), or even premium channels. Explore the channel list and enjoy watching your favorite shows, movies, news, and sports!
In the next step, we’ll show you how to add the cable channels to the Smart Hub interface on your Samsung Smart TV for easy access.
Step 5: Add cable channels to Smart Hub interface
Now that you have scanned for channels and have a list of available channels on your Samsung Smart TV, it’s time to add them to the Smart Hub interface. By doing so, you’ll be able to access and navigate through your cable channels seamlessly. Follow these steps to add cable channels to the Smart Hub interface:
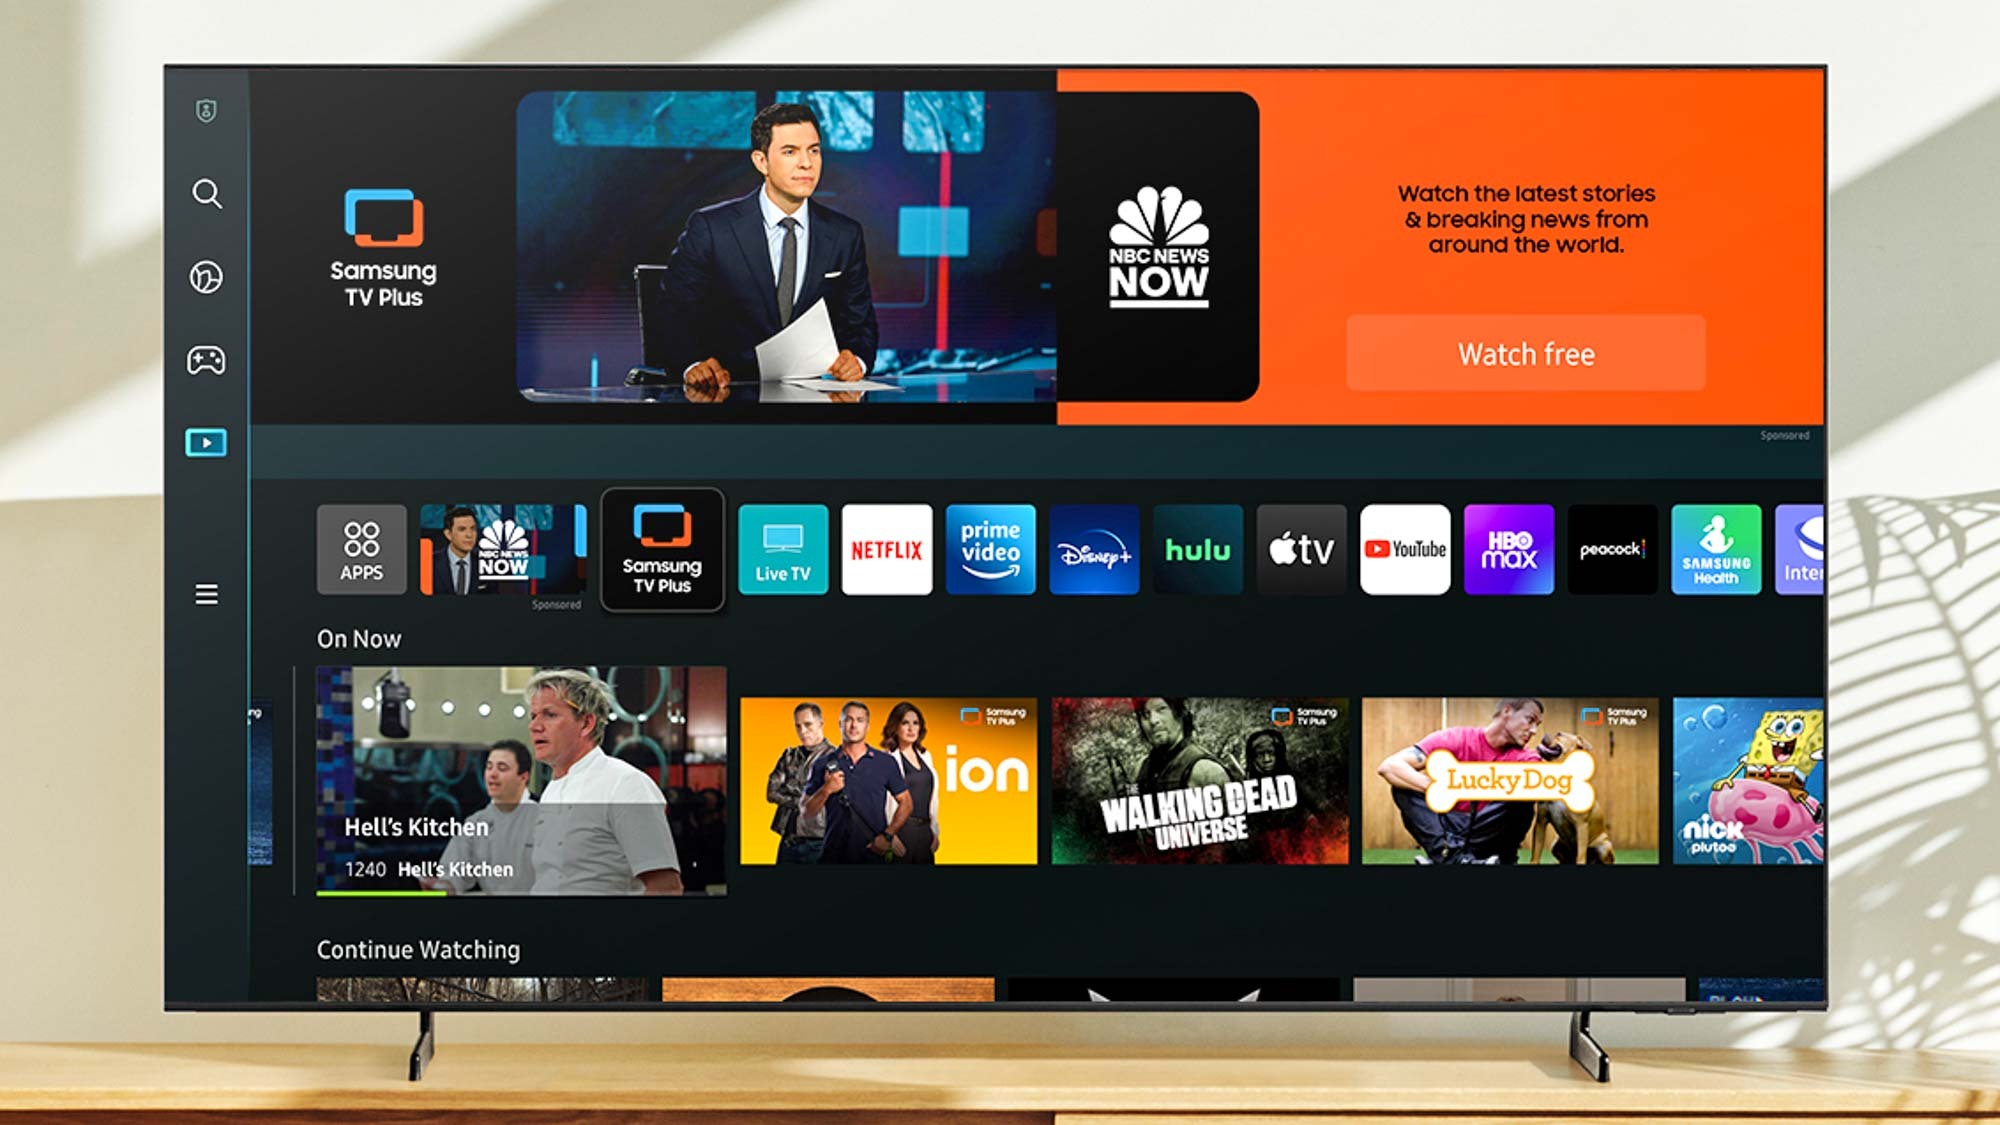
- Access the Smart Hub: Using your Samsung Smart TV remote, press the Smart Hub button. This will take you to the main Smart Hub interface.
- Select the “Source” option: Within the Smart Hub interface, navigate to the “Source” option. This will display a list of different input sources available on your TV.
- Choose the cable input source: Select the input source that corresponds to the HDMI port you connected your cable provider box to. It may be labeled as “HDMI” or the specific port number.
- Add the cable channels: Once you’ve selected the cable input source, you’ll see a list of available channels. Select the channel you want to add to the Smart Hub interface.
- Press the “Add to Home” or “Add to Favorites” option: Depending on your TV model, you may have the option to add the channel to the home screen or mark it as a favorite for easy access.
- Repeat for other channels: Follow the same process to add other cable channels of your choice to the Smart Hub interface. You can add as many channels as you like.
Once you have added the cable channels to the Smart Hub interface, they will appear as tiles or icons on your TV’s home screen. You can navigate through them using your Samsung Smart TV remote, making it convenient to switch between different cable channels without having to remember channel numbers.
Remember, you can also rearrange the order of the channels on the Smart Hub interface to suit your preferences. Simply highlight a channel tile, press the “Tools” or “Options” button on your remote, and choose the “Move” or “Reorder” option.
With your cable channels added to the Smart Hub interface, you’re all set to enjoy seamless access to your favorite cable programming on your Samsung Smart TV.
In the next step, we’ll show you how to set up parental controls to manage and restrict content access on your TV.
Step 6: Set up parental controls
To ensure a safe viewing experience for your family, it’s important to set up parental controls on your Samsung Smart TV. Parental controls allow you to manage and restrict access to certain content based on age ratings and content classifications. Here’s how to set up parental controls:
- Access the settings menu: Using your Samsung Smart TV remote, navigate to the TV’s menu and select the “Settings” option. This will open the settings menu.
- Find the parental controls option: Look for a section related to parental controls or content restrictions in the settings menu. The exact location may vary depending on your TV model.
- Select the parental control options: Within the parental controls menu, you’ll have the option to set up various restrictions. These may include setting a PIN code, blocking certain channels or programs, and restricting access to specific content.
- Set a PIN code: Choose a PIN code that you’ll use to access and modify the parental control settings. Make sure to choose a PIN that is unique and known only to you.
- Choose the desired restrictions: Select the content restrictions that align with your preferences. You can set age restrictions, block specific channels, or even restrict access to certain types of content, such as movies or TV shows with certain ratings.
- Save the parental control settings: Once you’ve configured the parental control options, save the settings. This will activate the parental controls on your Samsung Smart TV.
By setting up parental controls, you can have peace of mind knowing that inappropriate content is restricted and inaccessible on your TV. It’s also a great way to ensure that children in your household are only exposed to age-appropriate programming.
Remember to keep your PIN code secure and avoid sharing it with anyone who should not have access to the parental control settings. It’s also a good practice to periodically review and update the settings as needed, especially as your family’s content preferences and restrictions may change over time.
With parental controls in place, you can confidently allow your family to enjoy their favorite cable channels and maintain a safe and controlled viewing experience on your Samsung Smart TV.
In the next step, we’ll conclude the guide by summarizing the overall process and highlighting the importance of checking your specific TV model and cable provider for any specific instructions and recommendations.
Step 7: Enjoy cable channels on your Samsung Smart TV
Now that you have successfully set up your cable provider box, scanned for channels, added them to the Smart Hub interface, and set up parental controls, it’s time to sit back, relax, and enjoy all the cable channels on your Samsung Smart TV. Here’s how to make the most of your cable experience:
- Explore the channel guide: Take some time to navigate through the channel guide on your Samsung Smart TV. Use your remote control to scroll through the available channels and see what’s playing.
- Discover new content: With a wide range of cable channels at your fingertips, you can discover new TV shows, movies, documentaries, sports events, and more. Expand your viewing choices and explore different genres and channels.
- Take advantage of cable features: Depending on your cable provider and the capabilities of your cable box, you may have access to additional features such as On-Demand content, DVR capabilities, or interactive viewing experiences. Familiarize yourself with these features to enhance your cable viewing experience.
- Use the Smart TV functionalities: Remember that your Samsung Smart TV offers a plethora of other features beyond cable channels. You can access streaming services, browse the internet, play games, and use various apps. Take advantage of these functionalities when you want to explore alternative entertainment options.
- Stay updated with channel lineup changes: Keep an eye out for any changes in your cable provider’s channel lineup. Channels may be added, removed, or relocated over time. Stay informed to ensure you’re aware of any channel updates or additions.
Now that you have successfully connected and set up your cable on your Samsung Smart TV, it’s time to immerse yourself in the world of cable television. Enjoy your favorite shows, movies, live sports, and more, all from the comfort of your own home.
Remember, the process and specific features may vary depending on your cable provider and the model of your Samsung Smart TV. It’s always a good idea to refer to the user manual or reach out to customer support for your specific devices if you encounter any difficulties or have any questions.
We hope you found this guide helpful and that you have a fantastic cable viewing experience on your Samsung Smart TV!
Conclusion
Congratulations! You have successfully learned how to get cable on your Samsung Smart TV. By following the steps in this guide, you have connected your cable provider box, set up the necessary configurations, and added cable channels to the Smart Hub interface. Now, you can enjoy a seamless viewing experience right from your Smart TV.
Remember, it’s crucial to check the compatibility of your TV and cable provider box before starting the process. This ensures a smooth connection and compatibility between your devices. Additionally, setting up parental controls allows you to manage and restrict content access, creating a safe watching environment for everyone.
Keep in mind that the specific steps and features may vary depending on your cable provider and the model of your Samsung Smart TV. It’s always helpful to refer to the user manual or seek assistance from customer support if you encounter any issues or have specific questions regarding your setup.
We hope this guide has been informative and helpful in getting cable channels on your Samsung Smart TV. Now, sit back, relax, and enjoy the wide range of cable programming available at your fingertips. Whether you’re catching up on your favorite shows, exploring new genres, or watching live sports events, your Samsung Smart TV can provide you with endless entertainment possibilities.
Thank you for reading, and enjoy your cable viewing experience on your Samsung Smart TV!