Introduction
Welcome to the wonderful world of Samsung Smart TV! With its advanced features and smart capabilities, a Samsung Smart TV takes your TV viewing experience to a whole new level. Whether you’re streaming your favorite shows, playing games, or browsing the web, this guide will help you set up your Samsung Smart TV effortlessly.
Designed to deliver stunning picture quality, seamless connectivity, and a user-friendly interface, a Samsung Smart TV offers an all-in-one entertainment solution for your home. Gone are the days of simply watching traditional TV channels – now you can access a wide range of online content and enjoy a personalized viewing experience.
In this guide, we’ll take you through the step-by-step process of setting up your Samsung Smart TV from unboxing to troubleshooting common issues. We’ll cover everything you need to know to get your TV up and running smoothly, ensuring that you can make the most of its features.
Before we dive into the setup process, it’s important to note that each Samsung Smart TV model may have slight variations in terms of appearance and interface. However, the general setup steps remain consistent across most models.
So, let’s get started with unboxing your Samsung Smart TV and embark on a journey of immersive entertainment and endless possibilities!
Step 1: Unboxing and Setting Up Your Samsung Smart TV
Excitement fills the air as you unbox your brand new Samsung Smart TV. Before you can dive into the world of immersive entertainment, let’s walk through the initial setup process.
1. Carefully unbox your Samsung Smart TV and remove all the packaging materials. Ensure that you handle the TV with care to avoid any accidental damage.
2. Place the TV in a suitable location, ensuring that it is stable and secure. Consider factors such as the viewing angle, distance from the seating area, and minimizing glare from external light sources for an optimal viewing experience.
3. Connect the TV stand or wall-mount bracket following the instructions provided in the manual. Make sure to tighten all screws securely.
4. Locate the power cord and connect it to the back of the TV. Then, plug the other end into a power outlet. Ensure that the power outlet is easily accessible and unobstructed.
5. Power on the TV by pressing the power button either on the TV itself or on the remote control. You may need to wait a few moments for the TV to boot up.
6. Once the TV is powered on, you’ll be prompted to select your preferred language. Use the arrow keys on the remote control to navigate the menu and press the enter button to make your selection.
7. Next, you’ll need to choose your country or region. Again, use the arrow keys to navigate and the enter button to confirm your selection.
8. Now, select the source you’ll be using to watch TV. If you’re using an antenna, select “Antenna” and follow the on-screen instructions. If you’re using a cable/satellite box, select “Cable/Satellite box” and follow the prompts to complete the setup.
9. If your TV supports Smart Things, you’ll have the option to connect your TV to your smartphone or other compatible devices. Follow the instructions on the screen to establish the connection.
10. Finally, you’ll be prompted to scan for available channels. Select “Scan” and wait for the TV to find and store all the available channels in your area.
That’s it! You have successfully unboxed and set up your Samsung Smart TV. Now you’re ready to move on to the next steps and unlock the full potential of your TV’s smart features.
Step 2: Connecting to Power and Turning On
Now that you’ve unboxed your Samsung Smart TV, it’s time to connect it to power and turn it on. Follow these simple steps to ensure a smooth setup process:
1. Locate the power cord that came with your TV. Ensure that it is undamaged and has the appropriate plug for your region.
2. Connect one end of the power cord to the designated power input on the back of the TV.
3. Plug the other end of the power cord into a power outlet that is easily accessible. Avoid using power strips or extension cords, as they may not provide sufficient power for your TV.
4. Before turning on the TV, make sure that any external devices, such as cable boxes or game consoles, are properly connected to the TV via HDMI or other appropriate cables.
5. Locate the power button on your Samsung Smart TV. It is usually located on the front, bottom, or side panel of the TV. Alternatively, you can use the power button on the remote control.
6. Press the power button to turn on your TV. You may need to wait a few seconds for the TV to boot up.
7. Upon turning on the TV, you may be prompted to select the language and country settings. Use the remote control’s arrow keys to navigate through the menu and press the enter button to make your selections.
8. Once you have completed the initial setup, you will be brought to the home screen of your Samsung Smart TV. Congratulations, you have successfully connected your TV to power and turned it on!
Remember to keep the power cord and other cables out of reach of children or pets to ensure their safety. Additionally, ensure that the power outlet is not overloaded with other devices, as it may affect the performance of your TV.
Now that your Samsung Smart TV is powered on, you’re ready to move on to the next step and connect it to your Wi-Fi network.
Step 3: Connecting to Your Wi-Fi Network
Connecting your Samsung Smart TV to your Wi-Fi network is essential for accessing online content, streaming services, and other smart features. Follow these steps to ensure a successful connection:
1. On your Samsung Smart TV’s home screen, navigate to the settings menu. You can typically access the settings by pressing the “Home” or “Menu” button on your remote control and selecting the gear icon.
2. In the settings menu, locate and select the “Network” or “Network Settings” option. This will open the network settings page.
3. On the network settings page, you will see various options for connecting to a network. Choose the “Wireless” or “Wi-Fi” option.
4. Your TV will now scan for available Wi-Fi networks in the vicinity. Wait for the scanning process to complete and display the list of available networks.
5. Using the arrow keys on your remote control, navigate to your desired Wi-Fi network from the list. If your network is hidden, you may need to select the “Add Network” option and manually enter your network name (SSID) and password.
6. Once you have selected your Wi-Fi network, you will be prompted to enter the network password or passphrase. Use the remote control’s arrow keys and the on-screen keyboard to enter the correct password.
7. After entering the password, double-check for any typos or mistakes, as the password is case-sensitive. Once you are sure the password is correct, select the “Connect” or “Join” button to establish the connection.
8. Your Samsung Smart TV will now attempt to connect to the selected Wi-Fi network. This process may take a few moments. If the connection is successful, you will see a confirmation message or icon indicating a successful connection.
9. Once connected, you can test the network connection by accessing a streaming service or browsing the internet using the built-in web browser on your TV.
10. If your TV fails to connect to the Wi-Fi network, double-check that you have entered the correct password and that you are within range of the Wi-Fi signal. You may also try restarting both your TV and router, or contact your internet service provider for further assistance.
Congratulations! You have successfully connected your Samsung Smart TV to your Wi-Fi network. Now you can enjoy a wide range of online content, streaming services, and smart features on your TV.
Step 4: Setting Up Your Samsung Account
Creating a Samsung account is an important step in maximizing the functionality of your Samsung Smart TV. A Samsung account allows you to personalize your TV settings, download apps, and access additional features. Follow these steps to set up your Samsung account:
1. On your Samsung Smart TV’s home screen, navigate to the settings menu. This can typically be done by pressing the “Home” or “Menu” button on your remote control and selecting the gear icon.
2. In the settings menu, locate and select the “Account” or “Samsung Account” option. This will open the account settings page.
3. On the account settings page, select the “Create a New Account” option. If you already have a Samsung account, you can log in using your existing credentials.
4. Follow the on-screen prompts to enter your personal information, including your name, email address, and password. Ensure that you provide accurate information and create a strong, secure password.
5. After entering your information, review the terms and conditions and privacy policy. If you agree to these terms, select the checkbox to indicate your acceptance.
6. Once you have reviewed and accepted the terms, select the “Agree” or “Create” button to proceed with creating your Samsung account.
7. Your TV will now attempt to connect to the Samsung server and create your account. This process may take a few moments, so please be patient.
8. If the account creation is successful, you will see a confirmation message or an option to log in to your newly created account. Follow the on-screen instructions to log in.
9. Once you have successfully logged in to your Samsung account, you can customize your TV settings and explore additional features such as downloading apps from the Samsung App Store, syncing your account across multiple devices, and accessing personalized recommendations.
10. In the future, if you need to make changes to your account settings or recover your password, you can access the account settings menu on your Samsung Smart TV.
By setting up a Samsung account on your Smart TV, you unlock a world of possibilities and personalization. Enjoy the full benefits of your Samsung Smart TV and make it truly your own.
Step 5: Updating the TV’s Software
Keeping your Samsung Smart TV’s software up to date is crucial for accessing new features, improving performance, and ensuring compatibility with the latest apps and services. Follow these steps to update the software on your TV:
1. On your Samsung Smart TV’s home screen, navigate to the settings menu. This can typically be done by pressing the “Home” or “Menu” button on your remote control and selecting the gear icon.
2. In the settings menu, locate and select the “Support” or “Software Update” option. The exact wording may vary depending on your TV model.
3. On the software update page, you will see the current software version installed on your TV, as well as information about the latest available update.
4. Select the “Update Now” or “Check for Updates” button to initiate the software update process.
5. Your TV will now connect to the Samsung server and check for any available updates. Depending on your internet connection speed, this process may take a few minutes.
6. If a software update is available, you will be prompted to download and install it. Select the “Update” or “Start Update” button to proceed with the installation.
7. Sit back and wait for the software update to download and install. Do not turn off or unplug your TV during the update process, as this can cause software corruption or other issues.
8. Once the update is complete, your TV will automatically restart. This may take a few minutes.
9. After the restart, your TV will display a confirmation message indicating that the software update was successful.
10. If there were no updates available or if the update was unsuccessful, ensure that your TV is connected to the internet and try again. If the issue persists, you may need to contact Samsung customer support for further assistance.
Regularly checking for and installing software updates is essential for keeping your Samsung Smart TV running smoothly and securely. Make it a habit to check for updates periodically and enjoy the latest features and improvements on your TV.
Step 6: Configuring the Picture and Sound Settings
Configuring the picture and sound settings on your Samsung Smart TV is crucial for achieving optimal audiovisual performance. Follow these steps to customize the settings according to your preferences:
1. On your Samsung Smart TV’s remote control, locate and press the “Home” or “Menu” button. This will bring up the main menu.
2. Using the arrow keys on the remote control, navigate to the “Settings” or “Options” tab.
3. In the settings menu, locate and click on the “Picture” or “Display” option. This will open the picture settings page.
4. Adjust the picture settings according to your preferences. You can modify parameters such as brightness, contrast, color saturation, sharpness, and backlight level. Experiment with these settings to find the perfect balance for your viewing experience.
5. It’s recommended to use the TV’s built-in calibration tools, such as the “Picture Mode” or “Calibration” option, to fine-tune the settings. These modes are designed to optimize the picture quality based on specific content types, such as movies, sports, or gaming.
6. After configuring the picture settings, navigate to the “Sound” or “Audio” option in the settings menu.
7. In the sound settings, you can adjust parameters such as volume, equalizer settings, sound mode, and audio output settings. Modify these settings to achieve the desired audio experience, whether you prefer enhanced bass, surround sound, or a balanced audio profile.
8. It’s often beneficial to enable any available sound enhancement features, such as virtual surround sound, clear voice technology, or audio presets, based on your personal preferences.
9. As you adjust the settings, make sure to evaluate the changes by playing different content types, such as movies, music, and live broadcasts. This will help you fine-tune the settings to ensure an optimal viewing and listening experience across various media.
10. If you’re unsure about the optimal settings, you can also refer to online resources or professional calibrators to obtain recommended settings for your specific TV model.
By customizing the picture and sound settings on your Samsung Smart TV, you can enhance your overall viewing experience and enjoy content with exceptional audio and visual quality tailored to your preferences.
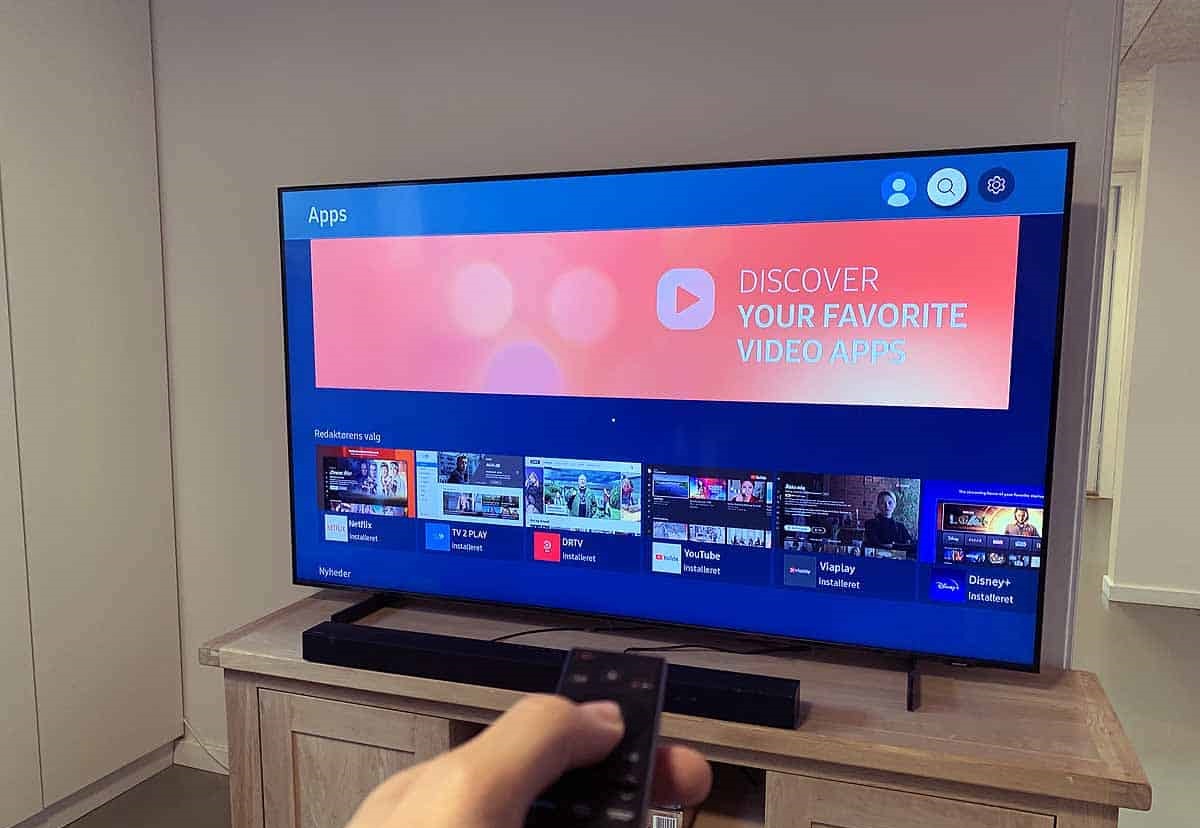
Step 7: Adding Apps and Customizing Your Home Screen
One of the great advantages of having a Samsung Smart TV is the ability to personalize your home screen and expand its functionality by adding apps. Follow these steps to add apps and customize your home screen:
1. On your Samsung Smart TV’s remote control, press the “Home” or “Menu” button. This will bring up the main menu.
2. Using the arrow keys on the remote control, navigate to the “Apps” or “App Store” option. This will open the app store page.
3. Browse through the available apps or use the search function to find specific apps you wish to install. Popular categories include streaming services, games, utilities, and social media.
4. Select the app you want to add to your TV and click on the “Install” or “Download” button. Wait for the installation process to complete. Repeat this step for any other apps you wish to add.
5. Once the apps are installed, you can access them by going to the “Apps” or “My Apps” section on your home screen. Use the arrow keys or the remote control’s navigation buttons to select and launch the app.
6. To customize your home screen, go back to the main menu and select the “Home Screen” or “Customize” option.
7. From the home screen customization menu, you can rearrange the order of the apps, create shortcuts to your favorite apps, and remove or hide apps you don’t use. Simply select the app icon and use the remote control’s navigation buttons to move or delete it.
8. Some Samsung Smart TVs also allow you to add widgets or customize the background image of your home screen. Explore the customization options available on your TV model and make it uniquely yours.
9. As you add apps and arrange your home screen, keep in mind your viewing habits and preferences. Place frequently used apps in easily accessible positions for quick access.
10. Additionally, periodically check for app updates in the app store and remove any apps that you no longer use. This will help keep your home screen organized and ensure you have the latest version of your favorite apps.
By adding apps and customizing your home screen, you can transform your Samsung Smart TV into a personalized entertainment hub that caters to your preferences and provides convenient access to your favorite content.
Step 8: Setting Up Smart Features and Services
Unlock the full potential of your Samsung Smart TV by setting up and utilizing its smart features and services. Follow these steps to make the most out of the smart capabilities of your TV:
1. On your Samsung Smart TV’s remote control, press the “Smart Hub” or “Smart Features” button. This will bring up the smart features menu.
2. Explore the available options in the smart features menu. You may find features such as voice control, screen mirroring, web browsing, and more.
3. If your TV supports voice control, follow the on-screen instructions to set it up. This enables you to control your TV using voice commands, making it easier to navigate and access content.
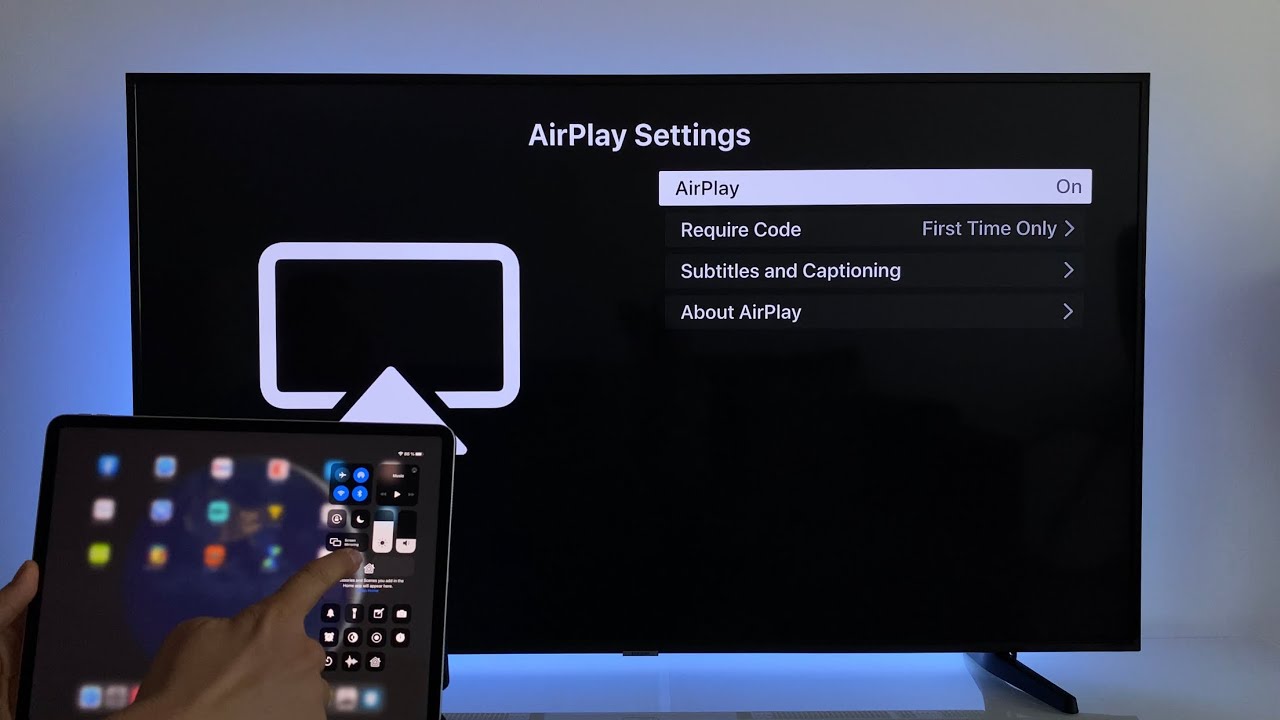
4. Utilize screen mirroring capabilities to display the content of your smartphone, tablet, or computer on the TV screen. Ensure that both devices are connected to the same Wi-Fi network and follow the instructions to establish the connection.
5. If your TV supports web browsing, launch the web browser from the smart features menu and follow the prompts to set up your browsing preferences. You can also connect a wireless keyboard or mouse for easier navigation.
6. Explore various smart services available on your TV, such as streaming platforms, music apps, news apps, and more. Install and set up these services through the app store or dedicated smart services section on your TV.
7. Some Samsung Smart TVs offer additional smart features, such as home automation integration and IoT (Internet of Things) connectivity. Follow the manufacturer’s instructions or refer to the user manual to set up these advanced features.
8. Take some time to familiarize yourself with the available settings and customization options within each smart feature or service. This allows you to personalize your experience and tailor the functionality to your liking.
9. Regularly check for updates to the smart features and services on your TV. This ensures that you have access to the latest features, improvements, and security patches.
10. Experiment and enjoy the diverse range of smart features and services on your Samsung Smart TV. Whether it’s streaming movies, controlling smart home devices, or exploring online content, make the most out of the smart capabilities of your TV.
By setting up and utilizing the smart features and services on your Samsung Smart TV, you can transform your TV into a smart hub that enhances your entertainment experience and integrates seamlessly with the digital world around you.
Step 9: Connecting External Devices (e.g., game consoles, cable boxes)
Your Samsung Smart TV is not only capable of providing you with a wide range of smart features but also allows you to connect external devices for an enhanced and versatile entertainment experience. Follow these steps to connect external devices such as game consoles, cable boxes, or Blu-ray players to your TV:
1. Locate the appropriate ports on the back or side of your Samsung Smart TV. Common ports include HDMI, USB, and audio/video (AV) ports. Refer to your TV’s user manual to identify the specific ports.
2. Connect one end of an HDMI cable to the HDMI output port on your external device (e.g., game console) and the other end to an available HDMI input port on your TV. Ensure that the cable is securely plugged in.
3. If you have multiple external devices, repeat step 2 for each device, using separate HDMI ports on your TV.
4. For devices that do not use HDMI, such as older cable boxes or gaming consoles, use the appropriate cables (e.g., AV cables) to connect the audio and video outputs of the device to the corresponding ports on your TV. Follow the color-coded connections for video (yellow) and audio (red and white).
5. If your external device requires power, connect it to a power outlet using the supplied power cords or adapters.
6. Once all external devices are connected, switch the input source on your TV to the corresponding HDMI input or AV input where the device is connected. Use the input/source button on your TV’s remote control to cycle through the available inputs.
7. Turn on the connected external devices and follow any on-screen prompts or instructions to complete the setup process for each device.
8. If necessary, adjust the picture and sound settings on your TV to optimize the viewing experience for each connected device. You can access these settings through the settings menu, as described in earlier steps.
9. Depending on the device you have connected, you may also need to configure additional settings, such as audio output settings, device-specific settings, or network settings. Consult the user manuals or documentation of the external devices for detailed instructions.
10. Enjoy the expanded entertainment options and seamlessly switch between the inputs to access different external devices or applications on your Samsung Smart TV.
By connecting external devices to your Samsung Smart TV, you can enhance your entertainment options and enjoy a variety of content from different sources, making your TV the ultimate entertainment hub.
Step 10: Troubleshooting Common Issues
While Samsung Smart TVs are designed to provide a seamless and enjoyable viewing experience, you may encounter occasional issues that can be easily resolved by following some troubleshooting steps. Here are some common issues and their solutions:
1. No Power or No Picture:
– Ensure that the power cord is securely plugged into both the TV and the power outlet.
– Check if the power outlet is functional by plugging in another device.
– Try pressing the power button on the TV or the remote control to turn it on.
2. Poor Picture Quality:
– Adjust the picture settings such as brightness, contrast, color saturation, and sharpness through the TV’s settings menu.
– Make sure your TV’s software is up to date by checking for software updates and installing them if available.
– If you are using an external device, check its resolution settings and ensure it is compatible with your TV.
3. No Sound or Poor Sound Quality:
– Check the audio cables and ensure they are securely plugged into the TV and the external devices.
– Adjust the volume settings on your TV and the connected devices.
– Check if the mute function is enabled on the TV or the remote control and disable it if necessary.
– Make sure your TV’s software is up to date.
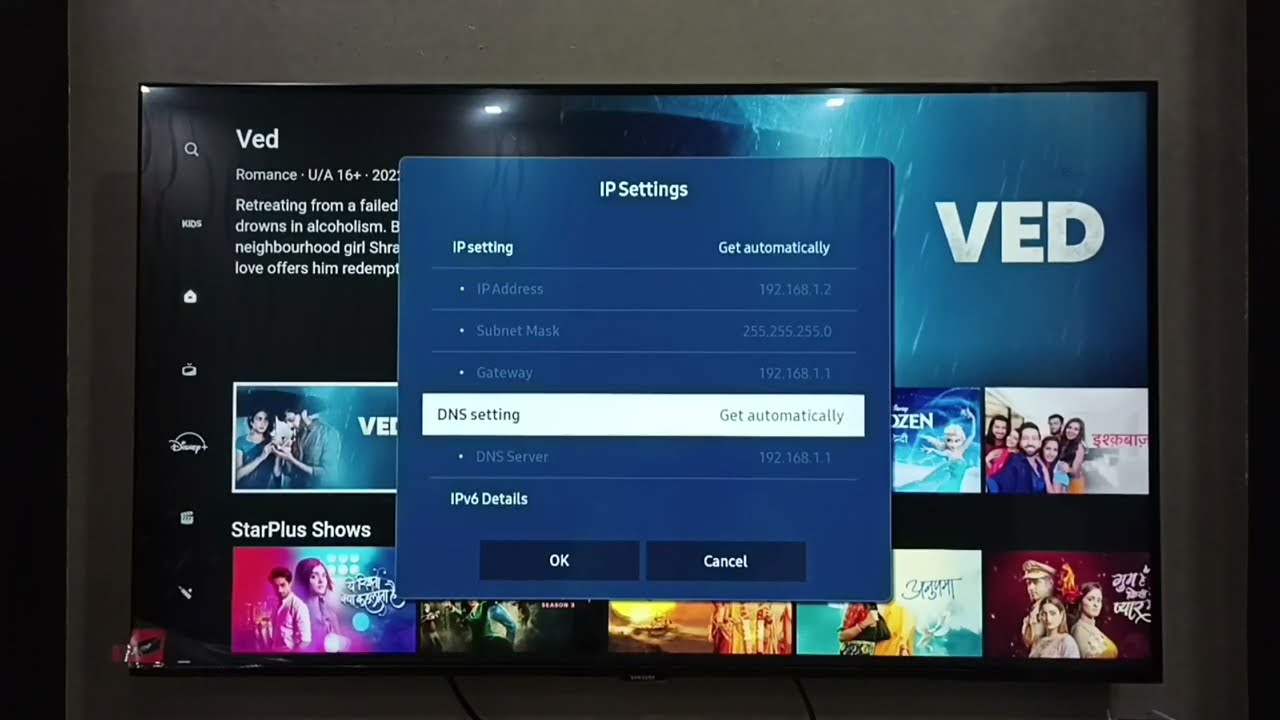
4. Wi-Fi Connectivity Issues:
– Ensure that your TV is within range of your Wi-Fi router.
– Check if other devices are connected to the Wi-Fi network and functioning properly.
– Restart your TV and router to refresh the connection.
– Double-check the Wi-Fi password you entered and try re-entering it if necessary.
5. App or Software Crashes:
– Update the app to the latest version through the app store.
– Clear the cache or data of the app through the TV’s settings menu.
– Restart your TV to refresh the system and clear any temporary issues.
6. Remote Control Issues:
– Replace the batteries in the remote control if they are weak or depleted.
– Ensure there are no obstructions between the remote control and the TV.
– Check if the remote control is paired properly with the TV if it is a Bluetooth remote.
– Try using the on-screen remote control options if available.
If the above troubleshooting steps do not resolve the issue, consult the user manual or visit the Samsung support website for further assistance. They may provide specific solutions or recommend contacting their customer support for additional help.
By following these troubleshooting steps, you can efficiently resolve common issues that may arise while using your Samsung Smart TV and continue enjoying a seamless and immersive entertainment experience.
Conclusion
Congratulations! You have successfully set up your Samsung Smart TV and learned how to navigate through the different steps to optimize your entertainment experience. From unboxing and turning on your TV to connecting it to Wi-Fi, updating the software, configuring picture and sound settings, adding apps, customizing your home screen, connecting external devices, and troubleshooting common issues, you are now equipped with the knowledge to make the most out of your Samsung Smart TV.
By following these steps, you have unlocked the world of smart features, personalized settings, and a vast array of apps and services. Whether you enjoy streaming your favorite shows, playing games, browsing the internet, or viewing content from external devices, your Samsung Smart TV provides a versatile and immersive entertainment experience.
Remember to periodically check for software updates to ensure that your TV remains up to date with the latest features and improvements. Additionally, continue exploring and experimenting with the different settings, apps, and services available on your TV to tailor the experience to your preferences.
If you encounter any issues while using your Samsung Smart TV, don’t worry! The troubleshooting steps provided in this guide will assist you in quickly resolving common problems and getting back to enjoying your TV.
Now you can sit back, relax, and immerse yourself in the world of entertainment that your Samsung Smart TV has to offer. Enjoy the stunning picture quality, captivating sound, and the convenience of smart features as you indulge in your favorite movies, shows, games, and more.
Embrace the possibilities and make every moment in front of your Samsung Smart TV a memorable experience that brings joy, entertainment, and relaxation into your life.