Introduction
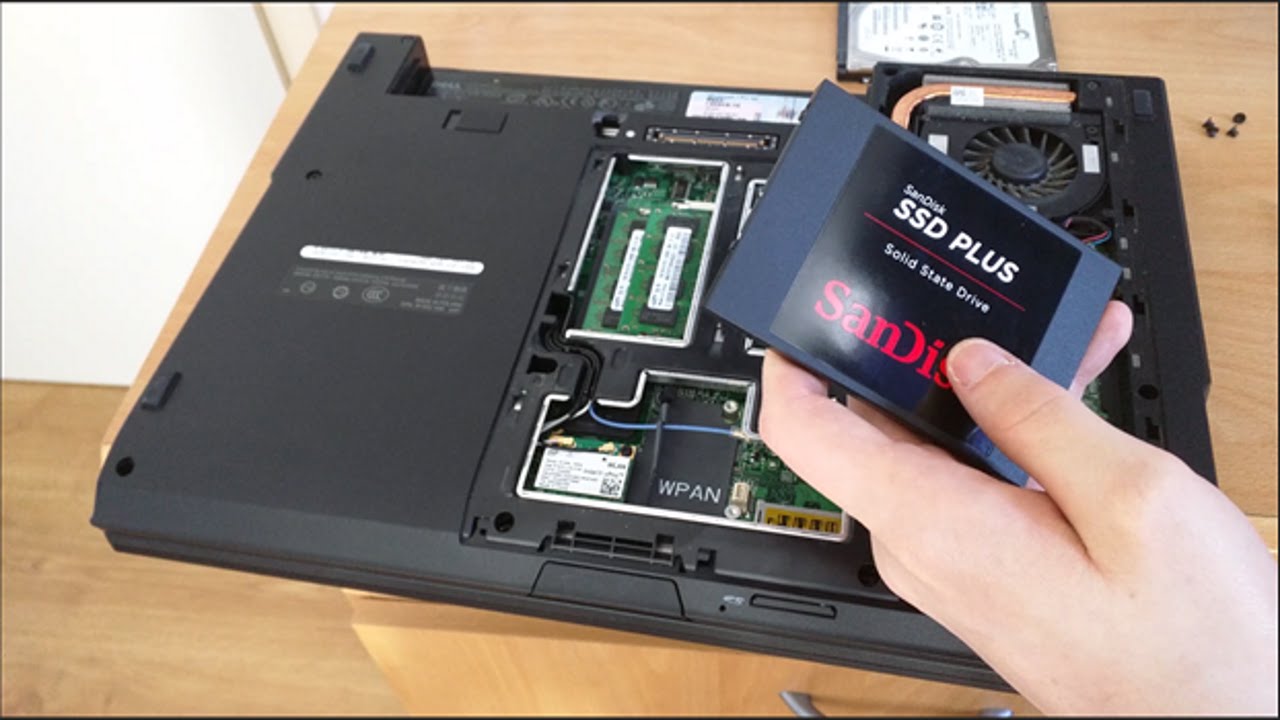
Welcome to our guide on how to format an SSD hard drive. Formatting a solid-state drive (SSD) is a crucial step in maintaining its performance and longevity.
An SSD is a type of storage device that offers several advantages over traditional hard drives, such as faster read and write speeds, lower power consumption, and increased durability. However, over time, an SSD can become fragmented, filled with unnecessary files, or affected by issues that may impact its performance.
Formatting an SSD involves erasing all the data on the drive and resetting it to its original state. This process helps optimize the drive’s performance, improves data organization, and removes any potentially corrupted or problematic files.
In this comprehensive guide, we will walk you through the step-by-step process of formatting an SSD hard drive. We will also discuss alternative methods, the benefits of formatting, and important considerations to keep in mind before you proceed.
Whether you are looking to optimize the speed and efficiency of your SSD or preparing it for a fresh installation of the operating system, this guide will provide you with valuable insights and instructions to ensure a successful formatting process.
Please note that formatting an SSD will permanently erase all data on the drive. It is essential to back up any important files or documents before proceeding.
Now, let’s delve into the reasons why formatting an SSD hard drive is necessary and how it can benefit your overall computing experience.
Reasons to Format an SSD Hard Drive
There are several reasons why formatting an SSD hard drive is beneficial and necessary. Let’s explore the main reasons why you should consider formatting your SSD:
1. Improved Performance: Formatting helps optimize the performance of your SSD by organizing the file system and removing any fragmented data. This can result in faster boot times, quicker application launches, and improved overall system responsiveness.
2. Removal of Unnecessary Files: Over time, your SSD can accumulate temporary files, duplicate files, and other unwanted data that can take up valuable storage space. Formatting the drive allows you to start afresh and remove all these unnecessary files, freeing up space and enhancing the efficiency of your SSD.
3. Resolve File System Issues: Sometimes, the file system on your SSD can become corrupt or develop errors that can lead to data loss or system instability. Formatting the drive can help resolve these file system issues, ensuring the smooth functioning of your SSD.
4. Preparation for Fresh Installation: If you plan to install a new operating system or perform a clean installation, formatting the SSD is a crucial step. It ensures that the drive is devoid of any residual system files from the previous installation, providing a clean slate for the new operating system.
5. Secure Data Erasure: When you format an SSD, all the data on the drive is permanently erased. This can be beneficial when you want to sell or dispose of the SSD, as it ensures that your sensitive data cannot be recovered by unauthorized individuals.
6. Resolving Disk Errors: Formatting can help in resolving disk errors and bad sectors on the SSD. By formatting the drive, you can identify and isolate these problematic sectors, preventing further data loss or system crashes.
7. Restoring Factory Settings: If you want to revert your SSD back to its original state, formatting is the way to go. This can be useful if you have made extensive changes to the drive and want to start fresh with the default settings.
By understanding these reasons, you can make an informed decision about when and why you should format your SSD hard drive. In the following sections, we will provide a detailed guide on how to format an SSD step-by-step.
Preparing for Formatting
Before you start formatting your SSD hard drive, it’s important to take some necessary steps to ensure a smooth and successful process. Here are the key preparations you should make:
1. Backup Important Data: Formatting your SSD will erase all data on the drive. Therefore, it is crucial to back up any important files, documents, or personal data that you want to preserve. You can create a backup on an external storage device or utilize cloud storage services for added security.
2. Check System Requirements: Ensure that your computer meets the minimum system requirements for formatting an SSD. Check the specifications of your operating system and SSD manufacturer’s recommendations to ensure compatibility and a seamless formatting process.
3. Verify Power Supply: It’s important to ensure a reliable power source during the formatting process. Connect your laptop or desktop computer to a power outlet or use a UPS (Uninterruptible Power Supply) to prevent any accidental power loss. Sudden power interruptions during formatting can lead to data corruption or incomplete formatting.
4. Gather Necessary Tools: Depending on your specific requirements, you may need certain tools to format your SSD. These can include a Windows installation media, a bootable USB drive, or a dedicated formatting software tool. Make sure you have these tools readily available before proceeding with the formatting process.
5. Disconnect External Devices: To minimize potential issues or interference, it’s advisable to disconnect any external devices (such as printers, scanners, and USB drives) from your computer before formatting the SSD. This ensures a smooth process and reduces the risk of accidentally formatting the wrong drive.
6. Update SSD Firmware: Check if there are any firmware updates available for your SSD model. Updating the firmware can fix potential issues and improve the overall performance and compatibility of the drive. Visit the manufacturer’s website to download and install the latest firmware update prior to formatting.
7. Understand Data Loss: It’s important to note that formatting an SSD will permanently erase all data on the drive. Be certain that you have backed up all necessary files and are prepared for the loss of any data stored on the SSD.
By following these preparations, you can ensure a smooth and hassle-free experience when formatting your SSD hard drive. Next, we will provide a step-by-step guide on how to format an SSD, including different methods and considerations to keep in mind.
Step-by-Step Guide to Format SSD Hard Drive
Formatting an SSD hard drive may seem like a daunting task, but with the right guidance, it can be quite straightforward. Here is a step-by-step guide to help you format your SSD:
Step 1: Backup Your Data: As mentioned earlier, formatting will erase all the data on your SSD. Therefore, it’s crucial to back up any important files or documents to an external storage device or cloud storage service.
Step 2: Identify the Correct SSD: Before proceeding, double-check that you have correctly identified the SSD you wish to format. Formatting the wrong drive can result in data loss or damage to your operating system. Double-check and ensure that you are selecting the correct SSD.
Step 3: Use Windows Built-in Disk Management Tool: If you are using a Windows operating system, you can utilize the built-in Disk Management tool to format your SSD. To access it, right-click on the Windows Start button and select “Disk Management” from the menu.
Step 4: Locate the SSD: In the Disk Management window, locate your SSD drive. It will be displayed under the “Volume” or “Disk” section. Take note of the disk number associated with your SSD.
Step 5: Delete Existing Partitions: Right-click on each partition within your SSD and select “Delete Volume” to remove all existing partitions. This will effectively erase all data on the SSD and prepare it for formatting.
Step 6: Create New Partition: After deleting all partitions, right-click on the unallocated space and select “New Simple Volume.” Follow the on-screen instructions to create a new partition. Choose the desired partition size and assign a drive letter.
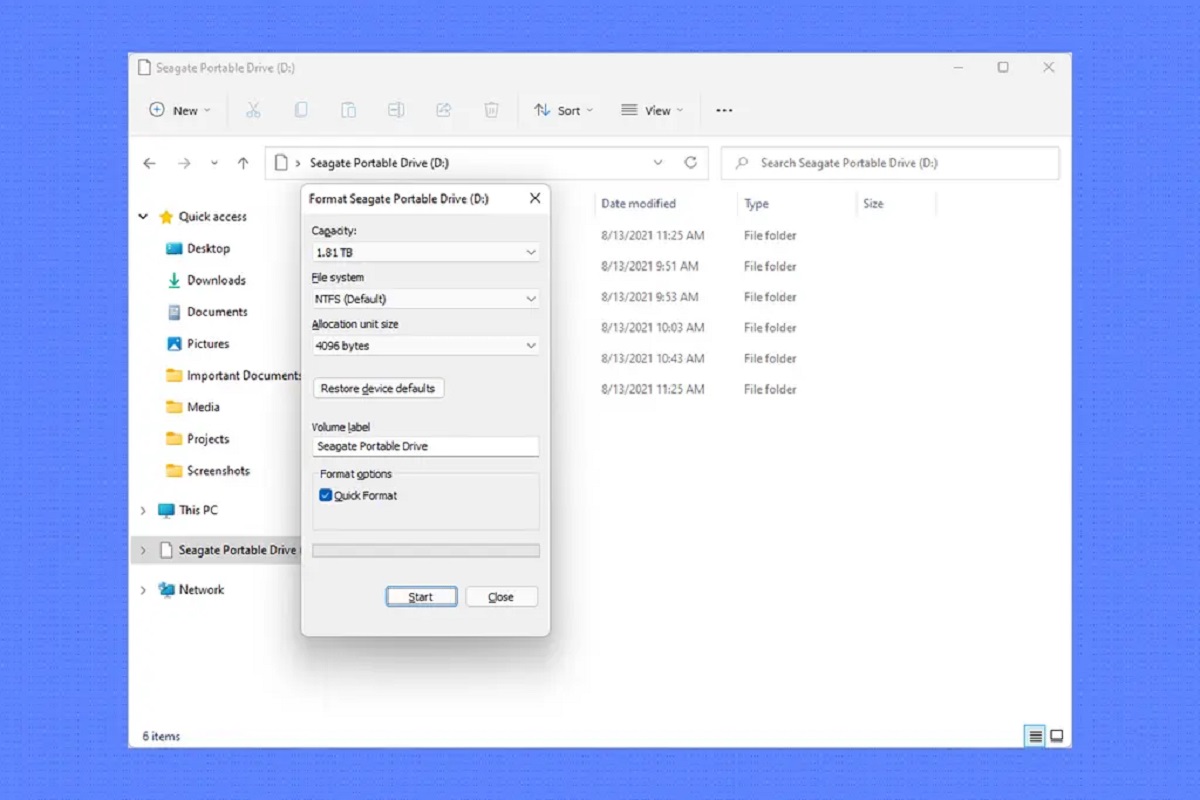
Step 7: Format the SSD: Right-click on the newly created partition and select “Format.” Choose the file system (such as NTFS) and allocation unit size. You can also assign a label to the partition if desired. Click “OK” to start the formatting process.
Step 8: Wait for Formatting to Complete: Depending on the size of your SSD, the formatting process may take some time. Be patient and allow the process to complete without interrupting it.
Step 9: Verify the Formatted SSD: Once the formatting is complete, you should see the formatted SSD with the assigned drive letter in the Disk Management window. You can also open File Explorer to verify that the SSD is now available and ready to use.
Step 10: Restore Your Backed-up Data: Finally, after successfully formatting the SSD, you can restore your backed-up data to the drive and begin using it as desired.
It’s important to note that the steps mentioned above are specific to Windows operating systems. If you are using a different operating system, the process may vary slightly. Always refer to the documentation provided by your specific operating system or consult with the manufacturer’s instructions for formatting an SSD on your particular system.
Now that you have successfully formatted your SSD, let’s explore some alternative methods that you can use to format your SSD hard drive.
Alternative Methods to Format SSD Hard Drive
In addition to using the built-in Disk Management tool on Windows, there are alternative methods you can explore to format your SSD hard drive. Here are a few options:
1. Command Prompt: If you prefer using command-line tools, you can format your SSD using the Command Prompt. Open the Command Prompt as an administrator, type the appropriate command, specifying the drive letter or disk number of your SSD, and choose the desired formatting options. This method provides more granular control over the formatting process.
2. Third-Party Formatting Tools: There are several third-party formatting tools available that offer additional features and customization options. Some popular options include EaseUS Partition Master, AOMEI Partition Assistant, and MiniTool Partition Wizard. These tools provide user-friendly interfaces, advanced partitioning options, and more flexibility in formatting your SSD.
3. Clean Install of Operating System: If you are planning a clean install of the operating system, you can format your SSD during the installation process. Create a bootable USB drive or DVD containing the installation files, boot from it, and follow the on-screen prompts to reach the disk partitioning step. During the installation, you can delete existing partitions on the SSD and create a new one, effectively formatting the drive in the process.
4. Manufacturer’s Tools: Many SSD manufacturers provide their own formatting tools or software utilities specifically designed for their SSD models. These tools often offer additional features like firmware updates, secure erase options, and detailed SSD information. Visit the manufacturer’s website and search for any available tools or utilities for formatting your SSD.
5. Live USB or CD/DVD: Another option is to use a live USB or CD/DVD containing a lightweight operating system like Linux. Boot from the live medium, select the disk management tool, and format your SSD as needed. This method can be useful if you need to format your SSD outside of your primary operating system environment.
Remember to refer to the documentation provided by these alternative methods or tools for the exact steps required to format your SSD. It’s also a good practice to research and read user reviews to ensure the compatibility and reliability of the tools you choose.
Whichever method you choose, make sure you understand the implications and potential risks involved in the formatting process. Take precautions to back up your important data and follow the instructions carefully to avoid any data loss or damage to your SSD or operating system.
Now that we have explored various methods to format your SSD, let’s move on to the benefits of formatting and why it’s important for your SSD’s performance.
Benefits of Formatting SSD Hard Drive
Formatting your SSD hard drive offers several benefits that can enhance its performance and improve your overall computing experience. Let’s explore the key advantages of formatting your SSD:
1. Enhanced Performance: Formatting removes fragmented data and optimizes the file system on the SSD. This helps improve data organization and access speed, resulting in faster read and write operations. A properly formatted SSD can provide smoother and more efficient performance, especially when running resource-intensive applications or multitasking.
2. Increased Storage Space: Over time, SSDs can accumulate temporary files, duplicate data, and unnecessary system files. Formatting allows you to start fresh, clearing out these digital clutter and reclaiming valuable storage space. This enables you to store more files, applications, and media without worrying about running out of storage capacity.
3. Error Correction: Formatting can help identify and isolate disk errors, bad sectors, or file system issues. During the formatting process, the drive’s firmware scans the disk for errors and attempts to repair them. By fixing these errors, you can prevent potential data loss or system crashes caused by corrupted sectors or file system errors.
4. Improved Data Security: Formatting permanently erases all the data on your SSD, making it an effective method to ensure your sensitive information cannot be recovered. This is particularly important when you plan to sell, donate, or recycle your SSD. By formatting the drive, you can keep your personal data safe from unauthorized access.
5. Software Compatibility: Formatting an SSD ensures that it is compatible with the latest software, operating systems, and drivers. It eliminates any compatibility issues that may arise due to outdated or incompatible files or configurations. This is especially useful when you are performing a clean installation of an operating system or upgrading to a new version.
6. Longevity and Reliability: Regularly formatting your SSD can help maintain its long-term reliability and durability. The formatting process involves performing various internal housekeeping tasks, such as wear leveling and TRIM operations. These operations help evenly distribute the data across the NAND flash memory cells and preserve the overall lifespan of the SSD.
7. Fresh Start: Formatting an SSD provides a clean slate, allowing you to start fresh with a new installation of the operating system or reconfigure the drive according to your needs. It offers an opportunity to remove any unwanted system files, bloatware, or software remnants that may be present on the drive, resulting in a cleaner and more optimized storage environment.
By understanding and harnessing these benefits, you can make an informed decision to format your SSD hard drive. However, it’s important to note that formatting will erase all data on the drive, so be sure to backup your important files before proceeding.
Next, let’s discuss some important considerations to keep in mind before you proceed with formatting your SSD.
Things to Consider before Formatting SSD Hard Drive
While formatting an SSD hard drive offers numerous benefits, it’s essential to consider certain factors before proceeding. Here are some important considerations to keep in mind:
1. Backup Your Data: Before formatting, ensure that you have backed up all your important files and data. Formatting permanently erases all data on the SSD, so it’s crucial to have a copy of your files stored on an external storage device or cloud storage service.
2. Verify SSD Health: Check the health and performance of your SSD before formatting. Most SSD manufacturers provide utility software that allows you to assess the health and condition of the drive. This will help you identify any underlying issues and ensure that the drive is in optimal condition for formatting.
3. Update SSD Firmware: Ensure that your SSD has the latest firmware installed. Firmware updates often bring performance improvements, bug fixes, and compatibility enhancements. Visit the manufacturer’s website and download the latest firmware version before proceeding with the formatting process.
4. Understand Data Loss: Remember that formatting will permanently erase all data on the SSD. Double-check that you have backed up all important files and are prepared for the loss of any data stored on the drive. Take extra caution to avoid accidentally formatting the wrong drive.
5. Verify Operating System Compatibility: Ensure that your operating system supports formatting an SSD and that the required drivers are up to date. In some cases, outdated or incompatible drivers may cause issues during the formatting process or affect the performance of the SSD afterward.
6. Consider Trim Support: Trim is a technology that helps optimize performance and improve the lifespan of SSDs. Before formatting, confirm that the operating system and file system you plan to use support Trim. This will ensure that the SSD can effectively manage the data and maintain its performance over time.
7. Consider Alternative Solutions: Formatting is not always the only solution to optimize SSD performance or resolve issues. Before proceeding with formatting, explore other potential solutions, such as running disk cleanup tools, disabling unnecessary services or startup programs, or optimizing the SSD using manufacturer-provided utilities.
8. Read Manufacturer’s Documentation: Familiarize yourself with the manufacturer’s documentation and guidelines specific to your SSD model. They may provide additional instructions, suggestions, or precautions that are essential for the successful formatting of your SSD.
By considering these factors and taking the necessary precautions, you can ensure a smooth and successful formatting process for your SSD hard drive. Remember to proceed with caution, follow the instructions carefully, and make informed decisions to maximize the benefits of formatting your SSD.
Now that we have covered the key considerations, let’s conclude this guide on formatting an SSD hard drive and summarize the essential points.
Conclusion
Formatting an SSD hard drive is a crucial step in optimizing its performance, enhancing storage efficiency, and resolving potential issues. By following the step-by-step guide provided in this article, you can successfully format your SSD, whether using the built-in Disk Management tool, command prompt, third-party software, or during a fresh operating system installation.
Before initiating the formatting process, it is essential to back up your important data, ensure compatibility with the operating system, and check for firmware updates. Understanding the benefits of formatting, such as improved performance, increased storage space, and enhanced data security, can help you make an informed decision.
Additionally, considering factors like the health of your SSD, Trim support, and alternative solutions before proceeding with formatting will further enhance the success of the procedure and overall SSD performance.
Remember that formatting permanently erases all data on the drive, so it is vital to back up your files beforehand and exercise caution to prevent accidental formatting of the wrong drive.
By following the tips and recommendations in this guide, you can maintain the longevity, reliability, and optimal performance of your SSD. Regularly formatting your SSD and keeping it organized can help you make the most of your storage device and ensure a smooth computing experience.
We hope this guide has provided you with valuable insights and instructions on how to format an SSD hard drive. Now, it’s time to put your knowledge into action and enjoy the benefits of a properly formatted SSD!


