Introduction
Welcome to this helpful guide on how to format your Spypoint SD card. If you’re a proud owner of a Spypoint device, you probably rely on it to capture high-quality photos and videos of the wildlife and outdoor adventures that surround you. However, over time, your SD card can become cluttered with unnecessary files or become corrupted, resulting in issues with your camera’s performance.
Formatting your SD card is a simple but essential task to ensure optimal functioning and reliable storage of your precious memories. By formatting, you will be able to erase all existing data on the card and prepare it for the camera to use again. This process helps to eliminate potential problems and maintain the overall health and performance of your Spypoint device.
In this guide, we will walk you through the step-by-step process of formatting your Spypoint SD card. We will cover all the necessary tools and equipment you will need, how to safely remove the SD card from your device, the specific steps for formatting on both Windows and Mac operating systems, and finally, how to reinsert the SD card back into your Spypoint device.
By following this guide, you’ll ensure that your Spypoint SD card is properly formatted and ready to capture and store all your breathtaking moments in the wild. Let’s get started!
Why you need to format your Spypoint SD card
Formatting your Spypoint SD card may seem like an unnecessary step, but it is crucial for maintaining the performance and reliability of your device. Here are a few key reasons why you should consider formatting your SD card:
- Clearing out clutter: Over time, your SD card accumulates various files, including photos, videos, and other data. Some of these files may be duplicates, corrupted, or no longer needed. By formatting your SD card, you can wipe away all these unnecessary files, freeing up valuable space for new captures.
- Preventing potential errors: As your SD card is continuously used, it can develop file system errors or become fragmented, impacting its performance. By formatting the card, you essentially start with a clean slate, eliminating any existing errors and ensuring smooth operation when using your Spypoint device.
- Maximizing storage capacity: Formatting your SD card also helps optimize its storage capacity. Sometimes, files can occupy fragmented portions of the card, leading to wasted space. Formatting consolidates the storage and ensures you can utilize the maximum capacity of your SD card.
- Fixing compatibility issues: If you’ve recently updated your Spypoint device or made changes to your camera settings, you may encounter compatibility issues with your existing SD card. Formatting the card can help resolve these compatibility problems and ensure seamless integration between your camera and the SD card.
- Protecting against data corruption: Data corruption can occur due to various factors, including improper ejection of the SD card or exposure to magnetic fields. By formatting the card, you minimize the risk of data corruption and ensure the longevity of your files.
By understanding the importance of formatting your Spypoint SD card, you can take proactive steps to maintain the performance and reliability of your device. In the following sections, we will guide you through the process of formatting your SD card on both Windows and Mac computers, ensuring a smooth and hassle-free experience.
Step 1: Gathering the necessary tools and equipment
Before you begin the process of formatting your Spypoint SD card, it’s important to gather all the necessary tools and equipment. Here’s what you’ll need:
- Spypoint SD card: Make sure you have the SD card that came with your Spypoint device or a compatible SD card that meets the device’s specifications.
- Computer or card reader: You will need a computer with an SD card slot or a USB card reader. This will allow you to connect your SD card to the computer and perform the formatting process.
- USB cable: If you are using a USB card reader instead of the computer’s built-in SD card slot, you will need a USB cable to connect the card reader to your computer.
- Full battery: Ensure that your Spypoint device has a full battery or is connected to a power source. This will prevent any interruptions during the formatting process.
- Backup (optional): Although formatting does not typically result in data loss, it’s always a good idea to back up your SD card before proceeding. You can copy the contents of the SD card to a computer or an external storage device to prevent any accidental data loss.
Once you have gathered all the necessary tools and equipment, you are ready to move on to the next step: safely removing the SD card from your Spypoint device.
Step 2: Safely remove the SD card from your Spypoint device
Before you can format your Spypoint SD card, it’s crucial to safely remove it from your device. Here’s how:
- Switch off your Spypoint device: Make sure your Spypoint camera or device is powered off. This will prevent any potential data corruption or damage to the SD card during the removal process.
- Locate the SD card slot: Depending on the specific model of your Spypoint device, the SD card slot may be located on the side, back, or bottom. Consult your device’s manual if you’re unsure about the exact location.
- Open the protective flap or cover: If there’s a protective flap or cover over the SD card slot, gently open it using your fingertips or a small, non-metal tool. Be careful not to apply excessive force that could damage the flap or cover.
- Eject the SD card: Locate the small, rectangular SD card inserted into the slot. To remove it, gently press down on the card until you hear a click. This indicates that the SD card has been successfully released from the slot.
- Remove the SD card: After unlocking the SD card from the slot, use your fingers to pull it out gently. Be cautious not to touch the metal connectors on the card, as this can cause damage or reduce its performance.
Once you have safely removed the SD card from your Spypoint device, it’s time to proceed to the next step: inserting the SD card into your computer or card reader.
Step 3: Insert the SD card into your computer or card reader
With the SD card safely removed from your Spypoint device, it’s time to insert it into your computer or card reader. Follow these steps to proceed:
- Identify the SD card slot: Locate the SD card slot on your computer or card reader. Most computers have built-in SD card slots on the side or front, while card readers typically have multiple slots for different types of memory cards.
- Insert the SD card: Take your SD card and align it with the slot’s direction indicated by the manufacturer’s label or arrow. Insert the SD card gently, ensuring it fits snugly into the slot without any force.
- Confirm card recognition: Once the SD card is inserted, your computer or card reader should recognize it and display a pop-up notification or show it as a removable storage device in File Explorer or Finder.
- Wait for proper detection: In some cases, it may take a few seconds for the computer or card reader to fully detect and initialize the SD card. Be patient and avoid removing or manipulating the card during this process.
Now that the SD card is successfully inserted into your computer or card reader, you’re ready to proceed with formatting it. The next sections will guide you through the specific steps for formatting on both Windows and Mac operating systems.
Step 4: Formatting the SD card on Windows
If you’re using a Windows computer, follow these steps to format your Spypoint SD card:
- Open File Explorer: Click on the File Explorer icon on your taskbar or press the Windows key + E to open it.
- Locate the SD card: In the left-hand pane of File Explorer, under “This PC” or “Computer,” you should see the SD card listed as a removable storage device. Identify the correct drive letter associated with your SD card (e.g., “E:”, “F:”, etc.).
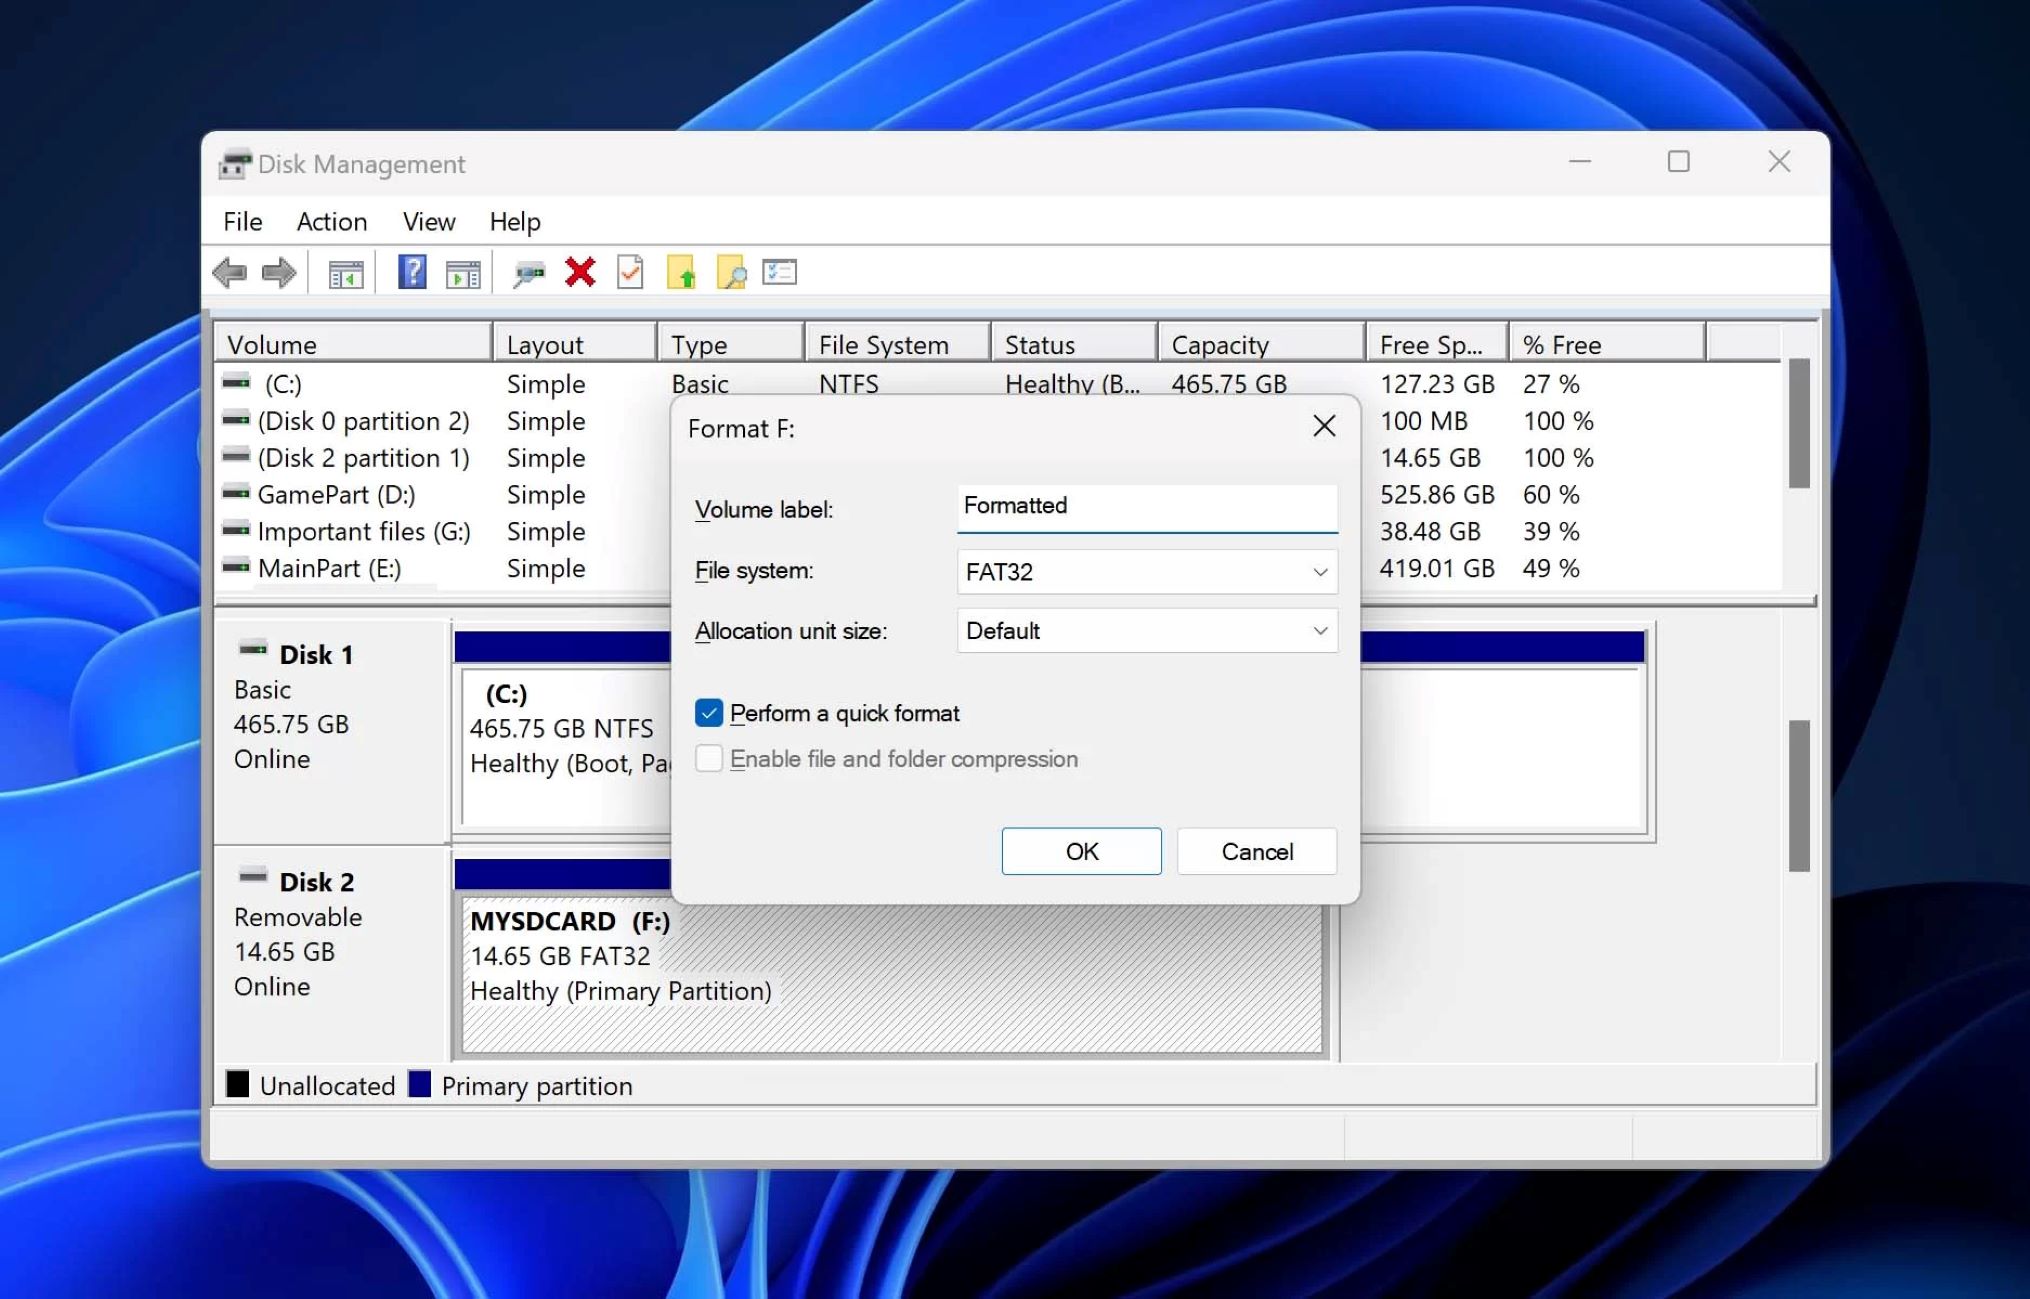
- Right-click on the SD card: Once you have identified the SD card, right-click on its drive letter and select “Format” from the contextual menu that appears.
- Choose formatting options: In the Format window, you can now customize the formatting options. Make sure the File System is set to “FAT32” or “exFAT,” which are compatible with most Spypoint devices. You can also enter a new Volume Label if desired.
- Start the formatting process: Double-check the selected options and then click on the “Start” button to initiate the formatting process.
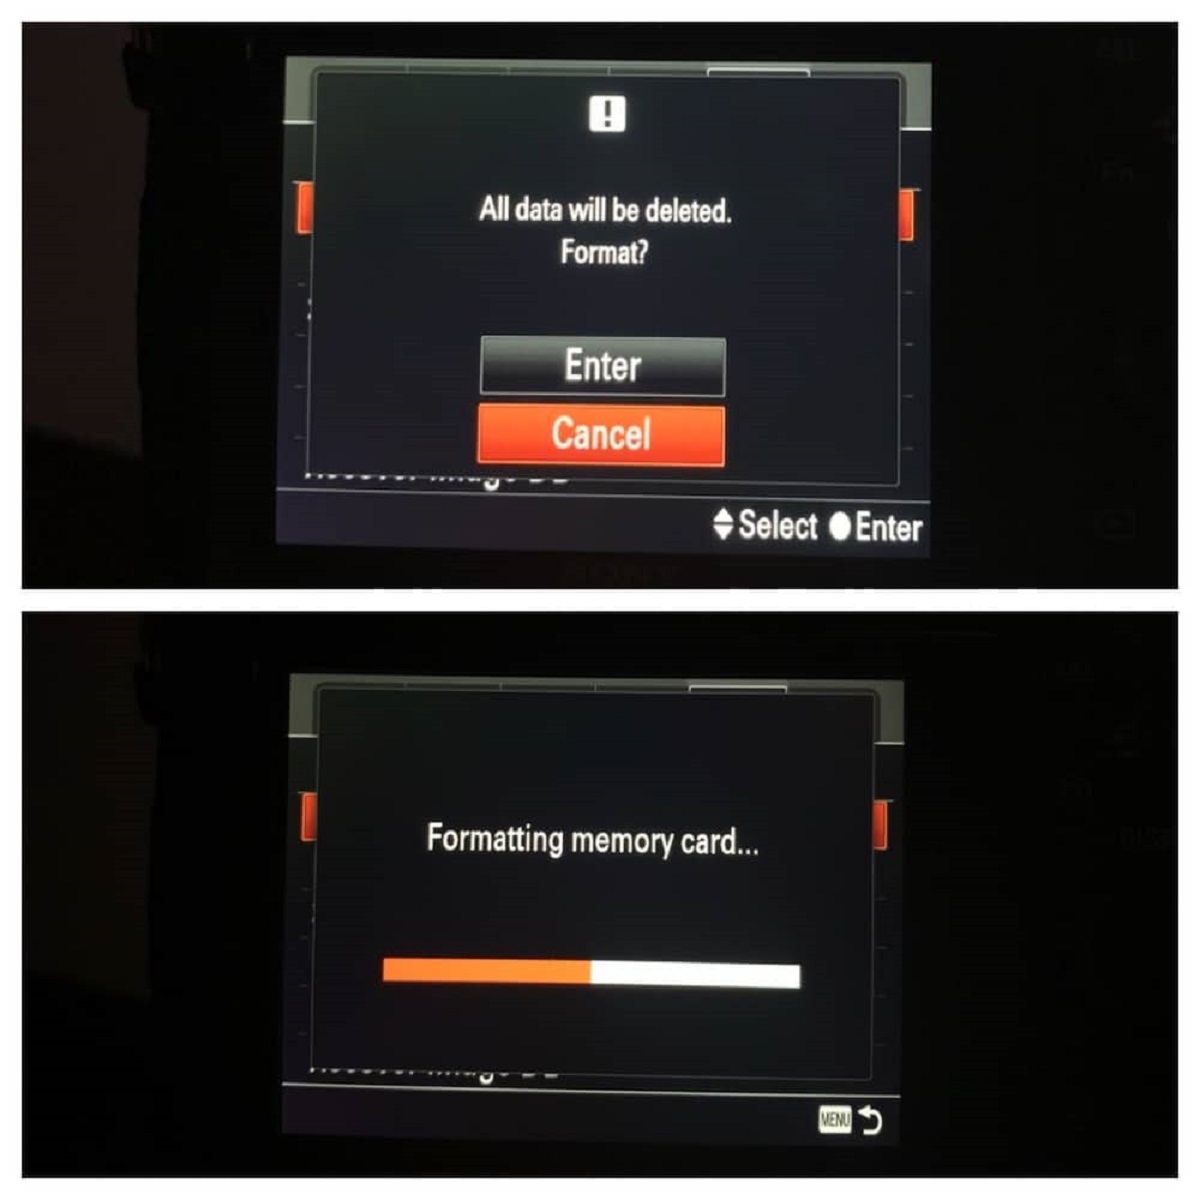
- Confirm the formatting: A warning message will appear, notifying you that all data on the SD card will be erased. If you have backed up any important data, ensure you have a copy and then click the “OK” button to confirm the formatting.
- Wait for the formatting to complete: The formatting process may take a few moments to complete, depending on the size of the SD card. During this time, do not remove the SD card or interrupt the process.
- Completion notification: Once the formatting process is finished, you will see a progress bar reaching 100%, and a completion notification will appear. Click the “OK” button to close the Format window.
Congratulations! You have successfully formatted your Spypoint SD card on a Windows computer. Now, let’s move on to formatting the SD card on a Mac.
Step 5: Formatting the SD card on Mac
If you’re using a Mac computer, follow these steps to format your Spypoint SD card:
- Open Disk Utility: Go to the “Applications” folder, then open the “Utilities” folder, and finally, launch the “Disk Utility” application.
- Select the SD card: In the left-hand sidebar of Disk Utility, you will see a list of all the drives and devices connected to your Mac. Locate and select the SD card from the list.
- Erase the SD card: With the SD card selected, click on the “Erase” tab at the top of the Disk Utility window.
- Choose formatting options: In the Erase window, you can now select the desired Format. Choose either “MS-DOS (FAT)” or “exFAT,” as they are compatible with most Spypoint devices. You can also enter a new Name for the SD card if desired.
- Start the erasing process: Double-check the selected options, and when you’re ready, click on the “Erase” button to begin the erasing and formatting process.
- Confirm the erasing: A warning message will appear, informing you that all data on the SD card will be permanently deleted. If you have any important data backed up, ensure you have a copy, and then click on the “Erase” button to proceed.
- Wait for the erasing to complete: The erasing and formatting process may take a few moments, depending on the size of the SD card. Avoid removing the SD card or interrupting the process while it is underway.
- Completion notification: Once the erasing process is finished, you will see a confirmation message in Disk Utility. Click on the “Done” button to close the Erase window.
Great job! You have successfully formatted your Spypoint SD card on your Mac computer. Now, in the next step, we will guide you on how to safely eject the SD card from your computer or card reader.
Step 6: Safely eject the SD card from your computer or card reader
Once you have formatted your Spypoint SD card on your computer or card reader, it’s important to safely eject it to prevent any data loss or damage. Follow these steps to safely eject the SD card:
- On Windows:
- Ensure that any file transfer or access to the SD card is complete.
- Locate the SD card icon in the system tray, usually found in the bottom-right corner of the screen near the clock.
- Right-click on the SD card icon and select “Eject” or “Safely Remove” from the context menu.
- Wait for the system to confirm that it is safe to remove the SD card. Once you see a notification, it is safe to proceed.
- On Mac:
- Ensure that any file transfer or access to the SD card is complete.
- Locate the SD card icon on your desktop or in Finder.
- Click on the SD card icon and drag it to the Trash icon in the dock. Alternatively, you can right-click on the SD card icon and select “Eject” from the context menu.
- Wait for the system to confirm that it is safe to remove the SD card. Once the SD card icon disappears from the desktop or Finder, it is safe to proceed.
By following the above steps, you can ensure that any ongoing read or write processes are completed before ejecting the SD card, minimizing the risk of data corruption. Now that you have safely ejected the SD card, it’s time to move on to the next step: re-inserting the SD card into your Spypoint device.
Step 7: Re-insert the SD card into your Spypoint device
Now that you have safely ejected the SD card from your computer or card reader, it’s time to re-insert it back into your Spypoint device. Follow these steps to re-insert the SD card:
- Locate the SD card slot: On your Spypoint device, find the SD card slot where the card originally came from. The location of the slot can vary depending on the model of your device.
- Align the SD card: Take the SD card and align it with the direction indicated by the manufacturer’s label or arrow. Ensure that the label side of the SD card is facing up, and the gold contacts on the card are facing down.
- Insert the SD card: Gently slide the SD card into the slot until it is fully inserted. Make sure not to apply excessive force, as this can damage the card or the device.
- Secure the SD card: Once the SD card is inserted, push it slightly until you hear or feel a click. This indicates that the card is securely in place and properly connected to the device.
Now that you have re-inserted the SD card into your Spypoint device, you’re one step closer to capturing amazing wildlife moments. However, before you start using the camera, there is one more important step to perform: verifying that the SD card is properly formatted and functioning correctly.
Step 8: Verify that the SD card is properly formatted and functioning correctly
After re-inserting the SD card into your Spypoint device, it’s crucial to ensure that the card is properly formatted and functioning correctly. Follow these steps to verify the status of your SD card:
- Power on your Spypoint device: Turn on your Spypoint camera or device and wait for it to initialize.
- Check for SD card recognition: On the device’s LCD screen or menu, navigate to the SD card or storage settings. Look for an indication that the SD card is recognized and properly formatted. It may display the total storage capacity or other relevant information.
- Capture a test photo or video: Use your Spypoint device to capture a test photo or video. Check if the file is saved successfully to the SD card and can be viewed or played back without any issues.
- Verify storage capacity: If your SD card has a large capacity, you can check the available storage space on your Spypoint device. Ensure that it matches the expected capacity after formatting. This will confirm that the card is utilizing its full storage potential.
- Perform additional tests: If you have advanced settings or features on your Spypoint device, you can explore them further to ensure that the SD card is functioning correctly. For example, try using burst mode, time-lapse photography, or video recording to ensure the SD card can handle different modes and settings.
If everything checks out and you encounter no issues or error messages during the verification process, congratulations! Your Spypoint SD card is properly formatted and functioning correctly. You’re now ready to capture stunning wildlife moments with confidence.
Remember, it’s good practice to regularly format your SD card to keep it running smoothly and avoid potential data corruption. Additionally, always make sure to back up your important files to another storage device or the cloud to prevent permanent data loss.
Conclusion
Formatting your Spypoint SD card is an essential task to maintain the performance and reliability of your device. By following the step-by-step guide outlined in this article, you can easily format your SD card and ensure optimal functioning for capturing and storing your wildlife adventures.
We began by highlighting the importance of formatting your SD card, including clearing out clutter, preventing errors, maximizing storage capacity, fixing compatibility issues, and protecting against data corruption.
We then walked you through the necessary steps, starting with gathering the necessary tools and equipment. We covered how to safely remove the SD card from your Spypoint device, insert it into your computer or card reader, and format it on both Windows and Mac operating systems.
We also emphasized the importance of safely ejecting the SD card from your computer or card reader and provided instructions on re-inserting the SD card back into your Spypoint device.
Lastly, we guided you on how to verify that the SD card is properly formatted and functioning correctly, ensuring that you can confidently capture and store your wildlife experiences without any issues.
Remember, regular formatting of your SD card is recommended to maintain its performance and avoid potential data loss. Additionally, always keep a backup of your important files to prevent any unforeseen data loss.
By following these steps and best practices, you can enjoy a seamless and reliable experience with your Spypoint SD card, knowing that it is formatted correctly and ready to capture your most remarkable outdoor moments.